

The Sage Meadow Butterfly is a lacy, open-winged appliqué worked in soft sage green cotton. Each of its four wings has a large teardrop-shaped window outlined by a dense fan of double crochet. A ridged oval body runs down the center, and two thin antennae end in tiny bobble tips.
This pattern uses one color only, so the shape and texture do all the work. The style sits somewhere between botanical and boho. You can sew the butterfly to a bag, frame it, tie it to a gift, or hang it on its own.
The pattern is written in US crochet terms. The finished butterfly measures about 5.5 in (14.0 cm) across the wings and 4.5 in (11.4 cm) tall from the upper wing tips to the lower wing edge. With the antennae included, it is about 5.25 in (13.3 cm) tall.
The butterfly is made in one piece. You make the body first. Each wing then starts as a chain loop anchored to the body edge. You fill that loop with single crochet, then work two short rows of double crochet around its outer side only, which leaves the center open as a window. The antennae are chained straight off the head, and one round of single crochet finishes the outline.
Finished Size and Construction
- Finished size: 5.5 in (14.0 cm) wide x 4.5 in (11.4 cm) tall (wings only); about 5.25 in (13.3 cm) tall with antennae
- Skill level: Intermediate
- Terminology: US crochet terms
- Yarn weight: DK / light worsted (#3) cotton or cotton blend
- Hook: 3.5 mm (US E-4)
- Number of pieces: 1 (the body, 4 wings, and 2 antennae are all worked onto each other as one piece)
- Layout: One symmetrical motif
- Body size: 1.75 in (4.4 cm) long x 0.5 in (1.3 cm) wide
- Size before border: 5 in (12.7 cm) wide x 4 in (10.2 cm) tall
- Border depth: 1 round of sc, about 0.25 in (0.6 cm)
Materials
Yarn: Choose a smooth, mercerized or combed cotton in DK weight. Cotton holds the wing shape well and shows the stitches clearly. Acrylic also works, but the wings curl more and need firmer blocking.
- Sage green: 20 g, about 45 m (49 yd)
This amount includes a margin of about 30 percent for your gauge swatch and for weaving in ends. One butterfly uses about 15 g.
Tools:
- 3.5 mm (US E-4) crochet hook
- Tapestry needle
- 4 locking stitch markers
- Scissors
- Blocking mat and rust-proof pins
- Spray bottle with water
- Fabric stiffener (optional, if the butterfly will hang)
Abbreviations (US Terms)
- ch – chain
- sl st – slip stitch
- sc – single crochet
- dc – double crochet
- tr – treble crochet
- BLO – back loop only
- st(s) – stitch(es)
- RS – right side
Special stitch – 4-dc bobble: [Yarn over, insert hook in the indicated st, yarn over and pull up a loop, yarn over and pull through 2 loops] 4 times in the same st. Yarn over and pull through all 5 loops on the hook.
Gauge and Checkpoints
Gauge: 20 sc and 22 rows = 4 in (10.2 cm) with a 3.5 mm hook. Each row of dc is about 0.5 in (1.3 cm) tall.
Gauge matters less for an appliqué than for a garment, but it decides whether the wings lie flat. Before you plan a set, make one complete butterfly as a test piece.
Checkpoints:
- After the body (Rnd 2): 1.75 in (4.4 cm) x 0.5 in (1.3 cm).
- After one upper wing: 2.25 in (5.7 cm) from the body edge to the tip, and 2 in (5.1 cm) tall.
- After one lower wing: 1.75 in (4.4 cm) from the body edge, and 2 in (5.1 cm) tall.
- Before the border: 5 in (12.7 cm) x 4 in (10.2 cm).
- After the border and blocking: 5.5 in (14.0 cm) x 4.5 in (11.4 cm).
If the piece is too big: switch to a 3.25 mm (US D-3) hook, and make sure you aren’t pulling up tall loops on your dc.
If the piece is too small: switch to a 3.75 mm (US F-5) hook. If the wing fans cup, loosen your tension instead of adding stitches.
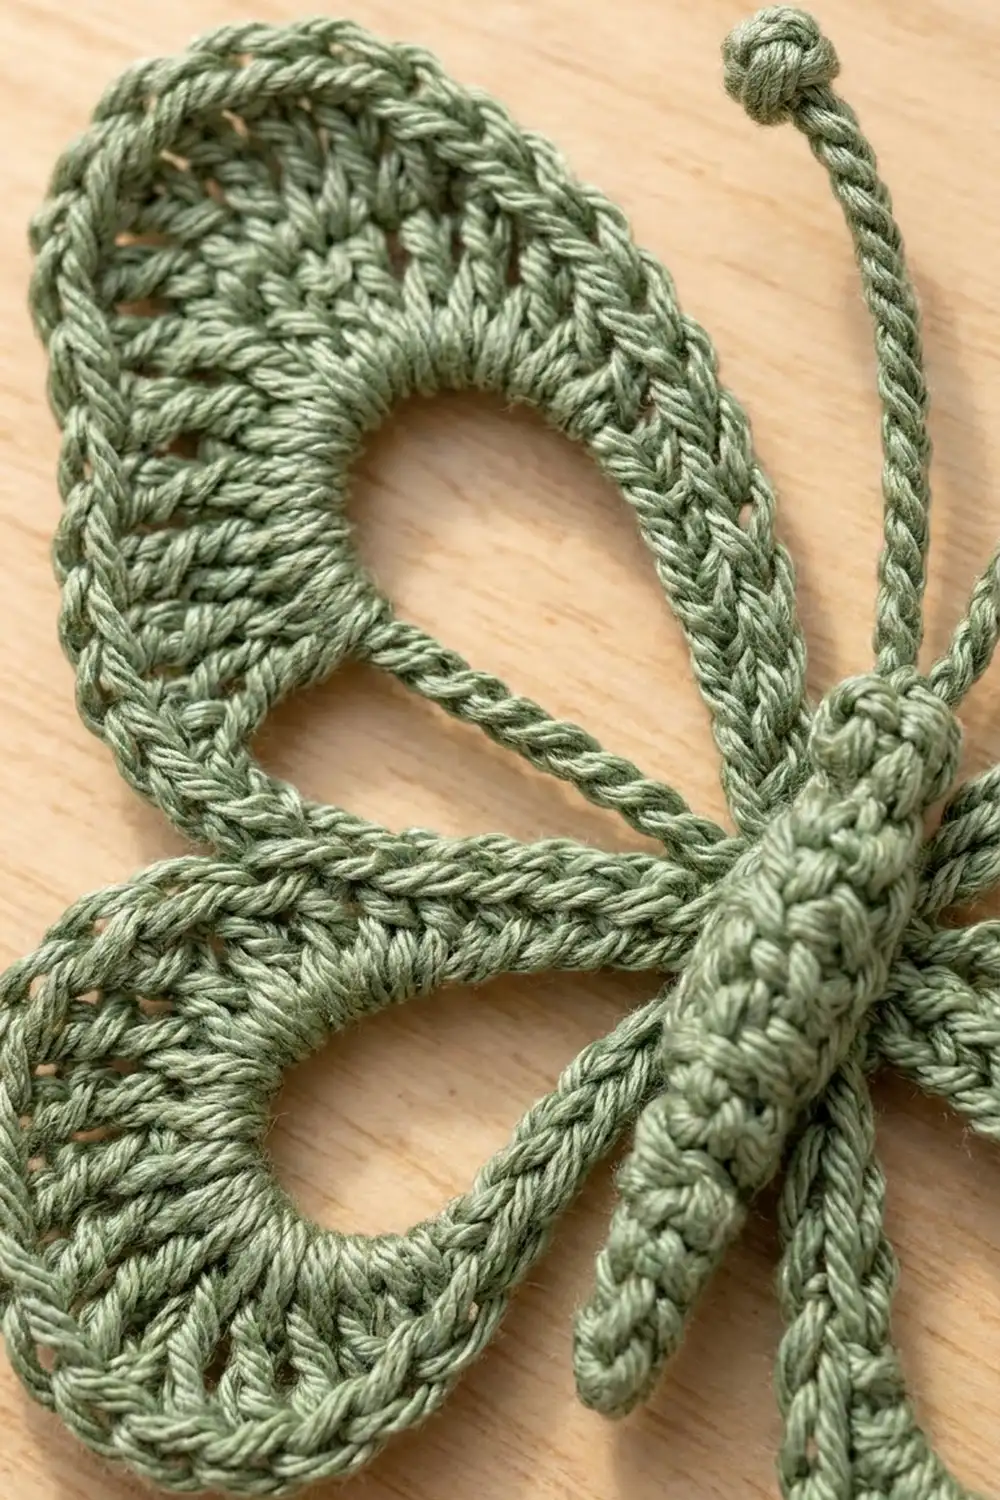
Body
Ch 10.
Rnd 1: Sc in 2nd ch from hook and in next 7 ch, 3 sc in last ch. Working along the opposite side of the foundation chain, sc in next 7 ch, 2 sc in same ch as first sc. Join with sl st to first sc. (20 sc)
Rnd 2: Ch 1, sc in BLO of each st around. Join with sl st to first sc. (20 sc)
The unused front loops form a raised ridge around the edge, which gives the body its segmented look. Fasten off and weave in the end.
Mark the body:
- The end where you worked 3 sc is the head. Mark its 2 center sts as H1 and H2.
- Each long side has 8 sts. Number them 1 to 8, starting at the head and ending at the tail.
- The remaining 2 sts are at the tail.
Check: 2 head + 8 + 8 + 2 tail = 20.
Upper Wing (Make 2)
Make one upper wing on the right long side of the body and one on the left. The instructions are the same for both sides. Each row is described from the tail side to the head side, so the point lands at the top on both wings.
Foundation loop: With the RS of the body facing, join yarn with sl st in st 2. Ch 22, then sl st in st 4. You now have a ch-22 loop anchored to the body.
Row 1: Ch 1, turn. Work 30 sc into the ch-22 loop, spacing them evenly. Work around the loop, not into the chains. Sl st in body st 1. (30 sc)
The 30 sc are slightly crowded on the loop, which curves it into the teardrop window.
Row 2: Turn. Sl st in each of the first 5 sc. Ch 3 (counts as dc), dc in the same st. [Dc in next st, 2 dc in next st] 10 times, dc in next st. Sl st in next sc of Row 1. (33 dc)
This row is worked over sc 5 through 26 only, which is 22 sts. That leaves 4 unworked sc at each end, next to the body. Those plain sc form the thin strip along the inner side of the window.
Row 3: Turn and skip the sl st. Ch 3 (counts as dc), dc in the same st. Dc in next 20 sts, 2 tr in each of next 3 sts, dc in next 8 sts, 2 dc in last st (top of the beginning ch-3). Sl st in next unworked sc of Row 1. (38 sts)
Check: 2 + 20 + 6 + 8 + 2 = 38 sts, worked over 1 + 20 + 3 + 8 + 1 = 33 sts. The 6 tr build the pointed upper outer corner.
Fasten off and weave in the end.
Lower Wing (Make 2)
Make one lower wing on each side of the body, below the upper wing.
Foundation loop: With the RS facing, join yarn with sl st in st 7. Ch 16, then sl st in st 5.
Row 1: Ch 1, turn. Work 22 sc into the ch-16 loop. Sl st in body st 8. (22 sc)
Row 2: Turn. Sl st in each of the first 4 sc. Ch 3 (counts as dc), dc in the same st. [Dc in next st, 2 dc in next st] 7 times, dc in next st. Sl st in next sc of Row 1. (24 dc)
This row is worked over sc 4 through 19, which is 16 sts, so 3 sc stay unworked at each end.
Row 3: Turn and skip the sl st. Ch 3 (counts as dc), dc in the same st. [Dc in next 2 sts, 2 dc in next st] 7 times, dc in next 2 sts. Sl st in next unworked sc of Row 1. (32 dc)
Check: 2 + (7 x 4) + 2 = 32 sts, worked over 1 + (7 x 3) + 2 = 24 sts. Because the increases are spread evenly, this wing stays round with no point.
Fasten off and weave in the end. At this stage the butterfly should measure 5 in (12.7 cm) x 4 in (10.2 cm).
Antennae (Make 2)
First antenna: Join yarn with sl st in H1. Ch 13. Work a 4-dc bobble in 4th ch from hook, then ch 1 to lock it. Sl st in the back bump of each of the remaining 9 ch. Sl st in H1 and fasten off.
Second antenna: Repeat in H2.
Working sl sts back along the chain twists it slightly, which gives the antennae a corded look. Each antenna is about 1.5 in (3.8 cm) long. Weave the tails into the body, not into the antennae, so the antennae stay thin.
Border
Border gauge: One round of sc adds about 0.25 in (0.6 cm) to every outer edge. That brings the width from 5 in (12.7 cm) to 5.5 in (14.0 cm) and the height from 4 in (10.2 cm) to 4.5 in (11.4 cm).
The border is one continuous round. Sc go only along the outer edges of the wings. Sl sts carry the yarn across the body and the inner Row 1 strips. The sl sts are not included in the counts.
Rnd 1 (RS): Join yarn with sl st in st 1 on the right side of the body. Work clockwise around the butterfly as follows.
Right upper wing:
- Sl st in each of the 4 unworked Row 1 sc.
- Work 2 sc in each of the 2 dc row-ends (4 sc).
- Across Row 3: sc in next 12 sts, 2 sc in each of next 2 sts (the center 2 tr of the point), sc in next 24 sts (40 sc).
- Work 2 sc in each of the 2 row-ends (4 sc).
- Sl st in each of the 4 unworked Row 1 sc.
(48 sc)
Right lower wing:
- Sl st in each of the 3 unworked Row 1 sc.
- Work 2 sc in each of the 2 row-ends (4 sc).
- Across Row 3: [sc in next 7 sts, 2 sc in next st] 4 times (36 sc).
- Work 2 sc in each of the 2 row-ends (4 sc).
- Sl st in each of the 3 unworked Row 1 sc.
(44 sc)
Tail: Sl st in right st 8, in each of the 2 tail sts, and in left st 8.
Left lower wing: Work exactly as for the right lower wing. (44 sc)
Left upper wing: Work as for the right upper wing, but work across Row 3 like this: sc in next 24 sts, 2 sc in each of next 2 sts, sc in next 12 sts (40 sc). (48 sc)
Head: Sl st in left st 1, then in H1 and H2 behind the antennae. Join with sl st to the first sl st and fasten off.
Round total: 48 + 44 + 44 + 48 = 184 sc.
Why the math works:
- Upper wing: 38 sts are worked one sc per st, plus 2 added at the point, for 40.
- Lower wing: 32 sts are worked one sc per st, plus 4 added, for 36.
- Most of the shaping already happened in Rows 2 and 3, so the border only adds enough stitches to ease around the point and the curve.
- Two sc per dc row-end matches the height of a dc, so the sides stay flat.
- On the left upper wing you work in the opposite direction, so the 12 and 24 swap places. The extra sts still land on the same 2 center tr.
Final Blocking
- Weave each remaining tail through at least 1 in (2.5 cm) of matching stitches.
- Spray the butterfly until it is damp but not dripping.
- Lay it RS up on the blocking mat.
- Pin the body straight first, at 1.75 in (4.4 cm) long.
- Pin the upper wing tips 5.5 in (14.0 cm) apart, measured tip to tip.
- Pin the lower wings so the total height is 4.5 in (11.4 cm).
- Place a pin inside each window to open it into a clean teardrop.
- Curve the antennae gently outward and pin the bobbles in place.
- Let the butterfly dry completely, usually 6 to 8 hours.
- If the butterfly will hang, brush on fabric stiffener while it is still pinned, then let it dry again.
Final Quality-Control Checklist
- The body is 1.75 in (4.4 cm) long, with a visible BLO ridge.
- Each upper wing has 38 sts in Row 3 and a clear point at the top outer corner.
- Each lower wing has 32 sts in Row 3 and a smooth, round edge.
- All four windows are open, with only plain Row 1 sc along the inner edge.
- The border has 48 sc on each upper wing and 44 sc on each lower wing, 184 sc in total.
- Both antennae are about 1.5 in (3.8 cm) long, with firm bobbles.
- The finished size is 5.5 in (14.0 cm) x 4.5 in (11.4 cm).
- The left and right sides mirror each other, and no tails show on the RS.
Troubleshooting
The window closes up or puckers. Your Row 1 sc are too tight, or you worked into the chains instead of around the loop. Work around the loop and keep the sc relaxed.
The upper wing has no point. The tr ended up at the wrong end. In Row 3, count from the tail side: the 20 dc come before the tr.
The wing fans ruffle. Your dc are too loose, or you added extra increases. Before you move on, recount Row 2: it should have 33 sts on an upper wing or 24 on a lower wing.
The wings cup toward the body. Your tension in Row 3 is too tight. Go up half a hook size for the dc rows only.
The border pulls the edge in. Work 2 sc in each row-end, not 1, and make sure you include the extra sc at the point.
The two sides don’t match in size. Check that the loops on both sides start and end on the same numbered body sts.
Care
Hand wash in cool water with mild soap. Roll the butterfly in a towel to press out the water, then dry it flat. Pin it back into shape if needed, and reapply stiffener if it hangs.
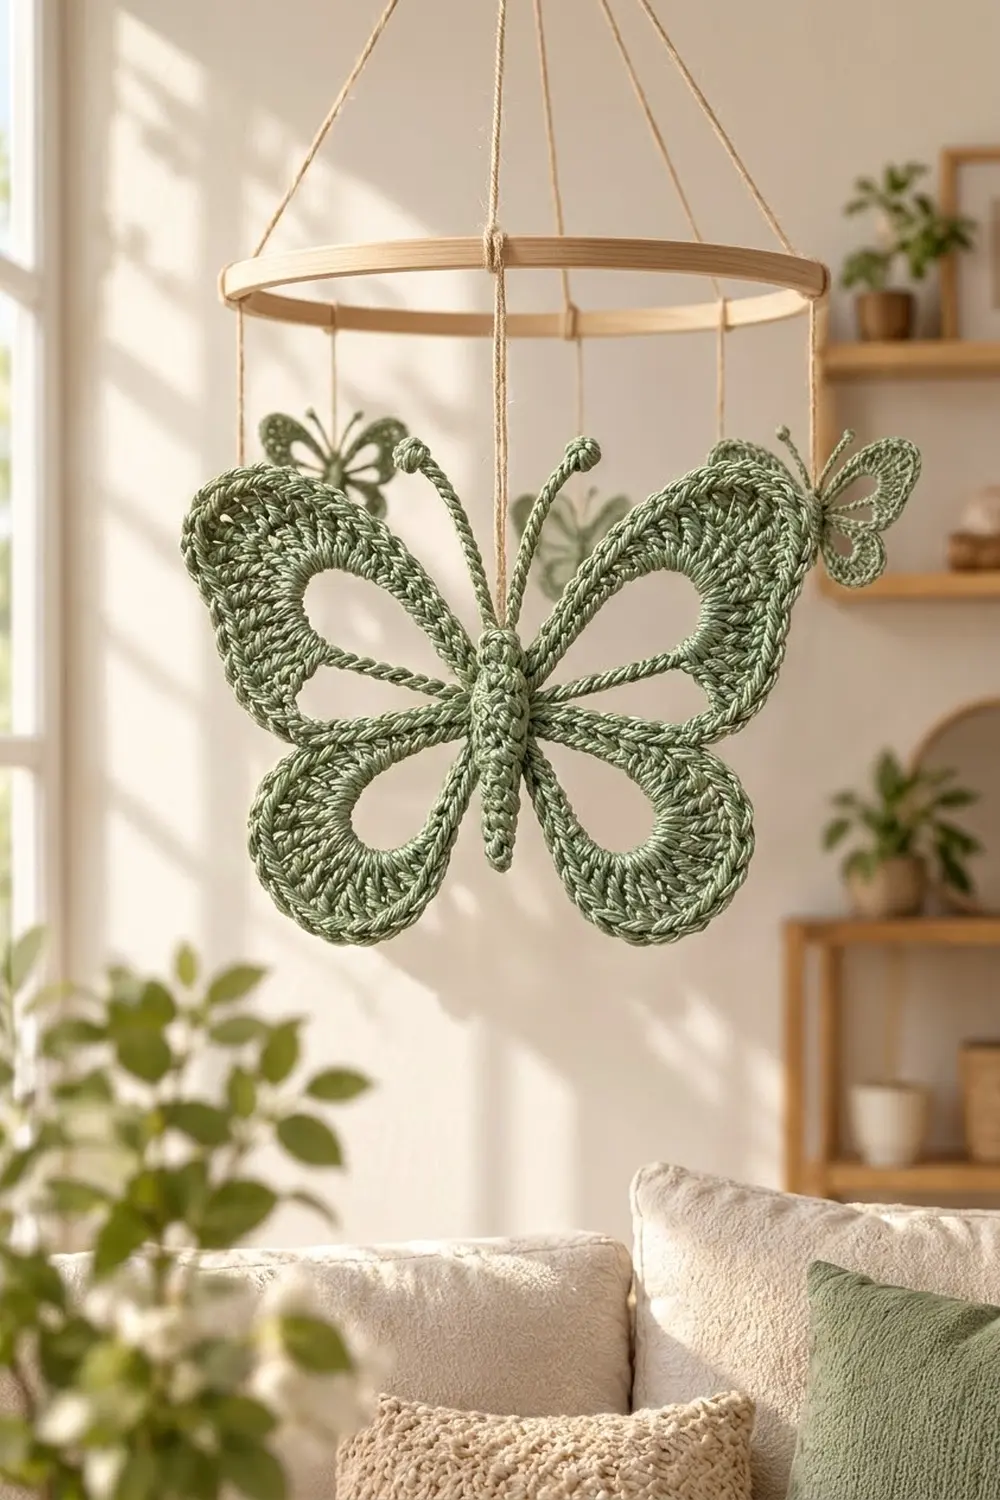
Final Notes
Here is how the measurements build. The body is 1.75 in (4.4 cm) x 0.5 in (1.3 cm). Each upper wing reaches 2.25 in (5.7 cm) out from the body, so the butterfly is 5 in (12.7 cm) wide and 4 in (10.2 cm) tall before the border. The 184-sc border adds 0.25 in (0.6 cm) all around, for a finished size of 5.5 in (14.0 cm) x 4.5 in (11.4 cm). Count Row 3 on every wing and count the border on each wing, and both sides will match.
Happy crocheting!