

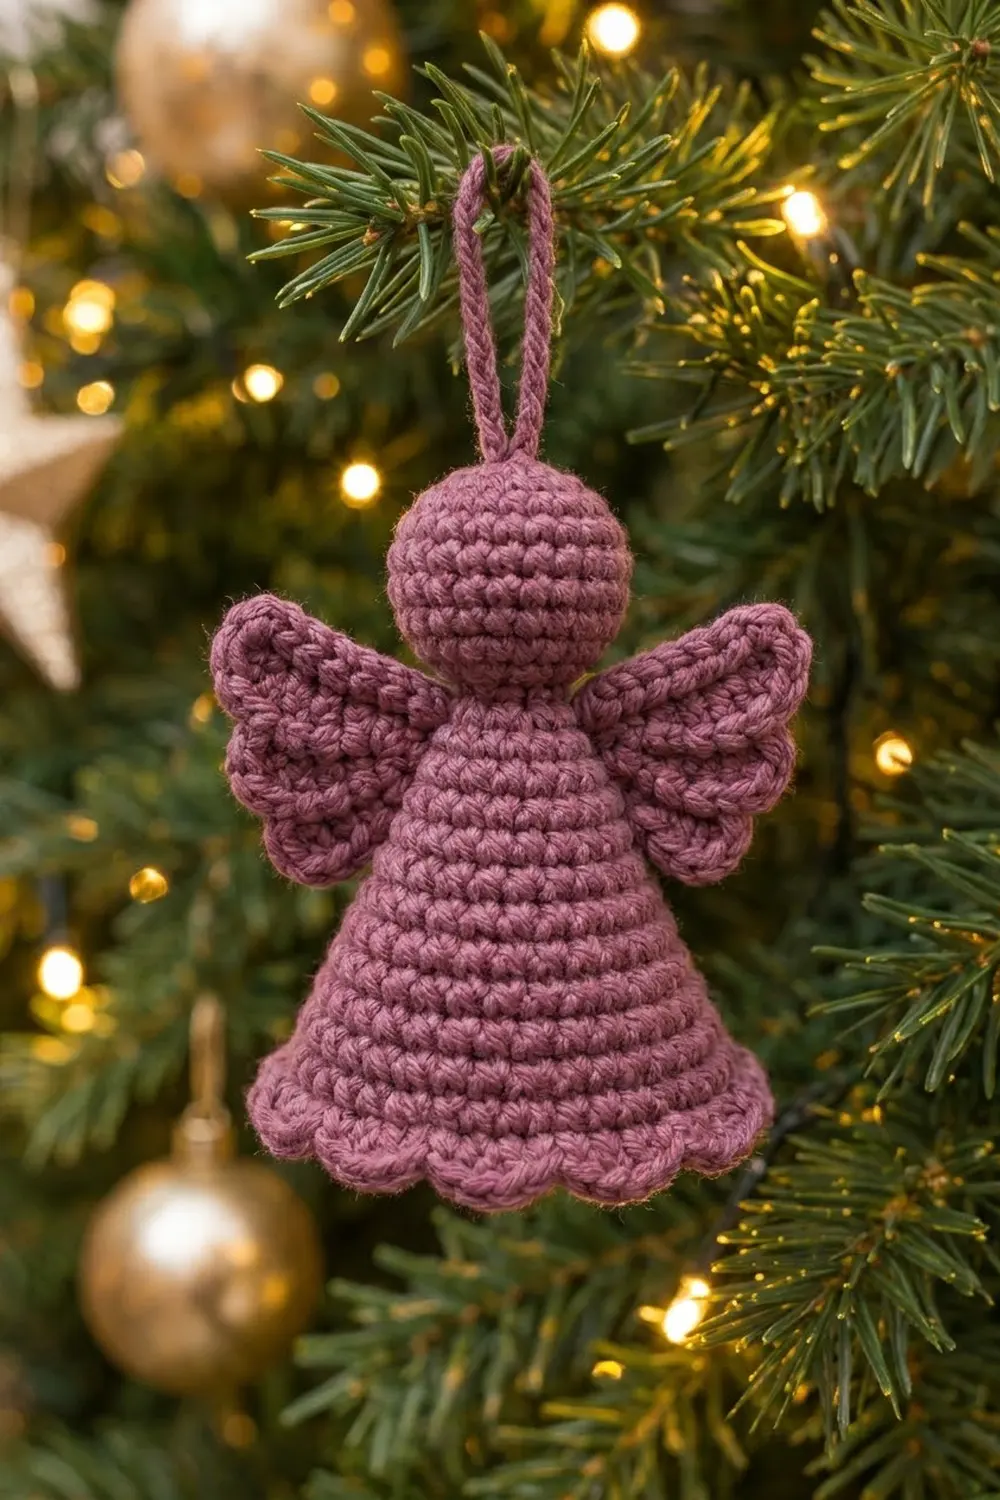
This little angel is a quiet, classic tree ornament. It has a round head, a smooth cone skirt that flares into a scalloped hem, and two softly lobed wings. It is worked in a single dusty mauve shade, so the texture of tight single crochet does all the talking.
The style is simple amigurumi. Every part is worked in continuous spiral rounds or short rows of single crochet. Taller stitches are used only at the hem and the wing lobes. The pattern uses US crochet terms throughout.
The finished angel measures about 3.75 in (9.5 cm) tall without the loop, about 2.5 in (6.4 cm) wide at the hem, and about 3 in (7.6 cm) across the wings. The hanging loop adds about 1.4 in (3.6 cm).
You will make a stuffed ball head, a cone body worked from the top down, a flat base disc, and two flat wings. The hem scallops are worked directly onto the body and the base is sewn inside. The head, wings, and loop are attached last.
Finished Size and Construction
- Finished size: 3.75 in (9.5 cm) tall without loop; 2.5 in (6.4 cm) wide at hem; 3 in (7.6 cm) wingspan
- Skill level: Easy+ (magic ring, increases, decreases, simple sewing)
- Terminology: US
- Yarn weight: DK (light, #3), cotton or cotton blend
- Hook: 2.75 mm (C-2)
- Number of pieces: 5 crocheted parts (head, body, base, 2 wings) plus a chain loop, assembled into one ornament
- Layout: head centered on top of the body; one wing on each upper side, straight edge sewn vertically
- Piece sizes: head 1 in (2.5 cm) diameter; body 2.5 in (6.4 cm) along the side; base 2.1 in (5.3 cm) diameter; each wing about 1.5 in (3.8 cm) tall x 1 in (2.5 cm) deep
- Size before border: body opening 2.1 in (5.3 cm) across after Rnd 15
- Border depth: scalloped hem about 0.25 in (0.6 cm); wing edging is one sc round, about 0.2 in (0.5 cm)
Materials
Choose a smooth, tightly plied DK cotton or cotton blend. Matte cotton gives the crisp stitch definition seen here and holds the cone shape without collapsing. Avoid fuzzy or loosely spun yarn, because the scallops and wing outline will blur.
- Dusty mauve (main and only color): 12 g, about 28 m (31 yd)
These amounts include a margin for a test piece, sewing tails, and the hanging loop. The ornament itself uses about 8 to 9 g.
Tools
- 2.75 mm (C-2) crochet hook
- Polyester fiberfill, about 5 g
- Optional: a 1.75 in (4.4 cm) circle of plastic canvas or card for a flat base
- Tapestry needle
- Stitch marker
- Sewing pins
- Scissors
Abbreviations (US Terms)
- ch – chain
- sl st – slip stitch
- sc – single crochet
- hdc – half double crochet
- dc – double crochet
- inc – 2 sc in the same stitch
- dec – single crochet decrease (invisible decrease recommended: insert hook in the front loops of the next 2 sts, yarn over, pull through both loops, yarn over, pull through 2)
- MR – magic ring
- FLO / BLO – front loop only / back loop only
- st(s) – stitch(es)
- Rnd – round
Special stitch – Scallop: 5 hdc in the same stitch.
Gauge and Checkpoints
Gauge: 11 sc and 12 rnds = 2 in (5.1 cm) in continuous spiral sc. That is 5.5 sts and 6 rnds per inch.
Make the head first as your test piece. It is small and quick, and it shows whether your gauge is right.
Checkpoints:
- Head after Rnd 3 (flat disc): about 1 in (2.5 cm) across
- Finished head: about 1 in (2.5 cm) diameter
- Body after Rnd 9: about 1.5 in (3.8 cm) along the side, opening about 1.4 in (3.6 cm) across
- Body after Rnd 15: about 2.5 in (6.4 cm) along the side, opening about 2.1 in (5.3 cm) across
- Base after Rnd 6: about 2.1 in (5.3 cm) across, matching the body opening
If your pieces are too big, go down to a 2.5 mm hook. If they are too small or stiff, try a 3 mm hook. Stuffing should never show between stitches. If it does, go down a hook size even if the size looks right.
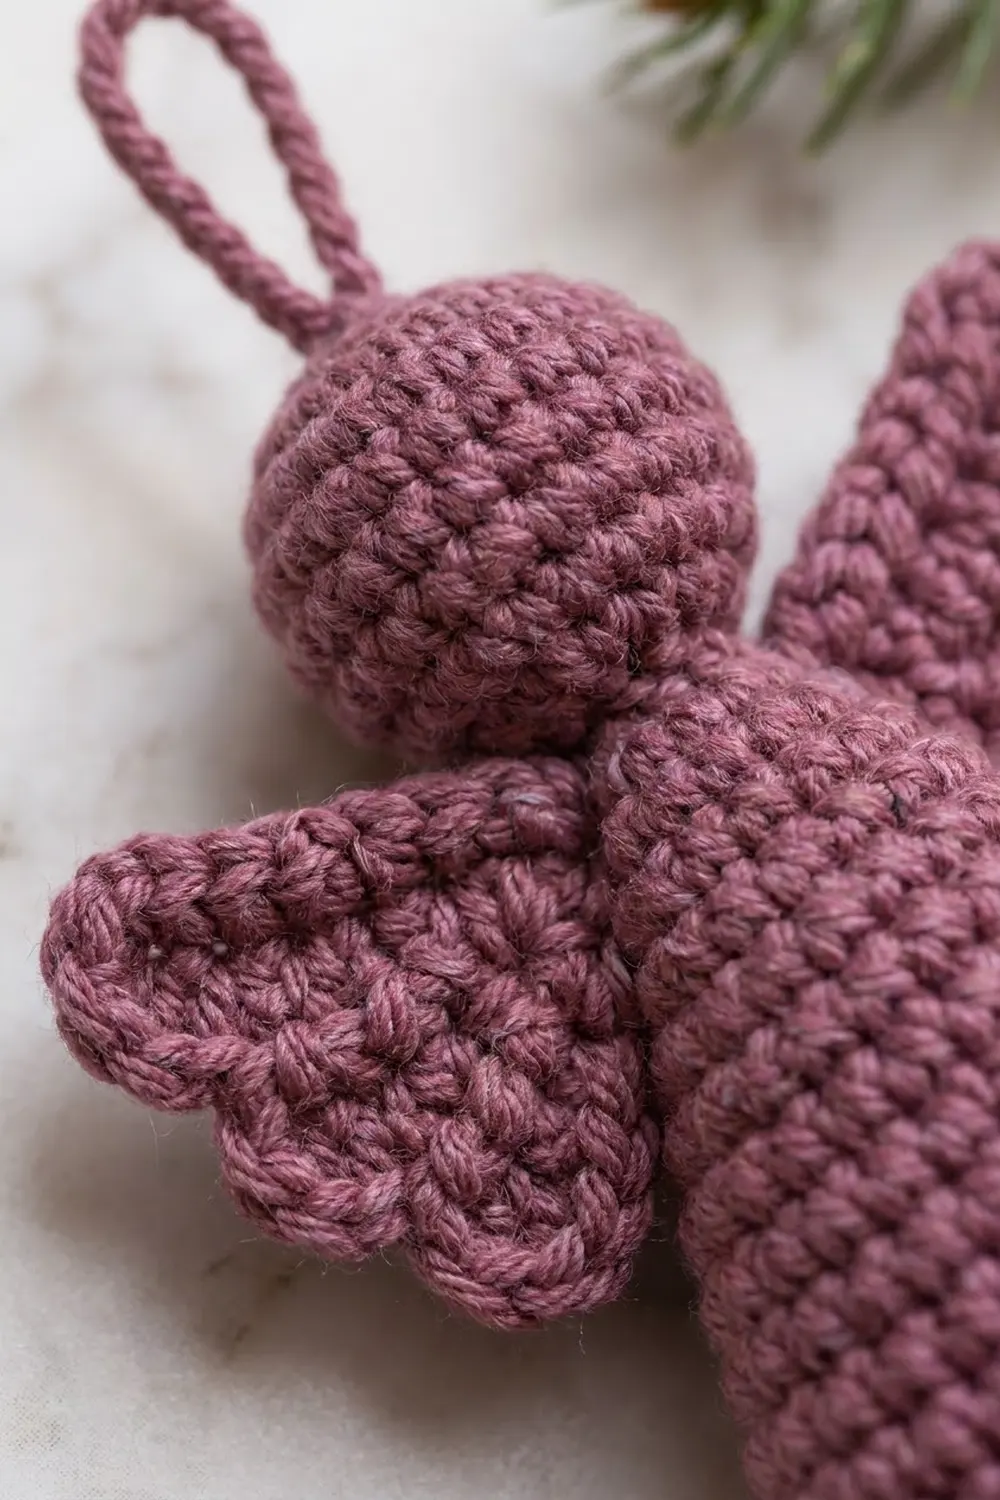
Head
Work in continuous rounds and do not join. Place a marker in the first st of each round and move it up as you go.
Rnd 1: MR, 6 sc in ring. (6)
Rnd 2: Inc in each st around. (12)
Rnd 3: [Sc in next st, inc] 6 times. (18)
Checkpoint: the disc should measure about 1 in (2.5 cm).
Rnds 4–7: Sc in each st around. (18 each round)
Rnd 8: [Sc in next st, dec] 6 times. (12)
Stuff the head firmly, shaping it into a smooth ball.
Rnd 9: Dec 6 times. (6)
Fasten off, leaving a 12 in (30.5 cm) tail for sewing. Do not close the hole fully; it will sit against the top of the body.
Body
The body is worked from the neck down in continuous rounds. Each growth round adds 3 sts, and a plain round follows every two growth rounds. This gives the even, straight-sided cone shape.
Rnd 1: MR, 6 sc in ring. Pull the ring tightly closed. (6)
Rnd 2: [Sc in next st, inc] 3 times. (9)
Rnd 3: [Sc in next 2 sts, inc] 3 times. (12)
Rnd 4: Sc in each st around. (12)
Rnd 5: [Sc in next 3 sts, inc] 3 times. (15)
Rnd 6: [Sc in next 4 sts, inc] 3 times. (18)
Rnd 7: Sc in each st around. (18)
Rnd 8: [Sc in next 5 sts, inc] 3 times. (21)
Rnd 9: [Sc in next 6 sts, inc] 3 times. (24)
Checkpoint: about 1.5 in (3.8 cm) along the side, opening about 1.4 in (3.6 cm) across.
Rnd 10: Sc in each st around. (24)
Rnd 11: [Sc in next 7 sts, inc] 3 times. (27)
Rnd 12: [Sc in next 8 sts, inc] 3 times. (30)
Rnd 13: Sc in each st around. (30)
Rnd 14: [Sc in next 9 sts, inc] 3 times. (33)
Rnd 15: [Sc in next 10 sts, inc] 3 times. (36)
Checkpoint: about 2.5 in (6.4 cm) along the side, opening about 2.1 in (5.3 cm) across. Do not fasten off; the hem is worked next (see Border).
Tip: on every other growth round, work 1 sc before starting the repeat so the increases don’t stack. This keeps the three increase lines from forming visible corners.
Base
Rnd 1: MR, 6 sc in ring. (6)
Rnd 2: Inc in each st around. (12)
Rnd 3: [Sc in next st, inc] 6 times. (18)
Rnd 4: [Sc in next 2 sts, inc] 6 times. (24)
Rnd 5: [Sc in next 3 sts, inc] 6 times. (30)
Rnd 6: [Sc in next 4 sts, inc] 6 times. (36)
Sl st in the next st. Fasten off, leaving a 16 in (40.6 cm) tail. The disc should lie flat and measure about 2.1 in (5.3 cm), the same as the body opening.
Wings (Make 2)
Each wing is a flat fan with two lobes. It is worked in short rows from a magic ring at the straight inner edge.
Row 1: MR, ch 1, 6 sc in ring. Do not join. Turn. (6)
Row 2: Ch 1, inc in each st across. Turn. (12)
Row 3: Ch 1, [sc in next st, inc] 6 times. Turn. (18)
The piece is now a half-disc. Pull the ring tail snug.
Row 4 (lobe row): Ch 1.
- Upper lobe (sts 1–10): sc in st 1, hdc in st 2, dc in st 3, 2 dc in each of sts 4–7, dc in st 8, hdc in st 9, sc in st 10. (14 sts)
- Notch: sl st in st 11. (1 st)
- Lower lobe (sts 12–18): sc in st 12, hdc in st 13, 2 hdc in each of sts 14–16, hdc in st 17, sc in st 18. (10 sts)
Row 4 total: 18 sts worked 1-per-stitch + 7 extra (4 in the upper lobe, 3 in the lower lobe) = 25 sts.
Do not turn. The wing edging is worked next (see Border).
Border
The border has two parts: the scalloped hem on the body and the outline round on each wing. Both use the same 2.75 mm (C-2) hook and gauge as the rest of the piece.
Scalloped Hem (Body Rnd 16)
Border gauge: each scallop uses 3 sts of Rnd 15. It measures about 0.55 in (1.4 cm) wide and 0.25 in (0.6 cm) deep.
Rnd 16 (FLO): Working in front loops only of Rnd 15: [sl st in next st, Scallop (5 hdc) in next st, sl st in next st] 12 times. Sl st in the first sl st to join.
Count: 36 sts of Rnd 15 worked 1-per-stitch + 48 extra (4 extra in each of the 12 scallops) = 84 sts, forming 12 scallops.
Fasten off and weave in the tail. The back loops of Rnd 15 stay free on the inside for sewing on the base.
Why the math works: Rnd 15 has 36 sts and the scallop repeat uses exactly 3 sts, so 36 ÷ 3 = 12 even repeats with nothing left over. The paired sl sts between scallops make the small dips. The 5 hdc in a single st push each scallop outward, so the hem flares slightly to about 2.5 in (6.4 cm) across.
Wing Edging (Wing Rnd 5)
Border gauge: one sc per stitch or row end, about 0.2 in (0.5 cm) deep.
Rnd 5: From the end of Row 4, ch 1 and rotate the piece to work along the straight edge. Work 1 sc in each row end of Rows 4, 3, 2, and 1 down to the ring (4 sc). Then work 1 sc in each row end of Rows 1, 2, 3, and 4 up the other side (4 sc). Now sc in each of the 25 sts of Row 4, including 1 sc in the notch sl st. Sl st in the first sc to join.
Count: straight edge 8 sc (4 on each side of the ring) + lobe edge 25 sc = 33 sc.
Fasten off, leaving a 12 in (30.5 cm) tail on each wing for sewing.
Why the math works: the straight edge has 8 row ends and gets exactly 8 sc, so it stays flat and straight for sewing. The lobe edge gets exactly 1 sc per Row 4 stitch, so it outlines the lobes without ruffling. The finished straight edge is about 1.5 in (3.8 cm), which matches the 9 body rounds it will be sewn to.
Assembly
- Stuff the body. Fill the cone lightly with fiberfill so it holds its shape without bulging. If you are using a plastic canvas circle, set it inside against the hem.
- Sew on the base. Hold the base against the inside of the hem. Whipstitch each of the 36 sts of base Rnd 6 to the matching free back loop of body Rnd 15, one to one. Add a little more stuffing before closing the last 6 sts.
- Attach the head. Center the head opening over the top of body Rnd 1. Sew around Rnd 9 of the head into body Rnds 1–2, going around twice for strength.
- Attach the wings. Flip the second wing over so the pair mirrors each other. Pin each straight edge vertically on the upper back sides of the body, from Rnd 3 down to Rnd 11, with the upper lobe pointing up and outward. Leave about 0.5 in (1.3 cm) between the wings at the center back. Whipstitch the full straight edge.
- Make the hanging loop. Join yarn at the center top of the head (Rnd 1), ch 20 (about 2.9 in / 7.4 cm), then sl st back into the same spot. Fasten off and weave the tails into the head. The folded loop stands about 1.4 in (3.6 cm).
Final Blocking
- Lightly mist the wings and hem with water, or hold a steam iron 1 in (2.5 cm) above them without touching.
- Pin each wing flat on a foam mat, opening the notch and rounding both lobes.
- Shape the scallops with your fingertips so all 12 sit evenly around the hem.
- Stand the angel on its base and smooth the cone so the stitch columns run straight.
- Let everything dry completely, about 2 to 4 hours.
- Unpin and check the wing angle. Nudge the wings slightly forward if they splay backward.
Final Quality-Control Checklist
- Head is round, firm, and about 1 in (2.5 cm) across.
- Body cone is 2.5 in (6.4 cm) along the side with no visible corners.
- Hem shows exactly 12 even scallops.
- Base is flat, centered, and fully closed.
- Angel stands upright on its own.
- Wings mirror each other, lie flat, are outlined all around, and sit level.
- Total height is about 3.75 in (9.5 cm) without the loop.
- Loop is secure and centered so the angel hangs straight.
- All tails are woven in and hidden inside.
Troubleshooting
Cone looks hexagonal or triangular. The increases are stacking. Offset them on every other growth round.
Hem is ruffled instead of scalloped. Your hdc are too tall. Use 4 hdc per scallop and keep the rest the same (36 + 36 extra = 72 sts total).
Base is smaller than the opening. Check your gauge on the base. Add a round of sc without increases only if the difference is more than 0.2 in (0.5 cm).
Wings curl. The edging is too tight. Block firmly, or redo Rnd 5 with slightly looser tension.
Angel hangs crooked. Move the loop so it sits exactly over the center of Rnd 1 of the head.
Stuffing shows through. Go down one hook size and redo the piece.
Care
Spot clean with cool water and mild soap, then reshape and air dry flat. Do not machine wash or tumble dry.
Final Notes
The measurement chain is short and simple. A gauge of 11 sc and 12 rnds per 2 in (5.1 cm) gives a 1 in (2.5 cm) head and a 36-st body opening of 2.1 in (5.3 cm), which matches the 36-st base exactly. Twelve 3-st scallop repeats flare the hem to 2.5 in (6.4 cm). Two 1.5 in (3.8 cm) wing edges sewn over 9 body rounds give a wingspan of about 3 in (7.6 cm). With the head on top, the finished angel stands about 3.75 in (9.5 cm) tall, ready for the tree.
Happy crocheting!