

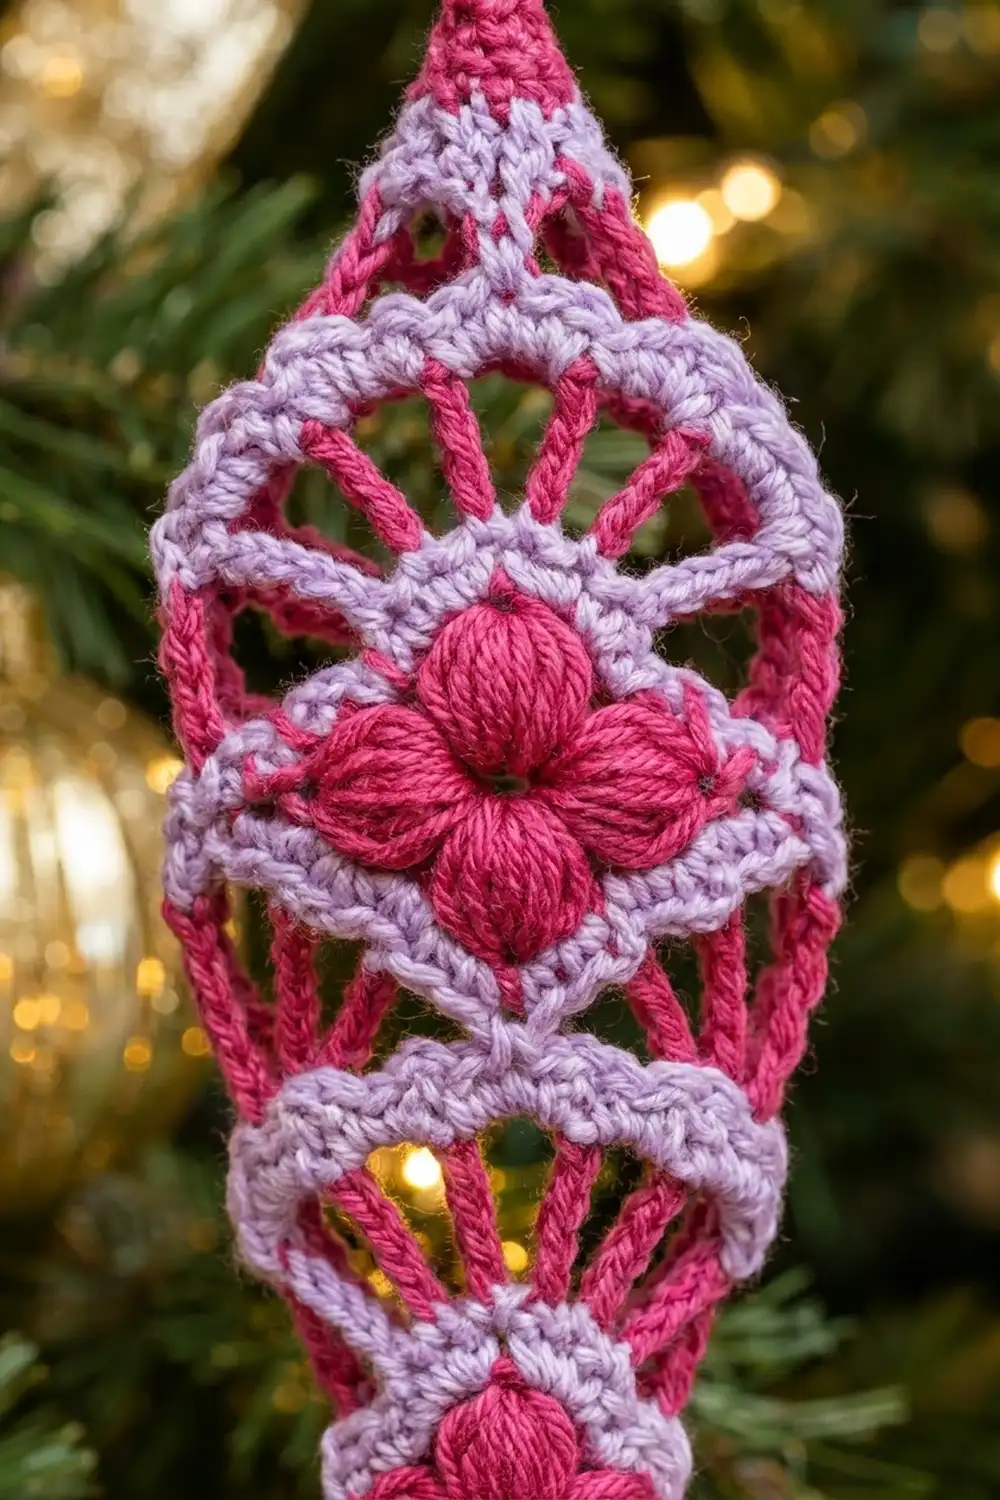
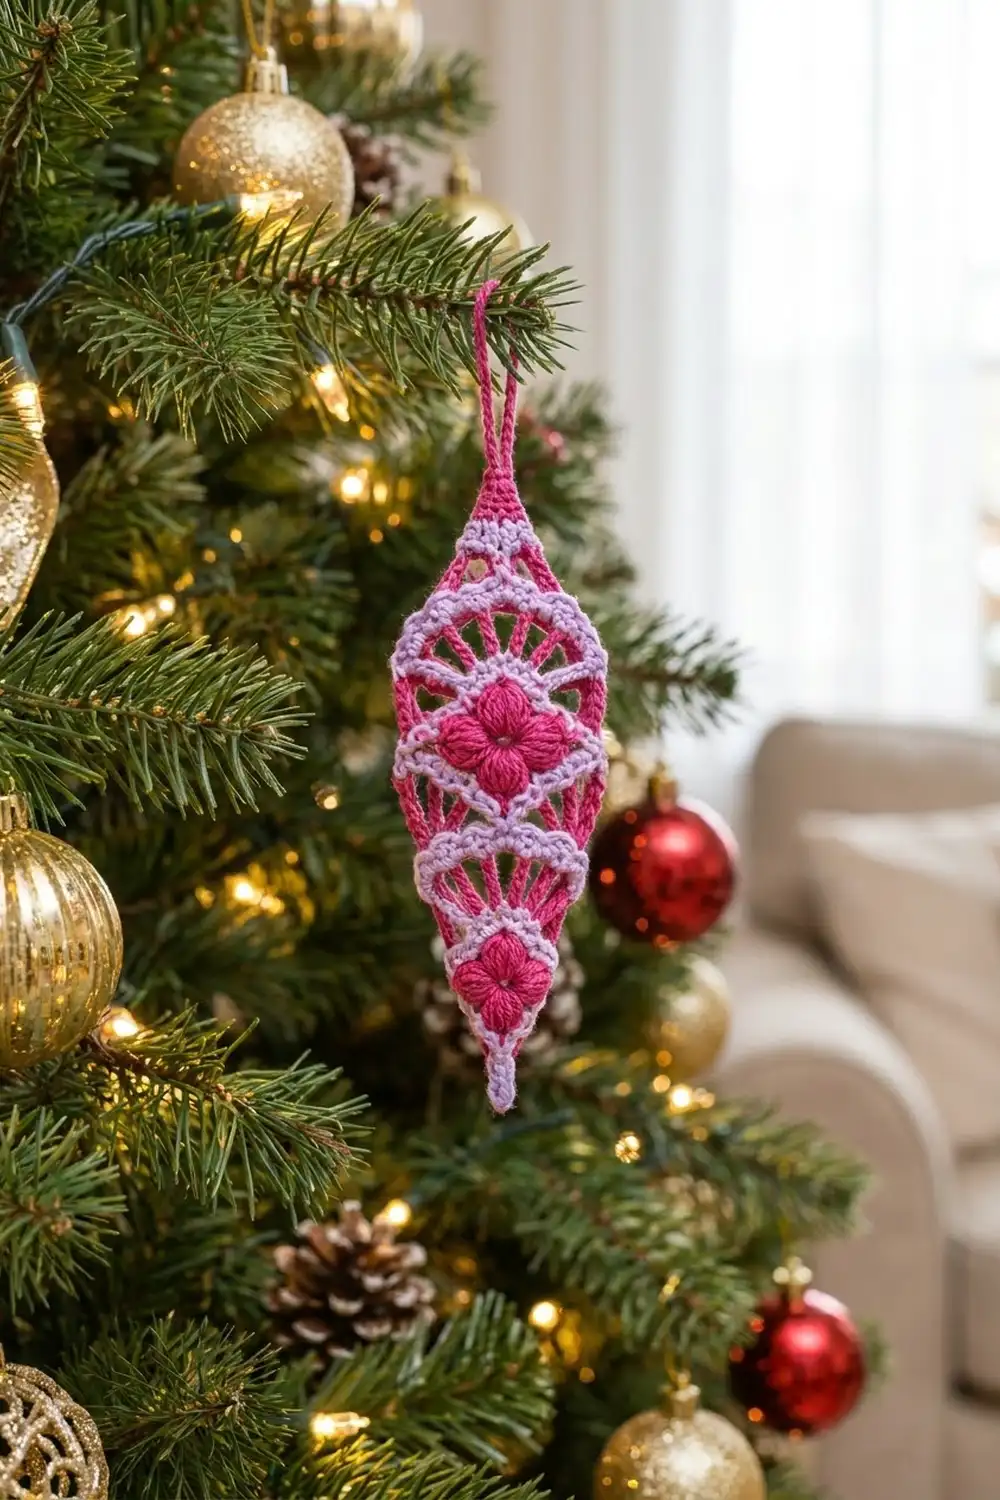
This slim ornament combines plump puff-stitch flowers with open, airy spoke bands. Arched lavender stripes run across it, and each one curves up a little like the top of a fan. The result is a pointed icicle shape that looks pretty on a tree branch or tied to a gift.
The palette is raspberry pink and soft lavender. All the puff flowers, spoke bands, the top cone and the outline are in pink. The lavender sits only in single rows, so it reads as clean stripes that frame each section.
The pattern uses US crochet terms. The finished ornament is 2.7 in (6.9 cm) wide and 7.5 in (19.1 cm) long. The hanging loop adds about 1.5 in (3.8 cm), for a total hanging length of 9.0 in (22.9 cm).
It is worked flat in one piece, in rows from the bottom tip to the top. You increase to the widest point, work straight through the center, then decrease into a cone. One round of single crochet neatens the outline and hides the color-change tails, and a chain loop finishes the top.
Finished Size and Construction
- Finished size: 2.7 in (6.9 cm) wide × 7.5 in (19.1 cm) long, plus a 1.5 in (3.8 cm) loop
- Skill level: Intermediate (puff stitches, color changes, shaping)
- Terminology: US crochet terms
- Yarn weight: DK / light worsted (weight 3) cotton
- Hook: 3.5 mm (E-4)
- Number of pieces: 1
- Layout: single flat ornament, worked bottom to top
- Piece size before border: 2.2 in (5.6 cm) wide × 7.0 in (17.8 cm) long at the center line
- Border depth: 0.25 in (0.6 cm) on every side
- Size after border: 2.7 in (6.9 cm) × 7.5 in (19.1 cm)
Materials
Mercerized or combed cotton works best. It shows the puff stitches clearly, holds the pointed shape, and keeps the spoke bands crisp. Acrylic DK also works, but the ornament will be softer and may need light starch.
Yarn:
– Color A, raspberry pink: 8 g (about 20 m)
– Color B, lavender: 4 g (about 10 m)
These amounts include a margin for your gauge swatch and weaving in. One 50 g ball of each color is enough for several ornaments.
Tools:
– 3.5 mm (E-4) crochet hook
– Tapestry needle
– Scissors
– Stitch marker
– Rust-proof pins and a foam blocking mat
– Spray bottle with water (optional: fabric stiffener or spray starch)
– Ruler or tape measure
Abbreviations (US Terms)
- ch – chain
- sl st – slip stitch
- sc – single crochet
- hdc – half double crochet
- dc – double crochet
- sk – skip
- st(s) – stitch(es)
- sp – space
- sc2tog – single crochet 2 together (decreases by 1)
- sc3tog – single crochet 3 together (decreases by 2)
- RS / WS – right side / wrong side
Special stitch – Puff: (Yarn over, insert hook in the stitch, yarn over and pull up a loop to dc height) 4 times, so you have 9 loops on the hook. Yarn over and pull through all 9 loops, then ch 1 to close. The closing ch does not count. Each puff counts as 1 stitch.
Turning chains: On dc rows, ch 2 does not count as a stitch. On sc rows, ch 1 does not count as a stitch.
Gauge and Checkpoints
Gauge: 10 dc and 4 dc rows = 2 in (5.1 cm), or 5 dc per 1 in (2.5 cm). Single crochet rows measure 0.25 in (0.6 cm) each, so 4 sc rows = 1 in (2.5 cm).
Since this is a single small piece, crochet Rows 1–5 first and treat them as your gauge test.
Checkpoints:
– After Row 5: 2.2 in (5.6 cm) wide × 2.0 in (5.1 cm) tall
– After Row 11: 4.75 in (12.1 cm) tall at the center line, still 2.2 in (5.6 cm) wide
– After Row 14: 6.0 in (15.2 cm) tall at the center line
– After Row 18: 7.0 in (17.8 cm) tall at the center line
– After the border: 2.7 in (6.9 cm) × 7.5 in (19.1 cm)
Too big? Go down to a 3.25 mm hook. Too small? Go up to a 3.75 mm hook. Small differences are fine for an ornament, but large ones will change the yarn amounts and how firm the piece is.
Pattern
Make the first row with Color A. Row 1 is the RS. The puffs look full on both faces, so the ornament is reversible.
Color changes: Work the last yarn over of the final stitch in the new color. Cut the old color, leaving a 4 in (10.2 cm) tail. You will work the border over these tails, so there is very little weaving in later.
Section 1: Tip and Small Flower (Color A)
Row 1 (RS): Ch 2, 3 sc in 2nd ch from hook, turn. (3 sts)
Row 2: Ch 1, 2 sc in first st, sc in next st, 2 sc in last st, turn. (5 sts)
Row 3: Ch 2, 2 dc in first st, dc in next st, Puff in next st (the center), dc in next st, 2 dc in last st, turn. (7 sts: 6 dc + 1 puff)
Row 4: Ch 2, 2 dc in first st, dc in next st, Puff in next st, dc in next st (the top of the Row 3 puff), Puff in next st, dc in next st, 2 dc in last st, turn. (9 sts: 7 dc + 2 puffs)
Row 5: Ch 2, 2 dc in first st, dc in each of next 3 sts, Puff in next st (the center), dc in each of next 3 sts, 2 dc in last st. Change to Color B, turn. (11 sts: 10 dc + 1 puff)
You now have the small flower: four puffs set in a diamond (1, then 2, then 1). The piece is at its full width of 2.2 in (5.6 cm).
Section 2: Lower Spoke Band
Row 6 (Color B): Ch 1, sc in each st across. Change to Color A, turn. (11 sc)
Row 7 (Color A): Ch 2, dc in first st, ch 1, sk next st, dc in next st; repeat from * to * 4 more times. Change to Color B, turn. (11 sts: 6 dc + 5 ch-1 sps)
The six dc posts are the pink spokes, and the ch-1 spaces between them make the band open.
Row 8 (Color B), arch row: Ch 1. Working into each dc and each ch-1 sp, work: sc, sc, hdc, hdc, dc, dc, dc, hdc, hdc, sc, sc. Change to Color A, turn. (11 sts)
The stitches get taller toward the center, which gives the lavender band its arch. The arch is 0.25 in (0.6 cm) tall at the edges and 0.5 in (1.3 cm) tall at the center.
Section 3: Large Center Flower (Color A)
Row 9: Ch 2, dc in each of first 5 sts, Puff in next st (the center), dc in each of last 5 sts, turn. (11 sts: 10 dc + 1 puff)
Row 10: Ch 2, dc in each of first 4 sts, Puff in next st, dc in next st (the top of the puff), Puff in next st, dc in each of last 4 sts, turn. (11 sts: 9 dc + 2 puffs)
Row 11: Ch 2, dc in each of first 5 sts, Puff in next st, dc in each of last 5 sts. Change to Color B, turn. (11 sts: 10 dc + 1 puff)
This flower sits at the widest part of the ornament and follows the arch below it. Checkpoint: 4.75 in (12.1 cm) at the center line.
Section 4: Upper Spoke Band
Row 12 (Color B): Ch 1, sc in each st across. Change to Color A, turn. (11 sc)
Row 13 (Color A): Work as Row 7. Change to Color B. (11 sts: 6 dc + 5 ch-1 sps)
Row 14 (Color B): Work as Row 8. Change to Color A. (11 sts)
Checkpoint: 6.0 in (15.2 cm) at the center line.
Section 5: Top Cone (Color A)
Row 15: Ch 1, sc2tog, sc in each of next 7 sts, sc2tog, turn. (9 sts)
Row 16: Ch 1, sc2tog, sc in each of next 5 sts, sc2tog, turn. (7 sts)
Row 17: Ch 1, sc2tog, sc3tog, sc2tog, turn. (3 sts)
Row 18: Ch 1, sc3tog. (1 st)
Do not fasten off. Checkpoint: 7.0 in (17.8 cm) tall at the center line × 2.2 in (5.6 cm) wide.
Border
Border gauge: 4 sc per 1 in (2.5 cm) along the side edges. Work 1 sc into the end of each sc row or arch row, and 2 sc into the end of each dc row. The arch rows end in a sc at each edge, so they count as sc rows.
Rnd 1 (Color A): Ch 1. Turn the piece so you can work down the first side edge.
- Side 1: Work 26 sc down the edge, from Row 18 to Row 1.
- Bottom tip: Work 3 sc into the base of the Row 1 starting chain.
- Side 2: Work 26 sc up the second edge, from Row 1 to Row 18.
- Top point: Work 3 sc into the top of the Row 18 stitch.
- Sl st to the first sc. (58 sc)
Work over the color-change tails as you go along both sides.
Count per side (rows bottom to top):
– Rows 1–2: 1 + 1 = 2
– Rows 3–5: 2 × 3 = 6
– Row 6: 1
– Row 7: 2
– Row 8: 1
– Rows 9–11: 2 × 3 = 6
– Row 12: 1
– Row 13: 2
– Row 14: 1
– Rows 15–18: 1 × 4 = 4
Total per side: 26 sc. Grand total: 26 + 26 + 3 + 3 = 58 sc.
Why the math works: Measured along the edge, the rows add up to 6.5 in (16.5 cm). The arch rows count only 0.25 in (0.6 cm) at the edge. At 4 sc per inch, 6.5 × 4 = 26 sc, so the sides lie flat without ruffling or pulling in. The 3-sc groups at each end let the border turn sharply around both points.
Hanging loop: Ch 16, then sl st into the center sc of the top 3-sc group. Fasten off and weave in the end. The loop measures about 1.5 in (3.8 cm).
The single round of sc adds 0.25 in (0.6 cm) on every side. The ornament grows from 2.2 in (5.6 cm) to 2.7 in (6.9 cm) wide, and from 7.0 in (17.8 cm) to 7.5 in (19.1 cm) long.
Final Blocking
- Weave in any remaining tails along the border on the WS. Trim close.
- Spray the ornament until it is damp but not dripping, or dip it in diluted fabric stiffener and squeeze out the extra.
- Lay it flat on the blocking mat. Pin the bottom tip and the top point 7.5 in (19.1 cm) apart.
- Pin the widest point, at the center flower, to 2.7 in (6.9 cm).
- Shape both lavender arches by gently pushing their centers upward with your fingertip.
- Spread the spokes evenly so the five gaps in each band look the same.
- Pinch each puff gently to round it out, and press the flower centers flat.
- Pin the loop straight up and let everything dry completely before unpinning.
Final Quality-Control Checklist
- Width is 2.7 in (6.9 cm) at the widest point.
- Length is 7.5 in (19.1 cm) from tip to top, not counting the loop.
- Each flower has four puffs in a diamond (1–2–1).
- Each spoke band has 6 dc posts and 5 even openings.
- Both lavender arches curve up at the center.
- The border has 58 sc: 26 per side and 3 at each point.
- Both points are sharp and centered.
- The loop is secure, centered and about 1.5 in (3.8 cm) long.
- No tails show on either face.
Troubleshooting
Puffs look flat or straggly: Pull each loop up to full dc height before you close the puff, and use the ch 1 to lock it.
Edges ripple: You have added too many border sc. Check the side count against 26.
Edges pull in or curl: You have worked too few border sc. Make sure every dc row end gets 2 sc.
The arch doesn’t curve: Check the order of stitches in Row 8 and Row 14. The three dc must sit in the center.
Ornament leans to one side: Make sure you increased in both the first and last stitch on Rows 2–5, and decreased evenly on Rows 15–17.
Spoke band looks tight: Make the ch-1 spaces a little looser, or use ch 2 and skip just 1 stitch. Do this only if your gauge is tight.
Color stripes look jagged: Always change color on the last yarn over of the previous row.
Care
Hand wash in cool water, press out the water in a towel, and reshape it flat to dry. Store it flat or hanging so the points don’t get crushed.
Final Notes
Here is the full measurement chain:
- Start at 5 dc per 1 in (2.5 cm).
- Rows 1–5 bring the piece to 11 stitches, which is 2.2 in (5.6 cm) wide and 2.0 in (5.1 cm) tall.
- Row 11 reaches 4.75 in (12.1 cm), and Row 14 reaches 6.0 in (15.2 cm).
- The cone ends at 7.0 in (17.8 cm).
- The 58-stitch border adds 0.25 in (0.6 cm) all around, for a finished 2.7 in (6.9 cm) × 7.5 in (19.1 cm) ornament.
- The 1.5 in (3.8 cm) loop is ready to hang.
If each checkpoint matches, the finished size will match too.
Happy crocheting!