

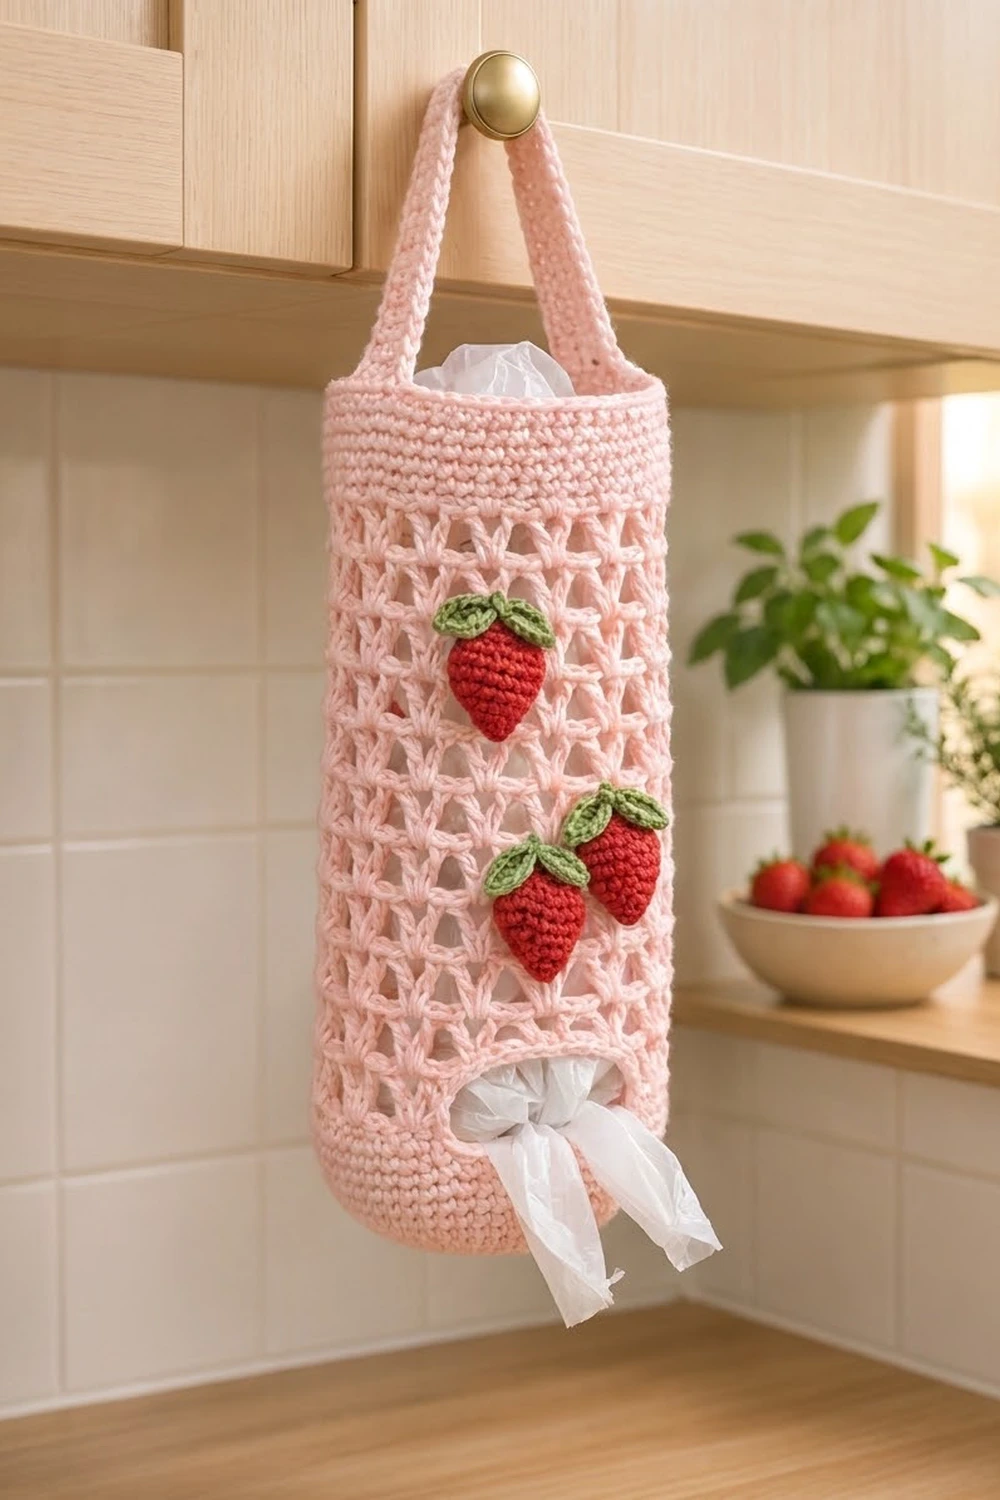
This plastic bag holder hangs from a hook or cabinet knob. You stuff grocery bags in through the top and pull them out one at a time through an oval opening near the base. The body is pale pink, with a solid bottom, an open V-stitch mesh in the middle and a neat solid band at the top.
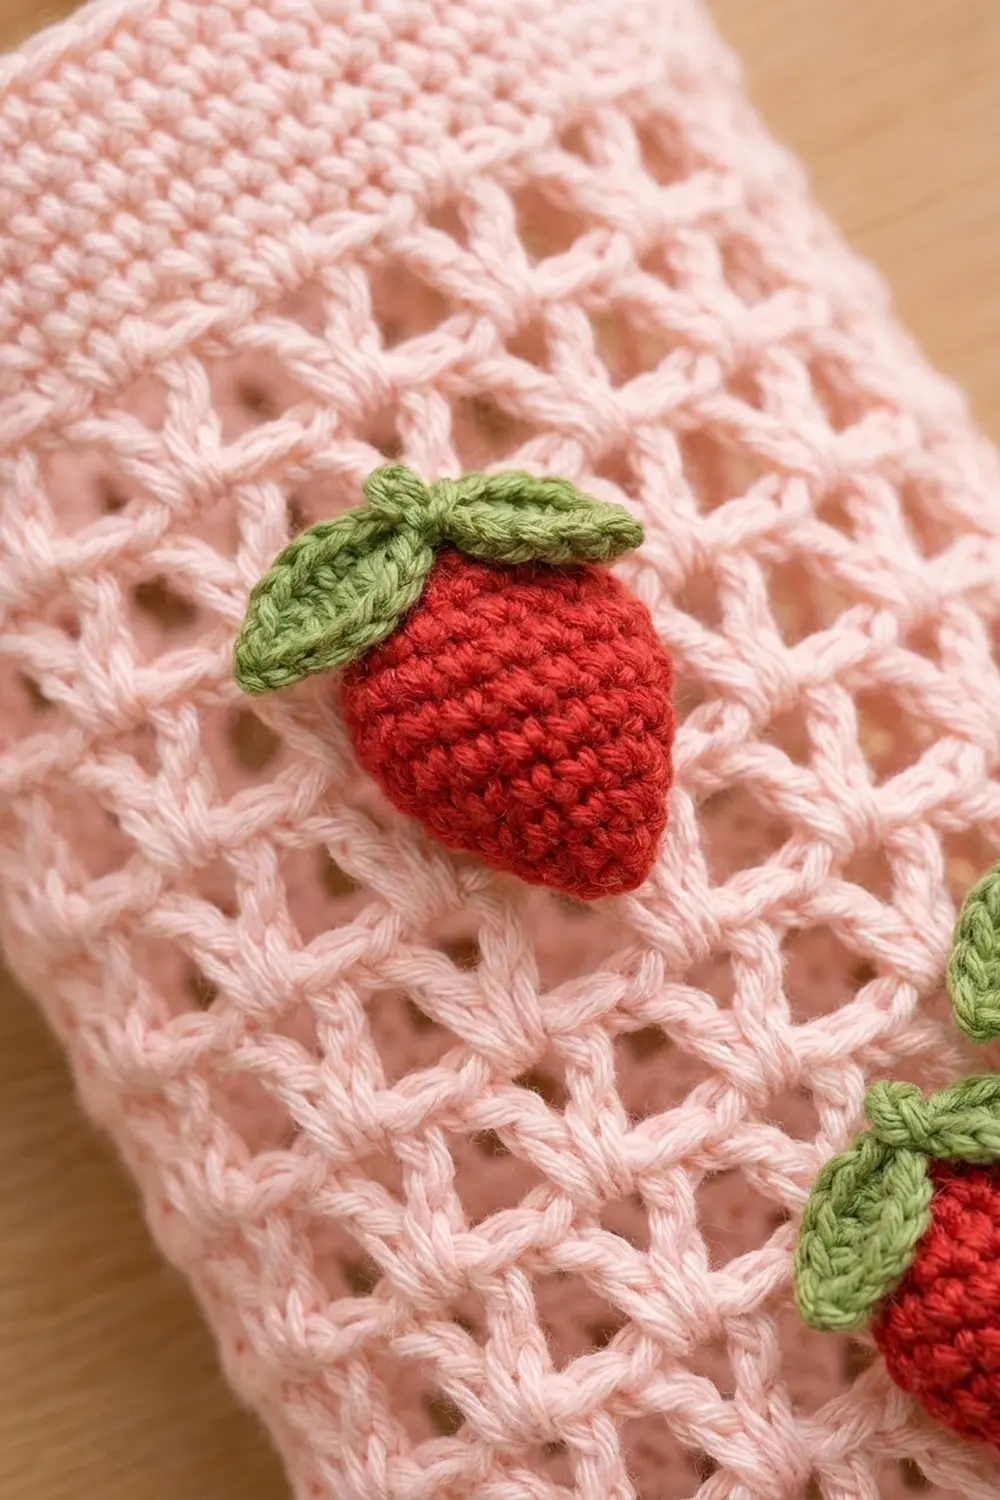
Three little red strawberries with green leaf caps decorate the front, which gives it a sweet, farmhouse-kitchen look. Pink, red and green cotton look fresh together, wash well and suit a sunny kitchen or pantry door. The mesh also lets you see when you’re running low on bags.
The pattern uses US crochet terms. The finished body is about 12.4 in (31.5 cm) tall and 6 in (15.2 cm) wide when flat, with a 12 in (30.5 cm) circumference. With the handle, the holder hangs about 18 in (45.7 cm) long.
You work the body in one piece from the bottom up. First comes a flat single crochet circle, then the walls rise in single crochet. A few turned rows leave the dispenser gap, a V-stitch mesh forms the main section, and a solid band finishes the top. You make the handle, strawberries and leaf caps separately and sew them on at the end.
Finished Size and Construction
- Finished size: body 6 in (15.2 cm) wide flat × 12.4 in (31.5 cm) tall; about 18 in (45.7 cm) hanging length
- Skill level: Easy–Intermediate
- Terminology: US
- Yarn weight: worsted (#4) cotton
- Hook: 4.0 mm (G-6)
- Number of pieces: 8 (1 body, 1 handle, 3 strawberries, 3 leaf caps)
- Layout: one tube, handle across the top, strawberries on the front mesh
- Piece size: base 3.75 in (9.5 cm) across; strawberry 1.75 in (4.4 cm) wide × 1.5 in (3.8 cm) tall; handle 15 in (38.1 cm) × 0.9 in (2.3 cm)
- Opening size before border: 4 in (10.2 cm) × 1.8 in (4.6 cm)
- Border depth: about 0.2 in (0.5 cm) around the opening; one slip-stitch round on the top rim
Materials
Use a smooth, mercerized or matte worsted-weight cotton. Cotton holds its shape when it’s stuffed with bags, and it doesn’t stretch out on a hook the way acrylic can. Choose a firm, tightly plied yarn so the V-stitches look crisp and the opening keeps its oval shape.
- Pale pink: 120 g, about 192 m (210 yd)
- Red: 10 g, about 16 m (17 yd)
- Green: 5 g, about 8 m (9 yd)
These quantities include a margin of about 15% for swatching and tension differences.
Tools:
- 4.0 mm (G-6) crochet hook
- Tapestry needle
- Stitch markers (at least 2)
- Scissors
- Measuring tape
- Rust-proof pins
Abbreviations (US Terms)
- ch – chain
- sl st – slip stitch
- sc – single crochet
- hdc – half double crochet
- dc – double crochet
- sc2tog – single crochet 2 together
- BLO – back loop only
- sp – space
- st(s) – stitch(es)
- rnd – round
- RS – right side
Special stitch – V-stitch (V-st): (dc, ch 1, dc) in the same stitch or space. Each V-st counts as 3 sts: 2 dc + 1 ch-1 sp.
Gauge and Checkpoints
Gauge: 16 sc and 18 sc rnds = 4 in (10.2 cm). In mesh, 4 V-sts (12 sts) = 3 in (7.6 cm) and 7 mesh rnds = 4 in (10.2 cm).
Treat the base as your swatch. Work Rnds 1–8 and lay the circle flat before you go on. Every later measurement depends on this circle, so it’s worth checking carefully.
Checkpoints:
- After Rnd 8: base measures 3.75 in (9.5 cm) across.
- After Rnd 13: tube measures 6 in (15.2 cm) wide when flat.
- After Row 21: opening gap measures 4 in (10.2 cm) wide and 1.8 in (4.6 cm) tall.
- After Rnd 37: mesh section measures 8 in (20.3 cm) tall.
- After Rnd 43: body measures 12.4 in (31.5 cm) tall.
If your base is bigger than 3.75 in (9.5 cm), go down to a 3.5 mm hook. If it’s smaller, go up to a 4.5 mm hook. A difference of 0.25 in (0.6 cm) across the base adds up to about 0.8 in (2.0 cm) around the tube. If only your mesh height is off, change the hook for the mesh rounds alone and keep the stitch counts the same.
Body
Use pale pink. Work the base in rounds and join each one: sl st to the first sc to join, and ch 1 at the start of each round (the ch 1 does not count as a stitch).
Rnd 1: Magic ring, ch 1, 6 sc in ring, join. (6)
Rnd 2: 2 sc in each st around. (12)
Rnd 3: Sc 1, 2 sc in next around. (18)
Rnd 4: Sc 2, 2 sc in next around. (24)
Rnd 5: Sc 3, 2 sc in next around. (30)
Rnd 6: Sc 4, 2 sc in next around. (36)
Rnd 7: Sc 5, 2 sc in next around. (42)
Rnd 8: Sc 6, 2 sc in next around. (48)
The base is now 3.75 in (9.5 cm) across.
Rnd 9: Sc in BLO of each st around. (48) This makes the crisp fold between base and wall.
Rnds 10–13: Sc in each st around. (48)
The walls now stand up on their own. Place a marker in the first stitch so you can find the start of the round easily.
Dispenser Opening
Now you work in turned rows over 32 sts and leave the other 16 sts unworked to make the gap.
Row 14 (RS): Ch 1, sc in next 32 sts, turn. (32) Leave the remaining 16 sts unworked.
Rows 15–21: Ch 1, sc in each st across, turn. (32 each row)
That gives 8 rows in total, so the opening is 1.8 in (4.6 cm) tall. Don’t turn at the end of Row 21.
Close the gap: Ch 16, then sl st in the first sc of Row 21 to bring the work back into a tube. Turn so the RS faces you.
Rnd 22 (RS): Ch 1, sc in each of the 16 ch, sc in each of the 32 sc, join. (48)
Rnd 23: Sc in each st around. (48)
Keep the chain relaxed. If it’s tight, the top of the opening will pucker and the oval will pinch in the middle.
V-Stitch Mesh
Rnd 24 (set-up): Ch 4 (counts as dc + ch 1), dc in the same st. Skip 2 sts, V-st in next st. Repeat from * 14 more times, skip the last 2 sts, then sl st in the 3rd ch of the beginning ch-4. (16 V-sts = 48 sts)
Rnds 25–37: Sl st into the first ch-1 sp, ch 4, dc in the same sp, V-st in each ch-1 sp around, then sl st in the 3rd ch of the beginning ch-4. (16 V-sts = 48 sts each round)
That makes 14 mesh rounds, or 8 in (20.3 cm). The Vs stack directly on top of each other in straight columns. Count your Vs at the end of every round, because a missed space shows right away in the mesh.
Top Band
Rnd 38 (conversion): Ch 1. Sc in each dc and in each ch-1 sp around (the beginning ch-4 gives 1 dc and 1 sp), join. That’s 48 sts worked 1-per-existing-stitch + 0 added = 48.
Rnds 39–42: Sc in each st around. (48)
The top band is 5 rounds, about 1.1 in (2.8 cm). Don’t fasten off yet if you want to work the rim straight away. Rnd 43 is the rim border (see Border).
Handle
Use pale pink.
Foundation: Ch 61.
Row 1: Sc in the 2nd ch from the hook and in each ch across, turn. (60)
Rows 2–4: Ch 1, sc in each st across, turn. (60)
Fasten off and leave a 12 in (30.5 cm) tail for sewing. The strap measures 15 in (38.1 cm) long and 0.9 in (2.3 cm) wide.
Strawberries (Make 3)
Use red. The berries are worked in rows, starting at the pointed tip.
Row 1: Ch 2, 3 sc in the 2nd ch from the hook, turn. (3)
Row 2: Ch 1, 2 sc in the first st, sc 1, 2 sc in the last st, turn. (5)
Row 3: Ch 1, 2 sc in the first st, sc 3, 2 sc in the last st, turn. (7)
Rows 4–6: Ch 1, sc 7, turn. (7)
Row 7: Ch 1, sc2tog, sc 3, sc2tog. (5)
Fasten off and leave an 8 in (20.3 cm) tail. Each berry is a teardrop 1.75 in (4.4 cm) wide and 1.5 in (3.8 cm) tall, with a point at the bottom and rounded shoulders at the top. The sc bumps give it a natural seedy texture.
Leaf Caps (Make 3)
Use green.
Make a magic ring.
- Leaves: Ch 5, sl st in the 2nd ch from the hook, sc in next ch, hdc in next ch, sc in last ch, sl st in ring. Repeat from * 2 more times. (3 leaves)
- Stem: Ch 3, sl st in the 2nd ch from the hook and in the next ch, then sl st in the ring.
Pull the ring closed and fasten off, leaving an 8 in (20.3 cm) tail. Each cap is about 1.25 in (3.2 cm) across.
Make All Pieces
- Pale pink: 1 body, 1 handle
- Red: 3 strawberries
- Green: 3 leaf caps
Front layout grid (body flat, opening centered at the bottom):
[ top band .............................. ]
[ mesh   | Berry 1 |         |           ]
[ mesh   |         |         |           ]
[ mesh   |         | Berry 2 | Berry 3   ]
[ mesh   |         |         |           ]
[ solid  |   ( dispenser opening )       ]
[ base  ................................. ]
Berry 1 sits about 2.25 in (5.7 cm) below the top band, slightly left of center. Berries 2 and 3 sit side by side about 2 in (5.1 cm) lower and right of center. Berry 3 sits slightly higher, with its edge just touching Berry 2.
Joining
Method: whipstitch with yarn tails and a tapestry needle.
Leaf caps to berries: Center each cap on the top edge of a berry (Row 7). One leaf points left, one points right and one drops down the front, with the stem standing up. Sew through the center of the ring and the tip of each leaf.
Strawberries to body: Pin them as shown in the grid. Slip a rolled towel inside the body first so you don’t sew through to the back. Sew around each berry’s outer edge, catching one strand of a mesh dc or V-st bar every 2 sts of the berry edge. Don’t pull tight, or the mesh will gather.
Handle to body: Flatten the body with the opening centered on the front. Each handle end goes at a side fold, 12 sts along the top band from the center of the opening (a quarter of the 48 sts). Lay each strap end inside the top band so it overlaps Rnds 38–42, which is 1.1 in (2.8 cm). Check that the strap isn’t twisted. Whipstitch around all edges of the overlap, catching only the inner layer of the band so no stitches show on the front.
Tension: Keep your sewing stitches the same firmness as your fabric. The handle carries the full weight of the bags, so go around each overlap twice.
Size checkpoint: The free strap is 15 − 2.2 = 12.8 in (32.5 cm) long, which makes an arch rising about 6 in (15.2 cm) above the rim.
Border
Border gauge: 1 sc per sc stitch, and 7 sc across 8 row ends.
Opening Edging
Join pale pink at a bottom corner of the opening.
Rnd 1: Ch 1. Sc in each of the 16 unworked sts of Rnd 13 (bottom edge: 16). Work 7 sc evenly across the 8 row ends of Rows 14–21 (side: 7). Sc in the underside of each of the 16 ch from the gap (top edge: 16). Work 7 sc evenly across the 8 row ends on the other side (side: 7). Join. (16 + 7 + 16 + 7 = 46)
Rnd 2: Sl st loosely in each st around. (46)
Fasten off and weave in the ends. The opening finishes at about 3.6 in (9.1 cm) × 1.4 in (3.6 cm).
Top Rim
Rnd 43: Sl st loosely in each st of Rnd 42 around. (48)
Why the math works: At gauge, 8 sc rows measure 1.8 in (4.6 cm) and 7 sc measure 1.75 in (4.4 cm). Using 7 sc per side lets the edge lie flat without flaring. The 16-st edges match the 16 skipped sts and the 16 chains one for one, so the long sides stay straight. The rim keeps all 48 sts, so the circumference stays at 12 in (30.5 cm).
Final Blocking
- Wet the finished holder in cool water and gently squeeze it out. Don’t wring it.
- Roll it in a towel to remove extra water.
- Slide the body over a bottle or rolled towel about 3.75 in (9.5 cm) wide.
- Line up the V columns so they run straight up.
- Shape the opening into a smooth oval with your fingers.
- Press the strawberries flat and spread the leaves.
- Let everything dry completely before hanging.
Final Quality-Control Checklist
- Base measures 3.75 in (9.5 cm) across and sits flat.
- Every mesh round has 16 V-sts.
- Top band and rim each have 48 sts.
- Opening edging has 46 sts, and the opening is centered on the front.
- Handle ends sit exactly opposite each other at the side folds.
- No sewing stitches show on the front of the top band.
- Berries point downward, with all three leaves visible.
- All ends are woven in at least 2 in (5.1 cm).
Troubleshooting
- Base cups or ruffles: Check that you have the right count on every increase round. If the counts are right, change your hook size.
- Mesh leans in a spiral: Always start each round in the first ch-1 sp, and join into the 3rd ch.
- Opening is lopsided: Recount Rows 14–21. Each row must have exactly 32 sts.
- Edging flares: Use 6 sc per side instead of 7.
- Handle stretches: Work Row 1 into the back bump of the chain, or add a fifth row.
- Berries curl: Steam them lightly before sewing.
- Holder tilts when hanging: Re-center the handle ends on the side folds.
Care
Hand wash in cool water with mild soap, reshape, and lay flat to dry. Don’t tumble dry, because the mesh can lose its shape.
Final Notes
The measurement chain is simple. The 3.75 in (9.5 cm) base gives 48 sts and a 12 in (30.5 cm) circumference. That circumference holds 16 V-sts in every mesh round. The solid section, mesh and top band add up to 12.4 in (31.5 cm) of height, and a 15 in (38.1 cm) strap gives an arch of about 6 in (15.2 cm). Check each step against its checkpoint and your holder will hang straight and dispense neatly.
Happy crocheting!