

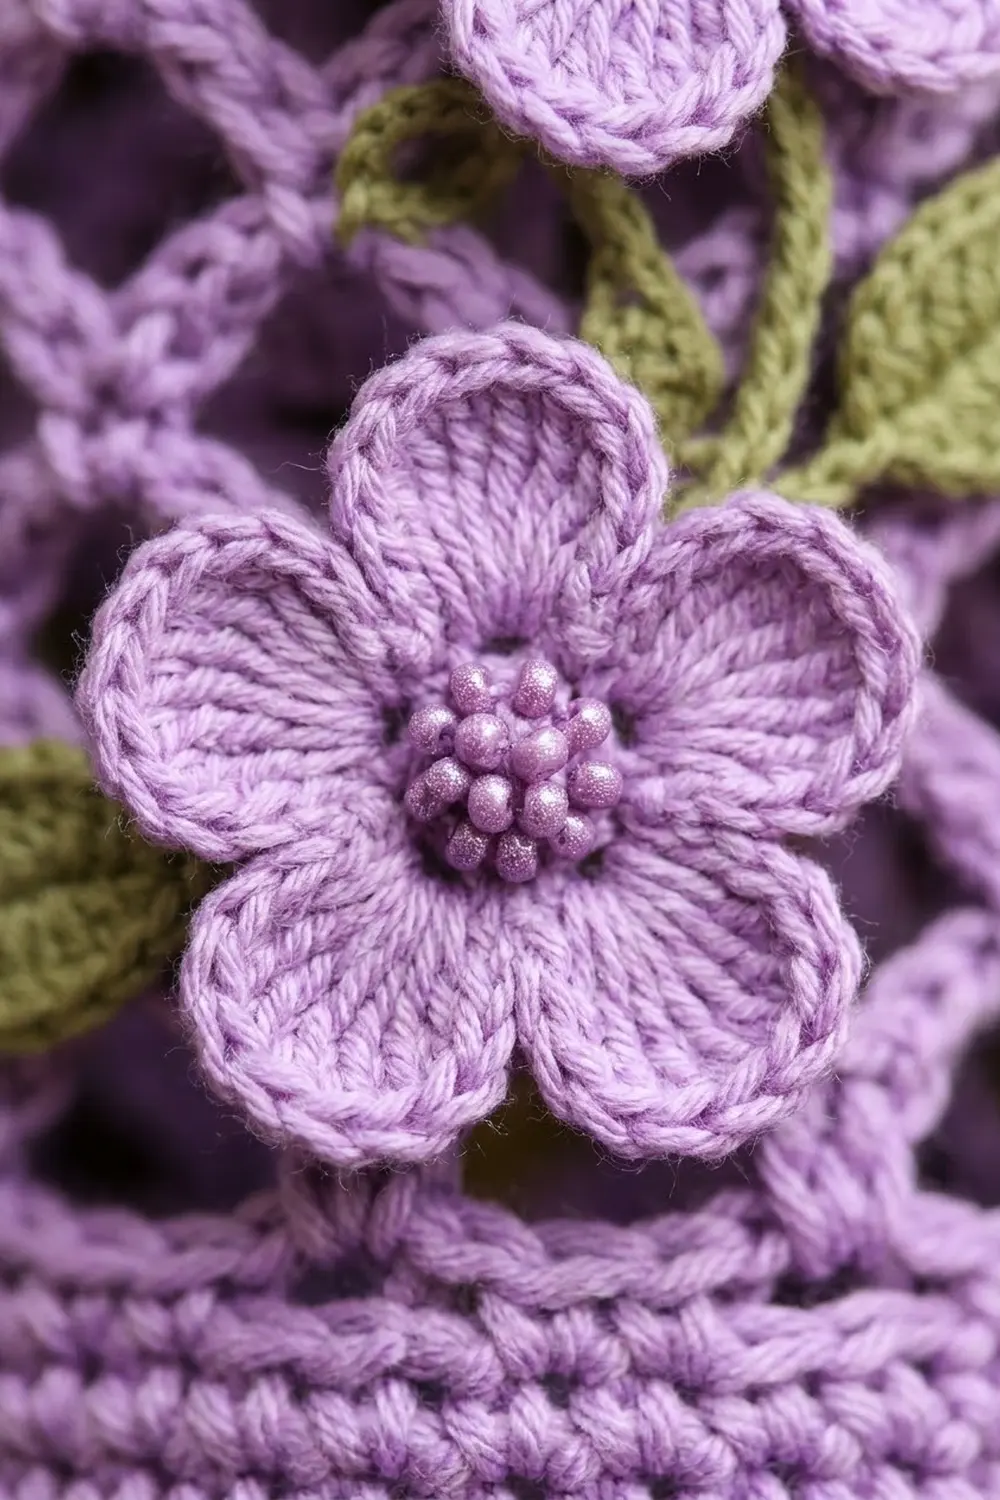
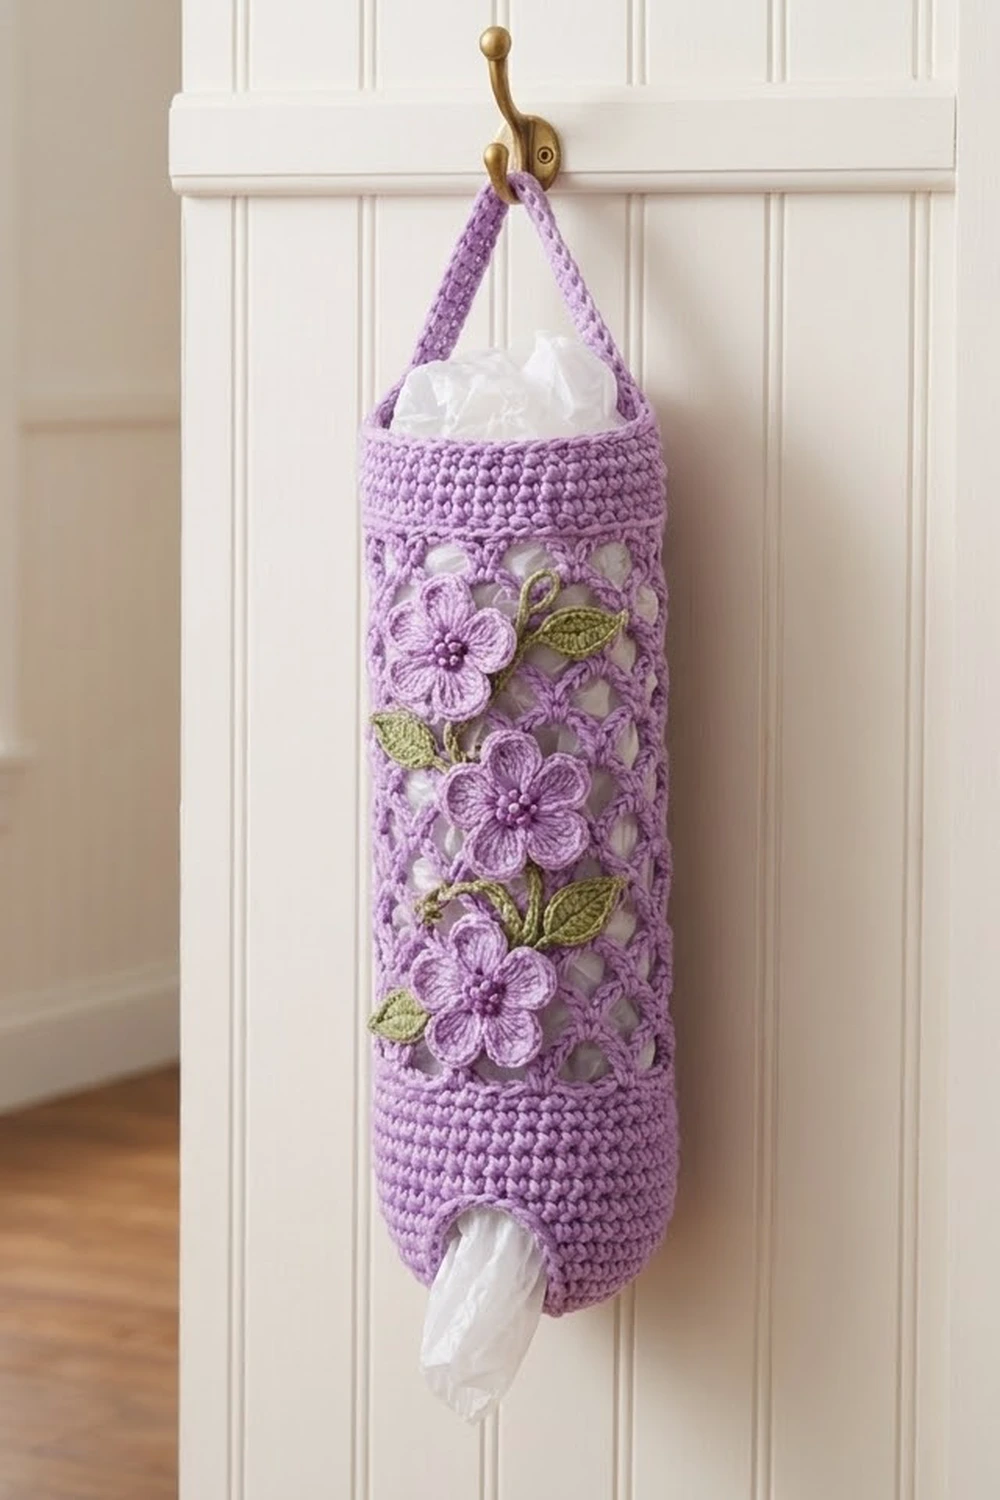
This bag holder is a slim lavender tube that hangs from a crochet strap and holds a stash of plastic grocery bags. You stuff bags in at the top and pull them out one at a time through a small arched opening near the base. A band of open arch mesh runs up the middle of the tube, and three puff-centered flowers trail down the front on a green leafy vine.
The palette is soft lavender with a fresh leaf green. A deep plum body with cream flowers works just as well. The style is farmhouse-pretty, but the holder is sturdy enough for daily use in a kitchen or laundry room.
The pattern uses US crochet terms. The finished body is 14 in (35.6 cm) tall and 6 in (15.2 cm) wide when flattened, about 3.8 in (9.7 cm) across as a tube. With the strap, the hanging length is about 18 in (45.7 cm).
Construction is simple and seamless. You start with a flat single crochet base, then build up a solid lower band with the dispensing opening worked in. Next come an open mesh section and a solid top band. A separate strap is stitched inside the rim, and the flowers and vine are sewn on last.
Finished Size and Construction
- Finished size: 14 in (35.6 cm) tall x 6 in (15.2 cm) flat width; about 18 in (45.7 cm) including strap
- Skill level: Intermediate
- Terminology: US
- Yarn weight: Worsted (#4) cotton
- Hook: 4.0 mm (G-6)
- Number of pieces: 1 holder made from 6 components: body, strap, 3 flowers, 1 vine
- Layout: single vertical tube, opening at lower front, strap at top
- Piece size: body 48 stitches around; 3.5 in (8.9 cm) lower band, 8.75 in (22.2 cm) mesh, 1.75 in (4.4 cm) top band
- Size before border: 14 in (35.6 cm) x 6 in (15.2 cm)
- Border depth: the slip stitch rim adds no height; the opening edging is 1 round of sc, about 0.25 in (0.6 cm) wide
Materials
Choose a smooth worsted-weight cotton or cotton blend. Cotton keeps its shape when it’s full of bags and doesn’t stretch out on the hook the way acrylic can.
- Lavender (main color): 110 g, about 187 m
- Leaf green: 10 g, about 17 m
Both quantities include a margin of roughly 15% for your gauge swatch and tails.
Tools:
– 4.0 mm (G-6) crochet hook
– Locking stitch markers (at least 3)
– Tapestry needle
– Scissors
– Measuring tape
– Rust-proof pins and a blocking towel
– A 4 in (10.2 cm) wide jar or rolled towel to block the tube
Abbreviations (US Terms)
- ch – chain
- sl st – slip stitch
- sc – single crochet
- hdc – half double crochet
- dc – double crochet
- inc – 2 sc in the same stitch
- sk – skip
- BLO – back loop only
- MR – magic ring
- st(s) – stitch(es)
- sp – space
- RS / WS – right side / wrong side
Special stitch – Puff: (Yarn over, insert hook in ring, pull up a loop) 3 times, yarn over, and pull through all 7 loops on hook.
Gauge and Checkpoints
Gauge: 16 sc and 18 rounds = 4 in (10.2 cm). In mesh, 3 rounds of ch-5 loops = 2 in (5.1 cm).
Work the base before anything else, because it doubles as your gauge test. After Round 8 it should measure about 3.5 in (8.9 cm) across.
Checkpoints:
– After Round 8 (base): 3.5 in (8.9 cm) diameter
– After Round 17: tube flattens to 6 in (15.2 cm) wide
– After Round 24: height from base fold 3.5 in (8.9 cm)
– After Round 37: height 12.25 in (31.1 cm)
– After Round 45: height 14 in (35.6 cm)
Too big? Switch to a 3.75 mm hook. Too small? Switch to a 4.5 mm hook. Always fix gauge on the base. Don’t add or remove stitches, because the mesh repeat needs exactly 48 stitches.
Body
Base
Work in continuous rounds, joining with sl st, and don’t turn unless told to. The ch 1 at the start of a round doesn’t count as a stitch.
Rnd 1: MR, ch 1, 6 sc in ring, sl st to first sc. (6)
Rnd 2: Ch 1, inc in each st around. (12)
Rnd 3: Ch 1, sc 1, inc 6 times. (18)
Rnd 4: Ch 1, sc 2, inc 6 times. (24)
Rnd 5: Ch 1, sc 3, inc 6 times. (30)
Rnd 6: Ch 1, sc 4, inc 6 times. (36)
Rnd 7: Ch 1, sc 5, inc 6 times. (42)
Rnd 8: Ch 1, sc 6, inc 6 times. (48)
Check: the base lies flat and measures 3.5 in (8.9 cm) across.
Lower Band with Dispensing Opening
Rnd 9: Ch 1, sc in BLO of each st around, sl st to first sc. (48) This turns the work upward and leaves a crisp fold line around the base.
Place a marker in sts 41 and 48 of Round 9. The 8 stitches from marker to marker are the bottom edge of the opening, and they become the front of the holder.
Row 10 (RS): Ch 1, sc in sts 1–40, leaving the last 8 sts unworked. Turn. (40)
Rows 11–15: Ch 1, sc in each of the 40 sts. Turn. (40) Row 15 is a WS row.
The opening is now a slot 2 in (5.1 cm) wide and about 1.3 in (3.3 cm) tall.
Rnd 16 (RS): Ch 1, sc in each of the 40 sts, ch 8, sl st to first sc. (40 sc + 8 ch = 48)
Rnd 17: Ch 1, sc in each of the 40 sc and in each of the 8 ch. Sl st to join. (40 + 8 = 48)
Check: the tube flattens to 6 in (15.2 cm) wide.
Rnds 18–24: Ch 1, sc in each st around. (48)
Check: about 3.5 in (8.9 cm) from the base fold.
Mesh Section
Rnd 25 (setup): Ch 1, sc in first st, ch 5, sk 2 sts, sc in next st 15 times, ch 2, sk last 2 sts, dc in first sc. (16 loops) The ch 2 + dc stands in for the last ch-5 loop and leaves your hook at the center of that loop.
Check the math: the first sc plus 15 repeats of 3 sts uses 46 sts, and the last 2 skipped sts make 48.
Rnds 26–36: Ch 1, sc around the post of the dc just made, ch 5, sc in next ch-5 loop 15 times, ch 2, dc in first sc. (16 loops)
Rnd 37: Ch 1, sc around the post of the dc, ch 5, sc in next ch-5 loop 15 times, ch 5, sl st to first sc. (16 loops) Ending with a full ch-5 gives the last loop the same shape as the others.
That makes 13 mesh rounds in total (Rnds 25–37). Each sc sits in the center of the loop below it, which staggers the loops into the scallop-like arch pattern.
Check: mesh section about 8.75 in (22.2 cm); total height about 12.25 in (31.1 cm).
Top Band
Rnd 38 (conversion): Sl st into the first ch-5 loop, ch 1, 3 sc in each loop around. Sl st to join. (16 loops x 3 sc = 48)
Rnds 39–45: Ch 1, sc in each st around. (48)
Check: top band 1.75 in (4.4 cm); body 14 in (35.6 cm). Don’t fasten off yet. The rim round comes in the Border section.
Strap
Use lavender.
Row 1: Ch 5, sc in 2nd ch from hook and in each ch across. Turn. (4)
Rows 2–54: Ch 1, sc in each st across. Turn. (4)
Fasten off and leave a 12 in (30.5 cm) tail. The strap measures 12 in (30.5 cm) x 1 in (2.5 cm).
Flowers (make 3)
Use lavender.
Rnd 1: MR, ch 2 (doesn’t count), puff in ring, ch 1 5 times. Pull the ring tight and sl st to the top of the first puff. (5 puffs + 5 ch-1 sps = 10)
Rnd 2: (Hdc, 3 dc, hdc) in next ch-1 sp, sl st in next puff 5 times. (5 petals x 5 sts + 5 sl st = 30)
Fasten off and leave a 10 in (25.4 cm) tail. Each flower is about 2 in (5.1 cm) across. The 5 tight puffs form a raised, beaded center, and the petals open up around them.
Leafy Vine
Use leaf green.
Leaf: Ch 7. Working back down this chain toward the stem: sl st in 2nd ch from hook, sc, hdc, dc, hdc, sc (6 sts), then sl st into the same stem chain where the leaf began.
Vine: Ch 40. Working back along the chain from the 2nd ch from hook:
– Tendril: 2 sc in each of the next 10 ch. It will twist into a curl.
– Sl st in next 4 ch, make a Leaf.
– Sl st in next 5 ch, make a Leaf 5 times.
That uses 10 + 4 + (5 x 5) = 39 chains, with 6 leaves. The sixth leaf sits at the end of the vine. Fasten off. The finished vine is about 9 in (22.9 cm) long, and each leaf is about 1.5 in (3.8 cm).
Border
The border is a firm rim plus a tidy edge around the dispensing opening. Border gauge: same as the body, 4 sc per in (2.54 cm) and 4.5 rows per in (2.54 cm).
Top rim (Rnd 46): Still on the body, sl st loosely in each st around. (48) Fasten off. One slip stitch per stitch keeps the rim at 12 in (30.5 cm) around. It doesn’t flare or pull in, and it firms up the edge where you push bags in.
Opening edging: With the RS facing, join lavender at the lower right corner of the opening.
– Bottom edge: 1 sc in the free top of each of the 8 unworked Round 9 sts. (8)
– Left side: 5 sc evenly over the 6 row ends of Rows 10–15. (5)
– Top edge: 1 sc in the underside of each of the 8 chains from Round 16. (8)
– Right side: 5 sc evenly over the 6 row ends. (5)
Sl st to the first sc. (8 + 5 + 8 + 5 = 26) Fasten off.
Why the math works: The top and bottom edges are 8 stitches wide, so they take 8 sc each, one per stitch. Each side has 6 rows of sc. At 18 rows versus 16 stitches per 4 in (10.2 cm), 6 row ends span the same distance as 6 x 16 / 18 = 5.3 stitches, so 5 sc is the closest whole number. That keeps the opening flat instead of rippled. Once a bag is pulled through, the 2 in (5.1 cm) x 1.3 in (3.3 cm) slot relaxes into a soft arch.
Attaching the Strap and Appliqués
- Flatten the tube with the opening centered on the front. Mark the two side folds at the top band.
- Overlap 1 in (2.5 cm) of each strap end on the inside of the top band, at the side folds. Make sure the strap isn’t twisted. Whipstitch all four edges of each overlap through the top band only. The 10 in (25.4 cm) of visible strap rises into a triangle about 4 in (10.2 cm) above the rim.
- Pin the vine on the front mesh so it runs from the lower left of the mesh, 0.5 in (1.3 cm) above the lower band, up to the upper right, with the tendril curling just below the top band. Tack the stem down every 0.75 in (1.9 cm) with green.
- Pin the three flowers in a gentle zigzag down the center front over the vine. Space them 2.75 in (7.0 cm) apart center to center, with the top flower 1.25 in (3.2 cm) below the top band. Let the leaves peek out beside the petals.
- Sew each flower through its center ring and each petal tip into the mesh strands behind it. Weave in all ends.
Final Blocking
- Lightly mist the body with water, or soak it and press out the water in a towel.
- Slide the tube over a 4 in (10.2 cm) jar or a rolled towel so the mesh opens evenly.
- Ease the height to 14 in (35.6 cm) and keep the loops vertical.
- Pin the flowers flat and shape each leaf to a point.
- Shape the opening into an arch with your fingers.
- Let it dry completely before you hang it.
Final Quality-Control Checklist
- Base is flat, 3.5 in (8.9 cm) across, with a clean BLO fold
- 48 stitches in every solid round
- 16 loops in every mesh round
- Opening is 2 in (5.1 cm) wide, edged with 26 sc
- Body is 14 in (35.6 cm) tall and 6 in (15.2 cm) wide when flattened
- Strap is untwisted and both ends sit at the side folds
- Flowers and vine are secure, and no ends show on the RS
Troubleshooting
- Base cups or ruffles: Your increases have drifted. Recount each round against the totals.
- Mesh spirals: You placed the sc to the side of a loop instead of its center. Always work into the loop space, not a chain.
- Opening corners gape: On Round 16, work the ch 8 snugly. In the edging, put the corner sc right into the corner.
- Strap stretches: Use a smaller hook for the strap, or add a second row of whipstitch at each end.
- Flower petals curl: Pull the magic ring tighter and steam-block the flower flat.
Care
Hand wash in cool water and lay flat to dry, reshaping the tube over a jar. Avoid tumble drying, which can shrink cotton and loosen the appliqués.
Final Notes
Each stage of the measurements builds on the last. A 3.5 in (8.9 cm) base gives 48 stitches, which make a 12 in (30.5 cm) tube that flattens to 6 in (15.2 cm). On top of that sit a 3.5 in (8.9 cm) lower band, 8.75 in (22.2 cm) of 16-loop mesh, and a 1.75 in (4.4 cm) top band, for 14 in (35.6 cm) in all. Check each stage as you go and the holder will come out square, sturdy, and ready to hang.
Happy crocheting!