
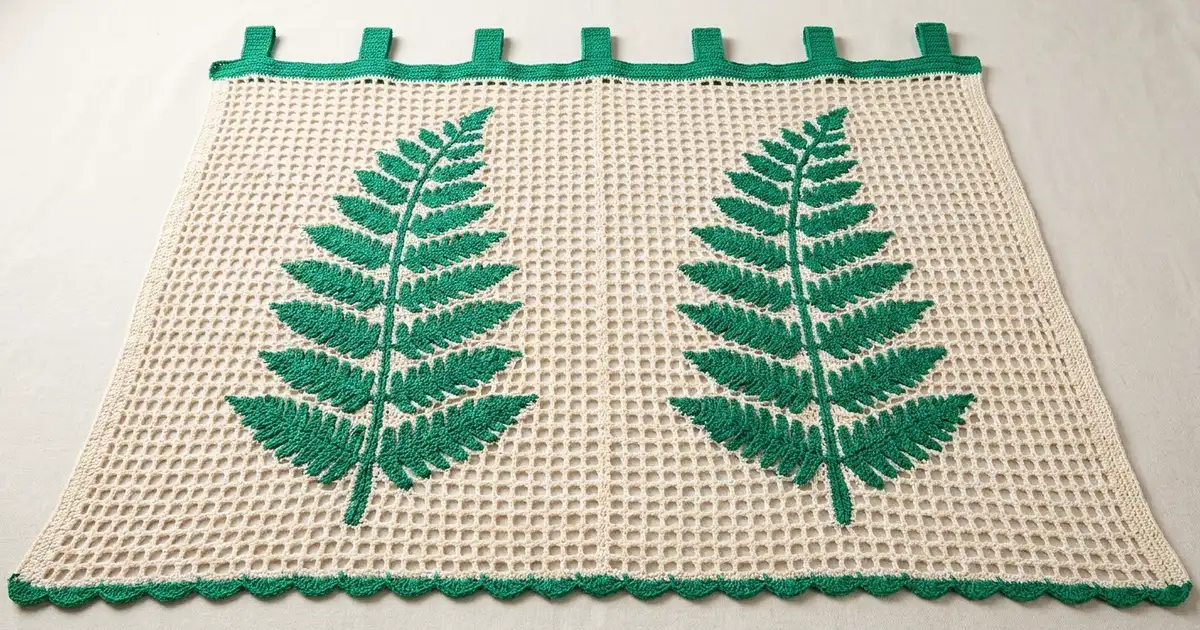
This curtain panel sets two tall emerald-green fern fronds on a soft cream open-mesh background. The fronds run from the hem nearly to the top. Each one has a thin chain-line stem and pairs of toothed, comb-like leaflets that get smaller toward the tip. When light comes through, the panel looks like a pressed botanical print.
The colors are simple. Cream is used for the mesh and side edges. Deep green is used for the fronds, the top band with its hanging tabs, and the small scalloped hem. The style is fresh, airy, and slightly vintage, inspired by filet curtains.
The pattern uses US crochet terms. One finished panel measures 36.5 in (92.7 cm) wide and 81.25 in (206.4 cm) long from the scallop tips to the top of the band. The tab loops add about 2.75 in (7.0 cm) above that, so the total drop from the rod is about 84 in (213.4 cm).
Here is how the panel is built:
- Work one rectangular mesh piece in rows of treble crochet and chain spaces.
- Add a cream edge along each side.
- Crochet two branched fern fronds and sew them onto the mesh.
- Finish with a green top band with eight tabs and a green scalloped hem.
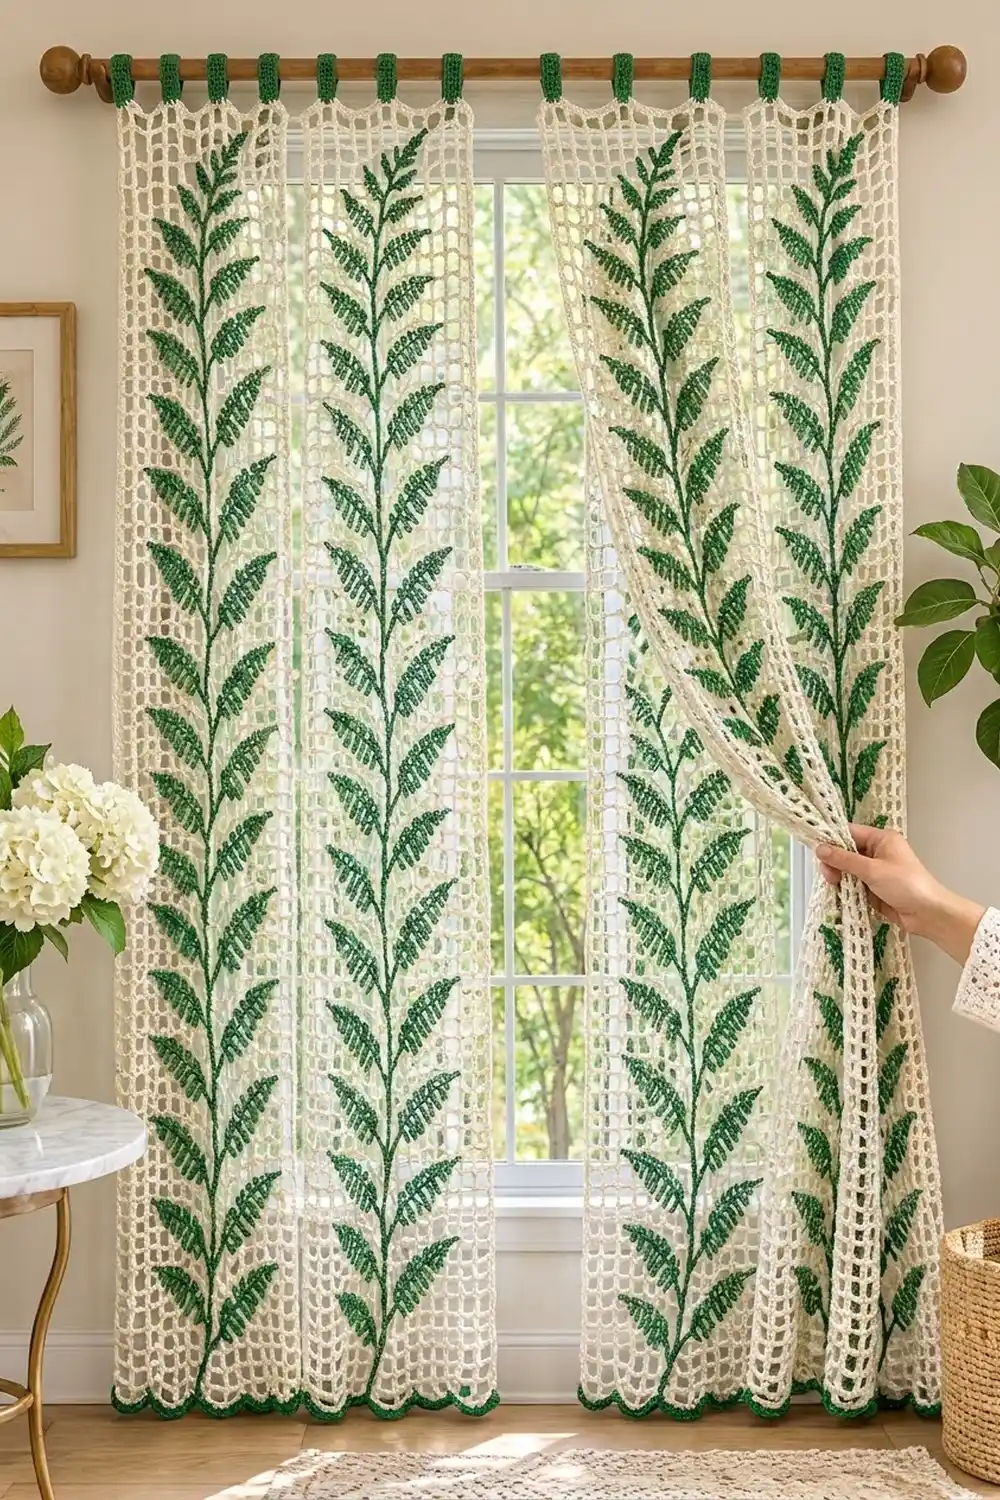
The photo shows two identical panels hung as a pair, so make two.
Finished Size and Construction
- Finished panel size: 36.5 in x 81.25 in (92.7 cm x 206.4 cm), plus tabs
- Skill level: Intermediate
- Terminology: US
- Yarn weight: Worsted (#4) cotton
- Hook: 5.0 mm (H-8)
- Number of pieces: 1 mesh panel and 2 fern fronds, sewn together. Make a second identical panel for a pair.
- Layout: 36 mesh squares wide by 80 rows tall. Each frond is centered 9 in (22.9 cm) from its nearest side edge.
- Mesh size before edging: 36 in x 80 in (91.4 cm x 203.2 cm)
- Border depth: side edges 0.25 in (0.6 cm), top band 0.5 in (1.3 cm), scalloped hem 0.75 in (1.9 cm)
Materials
Use a smooth mercerized or combed worsted-weight cotton, about 95 m per 50 g. Cotton holds the mesh square, shows the stitch texture clearly, and washes well. Avoid fuzzy or very stretchy yarns. They blur the leaflet teeth and let a long panel sag.
Per panel:
- Cream: 450 g, about 850 m
- Emerald green: 135 g, about 250 m
Double these amounts for a pair. The quantities include a margin of about 15% for swatching, sewing, and differences in tension.
Tools:
- 5.0 mm (H-8) hook
- 5.5 mm (I-9) hook for the foundation chain
- Tapestry needle
- Locking stitch markers
- Rust-proof pins
- Tape measure
- Scissors
- Blocking mats (or a clean floor area) and a spray bottle
Abbreviations (US Terms)
- ch: chain
- sl st: slip stitch
- sc: single crochet
- dc: double crochet
- tr: treble crochet
- sp: space
- st(s): stitch(es)
- RS / WS: right side / wrong side
Special technique, row-end sc: Insert the hook around the post of the tr at the end of a row, not into a stitch. Yarn over, pull up a loop, and finish the sc. Four of these fit evenly along one row-end, which is 1 in (2.5 cm) tall.
Gauge and Checkpoints
Mesh gauge: 4 mesh squares and 4 rows = 4 in (10.2 cm) after light blocking. One mesh square is 1 tr plus ch 3 and measures 1 in (2.5 cm) each way.
Sc gauge: 16 sc and 18 rows = 4 in (10.2 cm).
Chain gauge (for the fronds): 4 ch = 1 in (2.5 cm).
Make a test swatch before starting the full panel:
- Ch 40 and work Rows 1–8 of the mesh below, repeating the starred section only 6 times in Row 1 and 5 times in each later row. You will have 8 mesh squares across.
- Block lightly. The swatch should measure 8 in x 8 in (20.3 cm x 20.3 cm).
- Make one Large leaflet. It should measure 6.75 in (17.1 cm).
Checkpoints:
- After Row 1: 36 in (91.4 cm) wide
- After Row 20: 20 in (50.8 cm) tall
- After Row 40: 40 in (101.6 cm) tall
- After Row 80: 80 in (203.2 cm) tall
- After the side edges: 36.5 in (92.7 cm) wide
- Each frond laid out: about 72.75 in (184.8 cm) tall
If your swatch is too big, go down a half or full hook size. If it’s too small, go up a size.
Because the panel is long, small row-height errors add up fast. Being off by 0.1 in (0.3 cm) per row adds up to 8 in (20.3 cm) over 80 rows. If only the row height is off, add or remove rows until the mesh reaches 80 in (203.2 cm) instead of changing hooks.
Mesh Panel
With cream and the 5.5 mm hook, ch 152 loosely. Switch to the 5.0 mm hook.
Row 1 (RS): Tr in 12th ch from hook. The skipped chs count as the first tr, ch 3, and the base of the first square. *Ch 3, skip 3 ch, tr in next ch; repeat from * 34 more times, turn. (37 tr, including the skipped chs as the first tr, and 36 ch-3 sps)
Check: after the first tr, 140 ch remain, which is exactly 35 repeats of 4 ch.
Row 2: Ch 7 (counts as tr and ch 3), skip first ch-3 sp, tr in next tr. *Ch 3, tr in next tr; repeat from * 33 more times. Ch 3, tr in top of the beginning skipped chs of Row 1, turn. (37 tr, 36 ch-3 sps)
Rows 3–80: Ch 7 (counts as tr and ch 3), skip first ch-3 sp, tr in next tr. *Ch 3, tr in next tr; repeat from * 33 more times. Ch 3, tr in 4th ch of turning ch-7, turn. (37 tr, 36 ch-3 sps)
Fasten off after Row 80. The mesh measures 36 in x 80 in (91.4 cm x 203.2 cm).
Side Edges
With RS facing and cream, join with an sc around the post at the top of one side. Work 3 more row-end sc around the same post. Then work 4 row-end sc around each remaining post down the side. (320 sc: 80 rows x 4 sc) Fasten off.
Repeat on the opposite side. (320 sc)
Each side edge adds 0.25 in (0.6 cm), so the panel is now 36.5 in (92.7 cm) wide.
Fern Fronds (Make 2)
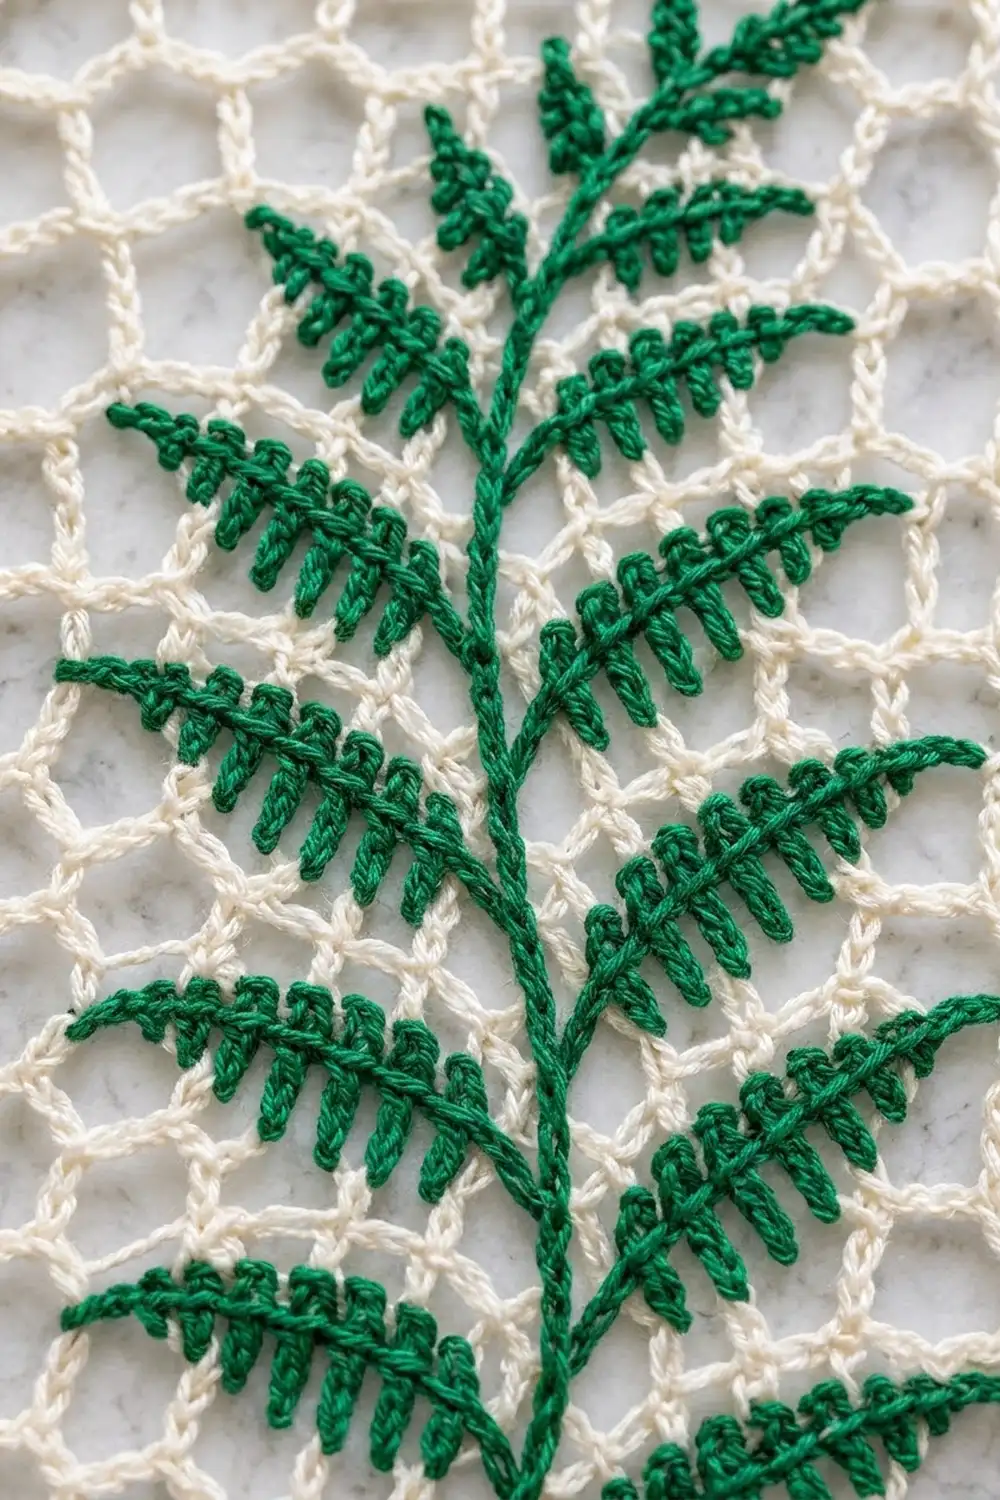
Each frond is one branched piece, worked from the base of the stem up to the tip. The stem chains stay as a fine chain line. Each leaflet is chained out from the stem and worked back toward it, so it ends where it started.
Leaflet method: Ch the stated number. Sl st in 2nd ch from hook. *Sc in next ch, dc in next ch; repeat from * the stated number of times. Sl st into the stem ch the leaflet grew from. The alternating sc and dc create the toothed, comb-like edge.
| Leaflet | Chain | Repeats | Stitches | Length |
|---|---|---|---|---|
| Large | 28 | 13 | 27 | 6.75 in (17.1 cm) |
| Medium | 22 | 10 | 21 | 5.25 in (13.3 cm) |
| Small | 16 | 7 | 15 | 3.75 in (9.5 cm) |
| Tip | 12 | 5 | 11 | 2.75 in (7.0 cm) |
Every leaflet has 1 sl st plus 2 sts per repeat. That is always 1 stitch fewer than the chain.
Node: Two leaflets of the same size worked from the same stem ch. Work one leaflet and sl st in the stem ch. Then work the second leaflet and sl st in the same stem ch.
With green:
- Ch 12 for the bare base of the stem, 3 in (7.6 cm).
- Nodes 1–5: Work a Large node, then ch 20 for the next stem section, 5 in (12.7 cm).
- Nodes 6–10: Work a Medium node, then ch 20.
- Nodes 11–13: Work a Small node, then ch 20.
- Node 14: Work a Small node, then ch 8, 2 in (5.1 cm).
- Tip: Work one Tip leaflet straight up from the last stem ch. Fasten off, leaving a 24 in (61.0 cm) tail.
Frond totals: 28 paired leaflets plus 1 Tip leaflet, and 280 stem chains (12 + 13 x 20 + 8).
Checkpoint: From the base to Node 5, the stem measures 23 in (58.4 cm). The whole frond measures 3 + 65 + 2 + 2.75 = 72.75 in (184.8 cm).
Attaching the Fronds
Lay the mesh flat, RS up, with the bottom (foundation) edge nearest you. Count the tr columns from the left side edge, starting at 0. Mark column 9 and column 27. Each is exactly 9 in (22.9 cm) from its nearest side edge.
- Place the base of the first stem on column 9 at Row 3, which is 3 in (7.6 cm) above the bottom of the mesh. Run the stem straight up the column and pin it every 2 in (5.1 cm).
- Open each pair of leaflets upward at about 45 degrees, with the toothed edge facing up. Large leaflets reach about 4.75 in (12.1 cm) out on each side, so the frond is about 9.5 in (24.1 cm) wide.
- Thread the frond tail onto a tapestry needle. Backstitch along the stem, catching the tr posts underneath.
- Tack each leaflet along its straight lower edge at the base, middle, and tip, catching the mesh strands. Leave the toothed edge free.
- Repeat with the second frond on column 27.
The tip should land near Row 76, about 4.25 in (10.8 cm) below the top of the mesh. Weave in all ends on the WS.
Border
Border gauge: 4 sc = 1 in (2.5 cm), the same as one mesh square (1 tr plus 3 sc).
Top Band and Tabs
Band Row 1: With RS facing, join green with an sc in the end of the right side edge. Working across Row 80, sc in each tr and work 3 sc in each ch-3 sp. Sc in the end of the left side edge, turn. (147 sc: 1 + 37 + 108 + 1)
Band Row 2: Ch 1, sc in each sc across, turn. (147 sc)
Tabs:
- Ch 1, sc in first 7 sts, turn.
- Work 26 more rows of 7 sc, for 27 rows in total, 6 in (15.2 cm). Fasten off, leaving a 12 in (30.5 cm) tail.
- Skip the next 13 sts of Band Row 2. Join green in the next st and work another tab the same way.
- Repeat step 3 six more times. (8 tabs of 7 sc, with 7 gaps of 13 sc)
Check: 8 x 7 + 7 x 13 = 56 + 91 = 147.
Each tab is 1.75 in (4.4 cm) wide, and each gap is 3.25 in (8.3 cm). Fold each tab to the WS and whipstitch its last row to the back of Band Row 1. The finished loops fit a rod up to 1.5 in (3.8 cm) in diameter.
Scalloped Hem
Hem Row 1: Turn the panel so the foundation edge is at the top, RS facing. Join green with an sc in the end of the left side edge. Working across the foundation, sc in the base of each tr and work 3 sc around each ch-3 gap. Sc in the end of the right side edge, turn. (147 sc)
Hem Row 2: Ch 1, sc in first 2 sc. *Skip 1 sc, 5 dc in next sc, skip 1 sc, sc in next sc; repeat from * 35 more times. Sc in last sc. Fasten off. (36 scallops: 39 sc and 180 dc)
Check: 2 + 36 x 4 + 1 = 147.
Why the Math Works
Each of the 36 mesh squares gives 1 tr plus 3 sc in its space, which is 4 sc per inch. Adding the final tr gives 145 sc across 36 in (91.4 cm). One sc on the end of each 0.25 in (0.6 cm) side edge brings the total to 147 sc across 36.5 in (92.7 cm). The hem repeat is 4 sts, so there is exactly one scallop per mesh square.
Final Blocking
- Weave in any remaining ends.
- Soak the panel in cool water for 15 minutes. Press out the water without wringing.
- Roll the panel in towels to remove more water.
- Lay it flat on mats or a clean sheet, RS up.
- Pin the side edges straight, 36.5 in (92.7 cm) apart, and pin the length to 81.25 in (206.4 cm).
- Square the mesh by eye, keeping the tr columns vertical.
- Open each leaflet to 45 degrees and pin out each scallop.
- Let the panel dry completely, then unpin.
If you don’t have enough space, block the panel in thirds. Pin and spray one section, let it dry, then move to the next.
Final Quality-Control Checklist
- Every mesh row has 37 tr and 36 ch-3 sps, and there are 80 rows.
- Each side edge has 320 row-end sc.
- Both band rows and Hem Row 1 have 147 sc each.
- There are 8 evenly spaced tabs, each sewn into a secure loop.
- There are 36 even scallops.
- Both fronds sit 9 in (22.9 cm) from their nearest side edge, with leaflets angled the same way.
- The panel measures 36.5 in x 81.25 in (92.7 cm x 206.4 cm).
- There are no loose ends and no puckering around the stems.
Troubleshooting
- The foundation edge pulls in: Your chain is too tight. Redo it with the larger hook.
- The mesh leans diagonally: Make sure every row ends in the top of the turning chain. Block firmly with the columns pinned straight.
- The panel is too long after hanging: Cotton mesh can stretch a little. Hang the panel for 24 hours before measuring, and take out rows before working the band if needed.
- The leaflets curl: Steam them lightly and pin them flat. Working the dc slightly looser also helps.
- The stem puckers the mesh: Backstitch more loosely and keep the mesh flat while you sew.
- The scallops ruffle: Work Hem Row 1 with a smaller hook.
Care
Hand wash, or machine wash cold on a gentle cycle in a mesh laundry bag. Reshape and dry flat, then hang the panel while it’s still slightly damp so it relaxes to its full length.
Final Notes
The measurements build on each other. One mesh square is 1 in (2.5 cm), so 36 squares make 36 in (91.4 cm) and 80 rows make 80 in (203.2 cm). The side edges bring the width to 36.5 in (92.7 cm). The band and hem add 1.25 in (3.2 cm), for a panel 81.25 in (206.4 cm) long. The two 72.75 in (184.8 cm) fronds sit inside that length. Check each stage against these numbers, and your second panel will match the first.
Happy crocheting!