

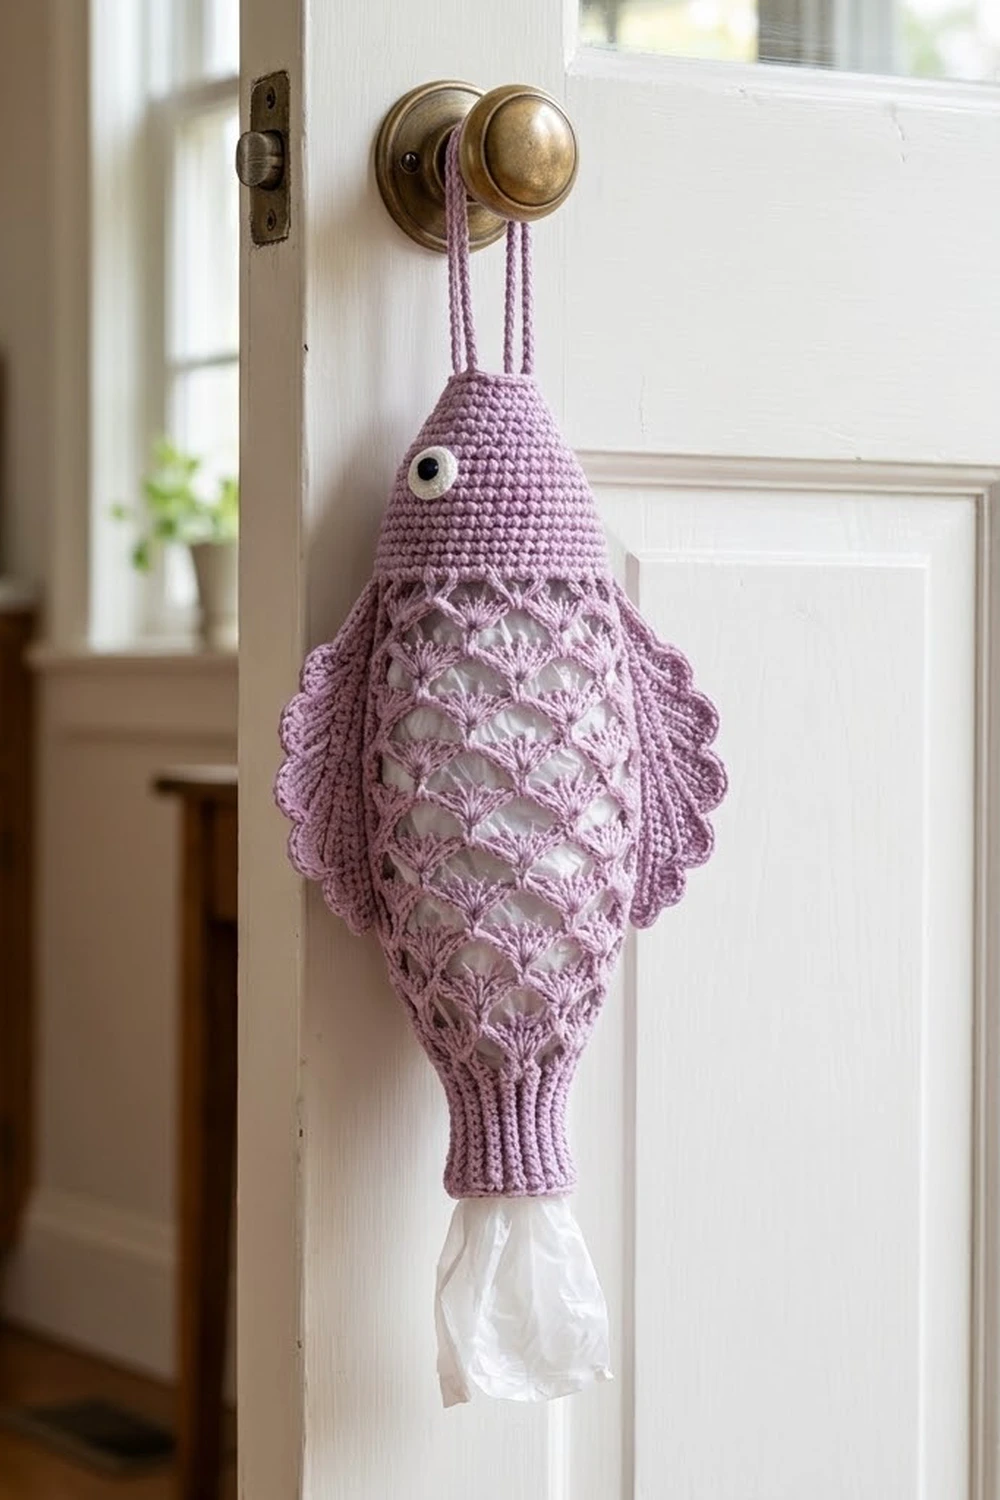
This fish-shaped holder keeps plastic grocery bags tidy and is fun to look at. The body is a lacy tube of fan “scales” between a solid single crochet head and a ribbed tail cuff. It’s finished with scalloped side fins, a bow-style tail, a white eye and two hanging loops.
The sample is soft lilac cotton with a white and black eye. For a deep plum version, just change the main color; everything else stays the same. The look is clean and textured without being fussy, and it suits a kitchen door, pantry or laundry hook.
The pattern uses US crochet terms. The finished fish is about 18 in (45.7 cm) long from the top of the head to the tail tips, not counting the loops. Laid flat, the body is about 7 in (17.8 cm) wide at its widest and about 11 in (27.9 cm) across the fins.
You crochet the body in the round from the tail cuff up to the head. Then you make the fins and tail lobes flat, add the scalloped edging, and sew everything on. Bags go in through the top of the head and pull out through the ribbed cuff.
Finished Size and Construction
- Finished size: about 18 in (45.7 cm) long x 7 in (17.8 cm) wide at the body; 11 in (27.9 cm) across the fins
- Skill level: Intermediate
- Terminology: US crochet terms
- Yarn weight: Worsted (#4), cotton or cotton blend
- Hook: 4.5 mm (US 7)
- Number of pieces: 10 parts for one fish: 1 body, 2 side fins, 2 large tail lobes, 2 small tail lobes, 1 eye, 2 hanging loops
- Layout: one vertical fish, with fins on the sides of the upper body, the tail bow over the cuff, the eye on the head and the loops at the top
- Body size: about 15 in (38.1 cm) long x 7 in (17.8 cm) wide
- Fin size before edging: 5.25 in (13.3 cm) x 1.5 in (3.8 cm)
- Edging depth: 0.75 in (1.9 cm) of scallops on the fins and tail lobes
Materials
Choose a smooth worsted cotton. It holds the fan shapes, doesn’t stretch out under the weight of the bags, and washes well. Acrylic also works, but the mesh will relax more.
- Main color (lilac, or plum for the dark version): 100 g, about 180 m
- White: 3 g, about 5 m (eye)
- Black: one 9 mm safety eye, or 1 g (about 2 m) of black yarn to embroider the pupil
Tools:
- 4.5 mm (US 7) hook
- Tapestry needle
- 4 stitch markers
- Rust-proof pins
- Measuring tape
- Scissors
All quantities include a margin of about 15 percent for swatching and sewing.
Abbreviations (US Terms)
- ch chain
- sl st slip stitch
- sc single crochet
- hdc half double crochet
- dc double crochet
- tr treble crochet
- fpdc front post double crochet
- bpdc back post double crochet
- sc2tog single crochet 2 together
- BLO back loop only
- sp space
- st(s) stitch(es)
- rnd round
Special stitches
- Fan: the stated number of dc, all worked into one stitch.
- Scallop: 5 dc worked into one stitch.
Gauge and Checkpoints
Gauge: 16 sc x 18 rnds = 4 in (10.2 cm). In dc, 15 sts x 8 rows = 4 in (10.2 cm).
Make a 4 in (10.2 cm) sc swatch before you start. After that, use the cuff as your real test piece. It’s small and shows quickly whether the body will come out the right size.
Checkpoints:
- Cuff (Rnd 4): 30 sts. About 8 in (20.3 cm) around before the ribbing pulls in. Laid flat, about 3.5 in (8.9 cm) wide and 2 in (5.1 cm) tall.
- Rnd 5: 32 sc, about 8 in (20.3 cm) around.
- Head (Rnd 23): 48 sc, 12 in (30.5 cm) around, 6 in (15.2 cm) wide flat.
- Top opening (Rnd 37): 30 sc, 7.5 in (19.1 cm) around, 3.75 in (9.5 cm) wide flat.
- Fin (Row 2): 5.25 in (13.3 cm) long.
If your pieces come out too big, go down half a hook size. If they’re too small, go up half a size. Change hooks now rather than partway through the mesh, because the fans will show the difference.
Body
Work in joined rounds from the cuff up, without turning. Place a marker in the first stitch of each round.
Ribbed Cuff
Foundation: With main color, ch 30 and sl st to the first ch to form a ring. Don’t twist the chain.
Rnd 1: Ch 3 (counts as dc), dc in each ch around, join to top of ch-3. (30 dc)
Rnds 2–4: Ch 2 (does not count), fpdc around next st, bpdc around next st, repeat 15 times, join. (30 sts)
The ribbing pulls the cuff in so it grips the bags as you pull them out.
Transition
Rnd 5 (conversion): Ch 1, sc in next 14 sts, 2 sc in next st, repeat 2 times, join. (30 sc worked 1-per-stitch + 2 added = 32 sc)
Rnd 6 (net, conversion): Ch 1, sc in first st, ch 3, skip 3 sts, sc in next st, ch 3, skip 3 sts, repeat 7 times, join to first sc. (8 sc + 24 ch = 32 sts; 8 ch-3 sps)
Fan Scale Mesh
The mesh alternates two kinds of rounds. Each fan sits on a sc from the net round, so each new row of fans is offset by half a repeat, like fish scales.
Fan round (k dc): Sl st into first ch-sp, ch 1, sc in same sp, ch 2, k dc in next sc, ch 2, sc in next ch-sp, ch 2, k dc in next sc, ch 2, repeat 7 times, join to first sc. The last fan goes into the first sc of the previous round. (8 fans, 8 sc)
Net round (ch m): Ch 1, sc in same st as join, ch m, skip the fan, sc in next sc, ch m, repeat 7 times, join to first sc. (8 sc, 8 ch-m sps)
Work these rounds in this order:
- Rnd 7: Fan round with 5 dc. (8 x 10 = 80 sts)
- Rnd 8: Net round with ch 5. (8 x 6 = 48 sts)
- Rnd 9: Fan round with 7 dc. (8 x 12 = 96 sts)
- Rnd 10: Net round with ch 7. (8 x 8 = 64 sts)
- Rnd 11: Fan round with 9 dc. (8 x 14 = 112 sts)
- Rnd 12: Net round with ch 9. (8 x 10 = 80 sts)
- Rnds 13–18: Repeat Rnds 11–12 three more times. (112 sts in each fan round, 80 sts in each net round)
- Rnd 19: Fan round with 7 dc. (96 sts)
- Rnd 20: Net round with ch 7. (64 sts)
- Rnd 21: Fan round with 5 dc. (80 sts)
- Rnd 22: Net round with ch 5. (48 sts)
All counts include chains. This gives 8 rows of fans. The oval fish shape comes from making the fans and loops bigger, then smaller again, while the number of repeats stays at 8. Mesh checkpoint: about 9.25 in (23.5 cm) tall and about 7 in (17.8 cm) wide flat at Rnds 13–18.
Head
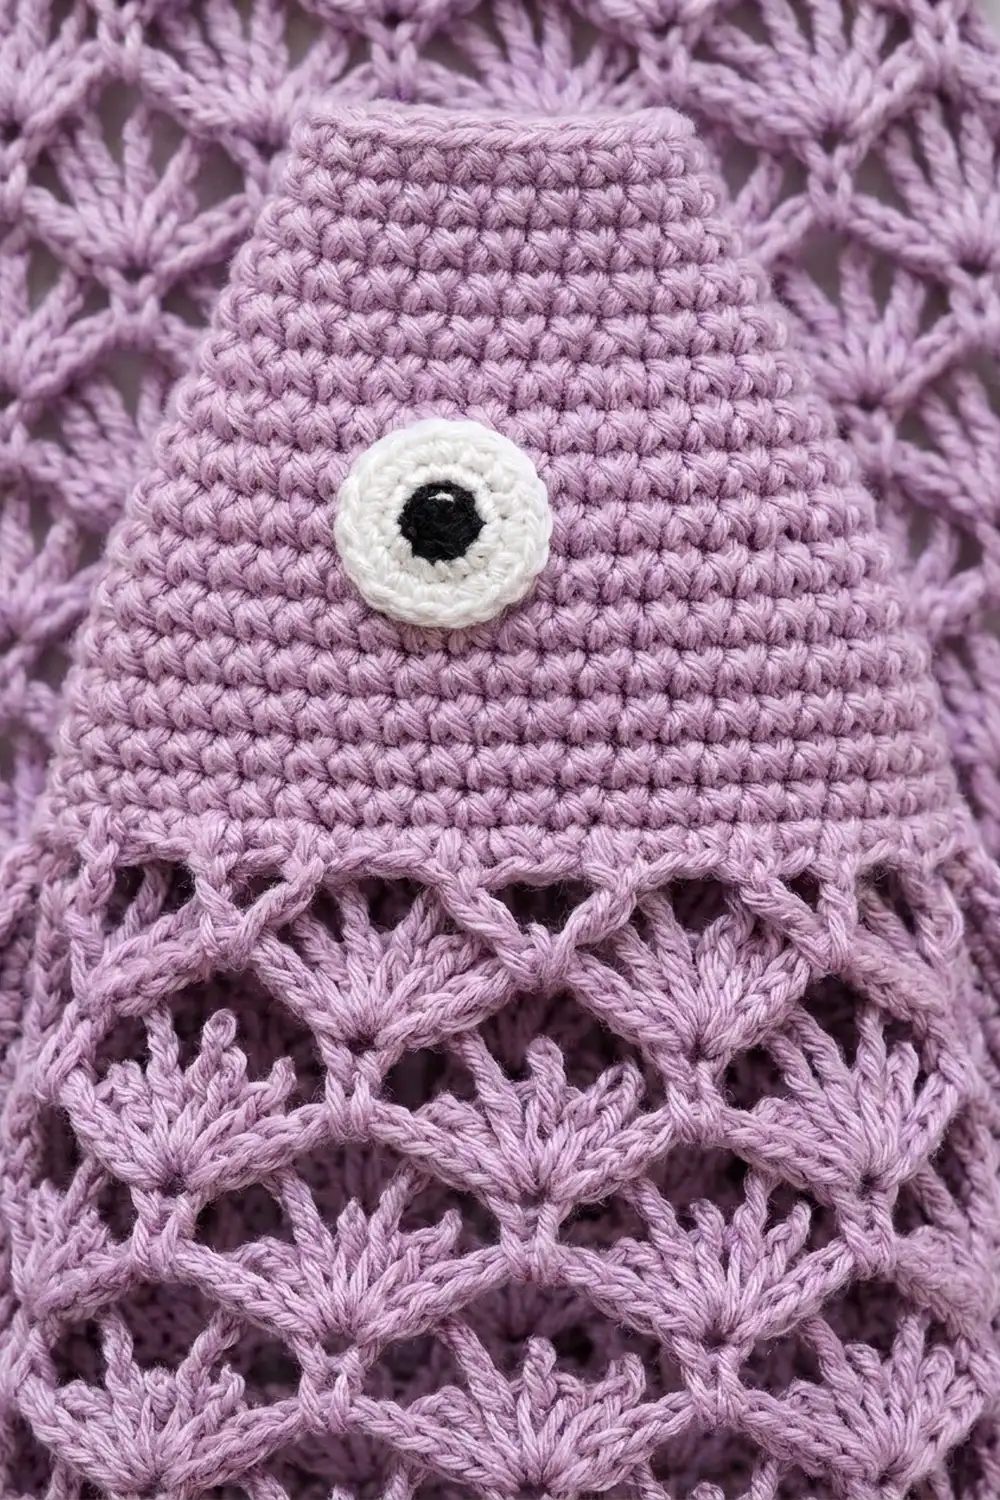
Rnd 23 (conversion): Ch 1, sc in next sc, 5 sc in next ch-5 sp, repeat 8 times, join. (8 sc worked 1-per-stitch + 40 sc in spaces = 48 sc)
Rnds 24–31: Ch 1, sc in each st around, join. (48 sc)
Rnd 32: Ch 1, sc in next 6 sts, sc2tog, repeat 6 times, join. (42 sc)
Rnd 33: Ch 1, sc in each st, join. (42 sc)
Rnd 34: Ch 1, sc in next 5 sts, sc2tog, repeat 6 times, join. (36 sc)
Rnd 35: Ch 1, sc in each st, join. (36 sc)
Rnd 36: Ch 1, sc in next 4 sts, sc2tog, repeat 6 times, join. (30 sc)
Rnd 37: Ch 1, sc in each st, join. (30 sc)
Don’t fasten off yet; you’ll finish the rim in the Border section. The head is about 3.25 in (8.3 cm) tall.
Side Fins (make 2)
The fins are worked flat. Graded stitch heights make the crescent shape, and working in BLO adds raised lines across the fin.
Foundation: Ch 22.
Row 1: Sc in 2nd ch from hook, hdc in next 2 ch, dc in next 3 ch, tr in next 9 ch, dc in next 3 ch, hdc in next 2 ch, sc in last ch. (21 sts)
Row 2: Ch 1, turn. Working in BLO: sc in first st, hdc in next 2, dc in next 3, tr in next 9, dc in next 3, hdc in next 2, sc in last st. (21 sts)
The straight foundation edge is the edge you’ll sew to the body. Don’t fasten off.
Tail Lobes
The lobes use the same method as the fins, in two sizes.
Large lobe (make 2): Ch 18.
- Row 1: Sc in 2nd ch from hook, hdc in next 2, dc in next 3, tr in next 5, dc in next 3, hdc in next 2, sc in last ch. (17 sts)
- Row 2: Ch 1, turn. Working in BLO, repeat the Row 1 sequence. (17 sts)
Size before edging: 4.25 in (10.8 cm) long x 1.5 in (3.8 cm) wide.
Small lobe (make 2): Ch 14.
- Row 1: Sc in 2nd ch from hook, hdc in next 2, dc in next 2, tr in next 3, dc in next 2, hdc in next 2, sc in last ch. (13 sts)
- Row 2: Ch 1, turn. Working in BLO, repeat the Row 1 sequence. (13 sts)
Size before edging: 3.25 in (8.3 cm) long x 1.25 in (3.2 cm) wide.
Eye
With white, make a magic ring.
- Rnd 1: Ch 1, 6 sc in ring, join. (6 sc)
- Rnd 2: Ch 1, 2 sc in each st, join. (12 sc)
- Rnd 3: Sl st in each st around. (12 sl st)
Fasten off, leaving a tail for sewing. Put the 9 mm safety eye in the center, or embroider a black circle. The eye is about 1 in (2.5 cm) across.
Hanging Loops (make 2)
Ch 48 and sl st to the first ch to form a ring. Sl st in each ch around. (48 sl st) Fasten off, leaving a long tail. Each loop lies flat as a narrow oval about 6 in (15.2 cm) long.
Border
The border has two parts: scallops on the fins and tail lobes, and a firm rim around the head opening.
Border gauge: One scallop plus its sc uses 4 edge sts, covers about 1 in (2.5 cm) of the edge, and stands 0.75 in (1.9 cm) tall.
Scalloped Edging
Work across the last row of each piece, which is the curved outer edge.
Fins: Ch 1, turn, sc in first st, skip 1 st, scallop in next st, skip 1 st, sc in next st, repeat 5 times. (5 scallops; 6 sc + 25 dc = 31 sts) Fasten off.
Large lobes: Work the same way, repeating 4 times. (4 scallops; 5 sc + 20 dc = 25 sts)
Small lobes: Work the same way, repeating 3 times. (3 scallops; 4 sc + 15 dc = 19 sts)
Why the math works: Each repeat uses exactly 4 edge sts (skip, scallop, skip, sc), and the first sc uses 1 more. So every edge needs a stitch count of 4n + 1. The fin edge has 21 = 4 x 5 + 1, the large lobe edge has 17 = 4 x 4 + 1, and the small lobe edge has 13 = 4 x 3 + 1. Every edge starts and ends on a sc, so the scallops sit evenly with no partial repeat at either end.
Head Rim
Rnd 38: Continuing on the body, ch 1, sl st loosely in each st around, join. (30 sl st)
The rim firms up the opening so it holds its 7.5 in (19.1 cm) circumference as bags go in and out. Fasten off and weave in all ends.
Assembly
Tail bow: Stack the lobes with their foundation edges toward the center. Point the two small lobes up and out and the two large lobes down and out so the four form a bow. Wrap main color tightly around the center 10 times to make a knot, then secure the yarn on the back.
Placement: Lay the body flat with the joins of the head rounds centered at the back.
- Sew the tail bow to the front of the cuff, just below the last net round. Sew only through the center of the bow and the top edge of the cuff so the opening stays free. The large lobes hang about 3 in (7.6 cm) below the cuff.
- Sew each fin to one side fold of the body along its foundation edge. Start at Rnd 22 and angle down toward Rnd 14, with the scallops pointing out and down.
- Sew the eye to the head, about 1 in (2.5 cm) below the rim and 1.5 in (3.8 cm) from the side fold.
- Sew one end of each hanging loop to the inside of the rim at each side fold. Bring the loops together at the top so they hang from one knob or hook.
Sewing tension: Whipstitch with main color. For each stitch, catch both loops of the fin’s foundation chain and one strand of the body. Keep the stitches snug but not tight; if the body puckers behind a fin, loosen them. Once both fins are on, the body should still measure 7 in (17.8 cm) across.
Final Blocking
- Soak the finished fish in cool water, then gently squeeze it in a towel.
- Lay it flat on a blocking mat.
- Open each fan with your fingers and pin the mesh to 7 in (17.8 cm) wide at its widest point.
- Check the overall length: 18 in (45.7 cm) from the rim to the tail tips.
- Pin out each scallop on the fins and tail so they spread evenly.
- Leave the cuff and head unpinned so the ribbing keeps its grip.
- Let it dry completely before hanging.
Final Quality-Control Checklist
- The cuff has 30 sts and grips the bags enough that they don’t slide out on their own.
- There are 8 rows of fans, each offset from the last, with 8 fans in every fan round.
- The head has 48 sc after Rnd 23 and 30 sc at the rim.
- Fins have 5 scallops, large lobes have 4, and small lobes have 3.
- The fins sit at the same height on both sides of the body.
- The tail bow doesn’t cover the cuff opening.
- The eye and loops are sewn on firmly.
- All ends are woven in for at least 1 in (2.5 cm).
Troubleshooting
Fans stack instead of alternating: In the net round, make each sc in the sc between two fans, not in a fan. Also check that the last fan of each fan round goes into the first sc.
Mesh spirals around the body: You may be joining into the wrong stitch. Keep the marker in the first sc of every round.
Body too wide: Your dc are too tall or loose. Go down half a hook size, or repeat Rnds 11–12 only two more times instead of three.
Scallops ruffle: Use 4 dc instead of 5 in each scallop.
Bags slip out on their own: Add one more ribbing round to the cuff before Rnd 5, or use a smaller hook for the ribbing.
Head opening stretches: Work the rim sl sts more firmly.
Care
Take the bags out first. Machine wash cool on a gentle cycle inside a laundry bag, or hand wash, then reshape and dry flat.
Final Notes
Here’s the measurement chain. A ribbed cuff of 30 sts, 8 in (20.3 cm) around, leads into a fan mesh 9.25 in (23.5 cm) tall that widens to 7 in (17.8 cm). Then a 48 sc head closes to a 30 sc rim, for a body about 15 in (38.1 cm) long. Add 5.25 in (13.3 cm) fins and a tail bow that hangs 3 in (7.6 cm) below the cuff, and the fish measures 18 in (45.7 cm). If you check each stage as you go, the finished fish will hang straight and hold plenty of bags.
Happy crocheting!