
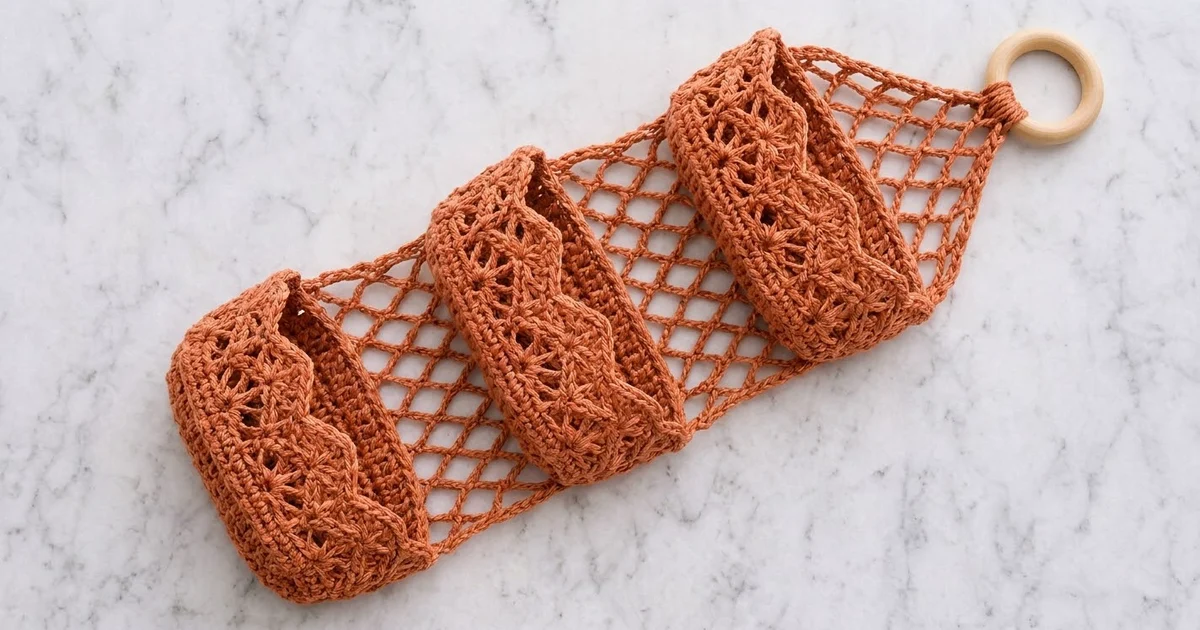
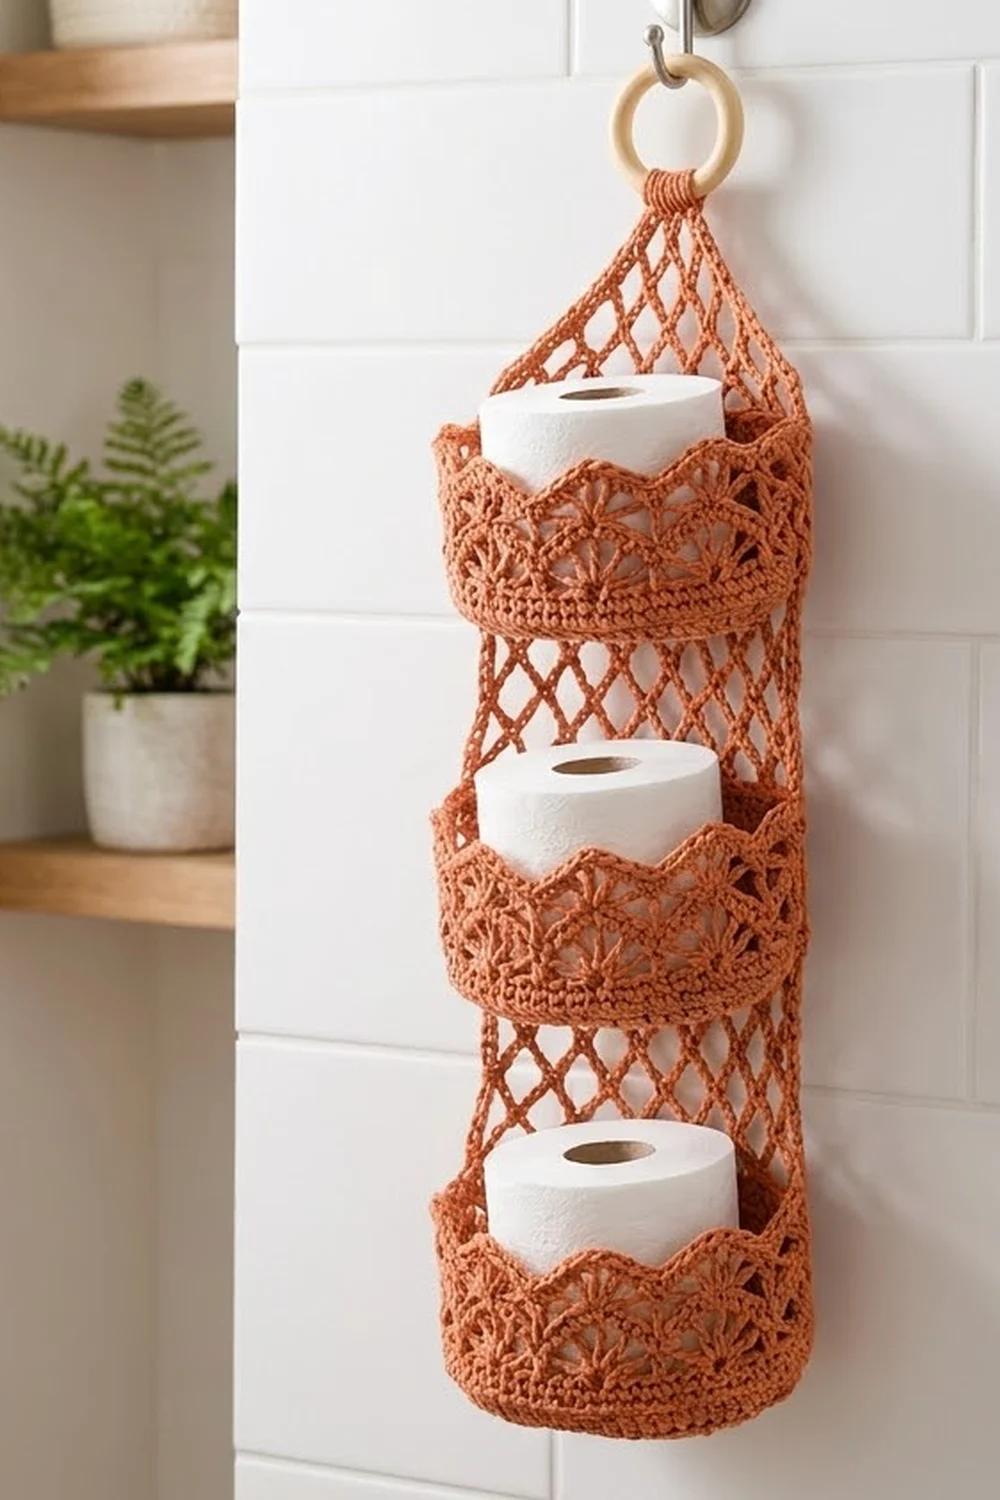
This hanging organizer holds three toilet paper rolls in a neat vertical stack. Three oval lace baskets sit on a diamond-mesh back panel. The panel narrows at the top and wraps around a wooden ring for hanging.
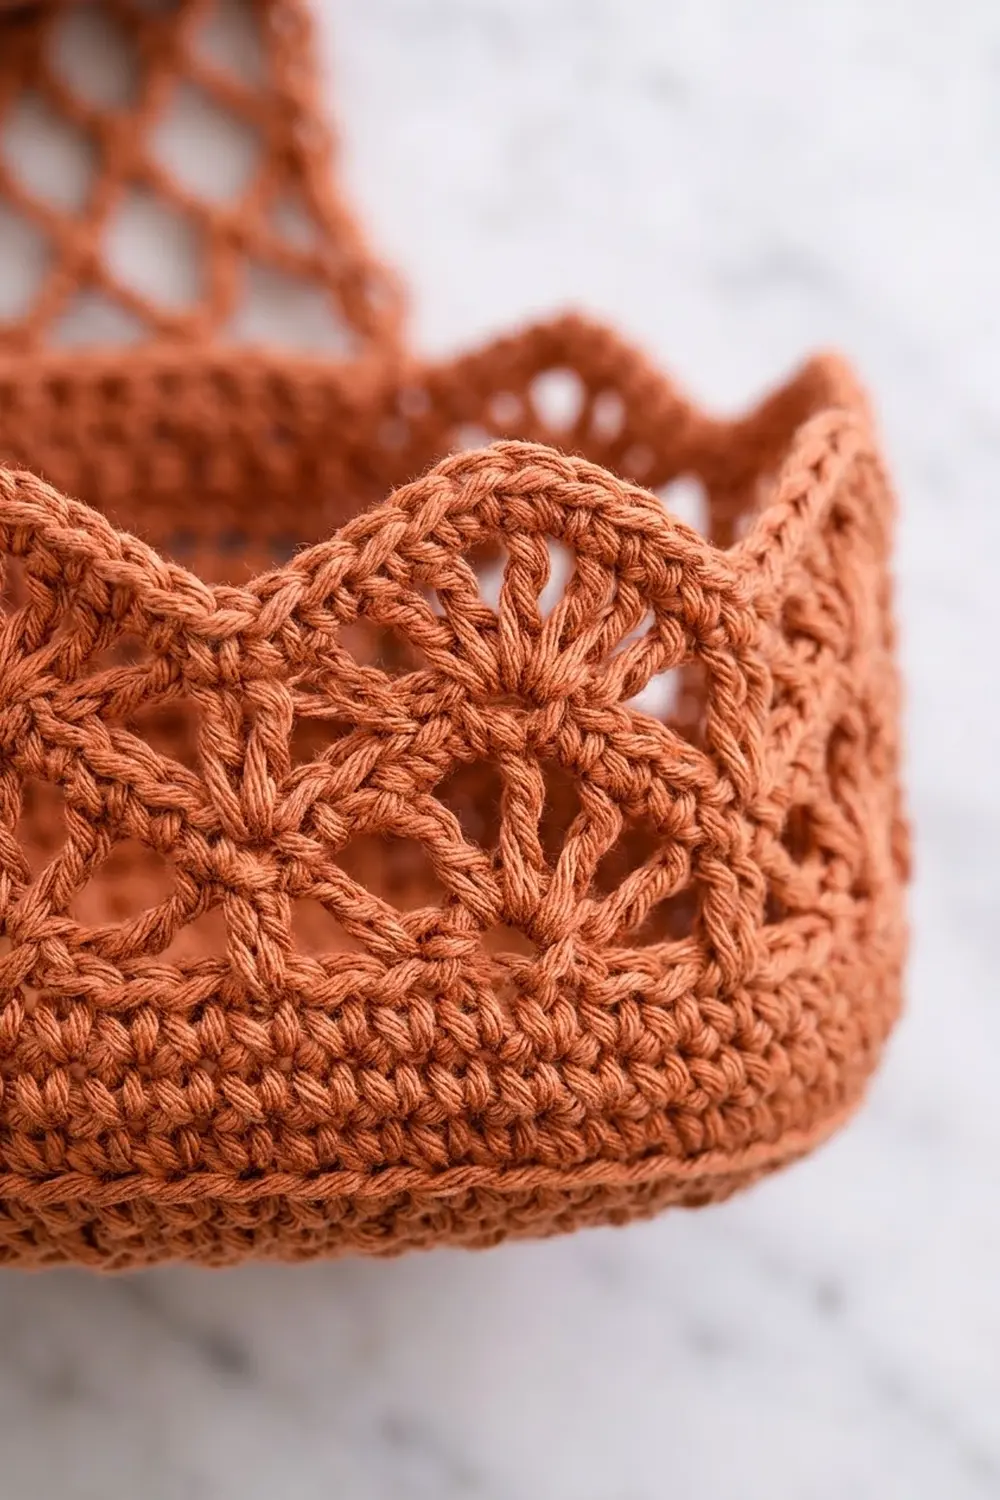
The sample is worked in warm terracotta cotton, which looks great against white tile and marble. A cream version gives a softer, farmhouse look. Each basket has a solid base, a firm lower wall, and an open lace band that ends in pointed zigzag peaks.
The pattern uses US crochet terms. The finished organizer is about 7.5 in (19.1 cm) wide and 25 in (63.5 cm) long, measured from the top of the ring to the bottom edge. Each basket sticks out 5 in (12.7 cm) from the wall.
The construction is simple. You make three baskets in joined rounds. Then you make one mesh panel in rows from the bottom up, ending with a taper and a hanging strap. You add a single crochet edging to the panel, sew on the baskets, and wrap the strap around the ring.
Finished Size and Construction
- Finished size: 7.5 in (19.1 cm) wide x 25 in (63.5 cm) long, ring included
- Skill level: Intermediate
- Terminology: US
- Yarn weight: Worsted (#4) cotton
- Hook: 5.0 mm (H-8)
- Number of pieces: 4 crocheted pieces (3 baskets + 1 mesh panel), plus a wooden ring
- Layout: 1 column x 3 tiers
- Basket size: base 7.5 in x 5 in (19.1 cm x 12.7 cm); wall 3.25 in (8.3 cm) at the peaks and 2.25 in (5.7 cm) at the valleys
- Panel before edging: 7 in (17.8 cm) wide x about 19.4 in (49.3 cm) long, plus a 2.5 in (6.4 cm) taper
- Edging depth: 0.25 in (0.6 cm)
Materials
Use a smooth, firm worsted-weight cotton or cotton blend. Cotton handles bathroom humidity, holds the basket shape, and shows the lace clearly. Avoid very soft acrylic, because the baskets will sag.
- Terracotta (or cream): 200 g, about 340 m (372 yd)
- 3 baskets: about 40 g / 68 m each
- Mesh panel, taper, strap and edging: about 55 g / 94 m
These quantities include a margin of about 25 g for your gauge swatch and small differences in tension.
Tools:
– 5.0 mm (H-8) hook
– Wooden ring, 2.5 in (6.4 cm) across
– 6 stitch markers
– Yarn needle
– Scissors
– Blocking mat and pins
– Optional: fabric stiffener for the basket walls
Abbreviations (US Terms)
- ch – chain
- sl st – slip stitch
- sc – single crochet
- hdc – half double crochet
- dc – double crochet
- tr – treble crochet
- BLO – back loop only
- sp(s) – space(s)
- st(s) – stitch(es)
- rep – repeat
V-stitch (V-st): (dc, ch 1, dc) in the same st.
Fan: 5 dc in the same sp.
Picot peak: (sc, ch 3, sc) in the same sp.
Gauge and Checkpoints
- Single crochet: 16 sts x 18 rows = 4 in (10.2 cm)
- Double crochet: 14 sts x 8 rows = 4 in (10.2 cm)
- Mesh: 5 ch-5 loops = 7 in (17.8 cm) wide; 8 rows = 5 in (12.7 cm)
Make one basket first and check it before you start the others.
Checkpoints:
– After base Rnd 1: about 4 in x 1 in (10.2 cm x 2.5 cm)
– After base Rnd 5: 7.5 in x 5 in (19.1 cm x 12.7 cm)
– After Rnd 8: wall stands 1 in (2.5 cm) high
– After Rnd 12: peaks reach 3.25 in (8.3 cm)
– Mesh after Row 8: 7 in (17.8 cm) wide x 5 in (12.7 cm) long
A standard roll is about 4.5 in (11.4 cm) across. If your base is smaller than 4.75 in x 7.25 in (12.1 cm x 18.4 cm), go up one hook size. If it is larger than 5.25 in x 7.75 in (13.3 cm x 19.7 cm), go down one hook size. Remake the base and measure again.
Basket (Make 3)
Join every round with a sl st to the first st. The beginning ch 2 or ch 1 does not count as a stitch unless stated.
Base
Ch 13.
Rnd 1: Dc in 3rd ch from hook, dc in next 9 ch, 6 dc in last ch. Rotate to work along the other side of the chain. Dc in next 9 ch, 5 dc in last ch (the same ch as the first dc). Join. (30 sts)
The base now has two straight sides of 9 sts and two curved ends of 6 sts. End A sits at the start and end of the round.
Rnd 2: Ch 2, 2 dc in first st, dc in next 9 sts, 2 dc in each of next 6 sts, dc in next 9 sts, 2 dc in each of last 5 sts. Join. (42 sts)
Rnd 3: Ch 2, 2 dc in first st, dc in next st, dc in next 9 sts, (2 dc in next st, dc in next st) 6 times, dc in next 9 sts, (2 dc in next st, dc in next st) 5 times. Join. (54 sts)
Rnd 4: Ch 2, 2 dc in first st, dc in next 2 sts, dc in next 9 sts, (2 dc in next st, dc in next 2 sts) 6 times, dc in next 9 sts, (2 dc in next st, dc in next 2 sts) 5 times. Join. (66 sts)
Rnd 5: Ch 2, 2 dc in first st, dc in next 3 sts, dc in next 9 sts, (2 dc in next st, dc in next 3 sts) 6 times, dc in next 9 sts, (2 dc in next st, dc in next 3 sts) 5 times. Join. (78 sts)
Each round adds 12 sts, 6 at each end, so the oval stays flat. It should measure 7.5 in x 5 in (19.1 cm x 12.7 cm).
Solid Wall Band
Rnd 6: Ch 1, sc in BLO of each st around. Join. (78 sc)
The unused front loops form a ridge, and the wall turns upward here.
Rnd 7: Ch 2, dc in each st around. Join. (78 dc)
Rnd 8: Ch 1, sc in each st around. Join. (78 sc)
Lace Band and Peaks
Rnd 9: Ch 4 (counts as dc and ch 1), dc in same st as join, skip 2 sts, V-st in next st; rep from * around, ending with skip 2 sts. Join to 3rd ch of beginning ch 4. (26 V-sts)
Check: 26 V-sts x 3 sts used = 78 ✓
Rnd 10: Sl st into first ch-1 sp, ch 1, sc in same sp, fan in ch-1 sp of next V-st, sc in ch-1 sp of next V-st; rep from * around, ending with fan in last V-st. Join to first sc. (13 fans + 13 sc = 78 sts)
Rnd 11: Ch 1, sc in sc, hdc in next dc, dc in next dc, (tr, ch 3, tr) in center dc, dc in next dc, hdc in next dc; rep from * around. Join. (91 sts + 13 ch-3 sps)
Each fan becomes a solid pointed triangle: 7 sts per repeat x 13 = 91.
Rnd 12: Ch 1, sc in next sc, ch 4, picot peak in next ch-3 sp, ch 4; rep from * around, starting the first repeat in the first sc. Join to first sc. (39 sc, 26 ch-4 sps, 13 picot points)
The ch-4 loops outline each triangle with an open zigzag that ends in a sharp point. Fasten off and weave in the ends.
Mesh Back Panel
Work the panel in rows from the bottom up.
Ch 27.
Row 1: Sc in 2nd ch from hook, ch 5, skip 4 ch, sc in next ch; rep from * 4 more times. Turn. (6 sc, 5 loops)
Row 2: Ch 5 (counts as dc and ch 2), sc in first loop, ch 5, sc in next loop; rep from * 3 more times, ch 2, dc in last sc. Turn. (4 full loops + 2 half loops)
Row 3: Ch 1, sc in dc, ch 5, sc in next loop; rep from * 3 more times, ch 5, sc in 3rd ch of turning ch. Turn. (6 sc, 5 loops)
Rows 4–31: Repeat Rows 2–3 fourteen more times.
You now have 31 rows. The odd rows have 6 sc and 5 full loops, and these are the rows you attach the baskets to. The panel measures 7 in (17.8 cm) wide x about 19.4 in (49.3 cm) long.
Taper
Row 32: Sl st into the center of the first loop, ch 1, sc in same loop, ch 5, sc in next loop; rep from * 3 more times. Turn. (4 loops)
Rows 33–35: Repeat Row 32. Each row has one loop fewer. (3, 2, then 1 loop)
The taper adds 2.5 in (6.4 cm).
Hanging Strap
Row 36: Ch 1, 7 sc in last loop. Turn. (7 sc)
Rows 37–43: Ch 1, sc in each st. Turn. (7 sc)
The strap measures about 1.75 in (4.4 cm). Leave a 12 in (30.5 cm) tail.
Make All Pieces
- Baskets: 3 in terracotta, about 40 g / 68 m each
- Mesh panel with taper and strap: 1 in terracotta, about 50 g / 85 m
- Edging: about 5 g / 9 m
Layout, from top to bottom:
        ( ring )
        [strap]
       /taper  \      Rows 32-43
      [ mesh   ]      Rows 27-31
      [BASKET 3]      Rim on Row 23, base on Row 21
      [ mesh   ]
      [BASKET 2]      Rim on Row 13, base on Row 11
      [ mesh   ]
      [BASKET 1]      Rim on Row 3, base on Row 1
      [foundation]
Edging
Add the edging to the panel before you sew on the baskets. It covers the two long sides and the bottom. Leave the taper edges as open mesh.
Edging gauge: 2 sc per mesh row end.
Rnd 1: With RS facing, join yarn at the top right corner of Row 31. Work 2 sc in each row end down the side. (62 sc)
Across the foundation, work 3 sc in the first ch, sc in each of the next 24 ch, 3 sc in the last ch. (30 sts for the bottom, including both corner groups)
Work 2 sc in each row end up the second side. (62 sc) Fasten off.
Total: 62 + 30 + 62 = 154 sts.
Why the math works: One mesh row is 0.625 in (1.6 cm) tall. At the sc gauge, 2.5 sc would lie flat along it. Working only 2 sc per row pulls the edge in a little, so it firms up without ruffling. Along the bottom, the 26 base ch plus 4 extra corner sts (2 per corner) give 30. The edging adds 0.25 in (0.6 cm) on each side, so the panel becomes 7.5 in (19.1 cm) wide.
Joining
Whipstitch the pieces together with a yarn needle and matching yarn.
Step 1 – Mark the back of each basket. On Rnd 8, mark off 31 sts centered on one straight side. That is the 9 straight-side sts plus 11 sts around each curve.
Step 2 – Sew rim to mesh, stitch for stitch. Lay the panel flat, RS up. Sew the 31 marked sts to an attachment row: 1 rim st to each of the 6 sc, and 5 rim sts along each ch-5 loop (one per chain). 6 + (5 x 5) = 31 ✓
- Basket 1: Row 3
- Basket 2: Row 13
- Basket 3: Row 23
Step 3 – Anchor the base. At the center back, tack the Rnd 6 ridge to the 6 sc of the odd row two rows lower (Rows 1, 11, 21). Make 2 small stitches at each sc.
Tension: Sew snugly, but don’t pull the mesh closed. The loops should stay open diamonds.
Size checkpoint: The rim lines are 10 rows apart, or 6.25 in (15.9 cm). That leaves enough room to lift a roll in and out.
Ring: Fold the strap over the wooden ring and sew Row 43 to Row 36. Wrap the tail tightly 8 times around the base of the strap to make a collar, then secure it.
Final Blocking
- Spray the whole piece with water until it is damp but not soaked.
- Pin the panel flat at 7.5 in (19.1 cm) wide, keeping the diamonds even.
- Fill each basket with a towel or a roll so the oval sets evenly.
- Pin each peak upward and each ch-4 loop into a sharp V.
- If you like, brush diluted fabric stiffener onto Rnds 9–12.
- Let it dry completely, for at least 24 hours, before hanging.
Final Quality-Control Checklist
- Each base has 78 sts and measures 7.5 in x 5 in (19.1 cm x 12.7 cm)
- Each basket has 13 evenly spaced peaks
- The panel has 31 rows, plus the taper and strap
- Edging counts are 62 / 30 / 62
- Each rim is attached by exactly 31 sts, on Rows 3, 13 and 23
- The ring collar is tight and all ends are woven in
- A roll fits easily into each basket
Troubleshooting
- Base cups or curls up: Your dc is too tight. Go up a hook size for Rnds 1–5.
- Base ruffles: Your tension is loose or you added extra increases. Recount each end: 6, 12, 18, 24, 30.
- Wall leans outward: Work Rnd 6 strictly in BLO and keep Rnds 7–8 firm.
- Peaks flop: Pin them tightly while blocking, or use stiffener.
- Mesh stretches too long: Cotton grows. Hang it with rolls in place before you decide, then remove a 2-row repeat if needed.
- Basket tilts forward: Add more base tacks at Rnd 6.
Care
Hand wash in cool water and lay flat to dry, reshaping each basket over a roll. If you used stiffener, reapply it after washing.
Final Notes
Here is the measurement chain. Each 78-st oval base measures 7.5 in x 5 in (19.1 cm x 12.7 cm) and carries a 3.25 in (8.3 cm) lace wall with 13 peaks. The 5-loop mesh panel is 7 in (17.8 cm) wide and becomes 7.5 in (19.1 cm) with edging. The three tiers sit 6.25 in (15.9 cm) apart, and the finished organizer is about 25 in (63.5 cm) long. If each stage matches these numbers, the finished piece will hang straight and hold its rolls neatly.
Happy crocheting!