
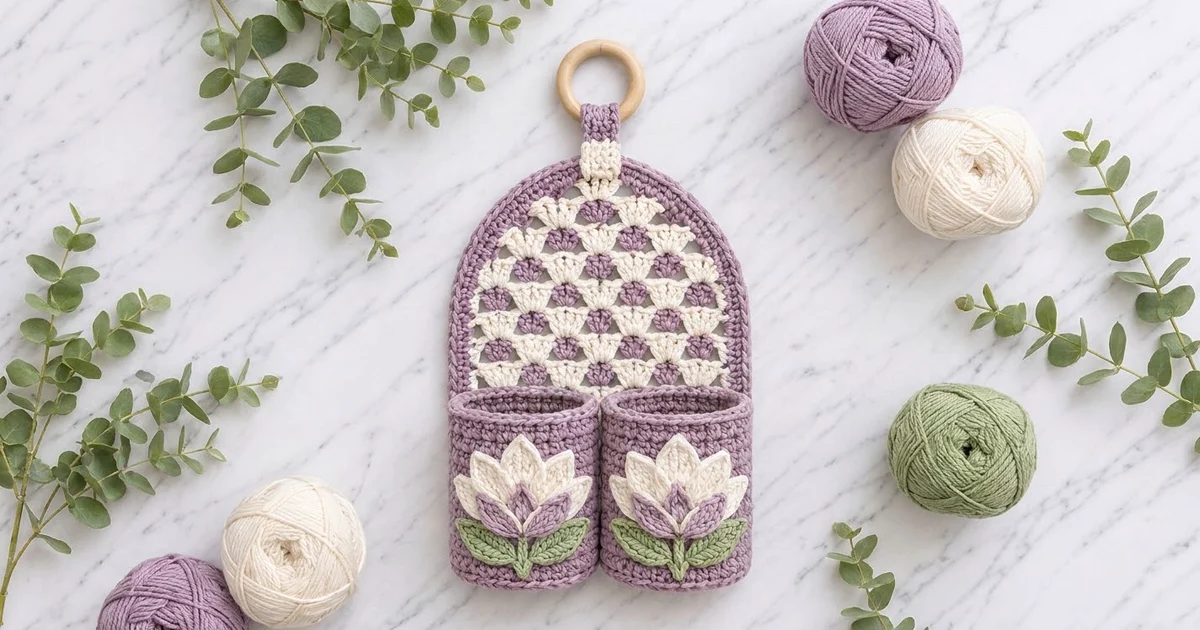
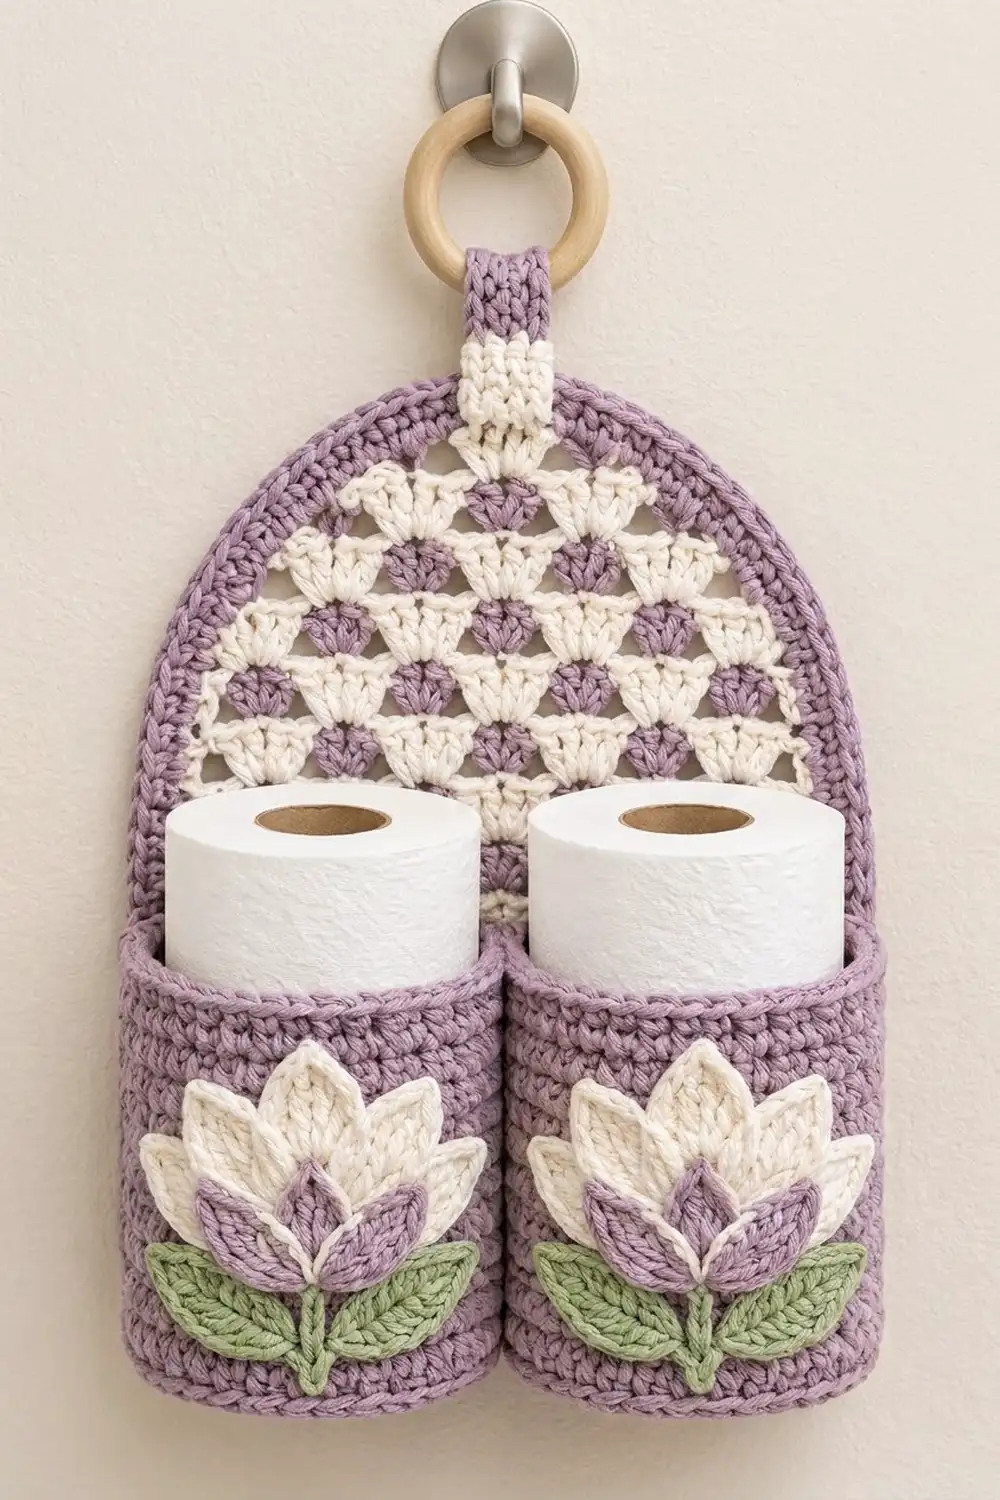
This hanging toilet paper holder has an arched back panel in a staggered shell stitch. Two round pockets are sewn across the bottom of the panel, and each pocket has a layered lotus on the front. A wooden ring at the top lets you hang it from a towel hook or a door hook.
The colors are soft lavender, warm cream and sage green. The shell rows alternate cream and lavender, which makes the panel look like a light, open fan pattern. The pockets are solid lavender. Each lotus has five cream petals, three lavender petals on top, and a green stem with two leaves.
The pattern uses US terms. The finished panel is 10 in (25.4 cm) wide and 14 1/8 in (35.9 cm) tall. Each pocket is 4.75 in (12.1 cm) across and 5 in (12.7 cm) tall.
Here is the order of work. You crochet the panel flat, shape the arch with shorter rows, and add a border. You work the pockets in rounds and sew on the lotus pieces. Then you sew the pockets to the panel and attach the strap and ring.
Finished Size and Construction
- Finished size: 10 in (25.4 cm) x 14 1/8 in (35.9 cm), plus strap and ring
- Skill level: Intermediate
- Terminology: US
- Yarn weight: Worsted (#4) cotton
- Hook: 5 mm (H-8)
- Number of pieces:
- 1 back panel
- 2 pockets
- 1 strap
- 1 band
- 2 lotus appliqués, each made of 5 cream petals, 3 lavender petals, 2 leaves and 1 stem
- Layout: The 2 pockets sit side by side and touch at the center. Their bases line up with the bottom of the panel.
- Pocket size: 4.75 in (12.1 cm) across x 5 in (12.7 cm) tall
- Panel size before border: 9 in (22.9 cm) x 13 1/8 in (33.3 cm)
- Border depth: 1/2 in (1.3 cm) on each side
Materials
Use a smooth worsted cotton. It holds the pocket shape and shows each petal stitch clearly.
- Lavender: 250 g / about 425 m
- Cream: 60 g / about 100 m
- Sage green: 25 g / about 40 m
These amounts include a margin of about 15 percent.
Tools:
- 5 mm (H-8) hook
- 2 in (5.1 cm) wooden ring
- Tapestry needle
- Locking stitch markers
- Rust-proof pins and a blocking mat
- Spray bottle
- Measuring tape
Abbreviations (US Terms)
- ch: chain
- sl st: slip stitch
- sc: single crochet
- hdc: half double crochet
- dc: double crochet
- inc: 2 sc in the same stitch
- BLO: back loop only
- MR: magic ring
- st(s): stitch(es)
- RS: right side
- rev sc: reverse single crochet
Special stitches:
- Shell: 5 dc in the same stitch.
- Half shell: 3 dc in the same stitch. At the start of a row, the ch 3 counts as the first dc.
- Rev sc (crab stitch): Single crochet worked from left to right, into the next stitch to the right.
Gauge and Checkpoints
- Single crochet: 16 sc x 18 rounds = 4 in (10.2 cm)
- Shell pattern: 4 repeats (24 sts) = 6 in (15.2 cm) wide, and 8 rows = 5 in (12.7 cm) tall
Make one pocket base first and use it as your gauge test. After Rnd 10 it should be 4.75 in (12.1 cm) across.
- If it is bigger, go down half a hook size.
- If it is smaller, go up half a hook size.
Measure at each checkpoint:
- Pocket base, Rnd 10: 4.75 in (12.1 cm) across
- Pocket wall, Rnd 32: about 4.9 in (12.4 cm) tall
- Panel, Row 8: 5 in (12.7 cm) tall and 9 in (22.9 cm) wide
- Panel, Row 17: 10 5/8 in (27.0 cm) tall
- Panel, Row 21: 13 1/8 in (33.3 cm) tall
- After the border: 10 in (25.4 cm) x 14 1/8 in (35.9 cm)
If the panel comes out wider than 9 in (22.9 cm), change your hook size. Do not leave out a shell, because the border counts depend on all 6 shells.
Pockets (Make 2, Lavender)
Work in continuous rounds. Mark the first stitch of each round.
Base
- Rnd 1: 6 sc in MR. (6)
- Rnd 2: Inc in each st. (12)
- Rnd 3: (Sc, inc) 6 times. (18)
- Rnd 4: (2 sc, inc) 6 times. (24)
- Rnd 5: (3 sc, inc) 6 times. (30)
- Rnd 6: (4 sc, inc) 6 times. (36)
- Rnd 7: (5 sc, inc) 6 times. (42)
- Rnd 8: (6 sc, inc) 6 times. (48)
- Rnd 9: (7 sc, inc) 6 times. (54)
- Rnd 10: (8 sc, inc) 6 times. (60)
Checkpoint: The base lies flat and is 4.75 in (12.1 cm) across.
Walls
- Rnd 11: Sc in the BLO of each st. (60) This leaves a ring of unused front loops, which gives the base a crisp edge.
- Rnds 12–32: Sc in each st. (60)
- Rnd 33: Sl st loosely in each st. (60) This makes a firm, rounded rim.
Fasten off and leave a 24 in (61.0 cm) tail.
The walls stay at 60 sts per round from Rnd 10 onward, so they go straight up without flaring.
Mark the back: Find the stitch at the round jog on Rnd 32 and place a marker there. Place two more markers, 7 sts to the left and 7 sts to the right. The 15 sts between them are the back strip, 3.75 in (9.5 cm) wide.
Lotus Appliqués (Make 2 Sets)
You work each petal and leaf around both sides of a chain. The chain becomes a center vein, and a ch-2 space makes the point.
Large petal (cream, make 10)
- Ch 8.
- Sc in the 2nd ch from hook.
- Work hdc, dc, dc, dc, hdc in the next 5 ch.
- In the last ch, work (sc, ch 2, sc). This is the tip.
- Turn to the other side of the chain. Work hdc, dc, dc, dc, hdc in the next 5 ch, then sc in the last ch.
- Sl st to the first sc.
Count: 14 sts plus the ch-2 tip. The petal is 1.75 in (4.4 cm) long.
Small petal (lavender, make 6)
- Ch 6.
- Sc in the 2nd ch from hook.
- Work hdc, dc, hdc in the next 3 ch.
- In the last ch, work (sc, ch 2, sc).
- Turn to the other side. Work hdc, dc, hdc in the next 3 ch, then sc in the last ch.
- Sl st to the first sc.
Count: 10 sts plus the ch-2 tip. The petal is 1.25 in (3.2 cm) long.
Leaf (green, make 4): Work the same as the large petal. (14 sts plus the ch-2 tip)
Stem (green, make 2): Ch 7. Sl st in the 2nd ch from hook and in each ch after it. (6 sl sts, 1.5 in / 3.8 cm long)
Assembly (one lotus per pocket)
- Find the front center of the pocket. It is directly opposite the marked jog.
- Sew the stem straight up from there, starting 1/2 in (1.3 cm) above the front-loop ridge.
- Sew one leaf on each side of the stem. Angle them about 45 degrees so the tips point up and outward.
- Fan the 5 cream petals out from the top of the stem:
- 1 straight up
- 2 at about 35 degrees
- 2 at about 70 degrees
Sew down only the lower halves so the tips stay free.
5. Lay the 3 lavender petals over the cream bases: 1 straight up and 2 at about 30 degrees. Sew them in place.
Each lotus is about 3.5 in (8.9 cm) wide and 3.5 in (8.9 cm) tall.
Back Panel (Cream and Lavender)
Work every row with the RS facing, from right to left. At the end of each row, fasten off. Join the next color at the right edge. Work over the yarn tails as you go.
Rectangle
- Foundation (cream): Ch 38.
- Row 1 (cream): Sc in the 2nd ch from hook. Skip 2 ch, shell in next ch, skip 2 ch, sc in next ch. Repeat from * 6 times in total. (6 shells + 7 sc = 37 sts)
- Row 2 (lavender):
- Join with a sl st in the first sc. Ch 3, then 2 dc in the same sc for a half shell.
- Sc in center dc of next shell, shell in next sc. Repeat from * 5 times in total.
- Sc in the center dc of the last shell, then 3 dc in the last sc.
(5 shells + 2 half shells + 6 sc = 37 sts)
– Row 3 (cream):
1. Join with a sc in the top of the beginning ch-3.
2. Shell in next sc, sc in center dc of next shell. Repeat from * 5 times in total.
3. Shell in the next sc, then sc in the last dc.
(6 shells + 7 sc = 37 sts)
– Rows 4–17: Repeat Row 2 on even rows and Row 3 on odd rows. (37 sts per row)
Checkpoint: 9 in (22.9 cm) wide x 10 5/8 in (27.0 cm) tall, with 9 cream rows and 8 lavender rows.
Arch
Each arch row starts and ends at the center dc of the outermost shell below. That leaves 3 sts uncovered at each end of the row below: the edge sc and 2 dc.
- Row 18 (lavender): Join with a sc in the center dc of the first shell. Shell in next sc, sc in center dc of next shell. Repeat from * 5 times in total. (5 shells + 6 sc = 31 sts, 7.5 in / 19.1 cm wide)
- Row 19 (cream): Work as Row 18, but repeat 4 times. (4 shells + 5 sc = 25 sts, 6 in / 15.2 cm wide)
- Row 20 (lavender): Work as Row 18, but repeat 3 times. (3 shells + 4 sc = 19 sts, 4.5 in / 11.4 cm wide)
- Row 21 (cream): Work as Row 18, but repeat 2 times. (2 shells + 3 sc = 13 sts, 3 in / 7.6 cm wide)
Checkpoint: 13 1/8 in (33.3 cm) tall, with a 3 in (7.6 cm) flat top.
Hanging Strap and Band
Strap (lavender)
- Ch 7.
- Row 1: Sc in the 2nd ch from hook and in each ch across. (6)
- Rows 2–22: Ch 1, turn, sc in each st. (6)
The strap is 1.5 in (3.8 cm) x 4.9 in (12.4 cm).
Band (cream)
- Ch 14.
- Row 1: Sc in the 2nd ch from hook and in each ch across. (13)
- Rows 2–5: Ch 1, turn, sc in each st. (13)
The band is 3.25 in (8.3 cm) x 1.1 in (2.8 cm).
Make All Pieces
- Cream: shared panel rows, 1 band, 10 large petals
- Lavender: shared panel rows, border, 2 pockets, 1 strap, 6 small petals
- Green: 4 leaves, 2 stems
Layout:
            ( ring )
            [strap ]
            [ band ]
         /‾‾‾‾‾‾‾‾‾‾‾‾\
        |  shell panel  |
        |  (Rows 1–21)  |
        | [P1]    [P2]  |
        | lotus  lotus  |
         ‾‾‾‾‾‾‾‾‾‾‾‾‾‾
Border (Lavender)
Border gauge: 4 sc = 1 in (2.5 cm).
Round 1
With the RS facing, join lavender in the first foundation ch at the bottom right. Work around the panel in this order:
- Bottom: 3 sc in the first ch, 1 sc in each of the next 35 ch, 3 sc in the last ch. (41)
- First side: Work into the row ends of Rows 1–17. Put 2 sc in each odd row and 3 sc in each even row. (42)
- Arch, going up: Work 3 sc across the uncovered sts of Row 17, then 2 sc in the side of Row 18. Repeat this step for Rows 18/19, 19/20 and 20/21. (20)
- Top: 1 sc in each st of Row 21. (13)
- Arch, going down: Mirror the climb. (20)
- Second side: Work the same as the first side. (42)
Sl st to the first sc. The arch has 53 sts, and the round has 178 sts.
Round 2
Ch 1. Sc in each st, with 3 sc in the center sc of each bottom corner.
There are 4 inner corners on each side of the arch, where a step turns upward. At each one, work hdc, dc, hdc in place of 3 sc:
- hdc in the last sc of the uncovered group
- dc and hdc in the 2 side sc
On the way down, work these in mirror order.
Counts: bottom 45, each side 42, arch 53. (182)
Round 3: Ch 1, rev sc in each st around. (182) Fasten off.
Why the math works
- Sides: 42 sc cover 10.5 in (26.7 cm). That matches the 10 5/8 in (27.0 cm) of the rows.
- Bottom: All 37 foundation sts are kept. Each corner gains 2 sts in Round 1 and 2 more in Round 2.
- Arch: 53 sts cover 13.25 in (33.7 cm). That is between the length of a smooth curve, about 10.8 in (27.4 cm), and the length of the stepped edge, 14 in (35.6 cm). The little bit of extra length keeps the curve from cupping.
The pockets are sewn on afterward, so they do not change any border count.
Joining
Sew the lotus pieces onto the pockets first. Then join with lavender, using a whipstitch through both loops.
Pocket bases
The bottom border has 45 sts on Round 2, and st 23 is the center.
- Left pocket: sew the 15 back front loops from its Rnd 10, one stitch to one stitch, into border sts 7–21.
- Right pocket: sew into border sts 25–39 the same way.
Sts 22–24 stay free. The curve of each pocket closes that gap.
Sides and rims
- Whipstitch the two outer columns of each back strip up to the panel, with stitches 1/4 in (0.6 cm) apart.
- Sew all 15 rim sts to the panel at the same spacing.
- Where the two pockets touch, add 3 stitches at the rim and 3 at mid-height.
Tension: Pull each stitch snug but not tight. Stitches that are too tight make the shells pucker. Stitches that are too loose let the pockets sag.
Checkpoint: The pockets span about 9.5 in (24.1 cm) and fit inside the 10 in (25.4 cm) panel.
Strap
- Fold the strap through the ring.
- Wrap the band around both layers and seam it at the back.
- Sew the strap ends to the back of the panel at the top center, overlapping 3/4 in (1.9 cm).
Final Blocking
- Mist the panel until it is damp.
- Pin it face up to 10 in (25.4 cm) x 14 1/8 in (35.9 cm).
- Pin the arch into a smooth curve, with a pin every 1 in (2.5 cm).
- Gently open each shell with your fingertips.
- Stuff each pocket with a rolled towel so it dries 4.75 in (12.1 cm) across.
- Flatten the petal tips, then lift them slightly.
- Let everything dry completely before you hang it.
Final Quality-Control Checklist
- Every rectangle row has 37 sts.
- The arch rows have 31, 25, 19 and 13 sts.
- The border rounds have 178, 182 and 182 sts.
- The pockets have 60 sts per round, and the walls are straight.
- Each lotus is centered and level.
- The pockets line up with the bottom of the panel.
- All tails are woven in, and the ring hangs straight.
Troubleshooting
- The panel is too wide. Your dc are loose. Go down a hook size.
- The shells slant. Put each sc into the center dc of a shell.
- You can see the steps through the border. Check the hdc-dc-hdc fills in Round 2.
- A pocket flares. You added stitches by mistake. Count 60 per round.
- The rolls don’t fit. Add one more increase round, for 66 sts.
- The holder tilts. Center the strap over the middle of the panel.
Care
Hand wash in cool water. Reshape it and dry it flat with the pockets stuffed.
Final Notes
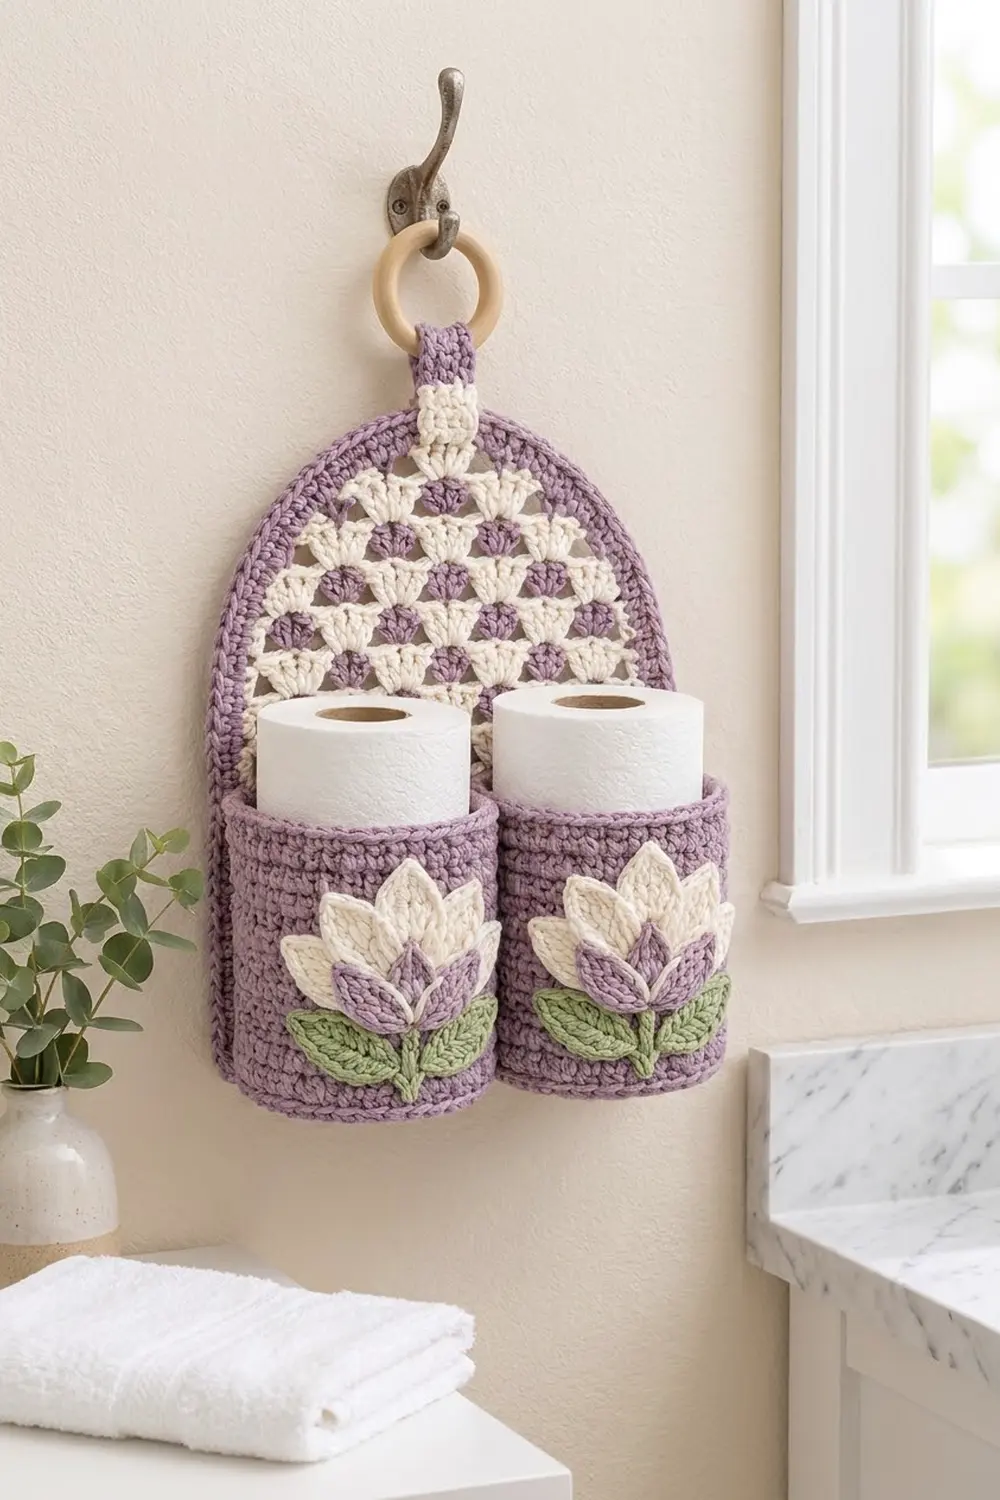
Each measurement builds on the one before. The pocket base is 4.75 in (12.1 cm). The panel is 9 in (22.9 cm) wide, 10 5/8 in (27.0 cm) tall after Row 17 and 13 1/8 in (33.3 cm) tall after Row 21. The border adds 1/2 in (1.3 cm) on each side, for a finished size of 10 in (25.4 cm) x 14 1/8 in (35.9 cm). If you check each stage, the holder will hang straight and hold two rolls neatly.
Happy crocheting!