
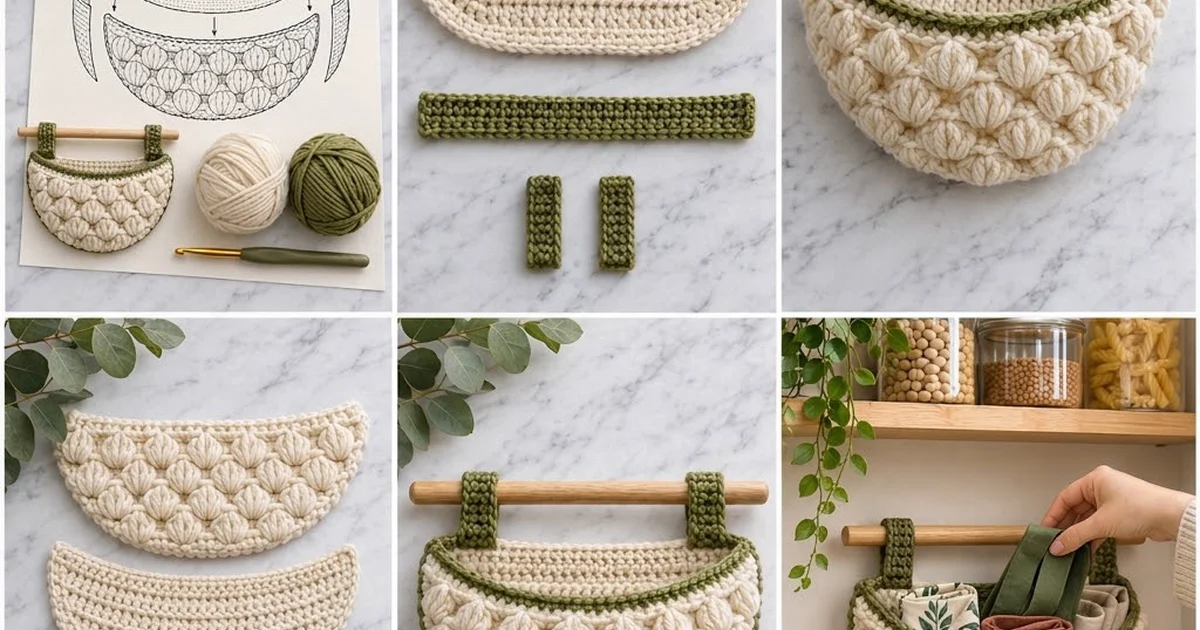
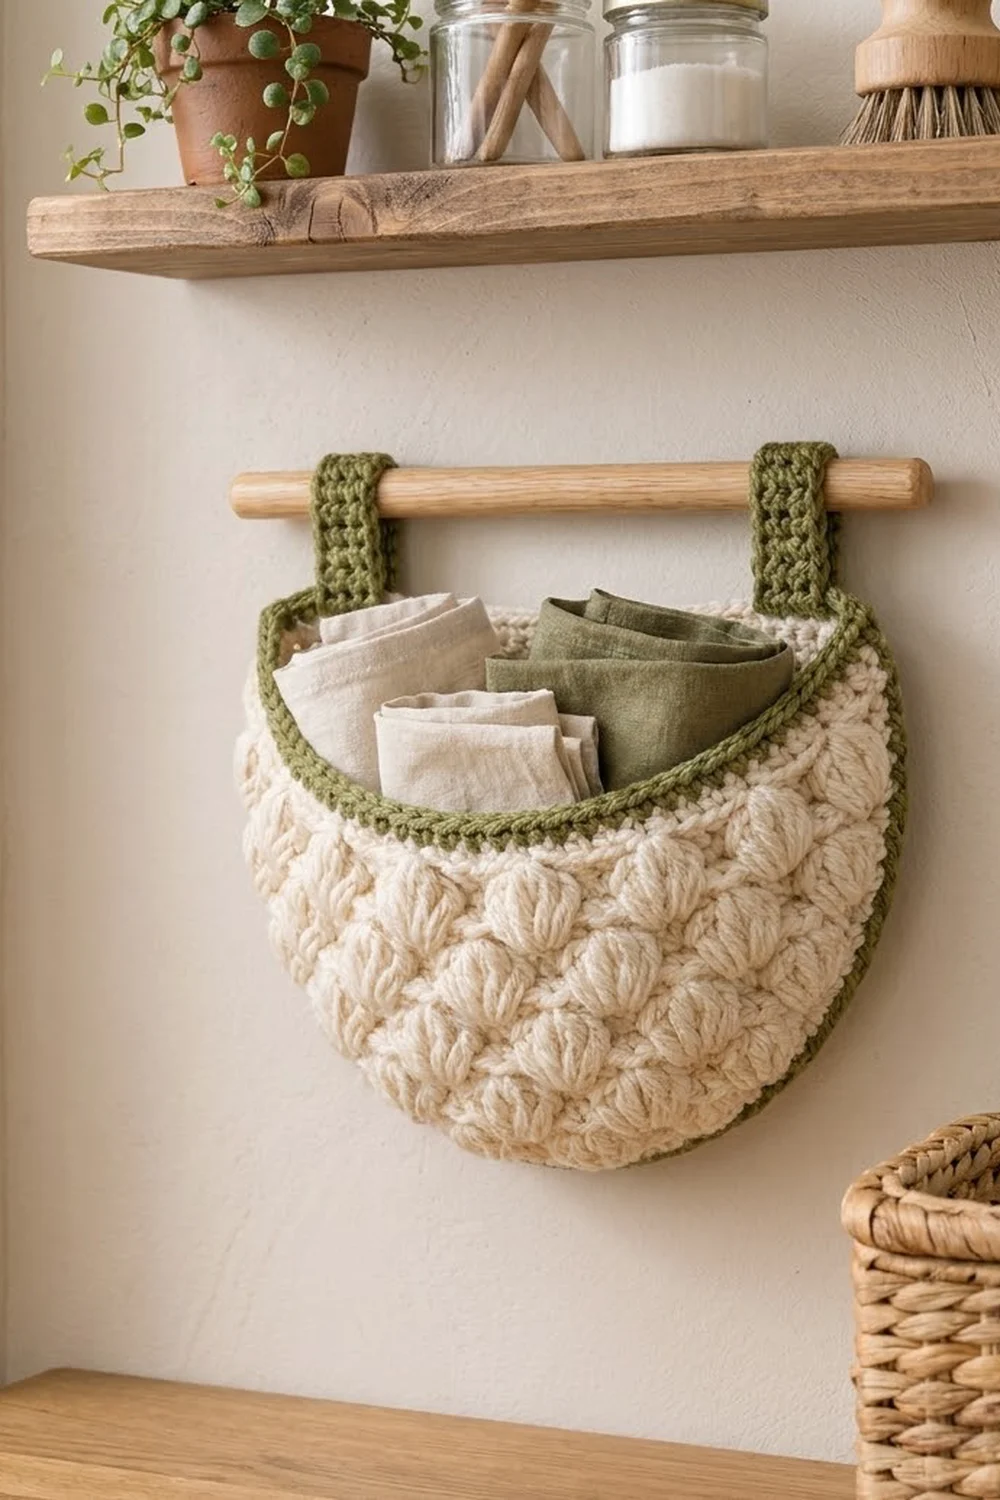
This half-moon wall pocket pairs a smooth cream back panel with a front panel covered in plump, staggered puff stitches. A narrow olive rim band finishes the pocket opening. An olive rope-style border outlines the whole shape, and two olive tabs hang it from a short wooden dowel.
The palette is calm and natural: warm cream for the body and soft olive for every accent. The pocket suits a pantry, entryway, or bathroom wall and holds napkins, tea towels, or mail.
The pattern uses US crochet terms. The finished pocket measures about 11 in (27.9 cm) wide and 7.2 in (18.3 cm) tall, not including the tabs and dowel.
Construction is flat and simple. You crochet five pieces: a back panel, a puff stitch front panel, a rim band, and two tabs. You sew the rim band to the front. The first border round joins the front and back, a reverse single crochet round finishes the edge, and you sew the tabs on last.
Finished Size and Construction
- Finished size: 11 in (27.9 cm) wide x 7.2 in (18.3 cm) tall
- Skill level: Intermediate
- Terminology: US terms
- Yarn weight: Worsted (#4)
- Hook: 5 mm (H-8)
- Number of pieces: 5 crocheted pieces (back, front, rim band, 2 tabs) plus 1 dowel
- Layout: front panel stacked on the back panel, joined along the sides and bottom
- Back panel size: 10 in (25.4 cm) wide x 6.2 in (15.7 cm) tall
- Front panel size: 12 in (30.5 cm) wide at the top x 5 in (12.7 cm) tall
- Size before border: 10 in (25.4 cm) x 6.2 in (15.7 cm), which is the back panel outline
- Border depth: 2 rounds, about 0.5 in (1.3 cm) on each edge
Materials
Choose a smooth worsted weight cotton or cotton blend. Cotton keeps the pocket firm and makes the puffs crisp. Acrylic also works, but the pocket will be softer.
- Cream (main color): 100 g, about 180 m
- Olive green (contrast color): 50 g, about 90 m
These quantities include a comfortable margin for a gauge swatch and weaving in.
Tools:
- 5 mm (H-8) crochet hook
- Tapestry needle
- Stitch markers (4)
- Scissors
- Wooden dowel, 0.75 in (1.9 cm) diameter, 14 in (35.6 cm) long
- Blocking mat and pins
- Measuring tape
Abbreviations (US Terms)
- ch: chain
- sc: single crochet
- rev sc: reverse single crochet (crab stitch), worked left to right
- st(s): stitch(es)
- inc: 2 sc in the same st
- RS / WS: right side / wrong side
- rep: repeat
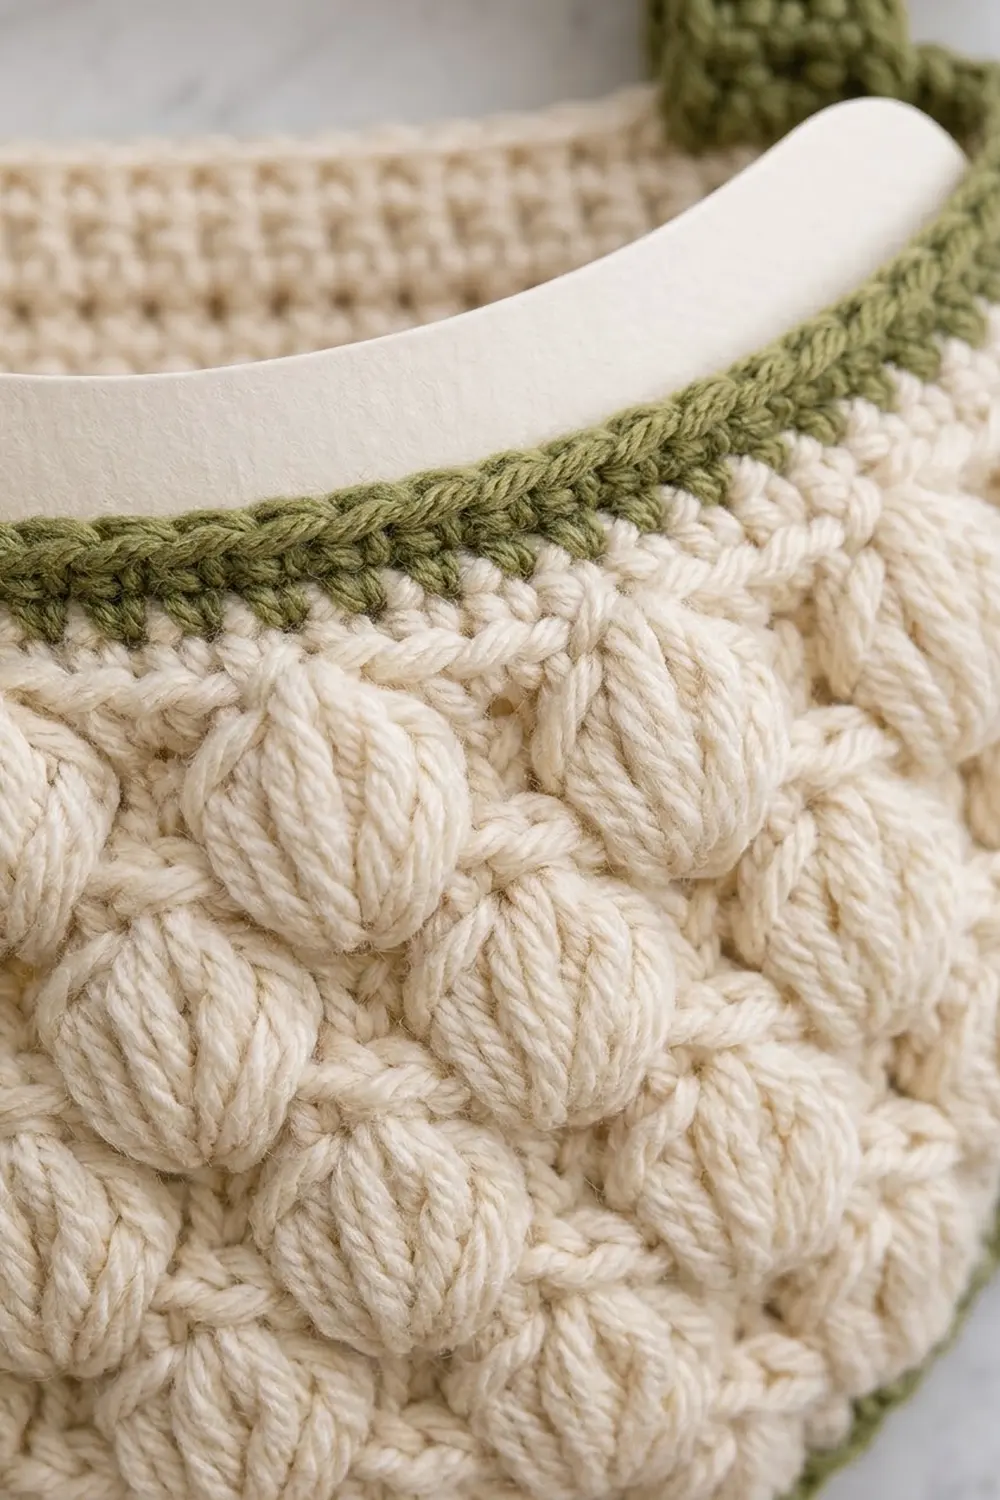
Puff stitch (puff): (Yarn over, insert hook in st, yarn over, pull up a loop to sc height) 4 times, leaving 9 loops on the hook. Yarn over, pull through all 9 loops, then ch 1 to close. The closing ch 1 does not count as a stitch. Each puff counts as 1 st.
Gauge and Checkpoints
- Single crochet: 16 sts and 18 rows = 4 in (10.2 cm)
- Puff pattern: 16 sts and 16 rows = 4 in (10.2 cm)
Make the back panel first. It works as your test piece, because it uses the main gauge and sets the size of everything joined to it.
Checkpoints:
- Back panel after Row 10: 32 sts, 8 in (20.3 cm) wide
- Back panel after Row 18: 40 sts, 10 in (25.4 cm) wide, 4 in (10.2 cm) tall
- Back panel after Row 28: 10 in (25.4 cm) x 6.2 in (15.7 cm)
- Front panel after Row 11: 36 sts, 9 in (22.9 cm) wide
- Front panel after Row 20: 12 in (30.5 cm) wide x 5 in (12.7 cm) tall
If your back panel is more than 0.25 in (0.6 cm) too wide, go down one hook size. If it is too narrow, go up one size. Recheck at Row 10.
Back Panel (Cream)
The back is worked flat from the bottom up. Increases at both ends build the curved lower edge, and straight rows form the upper section. The ch 1 at the start of each row does not count as a stitch.
Row 1: Ch 17. Sc in 2nd ch from hook and in each ch across. Turn. (16 sts)
Row 2: Ch 1, sc in each st across. Turn. (16 sts)
Row 3: Ch 1, inc in first st, sc in each st to last st, inc in last st. Turn. (18 sts)
Rows 4–10: Rep Row 3. Each row adds 1 st at each end. (Row 10: 32 sts)
Checkpoint: 32 sts, 8 in (20.3 cm) wide.
Row 11: Ch 1, sc in each st across. Turn. (32 sts)
Row 12: Rep Row 3. (34 sts)
Rows 13–18: Alternate Row 11 and Row 3, ending with an increase row. Row 14 has 36 sts, Row 16 has 38 sts, and Row 18 has 40 sts.
Rows 19–28: Ch 1, sc in each st across. Turn. (40 sts)
Fasten off. The back has a straight 40-st top edge, 28 row ends on each side, and a 16-st foundation edge at the bottom.
Front Panel (Cream, Puff Stitch)
The front is also worked from the bottom up, but it increases on every row from Row 2 through Row 17. This makes it 2 in (5.1 cm) wider than the back at the top. That extra width becomes the depth of the pocket.
Odd rows are WS rows and even rows are RS rows. Puffs are worked on WS rows so they pop out on the RS. On the row after a puff row, sc into the top of each puff and skip its closing ch.
Row 1 (WS): Ch 17. Sc in 2nd ch from hook and in each ch across. Turn. (16 sts)
Row 2 (RS): Ch 1, inc in first st, sc in each st to last st, inc in last st. Turn. (18 sts)
Row 3 (WS puff row): Ch 1, inc in first st, sc in next st, [puff in next st, sc in next 3 sts] 3 times, puff in next st, sc in next 2 sts, inc in last st. Turn. (20 sts, 4 puffs)
Rows 4–6: Rep Row 2. (22, 24, 26 sts)
Row 7 (WS puff row): Ch 1, inc in first st, sc in next 3 sts, [puff in next st, sc in next 3 sts] 4 times, puff in next st, sc in next 4 sts, inc in last st. Turn. (28 sts, 5 puffs)
Rows 8–10: Rep Row 2. (30, 32, 34 sts)
Row 11 (WS puff row): Ch 1, inc in first st, sc in next st, [puff in next st, sc in next 3 sts] 7 times, puff in next st, sc in next 2 sts, inc in last st. Turn. (36 sts, 8 puffs)
Checkpoint: 9 in (22.9 cm) wide.
Rows 12–14: Rep Row 2. (38, 40, 42 sts)
Row 15 (WS puff row): Ch 1, inc in first st, sc in next 3 sts, [puff in next st, sc in next 3 sts] 8 times, puff in next st, sc in next 4 sts, inc in last st. Turn. (44 sts, 9 puffs)
Rows 16–17: Rep Row 2. (46, 48 sts)
Row 18 (RS): Ch 1, sc in each st across. Turn. (48 sts)
Row 19 (WS puff row): Ch 1, sc in first 5 sts, [puff in next st, sc in next 3 sts] 9 times, puff in next st, sc in last 6 sts. Turn. (48 sts, 10 puffs)
Row 20 (RS): Ch 1, sc in each st across. (48 sts)
Fasten off. The front has 5 puff rows and 36 puffs in total. Each puff row is offset 2 sts from the puff row below, which creates the staggered, scale-like texture.
Rim Band (Olive)
Row 1: Ch 49. Sc in 2nd ch from hook and in each ch across. Turn. (48 sts)
Rows 2–4: Ch 1, sc in each st across. Turn. (48 sts)
Fasten off, leaving a 24 in (61.0 cm) tail. The band measures 12 in (30.5 cm) x 0.9 in (2.3 cm).
Tabs (Olive, Make 2)
Row 1: Ch 7. Sc in 2nd ch from hook and in each ch across. Turn. (6 sts)
Rows 2–24: Ch 1, sc in each st across. Turn. (6 sts)
Fasten off, leaving a 12 in (30.5 cm) tail. Each tab measures 1.5 in (3.8 cm) x 5.3 in (13.5 cm).
Make All Pieces
- Cream: 1 back panel, 1 front panel
- Olive: 1 rim band, 2 tabs
Layout, front view:
   [Tab]                      [Tab]
 ==========( dowel )==============
 |   Back panel, upper section   |
 |=========[ Rim band ]==========|
 |                               |
 |     Front panel (puffs)       |
  \                             /
   \___________________________/
      Olive border around all
Joining
Step 1: Attach the rim band. Place the band’s foundation edge along Row 20 of the front panel, with the RS facing out. Using the olive tail, whipstitch them together 1 st to 1 st, so 48 band sts meet 48 front sts. Keep the stitches snug but not tight, so the top edge stays 12 in (30.5 cm) long.
Step 2: Stack the panels. Lay the back panel RS up. Place the front on top, RS up, with the foundation edges aligned. On each side, Row 1 of the front meets Row 1 of the back and Row 20 meets Row 20. The extra front width bows outward to form the pocket.
Step 3: Pin. Pin the row ends together in pairs from Row 1 to Row 20 on both sides. Then pin the 16 foundation sts of the front to the 16 foundation sts of the back. The front is slightly taller over those 20 rows (4 rows per inch against 4.5). Ease it in, which adds a little more depth.
The actual stitching happens in Border Round 1, which joins the layers and edges the back in one pass.
Tension advice: Work the joined sts with an even, medium tension. If you pull tight, the curve will cup and the pocket won’t hang flat.
Size checkpoint: After Round 1, the piece should measure about 10.5 in (26.7 cm) x 6.7 in (17.0 cm).
Border (Olive)
Border gauge: 4 sts per inch along the edge, matching the sc gauge. Each round adds about 0.25 in (0.6 cm) per edge.
Round 1 (joining round): With the RS facing, join olive in the top right corner st of the back panel.
- Top right corner: 3 sc in the corner st.
- Right side, back only: sc in each row end from Row 27 down to Row 21. (7 sts)
- Right side, joined: working through both layers, sc in each row end from Row 20 down to Row 2. (19 sts)
- Bottom right corner: through both layers, 3 sc in the first foundation st.
- Bottom, joined: through both layers, sc in each of the next 14 foundation sts. (14 sts)
- Bottom left corner: through both layers, 3 sc in the last foundation st.
- Left side, joined: through both layers, sc in each row end from Row 2 up to Row 20. (19 sts)
- Left side, back only: sc in each row end from Row 21 up to Row 27. (7 sts)
- Top left corner: 3 sc in the corner st.
- Top edge: sc in each of the next 38 sts.
Join with a slip st to the first sc. (116 sts)
Per-side counts, Round 1. Each count includes that side’s 2 corner center sts, which are shared with the next side:
- Top: 1 corner + 1 + 38 + 1 + 1 corner = 42 sts
- Each side: 1 corner + 1 + 26 + 1 + 1 corner = 30 sts
- Bottom: 1 corner + 1 + 14 + 1 + 1 corner = 18 sts
Check: 42 + 30 + 18 + 30 = 120, minus 4 shared corners = 116.
Round 2: Ch 1. Working left to right, rev sc in each st around. Join with a slip st. (116 sts)
The per-side counts stay at 42, 30, 18, and 30, because rev sc is worked 1 per st with no corner increases. Fasten off.
Why the math works:
- The top row has 40 sts: 2 corner sts plus 38 middle sts. The 3-sc corners give the turning room.
- Each side has 28 row ends. Rows 1 and 28 are the corners, and the 26 row ends between them get 1 sc each.
- The front matches the back row for row on Rows 1 to 20, so the 19 joined row ends on each side pair 1 to 1 with none skipped.
- The 16 foundation sts on each panel also pair 1 to 1: 2 corner sts and 14 middle sts.
Attach the Tabs
Fold each tab in half around the dowel. Place it over the top edge of the back panel so that 3 rows, about 0.7 in (1.8 cm), overlap the front of the panel and 3 rows overlap the back. Center each tab over top-border sts 4 through 9, counting in from each top corner center st. Whipstitch both ends through all layers. The remaining 18 rows, 4 in (10.2 cm), form the loop around the dowel.
Final Blocking
- Weave in all ends.
- Spray the pocket lightly with water until it is damp, not soaked.
- Lay it RS up on a blocking mat.
- Pin the outer border to 11 in (27.9 cm) x 7.2 in (18.3 cm), shaping the bottom into a smooth arc with pins every 1 in (2.5 cm).
- Fill the pocket lightly with a folded towel to set its depth.
- Pin the rim band straight across the opening.
- Let it dry completely, remove the pins, and slide in the dowel.
Final Quality-Control Checklist
- Back panel measures 10 in (25.4 cm) x 6.2 in (15.7 cm) before the border.
- Front panel has 48 sts at the top and 36 puffs in 5 staggered rows.
- Rim band is sewn 1 st to 1 st across all 48 front sts.
- Border Round 1 has 116 sts: 42 on the top, 30 on each side, and 18 on the bottom.
- Border Round 2 has 116 rev sc and lies flat.
- Tabs sit level, the same distance from each corner.
- Finished pocket measures 11 in (27.9 cm) x 7.2 in (18.3 cm).
Troubleshooting
Puffs pop to the wrong side. Puffs belong on WS (odd) rows. Recheck your row count.
Puffs look flat or loose. Pull each loop up only to sc height, and close every puff with a firm ch 1.
The pocket does not open. Make sure the front reached 48 sts. Without that extra width, there is no depth.
The border ruffles or cups. Ruffling means extra sts, so work exactly 1 sc per row end. Cupping means tight tension, so go up one hook size for the border only.
The pocket tilts. Re-sew one tab so both tabs sit over the same border sts from their corners.
Care
Remove the dowel, then hand wash in cool water with mild soap. Roll the pocket in a towel to remove excess water, and dry it flat.
Final Notes
The measurement chain is short and easy to check. The back panel sets the base size at 10 in (25.4 cm) x 6.2 in (15.7 cm). The front adds 2 in (5.1 cm) of width for depth and joins row for row on Rows 1 to 20. Two border rounds of 116 sts each bring the pocket to 11 in (27.9 cm) x 7.2 in (18.3 cm). Check each stage before moving on, and your pocket will hang straight and hold its shape.
Happy crocheting!