

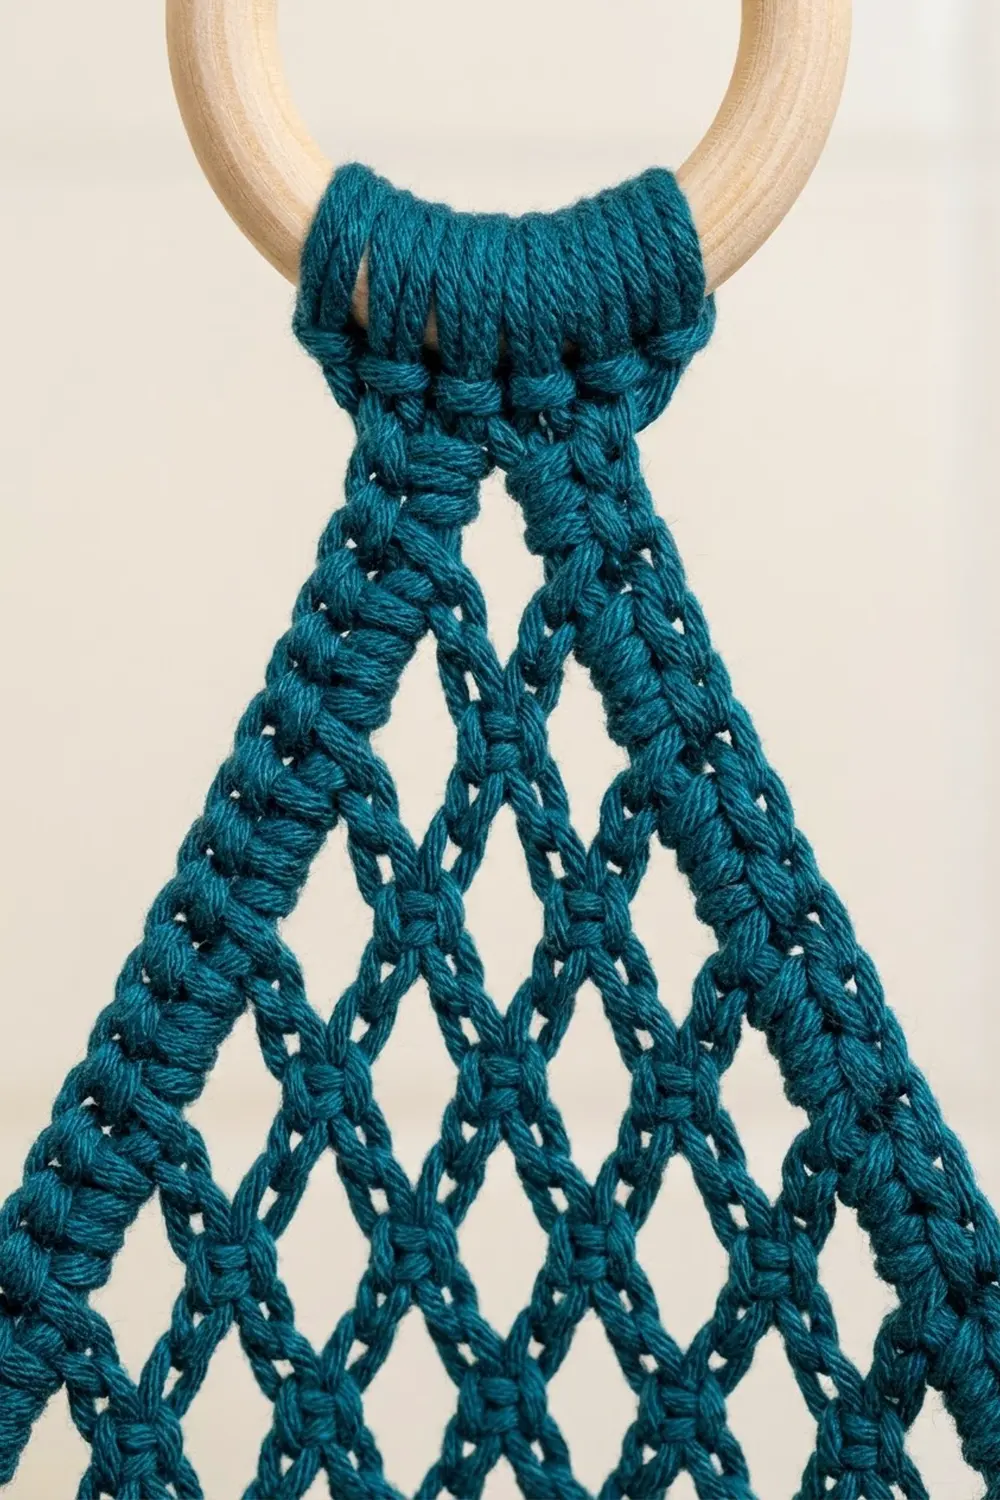
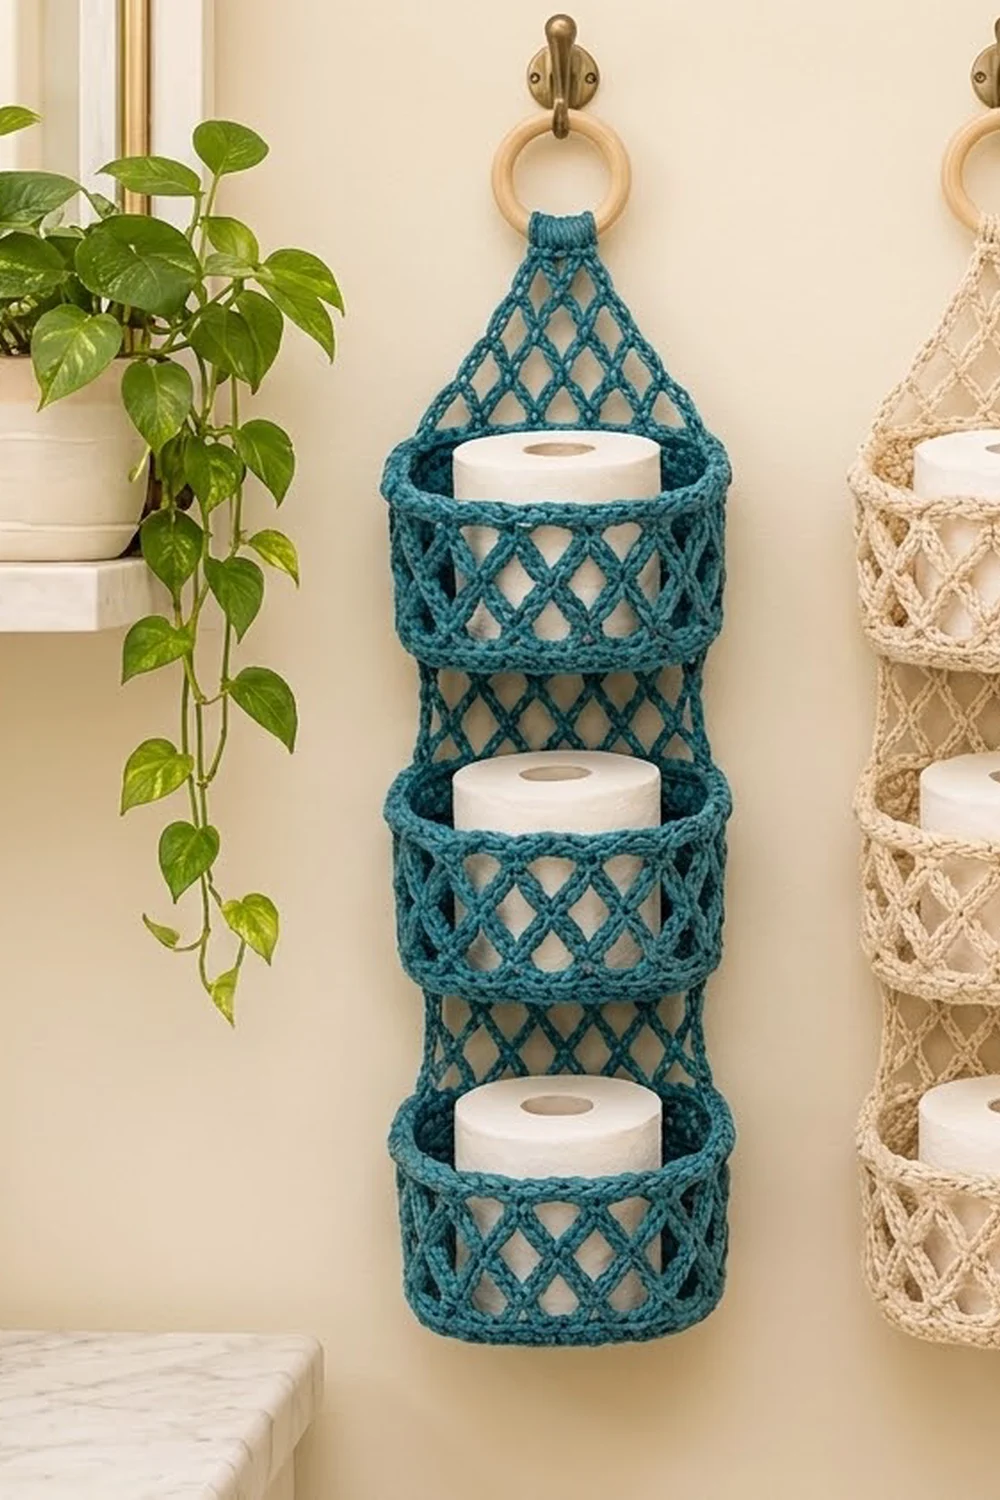
The Lagoon Lattice Hanging Basket is a wall organizer made of three small oval baskets stacked one above the other. Each basket has a solid oval base, a band of open diamond lattice around the sides, and a firm rim finished with a corded, braided-look edge. Short lattice panels across the back link the baskets, and a lattice triangle at the top narrows into a tab wrapped around a wooden ring.
The sample is worked in a deep teal cotton cord. It looks clean and modern and suits a bathroom, where each basket holds one spare toilet roll. A natural cream version looks just as good if you prefer a softer, boho look.
This pattern uses US crochet terms. The finished holder measures about 6 in (15.2 cm) wide and 23 in (58.4 cm) long including the ring, or 21 in (53.3 cm) without it. Each basket is 6 in × 4.5 in (15.2 cm × 11.4 cm) at the base and 4 in (10.2 cm) tall.
Construction is simple and modular. You make three identical baskets in joined rounds. Then you work two back connector panels in rows, each one joining a basket to the basket below it. Last, you work the hanger triangle up from the top basket and wrap its tab over the ring.
Finished Size and Construction
- Finished size: 6 in (15.2 cm) wide × 23 in (58.4 cm) long including ring
- Skill level: Intermediate
- Terminology: US crochet terms
- Yarn weight: Bulky (#5) cotton cord or cotton yarn
- Hook: 5.0 mm (H-8)
- Number of pieces: 3 baskets, 2 back connectors, 1 hanger triangle (6 crocheted pieces)
- Layout: 1 column of 3 baskets, linked at the back
- Basket size: base 6 in × 4.5 in (15.2 cm × 11.4 cm), height 4 in (10.2 cm)
- Basket height before rim border: 3 in (7.6 cm)
- Rim border depth: 1 in (2.5 cm)
Materials
Choose a smooth, firm cotton cord or bulky cotton yarn. Cotton holds the basket shape and stays put on the wall. Avoid stretchy acrylic: the lattice will sag once the baskets are filled.
- Teal (main color): 200 g, about 220 m
- Optional alternative colorway: Natural cream, same amount: 200 g, about 220 m
Tools:
- 5.0 mm (H-8) crochet hook
- One wooden ring, 2 in (5.1 cm) outer diameter
- 4 locking stitch markers
- Tapestry needle
- Scissors
- Measuring tape
- Pins and a spray bottle for blocking
These quantities include a margin of about 20% for a gauge swatch and small differences in tension.
Abbreviations (US Terms)
- ch – chain
- sl st – slip stitch
- sc – single crochet
- dc – double crochet
- sk – skip
- st(s) – stitch(es)
- BLO – back loop only
- FLO – front loop only
- FL / BL – front loop / back loop
- rev sc – reverse single crochet (crab stitch)
- RS – right side
Reverse single crochet (rev sc): Work from left to right (right to left if you crochet left-handed). Insert hook into the next stitch to the right, yarn over, pull up a loop, yarn over, pull through both loops. This makes the twisted, braided-look rim.
Gauge and Checkpoints
Gauge: 14 sc and 15 rounds = 4 in (10.2 cm) in sc worked in the round.
Make one complete basket before you commit to the whole set. Measure it at each checkpoint:
- After Rnd 8 (base): 6 in × 4.5 in (15.2 cm × 11.4 cm), lying flat.
- After Rnd 11: sides stand 0.75 in (1.9 cm) above the base edge.
- After Rnd 14 (before rim): 3 in (7.6 cm) tall.
- After Rnd 18: 4 in (10.2 cm) tall.
If your base is too big: go down to a 4.5 mm hook. If it is too small: go up to a 5.5 mm hook. If the base cups upward, your stitches are too tight. If it ruffles, they are too loose. Fix gauge on the base first, because every later count depends on its 60 stitches.
Basket (Make 3)
The rounds are joined, not spiraled. At the end of each round, sl st to the first st of the round. Begin every round with ch 1, which does not count as a stitch.
Base
Ch 9.
Rnd 1: Sc in 2nd ch from hook, sc in next 6 ch, 3 sc in last ch. Turn the work so you can crochet along the other side of the foundation chain. Sc in next 6 ch, then 2 sc in the last ch (the same ch as the first sc). Join. (18 sts)
Rnd 2: Ch 1, 2 sc in first st, sc in next 6, 2 sc in each of next 3, sc in next 6, 2 sc in each of last 2. Join. (24 sts)
Rnds 3–8: Ch 1, 2 sc in first st, sc in next K, sc in next 6, [2 sc in next st, sc in next K] 3 times, sc in next 6, [2 sc in next st, sc in next K] 2 times. Join. K = 1 in Rnd 3 and goes up by 1 each round, so K = 6 in Rnd 8. Each round adds 6 sts, 3 around each curved end, and the 6-st straight sections stay the same.
- Rnd 3: K = 1. (30 sts)
- Rnd 4: K = 2. (36 sts)
- Rnd 5: K = 3. (42 sts)
- Rnd 6: K = 4. (48 sts)
- Rnd 7: K = 5. (54 sts)
- Rnd 8: K = 6. (60 sts)
If the ends start to look pointed, work the 2 sc in the middle of each repeat on Rnds 5 and 7 instead of at the start. The stitch counts do not change.
Checkpoint: the base measures 6 in × 4.5 in (15.2 cm × 11.4 cm).
Sides
Rnd 9: Ch 1, sc in BLO of each st around. Join. (60 sts) This turns the edge up into a crisp fold. The unused front loops of Rnd 8 stay free for the connectors.
Rnds 10–11: Ch 1, sc in each st around. Join. (60 sts)
Lattice band
Rnd 12: Ch 1, sc in first st, ch 5, sk 3, [sc in next st, ch 5, sk 3] 14 times. Join to first sc. (15 ch-5 loops)
Rnd 13: Sl st in next 3 ch to reach the center of the first loop. Ch 1, sc in same loop, [ch 5, sc in next loop] 14 times, ch 5. Join to first sc. (15 ch-5 loops)
Rnd 14: Repeat Rnd 13. (15 ch-5 loops)
The offset loops form the diamond lattice. Each sc catches the middle of a loop below it, which gives the crossed look.
Checkpoint: the basket stands 3 in (7.6 cm) tall. Continue with the rim border before fastening off.
Make All Pieces
All 6 pieces use the teal cord:
- Baskets: 3, labeled Top, Middle and Bottom
- Back connectors: 2, worked directly onto the baskets (see Joining)
- Hanger triangle with tab: 1, worked directly from the Top basket
Layout, viewed from the front:
        [ ring ]
        [ tab  ]
       /hanger \
      [  TOP   ]
      |connector|   (back only)
      [ MIDDLE ]
      |connector|   (back only)
      [ BOTTOM ]
Mark the back half of each basket. Lay the basket flat with the beginning of the round at one curved end. Place marker A in the first st of Rnd 17 and marker B 30 sts away at the opposite end. The 30 sts between them, along one long side, are the back half. Place markers C and D in the matching 30 front loops of Rnd 8, directly below A and B.
Joining
The connectors run only across the back, so the front of each basket stays open for loading rolls. Each connector is worked down from the free Rnd 8 front loops of the upper basket and joined stitch-to-stitch to the free Rnd 17 back loops of the basket below.
Connector (make 2: Middle to Bottom, then Top to Middle)
Hold the upper basket upside down with the base facing you.
Row 1 (RS): Join yarn in the FL at marker C. Ch 1, sc in same st, [ch 5, sk 3, sc in next st] 7 times, sc in last FL at marker D. (30 sts used: 9 sc, 7 ch-5 loops)
Row 2: Ch 5 (counts as dc + ch 2), turn, sc in first loop, [ch 5, sc in next loop] 6 times, ch 2, dc in last sc. (6 full loops + 2 half loops)
Row 3: Ch 1, turn, sc in dc, [ch 5, sc in next loop] 6 times, ch 5, sc in 3rd ch of turning ch. (7 ch-5 loops, 8 sc)
Row 4: Ch 1, turn, sc in first sc, [3 sc in next loop, sc in next sc] 7 times, sc once more in same last sc. (1 + 7 × 4 + 1 = 30 sc)
Join row: Place the lower basket right side up below the connector, with markers A and B at the ends of Row 4. Holding Row 4 against the back loops of Rnd 17, sl st through both layers in each st: 1 Row 4 st to 1 BL. (30 sl sts) Fasten off.
The counts match because both edges are exactly 30 sts: half of the 60-st round. With 30 to 30 there is nothing to ease in, so the baskets hang straight above each other.
Tension: Keep the join sl sts loose enough to match the width of the sc row, about 0.25 in (0.6 cm) each. If they pull tight, the back panel puckers. Switch to a 5.5 mm hook for the join row if needed.
Checkpoint: The gap between the rim of the lower basket and the base of the upper basket is about 2 in (5.1 cm), and both baskets measure 6 in (15.2 cm) wide.
Rim Border (Rnds 15–18, Every Basket)
Work the border on each basket right after Rnd 14, before any joining. It uses the same gauge as the base: 14 sc = 4 in (10.2 cm). The rounds are counted as front half and back half, 30 sts each.
Rnd 15 (conversion round): Ch 1, sc in same sc as the join, 3 sc in next loop, [sc in next sc, 3 sc in next loop] 14 times. Join. (15 sc over sc + 45 sc in loops = 60 sts; 30 front, 30 back)
Rnds 16–17: Ch 1, sc in each st around. Join. (60 sts; 30 front, 30 back)
Rnd 18: Ch 1, rev sc in FLO of each st around. Join. Fasten off and weave in the end. (60 rev sc; 30 front, 30 back)
Working the rev sc in the front loops leaves the back loops of Rnd 17 free. The connectors and hanger attach there, so the braided edge stays smooth on top.
Why the math works: 15 loops × 4 sc each (1 over the sc + 3 in the loop) gives 60 sts, exactly the stitch count of the sides in Rnds 9–11. The rim is the same circumference as the base, so the basket walls stay vertical. 60 divides into two halves of 30, which matches the 30-st connector rows and the 30-st hanger base.
Checkpoint: the border adds 1 in (2.5 cm), bringing the basket to 4 in (10.2 cm) tall.
Hanger Triangle and Tab
Work up from the Top basket, into the free BL of Rnd 17 between markers A and B.
Row 1 (RS): Join at marker A, ch 1, sc in same st, [ch 5, sk 3, sc in next st] 7 times, sc in last st at marker B. (7 ch-5 loops; 30 sts used)
Row 2: Turn, sl st in next sc and in next 3 ch, ch 1, sc in same loop, [ch 5, sc in next loop] 6 times. (6 ch-5 loops)
Row 3: Turn, sl st in next 3 ch, ch 1, sc in same loop, [ch 5, sc in next loop] 5 times. (5 loops)
Rows 4–7: Work as Row 3, making 1 fewer repeat each row. (4, 3, 2, 1 loops)
Checkpoint: the triangle is about 4 in (10.2 cm) tall.
Row 8: Ch 1, turn, 5 sc in the single remaining loop. (5 sc)
Rows 9–16: Ch 1, turn, sc in each st across. (5 sc) The tab is 1.5 in (3.8 cm) wide and 2 in (5.1 cm) long.
Fold the tab over the wooden ring to the back and whipstitch Row 16 to the back of Row 8. Fasten off and weave in all ends.
Final Blocking
- Weave in every tail securely, running each one through at least 2 in (5.1 cm) of stitches.
- Mist the whole holder with water until it is evenly damp, not soaked.
- Lay it face down on a blocking mat with the three baskets in a straight line.
- Pin the back connectors and hanger triangle so the lattice diamonds open evenly.
- Stuff each basket with a towel or a spare roll wrapped in plastic so the oval shape sets.
- Check the measurements: 6 in (15.2 cm) wide, baskets 4 in (10.2 cm) tall, gaps 2 in (5.1 cm).
- Leave it to dry completely, usually 24 hours, before hanging.
Final Quality-Control Checklist
- Every basket has 60 sts in Rnds 9–11 and 15–18.
- Every lattice round has 15 loops.
- Each base measures 6 in × 4.5 in (15.2 cm × 11.4 cm).
- The connectors are on the back only, and the fronts open freely.
- Each connector join uses 30 sl sts with no puckering.
- The hanger triangle narrows evenly, from 7 loops down to 1.
- The tab is sewn tightly and the ring cannot slip.
- The holder hangs straight, about 23 in (58.4 cm) long including the ring.
Troubleshooting
- The base curls or cups: You are increasing too little or working too tightly. Recount 60 sts at Rnd 8 and loosen your tension.
- The base has pointed ends: Your increases are stacking in the same place. Use the staggered increases on Rnds 5 and 7.
- The lattice looks uneven: Make sure every sc goes into the center of the loop below, not into the chain stitches.
- The baskets tilt forward: The connector is too short. Check that Rows 2–3 are complete and that the join row is not pulled tight.
- The rim flares: The rev sc is too loose. Use a hook one size smaller for Rnd 18.
- The holder sags when full: Use a firmer cotton cord, or add a fourth sc round before the rim.
Care
Hand wash in cool water with mild soap, press out the water in a towel and dry flat in shape. Do not tumble dry, because the lattice can stretch.
Final Notes
The measurement chain is short and easy to check. Gauge of 14 sc = 4 in (10.2 cm) gives a 60-st base of 6 in × 4.5 in (15.2 cm × 11.4 cm). The sides keep those 60 sts, the 15-loop lattice band brings the basket to 3 in (7.6 cm) and the rim adds 1 in (2.5 cm) for a 4 in (10.2 cm) basket. 30-st back halves join through 2 in (5.1 cm) connectors, and the hanger triangle and tab finish the holder at about 23 in (58.4 cm) including the ring.
Happy crocheting!