

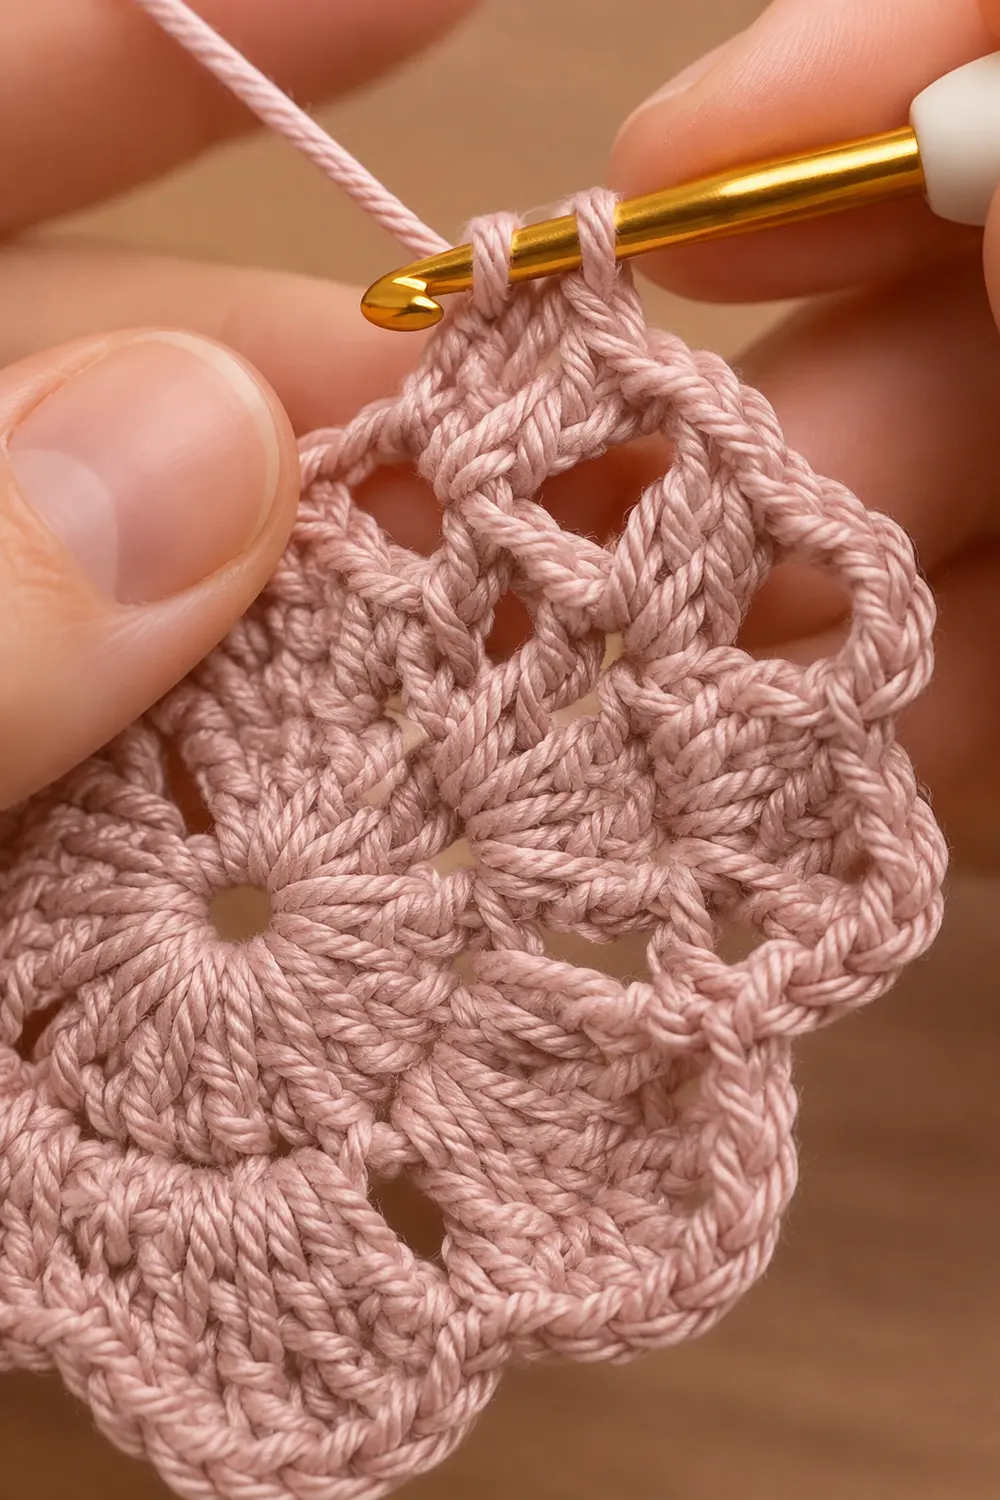
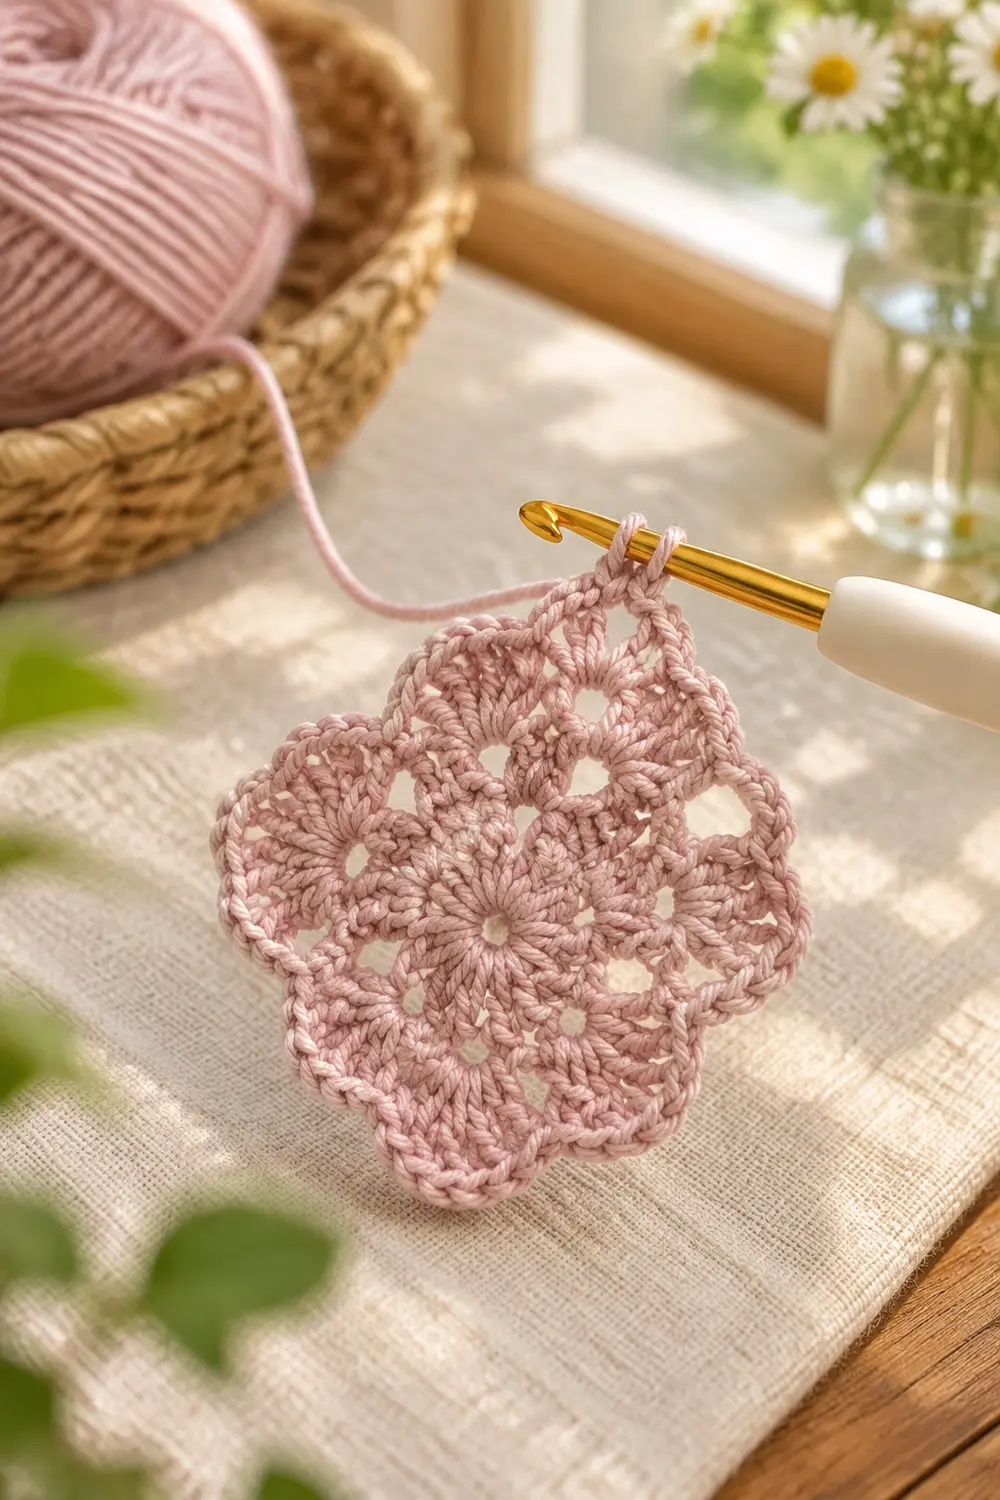
The Rosebud Lace Motif is a small, airy crochet piece worked in a soft dusty rose. It has a round center hole, four gently rounded lobes, and a scatter of chain-space holes that give it a light, lacy look. The silhouette is roughly square, and it turns into a diamond when rotated 45 degrees. Its edges are soft and slightly organic rather than sharp and boxy.
The style is calm and vintage. Double crochet clusters give it body, chain spaces open it up, and a smooth single crochet border frames everything. It works well as an appliqué, a gift-tag decoration, a coaster topper for a mug, or a little ornament.
This pattern uses US crochet terms. The finished motif measures 2.75 in (7.0 cm) across from side to side after blocking.
Construction is simple. You work one piece in the round from a magic ring. There are three double crochet rounds, then one single crochet border round that rounds the corners. There is no joining and no sewing, only two tails to weave in.
Finished Size and Construction
- Finished size: 2.75 in x 2.75 in (7.0 cm x 7.0 cm), side to side
- Skill level: Easy
- Terminology: US crochet terms
- Yarn weight: DK (#3), cotton or cotton blend
- Hook: 3.0 mm
- Number of pieces: 1
- Layout: Single motif, worked in joined rounds
- Piece size: 2.75 in (7.0 cm)
- Size before border: 2.25 in (5.7 cm) after Round 3
- Border depth: 0.25 in (0.6 cm) on each side
Materials
Yarn advice: Choose a smooth, mercerized or soft-twist cotton in DK weight. Cotton shows the open holes clearly and blocks crisply. Avoid fuzzy yarns, because they fill in the lace and hide the center ring. A dusty rose or mauve pink matches the original look, but any solid color works.
Yarn quantity:
– Dusty rose (main and only color): 4 g, about 9 m
This amount includes a margin of about 25% for your gauge swatch, the starting tail, and the weaving tail. One motif actually uses about 3 g.
Tools:
– 3.0 mm crochet hook
– Tapestry needle
– Small scissors
– 1 stitch marker
– Ruler or tape measure
– Rust-proof pins and a foam blocking mat
– Small spray bottle with water
Abbreviations (US Terms)
- ch – chain
- sl st – slip stitch
- sc – single crochet
- dc – double crochet
- st(s) – stitch(es)
- sp – space
- sk – skip
- rep – repeat
- * * – repeat the instructions between asterisks as directed
Special technique – magic ring: Wrap the yarn around two fingers to form a loop. Insert the hook, pull up a loop, and work the first round into the ring. Pull the tail to close the center. For this motif, close it only partway so a small round hole remains, about 0.125 in (0.3 cm) across.
Note: The ch 3 at the start of each dc round counts as 1 dc.
Gauge and Checkpoints
Gauge matters, even for a small motif. A small error in Round 1 grows every round. Make one motif first and measure it at each checkpoint before you make more or attach it to anything.
Key gauge:
– Round 1 (16 dc) = 1 in (2.5 cm) across
– Border sc on straight edges: 6 sc = 1 in (2.5 cm)
Checkpoints (lay the piece flat without stretching):
– After Round 1: 1 in (2.5 cm) across
– After Round 2: 1.75 in (4.4 cm) across, flat sides
– After Round 3: 2.25 in (5.7 cm) across, side to side
– After Round 4 (border), blocked: 2.75 in (7.0 cm) across
If your motif is too big: If you are more than 0.125 in (0.3 cm) over at Round 1 or Round 2, switch to a 2.75 mm hook and restart. Also check that your chains are not loose, especially the ch-3 corners.
If your motif is too small: Go up to a 3.25 mm hook. If Round 2 cups, your gauge is too tight for the stitch count. A larger hook usually fixes that.
If it ruffles: Your corner chains are probably too long. Keep each ch 3 corner snug.
Pattern
Leave a 6 in (15.2 cm) starting tail.
Round 1 – Center Ring (16 dc)
Make a magic ring.
Ch 3 (counts as dc). Work 15 dc into the ring. Pull the tail to close the ring partway, leaving a small round hole. Join with sl st to the top of the beginning ch 3.
Stitch count: 16 dc
Checkpoint: 1 in (2.5 cm) across. The circle should lie flat with no cupping.
Round 2 – Four Lobes (Growth Round)
This round divides the circle into 4 groups of 4 stitches. Each group grows to 6 dc, and the ch-2 spaces become the four corners.
Ch 3 (counts as dc), dc in the same st as the join, dc in the next 2 sts, 2 dc in the next st, ch 2.
*2 dc in the next st, dc in the next 2 sts, 2 dc in the next st, ch 2*. Rep from * to * 3 more times.
Join with sl st to the top of the beginning ch 3.
Stitch count: 24 dc and 4 ch-2 sps (4 lobes of 6 dc each)
Check: each lobe uses 4 sts from Round 1, and 4 lobes x 4 sts = 16 sts. That uses the whole round.
Checkpoint: 1.75 in (4.4 cm) across the flat sides. The lobes will bulge slightly. That bulge creates the organic, rounded silhouette.
Round 3 – Lace Round (Growth Round)
This round adds a hole in the middle of each lobe and builds the four corners.
Ch 3 (counts as dc), dc in the next 2 dc, ch 1, dc in the next 3 dc. Work (2 dc, ch 3, 2 dc) in the next ch-2 sp.
*Dc in the next 3 dc, ch 1, dc in the next 3 dc, (2 dc, ch 3, 2 dc) in the next ch-2 sp*. Rep from * to * 3 more times.
Join with sl st to the top of the beginning ch 3.
Stitch count: 40 dc, 4 ch-1 sps, and 4 ch-3 corner sps
Check: each repeat has 6 dc over the lobe plus 4 dc in the corner, so 10 dc. Then 4 repeats x 10 dc = 40 dc.
Checkpoint: 2.25 in (5.7 cm) across, side to side. You should now see 9 holes: the center ring, 4 lobe holes, and 4 corner holes.
Do not fasten off. Continue straight into the border.
Border
The border is one round of plain single crochet. It gives the motif a smooth, defined edge and rounds off the corners.
Border gauge: 6 sc = 1 in (2.5 cm) along the straight edges.
Per-side definition: For this motif, one “side” means 11 straight-edge sc plus the 5-sc corner group that follows them. Each corner group belongs to only one side and is not shared. That gives 16 sc per side, with no corner counted twice.
Round 4 – Single Crochet Border (Conversion Round)
This is a conversion round. You work 1 sc into each existing dc, 1 sc into each ch-1 space, and extra stitches only in the corners. It does not continue the growth pattern of the dc rounds.
Ch 1 (does not count as a st). Sc in the same st as the join, sc in the next 2 dc, sc in the ch-1 sp, sc in the next 3 dc, sc in the next 2 dc. Work 5 sc in the ch-3 corner sp. Sc in the next 2 dc.
*Sc in the next 3 dc, sc in the ch-1 sp, sc in the next 3 dc, sc in the next 2 dc, 5 sc in the ch-3 corner sp, sc in the next 2 dc*. Rep from * to * 3 more times.
Join with sl st to the first sc.
Stitch count per side: 3 + 1 + 3 + 2 + 5 + 2 = 16 sc
Total: 16 sc x 4 sides = 64 sc
The same count by source: 40 sc worked 1-per-dc + 4 sc in the ch-1 sps + 20 sc in the corners (5 x 4) = 64 sc
Place your stitch marker in the 3rd (center) sc of any 5-sc corner group. That stitch is the corner point, and you will use it for pinning.
Fasten off, leaving a 6 in (15.2 cm) tail.
Why the Math Works
- Sides stay true. One sc per dc and one sc per ch-1 sp keeps each straight edge the same length as Round 3. This prevents waving and pulling.
- Corners round smoothly. A ch-3 space alone would hold about 3 sc lying flat. Working 5 sc gives just enough extra fabric to turn the corner into a soft curve without ruffling. That curve creates the gently irregular silhouette.
- Size adds up. The border adds 0.25 in (0.6 cm) on each side, so the motif goes from 2.25 in + 0.25 in + 0.25 in = 2.75 in (7.0 cm). Because the corners are rounded, the outer edge is about 10.7 in (27.2 cm) long rather than a full 11 in (27.9 cm). At 6 sc per inch, 10.7 in x 6 = about 64 sc, which matches the stitch count.
Optional: If you want a larger project later, you can join several motifs into a small mat. This pattern describes only the single motif.
Final Blocking
- Weave in both tails before blocking. Run each tail through the back of the dc stitches in at least 2 directions, then trim it close.
- Lightly mist the motif with water until it is damp but not dripping. Cotton can also be soaked briefly and pressed in a towel.
- Lay it face up on the blocking mat.
- Pin the 4 marked corner points first so they sit exactly 2.75 in (7.0 cm) apart, measured side to side across the middle.
- Pin the center of each straight side to straighten the edge. Do not pull the sides into hard points, because the corners should stay rounded.
- Gently nudge each hole open with a pin tip: the center ring, the 4 lobe holes, and the 4 corner holes.
- Let it dry completely. For DK cotton this usually takes 2 to 4 hours.
- Unpin it and measure again. It should be 2.75 in (7.0 cm) across.
Final Quality-Control Checklist
- [ ] Round 1 has 16 dc and a small, open center hole
- [ ] Round 2 has 4 lobes of 6 dc each and 4 ch-2 sps
- [ ] Round 3 has 40 dc, 4 ch-1 holes, and 4 ch-3 corners
- [ ] Round 4 has 64 sc, with 16 sc per side
- [ ] All 9 holes are open and evenly spaced
- [ ] Corners are softly rounded, not pointed or ruffled
- [ ] The motif lies flat without cupping or waving
- [ ] The blocked size is 2.75 in (7.0 cm) side to side
- [ ] Tails are woven in securely and invisible from the front
Troubleshooting
Center won’t lie flat (cupping): Your Round 1 stitches are too tight. Use a larger hook, or loosen your dc tension.
Center hole is too big or loose: Pull the magic-ring tail tighter before you weave it in, then secure it with a backstitch.
The motif twists or skews: You may have worked the beginning ch 3 into the wrong stitch. Always join into the top of the ch 3, and start the next round in that same stitch.
Count is off in Round 3: Check that each lobe gets exactly 3 dc, ch 1, and 3 dc. A missed dc at the start of a round is the most common error.
Corners ruffle: The corner chains are too long, or you worked more than 5 sc. Keep each ch 3 snug and count the corner groups carefully.
Corners look pointed instead of rounded: You may have worked only 3 sc in the corner. Rework it with 5 sc.
Edges wave between corners: You probably added extra sc on the straight edges. Each side should have exactly 11 straight-edge sc.
Holes are closed or uneven: Ease them open with a pin tip while the piece is damp during blocking.
Care
Hand wash the motif in cool water with mild soap, then press out the water in a towel. Lay it flat and reshape it to 2.75 in (7.0 cm) to dry.
Final Notes
The Rosebud Lace Motif comes down to a short measurement chain:
- Round 1: 16 dc, 1 in (2.5 cm)
- Round 2: 24 dc, 1.75 in (4.4 cm)
- Round 3: 40 dc, 2.25 in (5.7 cm)
- Round 4: 64 sc, 2.75 in (7.0 cm) after blocking
If each checkpoint matches, the finished motif will too. Check your gauge early, keep the corner chains snug, and give it a gentle block to open the lace.
Happy crocheting!