

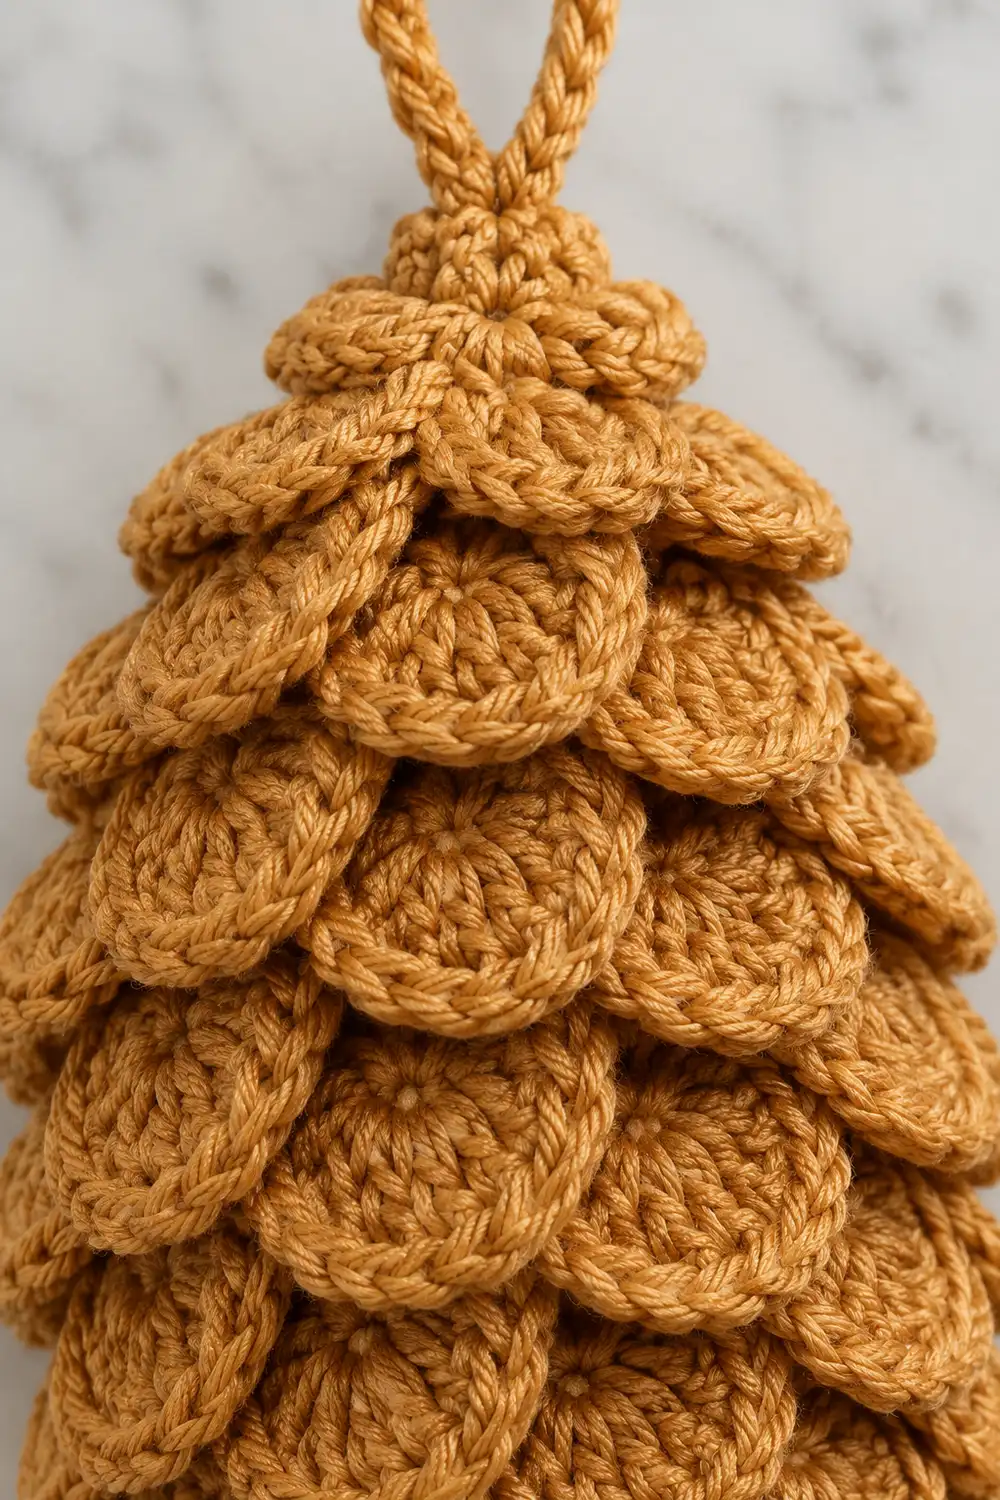
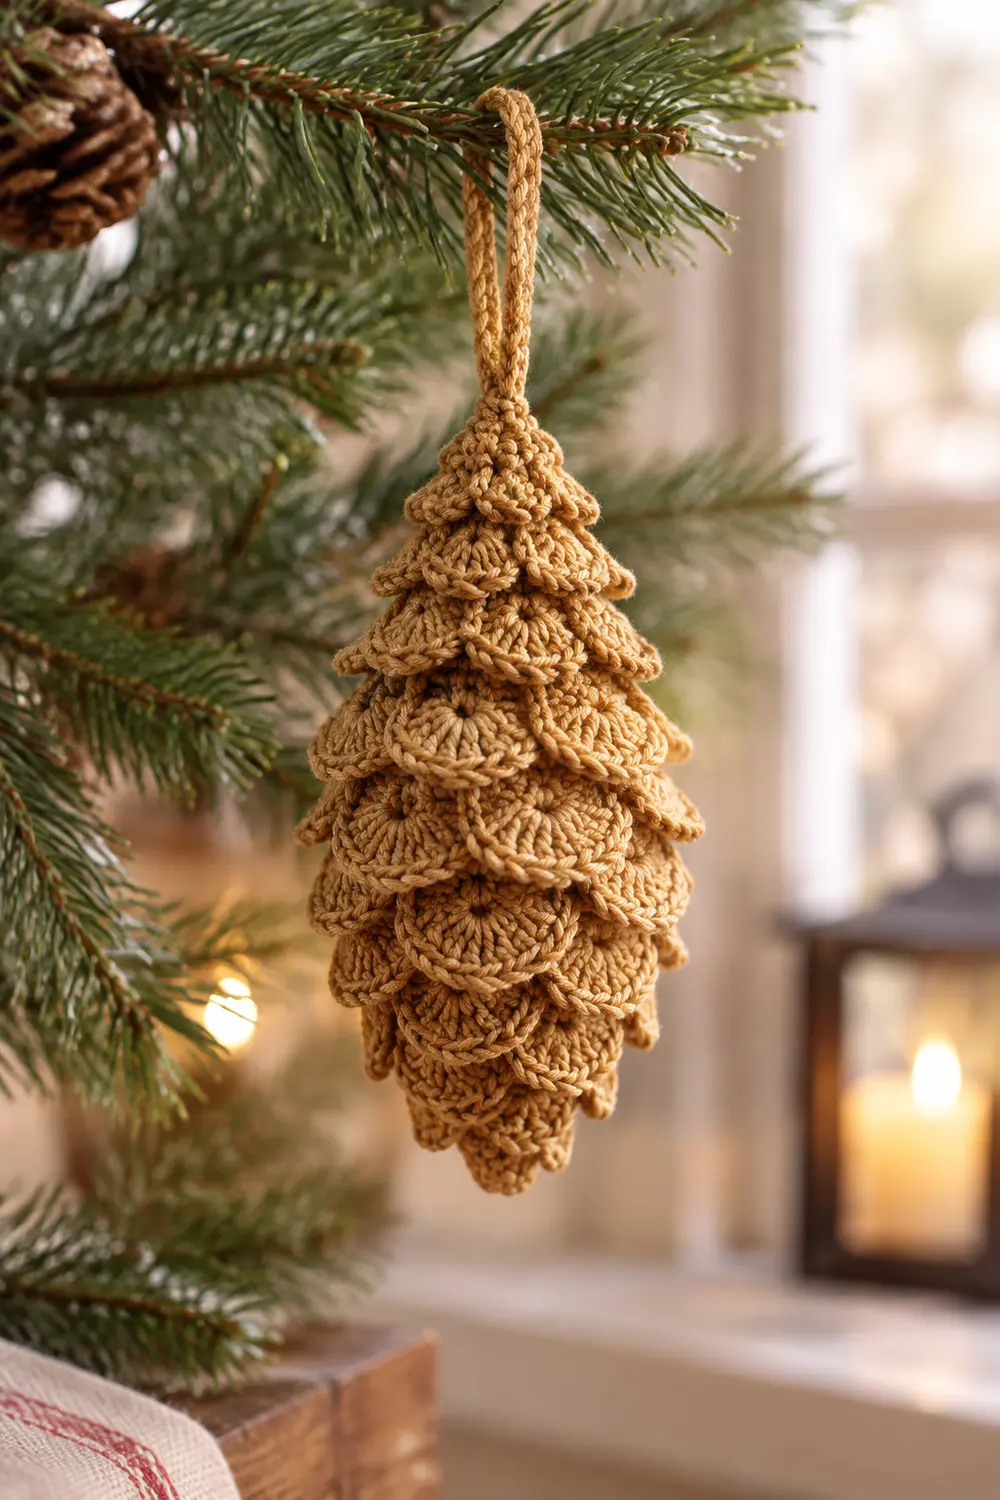
This little pinecone is made of tidy, overlapping shells that grow from small at the tip to full and rounded in the middle, then taper again toward the top. The result is a dimensional, scaled texture that looks carved rather than crocheted.
It is worked in one solid tan/gold yarn, so the texture does all the work. The style is classic and warm. It suits a holiday tree, a gift tag, or a shelf display. A small corded loop at the top makes it ready to hang.
The pattern uses US crochet terms. The finished pinecone measures about 3.5 in (8.9 cm) tall and 2.5 in (6.4 cm) wide at its widest tier, not counting the hanging loop.
Construction is simple once you see the rhythm. You work one piece in joined rounds from the bottom tip upward. Every tier follows the same three-round pattern. First comes a back-loop round that shapes the body. Then comes a plain sc round. Last comes a shell round worked into the front loops of that plain round. The shells fold down over the tier below, so each row of scales overlaps the last like shingles.
Finished Size and Construction
- Finished size: 3.5 in (8.9 cm) tall x 2.5 in (6.4 cm) wide, excluding loop
- Skill level: Easy-intermediate (front/back loop work, shells in the round)
- Terminology: US crochet terms
- Yarn weight: DK (light worsted, #3)
- Hook: 3.5 mm (US E-4)
- Number of pieces: 1
- Layout: Single piece worked in joined rounds, bottom tip to top, with 7 tiers of shells
- Piece size: Body circumference at widest is 24 sts, or 4.8 in (12.2 cm)
- Size before border: About 3.25 in (8.3 cm) tall after Round 22, including the Tier 1 shells that hang below the tip
- Border depth: The top closure adds about 0.25 in (0.6 cm), and the hanging loop adds 1.25 in (3.2 cm) above that
Materials
Yarn advice: Choose a smooth DK cotton or cotton blend in tan, gold, or honey. Cotton gives crisp shell edges that hold their curve. Fuzzy or very soft acrylic will blur the scales. Avoid splitty yarn, because you will be working many stitches into single front loops.
- Tan/Gold: 15 g, about 36 m (39 yd)
Quantities include a margin of roughly 25% for your gauge swatch rounds, the hanging loop, and weaving in ends.
Tools:
- 3.5 mm (US E-4) crochet hook
- Polyester fiberfill, about 5 g
- 1 stitch marker
- Tapestry needle
- Scissors
Abbreviations (US Terms)
- ch – chain
- sl st – slip stitch
- sc – single crochet
- hdc – half double crochet
- dc – double crochet
- sc2tog – single crochet 2 together
- inc – 2 sc in the same stitch
- st(s) – stitch(es)
- MR – magic ring
- FLO – front loop only
- BLO – back loop only
- sk – skip
Special stitches
- Small shell: 5 hdc in the same stitch.
- Medium shell: 5 dc in the same stitch.
- Large shell: 7 dc in the same stitch.
- Shell repeat (4 sts): sl st in next st, sk 1, shell in next st, sk 1. Every shell round uses this 4-stitch repeat, so each base round must be divisible by 4.
Gauge and Checkpoints
Gauge: 5 sc and 5 rounds = 1 in (2.5 cm) in sc worked in the round.
You are making a single piece, so your first rounds act as your test. Work Rounds 1–12 and then measure before you continue.
Checkpoints:
- After Round 2: The flat circle measures about 0.75 in (1.9 cm) across.
- After Round 12: The body circumference is 4.8 in (12.2 cm), and the body is 1.8 in (4.6 cm) tall from the tip.
- Shell heights: Small shells stand about 0.3 in (0.8 cm) tall. Medium shells stand about 0.45 in (1.1 cm). Large shells stand about 0.5 in (1.3 cm).
- After Round 21: The body is 3 in (7.6 cm) tall from the tip.
If the piece is too big: Go down to a 3.25 mm hook. If only the shells look floppy, keep the hook but tighten your dc tension.
If the piece is too small: Go up to a 3.75 mm hook. Check that you are not pulling the BLO rounds tight, because that narrows the body.
Pattern
Join every round with a sl st to the first stitch. Begin each round with ch 1, which does not count as a stitch. Place a marker in the first stitch of each sc round.
Bottom Tip
Round 1: Work 6 sc in the MR. Pull the ring closed and join. (6 sts)
Round 2: Work 2 sc in each st around. (12 sts)
Round 3: Sc in each st around. (12 sts)
Tier 1 – Small Shells
Round 4 (FLO of Round 3): Repeat sl st in next st, sk 1, small shell in next st, sk 1 3 times. Join to the first sl st. (3 small shells: 15 hdc + 3 sl st)
Round 5 (BLO of Round 3): Ch 1. Work into the unused back loops of Round 3, behind the shells. Repeat sc in next 2 sts, inc in next st 4 times. (16 sts: 12 worked + 4 added)
Fold the Tier 1 shells downward so they point toward the tip.
Round 6: Sc in each st around. (16 sts)
Tier 2 – Medium Shells
Round 7 (FLO of Round 6): Repeat sl st, sk 1, medium shell, sk 1 4 times. (4 medium shells: 20 dc + 4 sl st)
Round 8 (BLO of Round 6): Repeat sc in next 3 sts, inc 4 times. (20 sts: 16 worked + 4 added)
Round 9: Sc in each st around. (20 sts)
Tier 3 – Large Shells
Round 10 (FLO of Round 9): Repeat sl st, sk 1, large shell, sk 1 5 times. (5 large shells: 35 dc + 5 sl st)
Round 11 (BLO of Round 9): Repeat sc in next 4 sts, inc 4 times. (24 sts: 20 worked + 4 added)
Round 12: Sc in each st around. (24 sts)
Stop here for the gauge checkpoint. Then add a little stuffing to the tip and keep stuffing as you go.
Tier 4 – Large Shells
Round 13 (FLO of Round 12): Repeat sl st, sk 1, large shell, sk 1 6 times. (6 large shells: 42 dc + 6 sl st)
Round 14 (BLO of Round 12): Sc in each st around. (24 sts)
Round 15: Sc in each st around. (24 sts)
Tier 5 – Large Shells (Widest Tier)
Round 16 (FLO of Round 15): Repeat sl st, sk 1, large shell, sk 1 6 times. (6 large shells: 42 dc + 6 sl st)
Round 17 (BLO of Round 15): Repeat sc in next 4 sts, sc2tog 4 times. (20 sts: 24 consumed into 20)
Round 18: Sc in each st around. (20 sts)
Tier 6 – Medium Shells
Round 19 (FLO of Round 18): Repeat sl st, sk 1, medium shell, sk 1 5 times. (5 medium shells: 25 dc + 5 sl st)
Round 20 (BLO of Round 18): Repeat sc in next 3 sts, sc2tog 4 times. (16 sts: 20 consumed into 16)
Round 21: Sc in each st around. (16 sts)
Tier 7 – Small Shells
Round 22 (FLO of Round 21): Repeat sl st, sk 1, small shell, sk 1 4 times. (4 small shells: 20 hdc + 4 sl st)
Stuff the body firmly but evenly. It should feel like a soft egg, not a hard ball.
Shaping summary: The body grows 12 → 16 → 20 → 24. It holds at 24 for two tiers, then shrinks 24 → 20 → 16. Because the shell sizes follow that same curve (small, medium, large, large, large, medium, small), you get the drop-shaped pinecone silhouette.
Border: Top Closure and Hanging Loop
This piece has no flat sides, so there is no per-side border. The scalloped shells already form the finished edge of every tier. The “border” here is the top closure and the hanging loop. Both are worked at the same gauge as the body, 5 sc/in (2.5 cm).
Round 23 (BLO of Round 21): Work sc2tog 8 times. (8 sts: 16 consumed into 8)
Top up the stuffing through the small opening if needed.
Round 24: Work sc2tog 4 times. (4 sts: 8 consumed into 4)
Why the math works: Round 21 has 16 sts, which equals 3.2 in (8.1 cm) around. Halving the count twice (16 → 8 → 4) pulls the top into a tight point in about 0.25 in (0.6 cm) of height. This matches the gentle taper at the bottom tip. The 4 remaining stitches leave no visible hole.
Hanging loop: Sl st in the next st. Ch 20, then sl st into the same st to form a loop. Sl st into each of the 20 ch back around the loop to make a firm cord, and then sl st into the base. The loop stands about 1.25 in (3.2 cm) tall.
Fasten off. Thread the tail down through the center of the pinecone and out the side, then trim it. Weave in the starting tail at the tip.
Final Blocking
- Hold the pinecone upright and check that every tier of shells points downward toward the tip.
- Gently pinch each shell so its curve opens evenly. Make sure the center dc of each shell sits at the lowest point.
- Hover a steam iron about 1 in (2.5 cm) above the piece, or use a garment steamer. Do not touch or press the yarn.
- While the yarn is warm and damp, nudge any tilted shells so they overlap the tier below in a neat staggered pattern.
- Roll the body lightly between your palms to even out the stuffing.
- Let it dry fully, about 30 minutes, standing upright or hanging by the loop.
Final Quality-Control Checklist
- [ ] Height is about 3.5 in (8.9 cm) without the loop
- [ ] Widest tier measures about 2.5 in (6.4 cm) across
- [ ] Shell count per tier from bottom to top is 3, 4, 5, 6, 6, 5, 4
- [ ] Shell sizes grade small, medium, large, large, large, medium, small
- [ ] Every shell points downward and overlaps the tier below
- [ ] No gaps show between tiers where the BLO rounds join
- [ ] Stuffing is even, with no lumps or soft spots
- [ ] The top closes neatly with no hole
- [ ] Loop is secure and about 1.25 in (3.2 cm) tall
- [ ] All ends are woven in and hidden
Troubleshooting
Shells stand upright instead of overlapping. Fold them down after each BLO round, and steam them during blocking. Firm cotton may need a second pass of steam.
Shells look ruffled or wavy. Your dc tension is loose. Tighten it, or drop to a 3.25 mm hook for the shell rounds only.
I can’t find the back loops behind the shells. Fold the shells forward and down, then look for the row of unworked loops just behind them. Work Round 5 and each later BLO round there.
Stitch count is off after a BLO round. Count only the back loops of the plain round. The sl sts from the shell round are not stitches for the next round.
Body looks lumpy. You have added too much stuffing at once. Pull a little out and stuff in small wisps.
Hole at the top. Run the tail through the front loops of the final 4 sts and cinch them closed before you make the loop.
Optional: If you want a cluster of pinecones, make several and tie them together on a ribbon. The pattern itself stays a single ornament.
Care
Spot clean with cool water and mild soap, then reshape the shells and let the ornament air dry. Do not machine wash or tumble dry, because both will crush the stuffing and flatten the scales.
Final Notes
The measurement chain is short and easy to check. Gauge is 5 sc and 5 rounds per 1 in (2.5 cm). After Round 2, the circle measures 0.75 in (1.9 cm) across. After Round 12, the body is 24 sts, or 4.8 in (12.2 cm) around, and 1.8 in (4.6 cm) tall. After Round 21, the body is 3 in (7.6 cm) tall, or about 3.25 in (8.3 cm) with the Tier 1 shells. The top closure adds 0.25 in (0.6 cm), giving a finished pinecone of 3.5 in (8.9 cm) tall and 2.5 in (6.4 cm) wide, plus a 1.25 in (3.2 cm) loop. Every tier uses the same three-round rhythm of BLO shaping, plain sc, and FLO shells. Once your first tier looks right, the rest will follow.
Happy crocheting!