

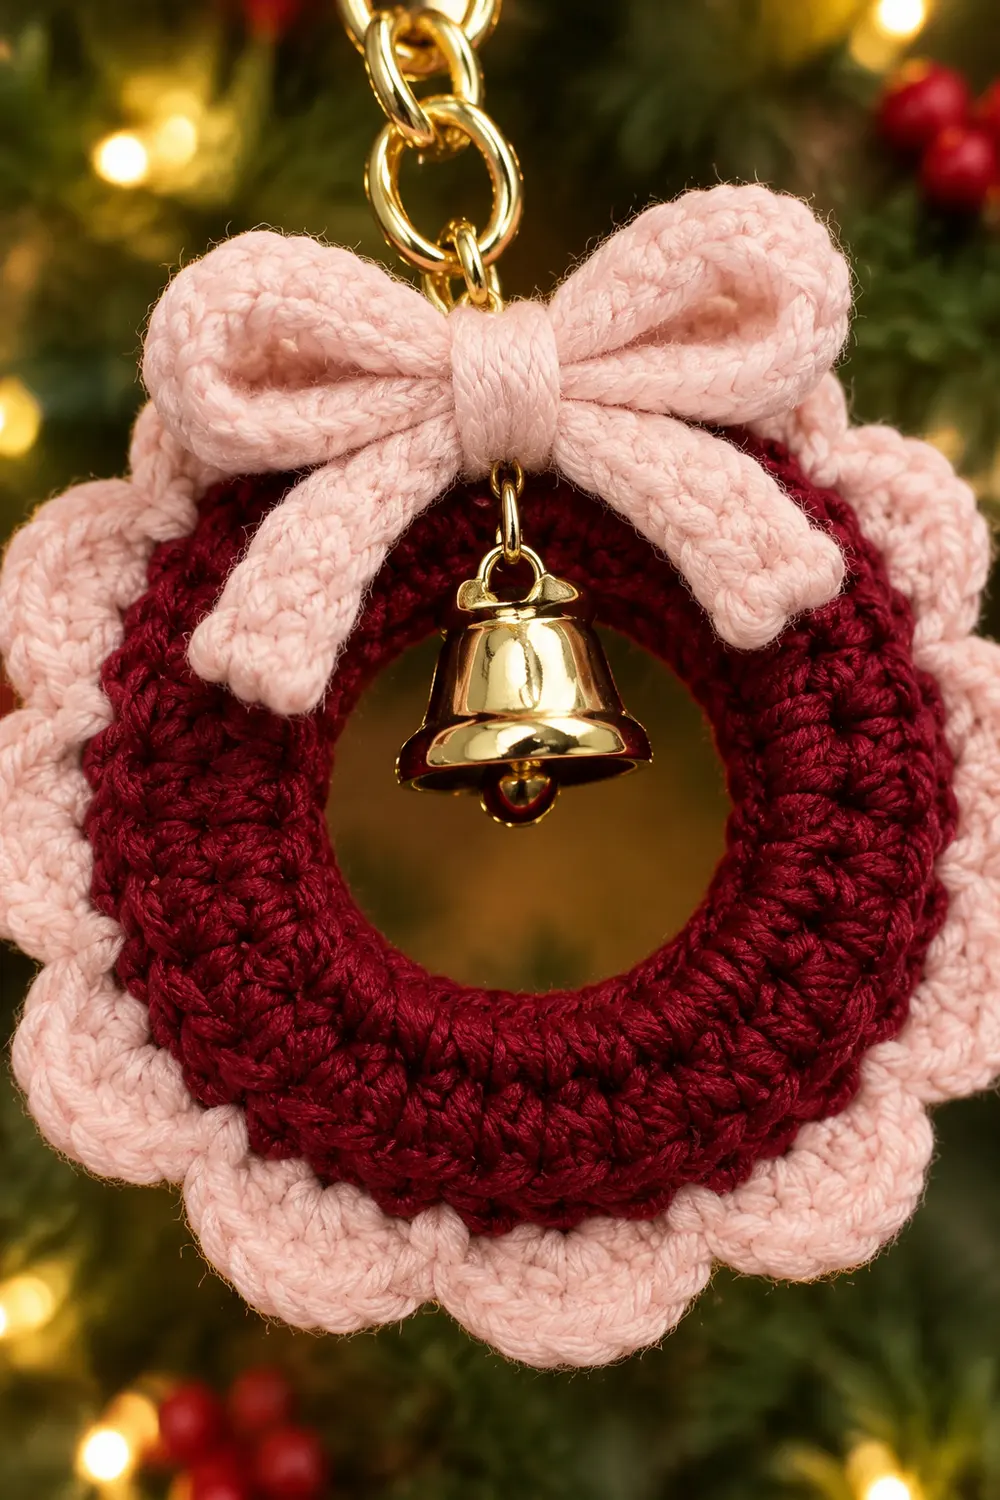
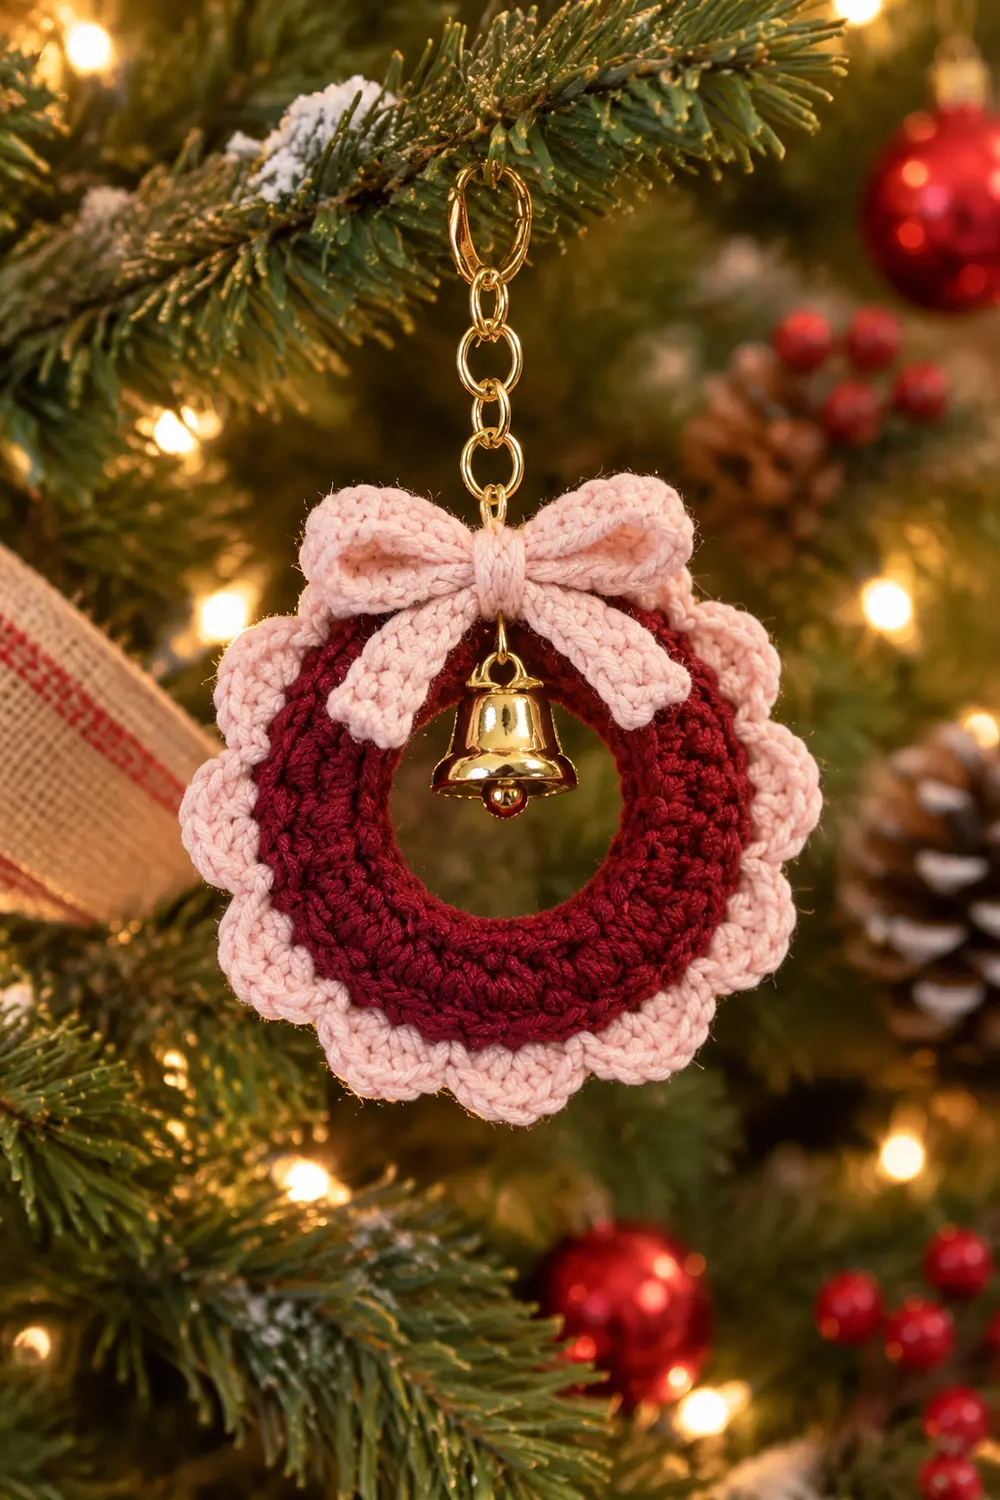
This little wreath is a single crocheted ornament keychain. It has a deep burgundy ring with a pale pink scalloped shell edge that gives it a flower-like outline. A pale pink bow sits at the top, and a small gold metal ball ornament hangs inside the open center. A gold-tone chain loop at the top lets you clip it to a bag or keys, or hang it on a tree.
The palette is burgundy (wine red) and pale pink, with gold metal accents. The style is cozy and festive but still soft and sweet. It suits a handbag charm, a gift topper, or a tree ornament.
This pattern uses US crochet terms. The finished ornament measures 3 in (7.6 cm) in diameter across the scallops, with a center hole of about 1 in (2.5 cm).
You will work the wreath base in the round over a chain ring with two rounds of half double crochet in burgundy. Next you add a pale pink single crochet round and a shell-stitch scallop round. Then you make a small two-part bow, block everything, and attach the bow, ball ornament and chain.
Finished Size and Construction
- Finished size: 3 in (7.6 cm) diameter across the scallops
- Skill level: Easy
- Terminology: US crochet terms
- Yarn weight: Worsted (#4), cotton or cotton blend
- Hook: 3.5 mm (E-4), sized down from the usual for firm fabric
- Number of pieces: 1 ornament. The wreath is worked in one piece, plus a sewn-on bow appliqué made from two small strips.
- Layout: Circular wreath. The bow is centered at the top, the ball ornament hangs inside the hole, and the chain loop is at the top.
- Piece size: Wreath 3 in (7.6 cm). Bow about 1.6 in (4.1 cm) wide.
- Size before border: 2.2 in (5.6 cm) diameter after the burgundy rounds
- Border depth: 0.4 in (1.0 cm) per side (pink sc round plus shell round)
Materials
Use a smooth, firm worsted cotton or cotton blend. Cotton holds the scallops crisply and stands up to handling on a keychain. Avoid fuzzy or very stretchy acrylic, which blurs the shells.
- Burgundy / wine red: 6 g, about 12 m (wreath base)
- Pale pink: 6 g, about 12 m (border and bow)
Tools and hardware:
- 3.5 mm (E-4) crochet hook
- Tapestry needle
- Scissors
- 1 stitch marker
- Ruler or tape measure
- Gold metal ball ornament with a hanging loop, about 0.4 in (1.0 cm)
- 2 gold jump rings, about 0.25 in (0.6 cm)
- Gold-tone chain keychain with clasp, about 3 in (7.6 cm) long
- Two small pliers for opening jump rings
- Rust-proof pins and a foam mat for blocking
The yarn quantities include a comfortable margin for a gauge swatch and weaving in ends.
Abbreviations (US Terms)
- ch – chain
- sl st – slip stitch
- sc – single crochet
- hdc – half double crochet
- dc – double crochet
- st(s) – stitch(es)
- sk – skip
- rep – repeat
Special stitch – Shell: Work 5 dc into the same stitch.
Gauge and Checkpoints
This is a single small piece, so the wreath itself is your test piece. Work Rounds 1–2 first and measure them before adding the pink border.
Approximate gauge: 4.5 hdc and 5 sc per inch (2.5 cm) with a 3.5 mm hook. The fabric should feel firm and dense, with no gaps between posts.
Checkpoints:
- After Round 1: outer diameter 1.6 in (4.1 cm), hole about 1 in (2.5 cm)
- After Round 2: 2.2 in (5.6 cm)
- After Round 3: 2.5 in (6.4 cm)
- After Round 4: 3 in (7.6 cm)
If your wreath is too big (more than 0.1 in / 0.3 cm over at any checkpoint), go down to a 3.25 mm hook or tighten your tension.
If it is too small, go up to a 3.75 mm hook.
If it cups or ruffles instead of lying flat, see Troubleshooting before continuing.
Wreath Base (Burgundy)
The base is worked in joined rounds with the right side facing. Do not turn.
Foundation: With burgundy, ch 16. Sl st into the first ch to form a ring. Make sure the chain is not twisted.
Round 1: Ch 2 (does not count as a st). Work 24 hdc into the center of the ring, over the chain rather than into the chain stitches. Slide the stitches along the chain so they sit evenly all the way around. Sl st to the top of the first hdc. (24 hdc)
Working over the chain keeps the hole round and smooth. The 24 hdc crowd the 16-ch ring slightly, which tightens the hole to about 1 in (2.5 cm).
Checkpoint: 1.6 in (4.1 cm) across, hole about 1 in (2.5 cm).
Round 2 (growth round): Ch 2 (does not count). Starting in the same st as the join, hdc in next 2 sts, 2 hdc in next st. Rep from * 8 times total. Sl st to the first hdc. (32 hdc)
This round’s count is 24 sts worked once plus 8 increases, giving 32 hdc.
Checkpoint: 2.2 in (5.6 cm) across. Lay the piece on a flat surface. It should lie flat without cupping or rippling.
Fasten off burgundy, leaving a 4 in (10.2 cm) tail to weave in.
Bow Appliqué (Pale Pink)
The bow is made from two small strips. Together they form the single bow appliqué.
Loop strip:
- With pale pink, ch 17.
- Row 1: Sc in the 2nd ch from the hook and in each ch across. (16 sc)
- Row 2: Ch 1, turn. Sc in each st across. (16 sc)
- Fasten off, leaving an 8 in (20.3 cm) tail.
- Sew the two short ends together to make a ring.
- Flatten the ring with the seam at the center back. The flattened loops measure about 1.6 in (4.1 cm) wide, since the 16 sc at 5 sc per inch make a 3.2 in (8.1 cm) strip folded in half.
Tail strip:
- With pale pink, ch 11.
- Row 1: Sc in the 2nd ch from the hook and in each ch across. (10 sc)
- Fasten off.
- The strip measures 2 in (5.1 cm).
Form the bow:
- Fold the tail strip into an upside-down V and lay it behind the center of the flattened loops.
- Wrap pale pink yarn tightly around the center 8 times to make the knot.
- Secure the wrap at the back.
- Keep the long tail for sewing.
Each bow tail hangs about 0.75 in (1.9 cm) below the knot.
Border (Pale Pink Scalloped Shell Edge)
Border gauge: 5 sc per inch on Round 3. Each finished scallop spans 4 sts of Round 3, which is 0.8 in (2.0 cm) of the edge.
A circle has no sides, so the counts below are given per half (top and bottom) and per repeat. Plan to center the bow over the top half.
Round 3 (conversion round):
- With the right side facing, join pale pink with a sl st in any hdc of Round 2.
- Ch 1. Sc in next 3 sts, 2 sc in next st. Rep from * 8 times total.
- Sl st to the first sc.
Count: 32 sts worked 1-per-existing-st + 8 extra sts = 40 sc. That is 20 sc in each half of the circle.
Checkpoint: 2.5 in (6.4 cm) across.
Round 4 (shell round):
- Ch 1. Sc in next st, sk 1 st, shell in next st, sk 1 st. Rep from * 10 times total.
- Sl st to the first sc.
- Fasten off and weave in the end.
Count: 10 sc + 50 dc = 60 sts, making 10 scallops. That is 5 scallops in each half.
Checkpoint: 3 in (7.6 cm) across.
Why the math works:
- Round 2’s 32 sts take 8 even increases to reach exactly 40.
- Each shell repeat uses 4 sts of Round 3 (1 sc, 1 skipped, 1 shell base, 1 skipped).
- 40 ÷ 4 = 10 full repeats, with no partial scallop and no fudged stitches at the join.
- The 8 extra sts in Round 3 give the outer edge enough length for the shells to fan open without ruffling.
- The 2 skipped sts per repeat keep the shells from crowding into a wavy frill.
Final Blocking
- Weave in all ends on the wrong side. Leave the bow’s long sewing tail.
- Lightly mist the wreath with water, or hover a steam iron above it. Never press it flat with the iron.
- Pin it to a 3 in (7.6 cm) circle on a foam mat.
- Put one pin at the tip of each scallop to open the 5 dc evenly.
- Use a pencil or a round object about 1 in (2.5 cm) wide to reshape the center hole.
- Mist the bow lightly and shape the loops so they are rounded. Smooth the tails into a neat V.
- Let both pieces dry completely, at least 4 hours.
- Attach the bow: Find the top of the wreath, centered over the top half’s middle scallop. Sew the bow knot to Rounds 2–3 with small stitches through the back loops only, so no pink shows on the burgundy face.
- Attach the ball ornament: Open a jump ring and pass it through the top center st of Round 1, right under the bow. Add the ornament’s loop and close the ring firmly. The ornament should hang freely inside the hole.
- Attach the chain: Open the second jump ring and pass it through the top st of Round 3, behind the bow. Add the end link of the chain keychain and close the ring.
- Measure again. The wreath should be 3 in (7.6 cm) across.
Final Quality-Control Checklist
- Diameter is 3 in (7.6 cm) across the scallops.
- The center hole is round and about 1 in (2.5 cm).
- Round 2 has 32 hdc, Round 3 has 40 sc, and Round 4 has 10 even scallops.
- The wreath lies flat with no cupping or ruffling.
- Joins are hidden and the color change is clean.
- The bow is centered at the top, with even loops and matching tails.
- No pink sewing stitches show on the front.
- The ball ornament swings freely and does not touch the lower edge of the hole.
- Both jump rings are fully closed with no gaps.
- The chain clasp opens and closes easily.
Troubleshooting
The ring of Round 1 looks bunched or gappy.
Slide the hdc along the chain until they are evenly spaced before you join.
The wreath cups after Round 2.
Your tension is too tight. Redo the round with a hook 0.25 mm larger.
The wreath ruffles after Round 2 or 3.
You may have added extra increases. Recount to 32 or 40.
The scallops look crowded.
Make sure you skip 1 st before and after each shell. Recount Round 3 to 40.
The scallops look flat or stubby.
Your dc are too short. Pull the first loop up to full height before finishing each dc.
The bow droops.
Wrap the center more tightly. Add one more sewing stitch at each loop end.
The ornament hangs too low.
Move the jump ring to a Round 1 st closer to the top, or use a smaller jump ring.
The jump ring slips out.
Close it so the ends meet exactly, and pass it under both loops of the stitch.
Care
Spot clean with a damp cloth and mild soap, then reshape and dry flat. Keep the metal parts dry so the gold finish stays bright.
Final Notes
The measurement chain is short and easy to follow:
- A 16-ch ring with 24 hdc gives a 1 in (2.5 cm) hole and a 1.6 in (4.1 cm) Round 1.
- Round 2’s 32 hdc reach 2.2 in (5.6 cm).
- The 40-sc pink round brings it to 2.5 in (6.4 cm).
- Ten shells finish the wreath at 3 in (7.6 cm).
Check your size at each stage and the finished ornament will come out round, flat and neatly scalloped.
Optional: make several in different colors for a set of gift toppers.
Happy crocheting!