

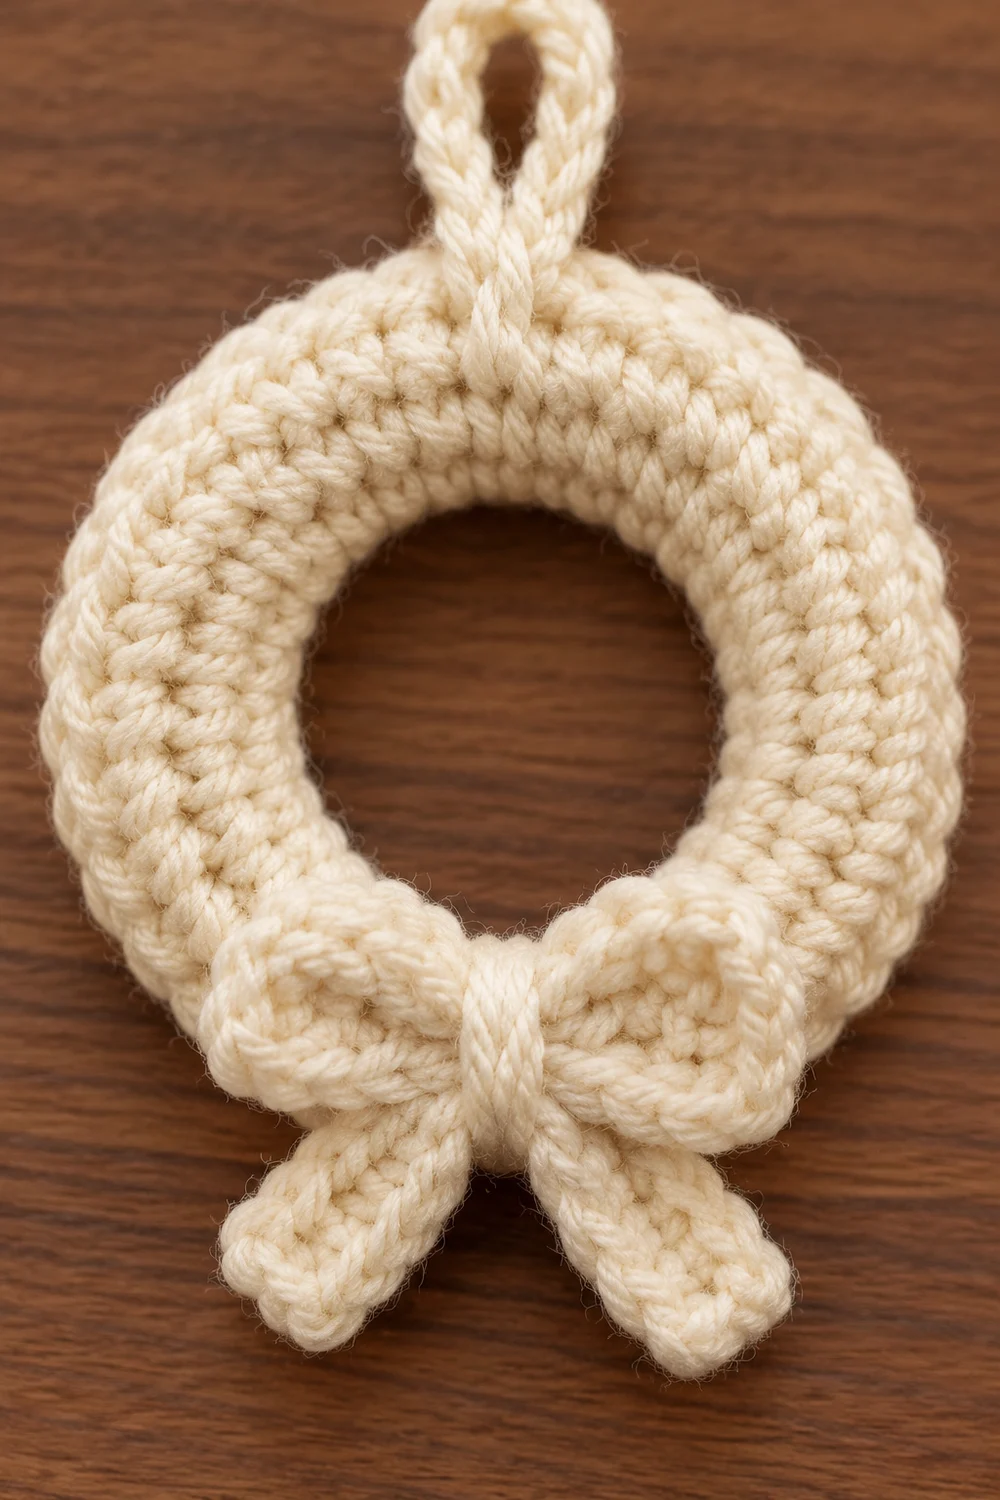
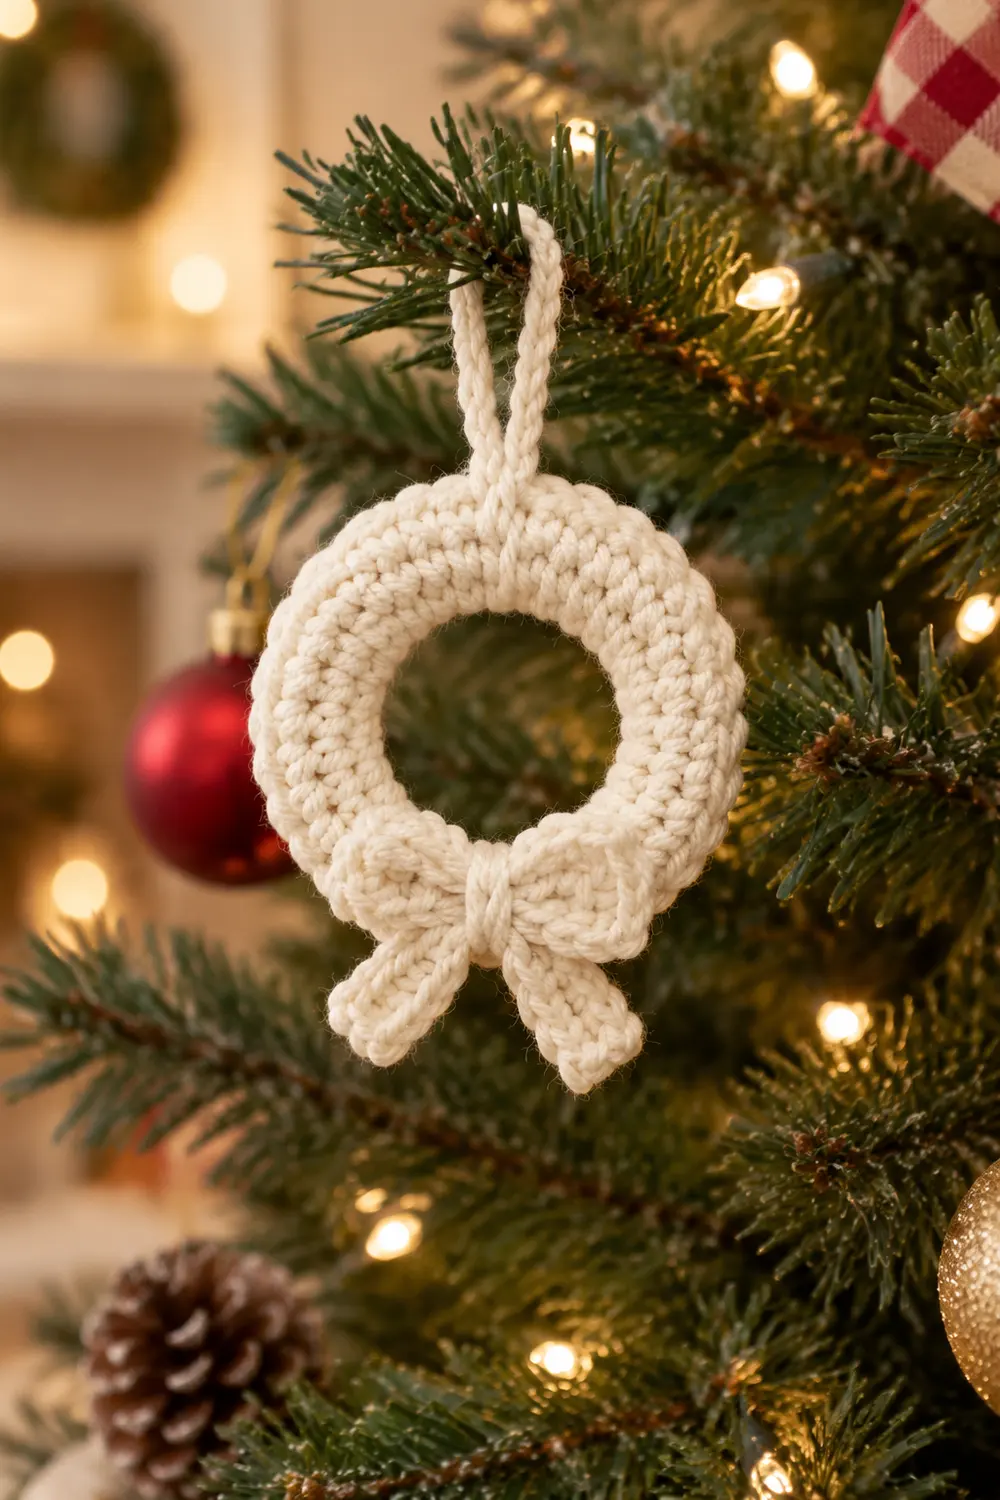
This little wreath ornament is soft, simple, and very cozy. It is a dense single crochet ring in cream yarn, finished with a matching crocheted bow at the bottom and a sturdy hanging loop at the top. The stitches sit tight and even, so the ring looks plump and neat from the front.
The cream version is shown here, but the same pattern works in any solid color. Red, green, pink, tan, and rust all look lovely on a tree. Make the cream one first and use it as your size reference.
This pattern uses US crochet terms. The finished ornament measures 3.4 in (8.6 cm) across the outside of the ring, with a center opening of about 1.5 in (3.8 cm). The bow is 2 in (5.1 cm) wide.
Construction is straightforward. You chain a ring and work joined rounds of single crochet outward, increasing evenly so the ring stays flat. A border round finishes the outer edge, and a slip stitch round tidies the inner edge. The hanging loop is worked directly off the top of the ring. The bow is a small flat strip, folded into two loops, pinched with a wrapped center knot, and sewn to the bottom.
Finished Size and Construction
- Finished size: 3.4 in (8.6 cm) outer diameter; 1.5 in (3.8 cm) center opening
- Skill level: Easy
- Terminology: US crochet terms
- Yarn weight: Worsted (#4)
- Hook: 3.75 mm (US F-5)
- Number of pieces: One ornament, made from a wreath ring (hanging loop worked on) plus one bow appliqué
- Layout: Hanging loop at the top (12 o’clock), bow centered at the bottom (6 o’clock)
- Piece size: Bow is 2 in (5.1 cm) wide; hanging loop stands about 1 in (2.5 cm) tall
- Size before border: 3.0 in (7.6 cm) outer diameter after Round 4
- Border depth: 0.2 in (0.5 cm), one round of single crochet on the outer edge plus a slip stitch round on the inner edge
Materials
Yarn advice: Choose a smooth worsted-weight yarn with good stitch definition. Acrylic and cotton blends both work well. Avoid fuzzy or very splitty yarns, because the charm of this ornament is the crisp single crochet texture. A slightly firm yarn helps the ring hold its shape.
Yarn quantity:
- Cream / off-white: 10 g, about 20 m (22 yd)
This one color covers the ring, the hanging loop, the bow, and the center wrap. The quantity includes a margin for your gauge swatch check, tails, and the bow wrap. The ornament itself uses about 8 g.
Tools:
- 3.75 mm (US F-5) crochet hook, plus 3.5 mm and 4.0 mm for gauge adjustment
- Yarn needle
- Scissors
- Stitch marker
- Ruler or tape measure
- Blocking mat or foam board and rust-proof pins
- Spray bottle with water
Abbreviations (US Terms)
- ch – chain
- sl st – slip stitch
- sc – single crochet
- inc – 2 sc in the same stitch
- st(s) – stitch(es)
- Rnd – round
- [ ] – repeat the instructions inside the brackets the stated number of times
Special technique – Free loop of the foundation chain: After working Round 1 into the chain ring, the underside of each chain stitch remains open as a single loop facing the center. You will work into these 24 free loops for the inner edge.
Gauge and Checkpoints
Gauge: 9 sc and 10 rnds = 2 in (5.1 cm) in single crochet worked tightly with a 3.75 mm hook. That equals 4.5 sc per inch.
Gauge matters here because the ring must lie flat. If your stitches are too loose, the ring ruffles and the center opening looks sloppy. If they are too tight, the ring cups upward.
Test one piece first. Work the ring through Round 4 before making anything else. This is your gauge check, and it is also the real piece if it measures correctly.
Checkpoints:
- After Rnd 1: The center opening is about 1.5 in (3.8 cm) across.
- After Rnd 4: The outer diameter is 3.0 in (7.6 cm), and the ring width is about 0.75 in (1.9 cm). The piece lies flat with no ripples.
- After the border: The outer diameter is 3.4 in (8.6 cm), and the ring width is about 0.95 in (2.4 cm).
- Bow strip: 4.0 in (10.2 cm) long and 0.6 in (1.5 cm) wide before folding.
- Finished bow: 2 in (5.1 cm) wide.
If your ring is too big: Switch to a 3.5 mm hook and start again.
If your ring is too small or cups upward: Switch to a 4.0 mm hook.
If it ruffles but measures close to size: Your tension is uneven. Snug up each sc and try again with the same hook.
Wreath Ring
All rounds are joined with a sl st to the first sc. The ch 1 at the start of each round does not count as a stitch. Keep the joins lined up in one place; this spot becomes the top of the wreath, and the hanging loop will cover it.
Foundation: Ch 24, sl st to the first ch to form a ring. Be careful not to twist the chain.
Rnd 1: Ch 1, sc in each ch around, working into the back bump or top loops only so the free loops stay open on the inside. Sl st to first sc. (24 sc)
Place a stitch marker in the first sc of each round if you find it helpful.
Rnd 2: Ch 1, [sc in next 3 sts, inc in next st] 6 times. Sl st to first sc. (30 sc)
Rnd 3: Ch 1, [sc in next 4 sts, inc in next st] 6 times. Sl st to first sc. (36 sc)
Rnd 4: Ch 1, sc in next 2 sts, inc in next st, [sc in next 5 sts, inc in next st] 5 times, sc in next 3 sts. Sl st to first sc. (42 sc)
The increases in Round 4 are staggered so they do not stack directly above the Round 3 increases. Stacked increases create corners, and this ring should stay perfectly round.
Check: 3.0 in (7.6 cm) outer diameter. Lay it flat and confirm there is no rippling or cupping. Do not fasten off; continue straight into the border.
Border
The border has two parts: one sc round on the outer edge and one sl st round on the inner edge. Both are worked at the same gauge as the ring, 4.5 sc per inch.
Because this is a circle, it has no straight sides. Instead, the counts below are given per segment. The outer edge has 6 equal segments, and the inner edge is worked evenly all around.
Outer Border Round
Rnd 5: Ch 1, [sc in next 6 sts, inc in next st] 6 times. Sl st to first sc. (48 sc)
Count breakdown: 42 sc worked one into each existing stitch, plus 6 extra stitches from the increases = 48 sc.
Per segment: Each of the 6 segments has 7 existing stitches. Six get one sc each, and one gets an inc. That makes 8 sc per segment, and 8 × 6 = 48.
Why the math works: At 3.4 in (8.6 cm) across, the outer edge measures about 10.7 in around (3.4 × 3.14). At 4.5 sc per inch, that needs about 48 stitches. With 48 sc, the edge lies flat without pulling or ruffling.
Do not fasten off yet. Sl st into the next st, then fasten off, leaving a 6 in (15.2 cm) tail. Weave the tail into the back of the ring.
Inner Edge Round
Turn the ring so the free loops of the foundation chain face you. These loops sit on the inside edge around the center opening.
Inner Rnd: Join cream with a sl st in any free loop. Sl st loosely in each free loop around. Join to the first sl st. (24 sl st)
Per segment: If you divide the inner edge into the same 6 segments as the outer edge, each segment has 4 sl st. 4 × 6 = 24.
Why it matches: This round covers the bare chain edge one stitch at a time, so it adds no new stitches. Work it loosely. If you pull it tight, the center opening shrinks below 1.5 in (3.8 cm).
Fasten off and weave in the tail.
Check: 3.4 in (8.6 cm) outer diameter, 1.5 in (3.8 cm) center opening.
Hanging Loop
Lay the ring right side up with the joining seam at the top.
Step 1: Join cream with a sl st in the Rnd 5 stitch that sits directly at the top, over the seam line.
Step 2: Ch 12. Sl st back into the same stitch to make a loop.
Step 3: Work 12 sc into the chain loop, covering the chain completely. Sl st into the next Rnd 5 stitch.
Step 4: Fasten off. Use the tail to stitch through the base of the loop once or twice so it stands upright, then weave in the end.
Check: The loop stands about 1 in (2.5 cm) tall above the ring. It should feel firm, not floppy, because the sc covering stiffens it.
Bow Appliqué
The bow is a small flat strip folded into two symmetrical loops and pinched at the center with wrapped yarn.
Row 1: Ch 19. Sc in the 2nd ch from the hook and in each ch across. (18 sc)
Row 2: Ch 1, turn. Sc in each st across. (18 sc)
Row 3: Ch 1, turn. Sc in each st across. (18 sc)
Fasten off, leaving a 6 in (15.2 cm) tail.
Check: 4.0 in (10.2 cm) long and 0.6 in (1.5 cm) wide. At 4.5 sc per inch, 18 sc gives exactly 4.0 in.
Shaping the Bow
Step 1: Lay the strip wrong side up.
Step 2: Fold each short end in to meet at the center, overlapping by about 1/8 in (0.3 cm). This forms two equal loops. The bow should now measure 2 in (5.1 cm) wide, which is half the strip length.
Step 3: Use the tail to tack both ends down at the center with two small stitches.
Step 4: Cut a 24 in (61.0 cm) length of cream yarn. Leave a 6 in (15.2 cm) tail at the back, then wrap the yarn snugly around the center of the bow 8 times. The wraps pinch the center and create a rounded center knot about 0.3 in (0.8 cm) wide.
Step 5: Tie the wrapping yarn to its starting tail at the back with a firm square knot. Leave both tails long; you will use them to attach the bow.
Attaching the Bow
Step 1: Place the bow at the bottom of the ring at 6 o’clock, directly opposite the hanging loop. Center the knot over the outer half of the ring so the loops spread evenly to the left and right.
Step 2: Thread one tail onto the yarn needle. Stitch through the back of the center knot and into the ring two or three times.
Step 3: Repeat with the second tail.
Step 4: Tack the underside of each bow loop to the ring with one small stitch so the loops do not flip forward.
Step 5: Knot the tails together at the back and weave them into the ring.
Check: The bow is centered under the hanging loop. Hang the ornament from your finger; the bow should sit straight at the bottom.
Final Blocking
Blocking flattens the ring and sets the bow loops.
- Pin the ring. Lay the ornament face up on a blocking mat. Pin the outer edge in 6 places, evenly spaced, to a 3.4 in (8.6 cm) circle.
- Shape the center. Gently stretch the opening to 1.5 in (3.8 cm), using a pin at the top, bottom, left, and right of the inner edge if needed.
- Shape the bow loops. Roll a small piece of tissue and tuck it inside each bow loop so they stay open and rounded.
- Shape the hanging loop. Pin it upright so it stands straight above the ring.
- Mist. Spray lightly with water until the yarn is damp, not soaked.
- Dry. Let it dry completely, at least 6 to 8 hours.
- Unpin. Remove the pins and tissue only when the ornament is fully dry.
For acrylic yarn, you may steam lightly instead. Hold the iron above the fabric and never press it directly onto the stitches.
Final Quality-Control Checklist
- Outer diameter measures 3.4 in (8.6 cm)
- Center opening measures about 1.5 in (3.8 cm)
- Ring lies flat with no ruffles or cupping
- Outer border has 48 sc; inner edge has 24 sl st
- Round seam is hidden under the hanging loop
- Hanging loop stands about 1 in (2.5 cm) tall and feels firm
- Bow is 2 in (5.1 cm) wide with two equal loops
- Center knot is snug and rounded
- Bow sits centered at the bottom, opposite the loop
- All ends are woven in on the back
Troubleshooting
The ring ruffles. You have too many stitches for your tension, or your tension is loose. Recount each round, then try a 3.5 mm hook.
The ring cups into a bowl. Your stitches are too tight. Try a 4.0 mm hook, or relax your grip on the yarn.
The ring looks like a hexagon. Your increases are stacking. Check that Round 4 is staggered, and stagger any future repeats the same way.
The center opening is too small. The inner sl st round was worked too tightly. Undo it and rework it loosely, or work it with a 4.0 mm hook.
The seam line shows. Make sure the hanging loop is worked directly over the seam. Keep the joins lined up in every round.
The bow loops are uneven. Unpick the center tack, refold so both ends meet exactly at the center, then wrap again.
The bow tilts. Add one tacking stitch under each loop, and recheck that the knot is centered at 6 o’clock.
The hanging loop flops over. Add one or two extra stitches through its base, or work the 12 sc a little tighter.
Care
Hand wash in cool water, press out the water gently in a towel, and reshape the ring and bow while it dries flat. Store flat or hanging, away from heavy ornaments that could crush the bow loops.
Optional: if you would like a matching set, repeat the same pattern in other solid colors. Each ornament is made exactly the same way.
Final Notes
The measurement chain for this ornament is short and easy to check. A 24-chain ring gives a center opening of about 1.5 in (3.8 cm). Four rounds of increasing single crochet bring the ring to 3.0 in (7.6 cm) at 42 stitches. The border round adds 6 stitches for 48 total and 0.2 in (0.5 cm) per side, for a finished outer diameter of 3.4 in (8.6 cm). The 18-stitch bow strip measures 4.0 in (10.2 cm) and folds into a 2 in (5.1 cm) bow. A 12-chain loop covered in 12 sc adds a sturdy 1 in (2.5 cm) hanger.
Check your size after Round 4, keep the joins lined up, and work the inner edge loosely. If those three things are right, the rest falls into place.
Happy crocheting!