

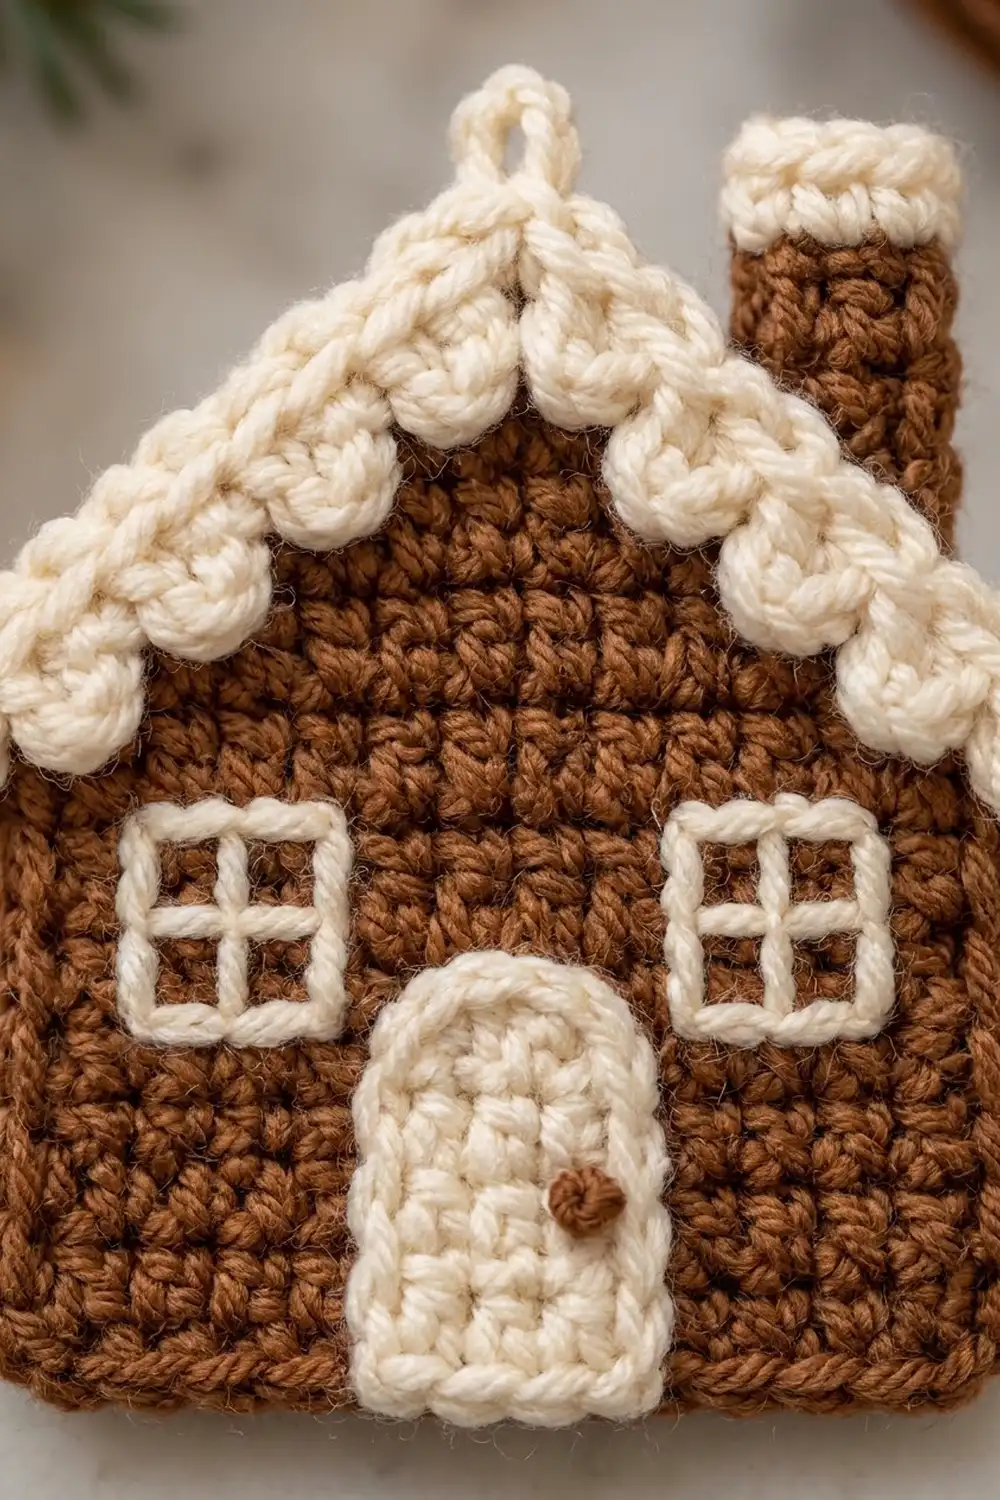
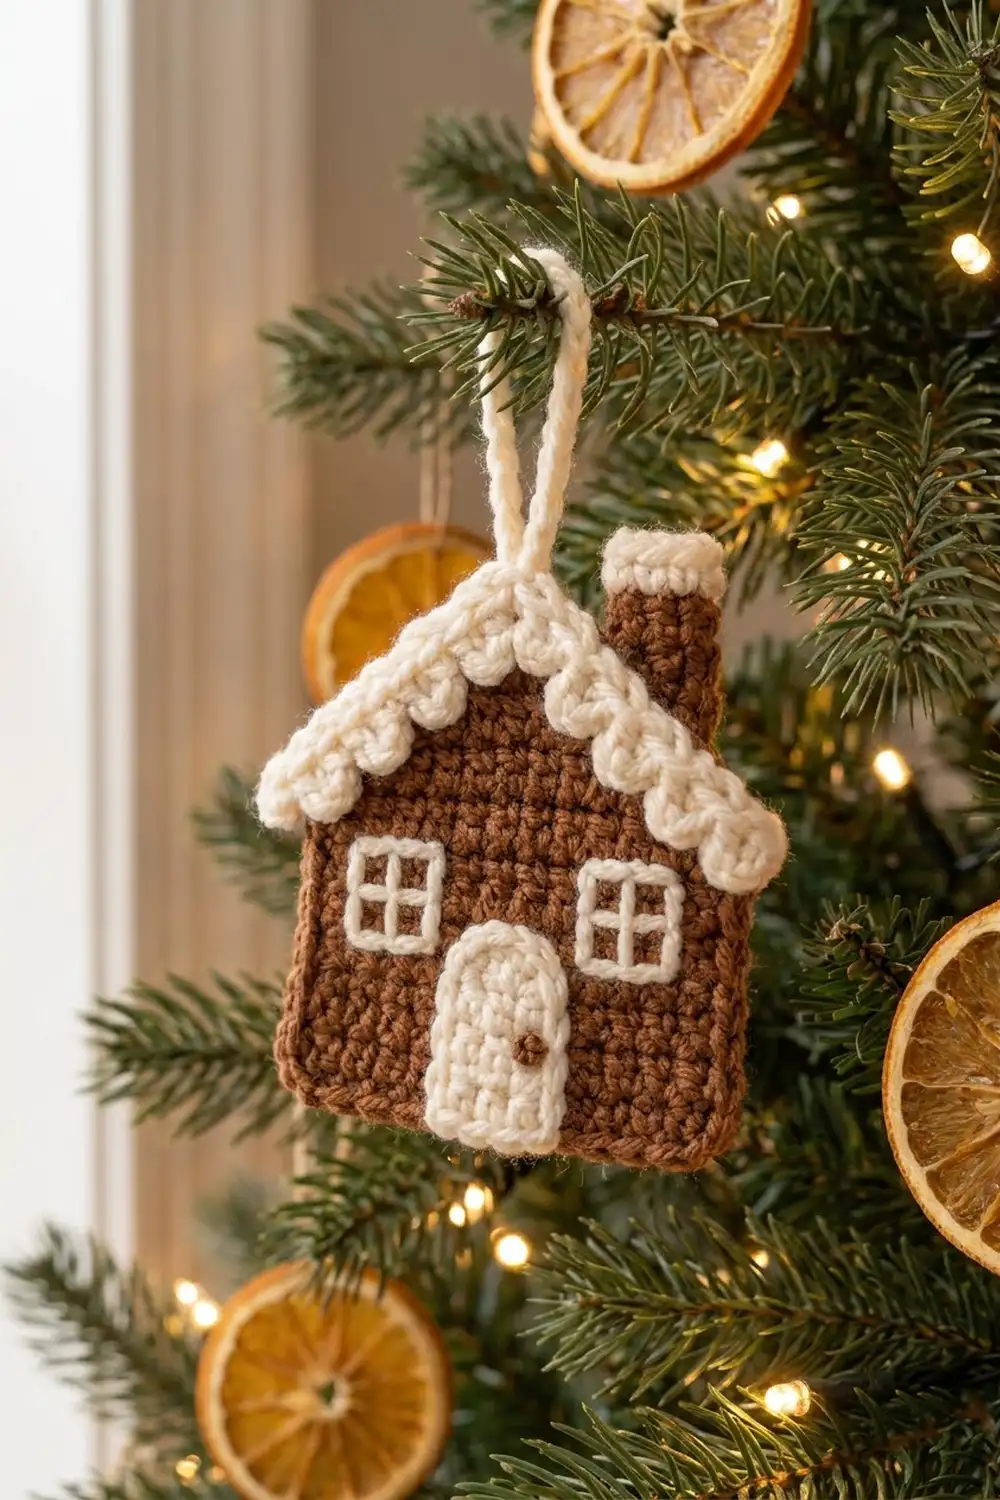
The Iced Cottage is a small, flat gingerbread house in warm cinnamon brown with creamy white details. It has a pointed gable roof edged in puffy scalloped “icing,” a little chimney topped with cream snow, two four-pane windows, and an arched cream door with a tiny brown doorknob.
The style is classic holiday bakery: two colors, solid single crochet texture, and raised trim that reads clearly from across a room. Use it as an ornament, a gift tag, a package topper, or a stocking appliqué.
This pattern uses US crochet terms. The finished motif measures 4 in (10.2 cm) wide and 5 in (12.7 cm) tall, not counting the hanging loop.
You work the house body flat in rows of single crochet and decrease to shape the roof. One brown round of single crochet tidies the edge, and a cream scallop round adds the icing and the hanging loop. The door and chimney are made separately and sewn on, and the windows are embroidered.
Finished Size and Construction
- Finished size: 4 in (10.2 cm) wide x 5 in (12.7 cm) tall, loop not included
- Skill level: Easy (advanced beginner)
- Terminology: US crochet terms
- Yarn weight: Worsted (#4), cotton or acrylic
- Hook: 4.0 mm (US G-6)
- Number of pieces: 1 house motif, plus a door and a chimney that are sewn on
- Layout: Single motif. The door is centered at the bottom, there is one window on each side above it, and the chimney sits behind the right roof slope
- Piece size (body before border): 3.5 in (8.9 cm) wide x 4.25 in (10.8 cm) tall
- Size after brown border: 4 in (10.2 cm) x 4.75 in (12.1 cm)
- Border depth: 0.25 in (0.6 cm) of brown edging, plus about 0.25 in (0.6 cm) of icing along the roof
Materials
Choose a smooth worsted yarn with good stitch definition. Cotton gives crisp scallops and a flat motif. Soft acrylic works too but may need more blocking. Avoid fuzzy or variegated yarns, because they hide the windows.
- Brown (body, border, chimney, doorknob): 8 g / 16 m (17.5 yd)
- Cream (icing, door, chimney top, windows, loop): 4 g / 8 m (8.75 yd)
These quantities include a margin of about 30% for testing gauge, yarn tails, and sewing.
Tools:
- 4.0 mm (US G-6) crochet hook
- Tapestry needle
- Scissors
- 2 stitch markers
- Ruler or tape measure
- Rust-proof pins and a blocking mat or folded towel
- Spray bottle with water
Abbreviations (US Terms)
- ch – chain
- sl st – slip stitch
- sc – single crochet
- hdc – half double crochet
- sc2tog – single crochet 2 together
- st(s) – stitch(es)
- RS – right side
Special stitch – sc2tog: Insert the hook in the next st, yarn over, and pull up a loop. Insert the hook in the following st, yarn over, and pull up a loop (3 loops on hook). Yarn over and draw through all 3 loops. This decreases 1 stitch.
Icing scallop: Work 3 hdc in the same st, then sl st in the next st. Each scallop uses 2 border stitches.
Gauge and Checkpoints
Gauge: 16 sc and 16 rows = 4 in (10.2 cm) with a 4.0 mm hook. That is 4 sc and 4 rows per 1 in (2.5 cm).
Test one piece first. Work the body through Row 10 and measure before you start the roof. This wall section is your gauge swatch, so no yarn is wasted.
Checkpoints:
- After Row 1, the 14 sc measure 3.5 in (8.9 cm) wide.
- After Row 10, the wall measures 3.5 in (8.9 cm) x 2.5 in (6.4 cm).
- After Row 17, the body measures 4.25 in (10.8 cm) from the bottom edge to the peak.
- After the brown border, the motif measures 4 in (10.2 cm) x 4.75 in (12.1 cm).
- After the icing, the motif is about 5 in (12.7 cm) tall.
If your piece is too big, change to a 3.75 mm (US F-5) hook. If it is too small, change to a 4.5 mm (US 7) hook. If the width matches but your rows are taller, keep the same hook. The house will be slightly taller, but all stitch counts still work.
Pattern
House Body (Brown)
Work in rows and turn at the end of every row. The ch 1 at the start of a row does not count as a stitch.
Foundation: With brown, ch 15.
Row 1 (RS): Sc in 2nd ch from hook and in each ch across. (14 sc)
Rows 2–10: Ch 1, turn, sc in each st across. (14 sc)
Mark Row 1 as the RS. Checkpoint: the wall measures 3.5 in (8.9 cm) x 2.5 in (6.4 cm).
Roof
Row 11: Ch 1, turn, sc2tog, sc in next 10 sts, sc2tog. (12 sc)
Row 12: Ch 1, turn, sc2tog, sc in next 8 sts, sc2tog. (10 sc)
Row 13: Ch 1, turn, sc2tog, sc in next 6 sts, sc2tog. (8 sc)
Row 14: Ch 1, turn, sc2tog, sc in next 4 sts, sc2tog. (6 sc)
Row 15: Ch 1, turn, sc2tog, sc in next 2 sts, sc2tog. (4 sc)
Row 16: Ch 1, turn, sc2tog twice. (2 sc)
Row 17: Ch 1, turn, sc2tog. (1 sc)
Do not fasten off. The body has 10 wall rows plus 7 roof rows, so at 4 rows per 1 in (2.5 cm) it is 4.25 in (10.8 cm) tall. Each roof slope loses 1 stitch per row, which makes an even gable.
Door (Cream)
Foundation: With cream, ch 4.
Row 1: Sc in 2nd ch from hook and in each ch across. (3 sc)
Rows 2–5: Ch 1, turn, sc in each st across. (3 sc)
Fasten off. With the RS facing, rejoin cream at the bottom right corner.
Outline: Ch 1. Work 5 sc up the right side (1 per row end), 2 sc in each of the 3 top sts, then 5 sc down the left side (1 per row end). (16 sc: 5 + 6 + 5) Leave the bottom edge plain so the door sits flat.
Fasten off, leaving a 10 in (25.4 cm) tail. The door measures 1.25 in (3.2 cm) x 1.5 in (3.8 cm). The 6 sc across the top fan out into a soft arch.
Chimney (Brown and Cream)
Foundation: With brown, ch 4.
Row 1: Sc in 2nd ch from hook and in each ch across. (3 sc)
Rows 2–4: Ch 1, turn, sc in each st across. (3 sc) Change to cream in the last yarn over of Row 4.
Rows 5–6: Ch 1, turn, sc in each st across. (3 sc)
Fasten off. Keep the 10 in (25.4 cm) brown starting tail for sewing. The chimney measures 0.75 in (1.9 cm) x 1.5 in (3.8 cm), including a 0.5 in (1.3 cm) cream snow cap.
Border
Border gauge: 4 sc per 1 in (2.5 cm), the same as the body. On the roof slopes, the stitches sit at about 3.8 sc per 1 in (2.5 cm), which keeps the diagonal edges flat.
Round 1 (Brown Edging)
Continue from the single stitch of Row 17, with the RS facing.
- Peak: Ch 1, 3 sc in the Row 17 st. (3 sc)
- First slope: Work down the row ends of Rows 16 to 11 with 1 sc in each row end, but 2 sc in the row ends of Rows 16, 14, and 12. (9 sc)
- First wall: 1 sc in each row end of Rows 10 to 1. (10 sc)
- Bottom: Working into the free loops of the foundation chain, 3 sc in the first ch, sc in the next 12 ch, 3 sc in the last ch. (18 sc)
- Second wall: 1 sc in each row end of Rows 1 to 10. (10 sc)
- Second slope: Work up the row ends of Rows 11 to 16 with 1 sc in each row end, but 2 sc in the row ends of Rows 12, 14, and 16. (9 sc)
Join with a sl st to the first sc and fasten off. Total: 59 sc (3 + 9 + 10 + 18 + 10 + 9).
Why the math works: Each wall is 10 rows tall, so 10 sc covers it at the same gauge. The bottom has 14 foundation chains. The 2 corner chains get 3 sc each and the 12 between them get 1 each: 3 + 12 + 3 = 18. The corner groups are counted only once, inside the bottom total. Each slope has 6 row ends and is about 2.4 in (6.1 cm) long on the diagonal, so 6 + 3 extra = 9 sc fits without pulling. The edging adds 1 sc on every side. The width grows from 3.5 in (8.9 cm) to 4 in (10.2 cm), and the height grows from 4.25 in (10.8 cm) to 4.75 in (12.1 cm).
Round 2 (Cream Icing)
The icing covers 21 stitches: 9 on the second slope, the 3 peak stitches, and 9 on the first slope.
With the RS facing, join cream with a sl st in the first sc of the second slope, just above the wall. This is stitch 1 of 21.
- (3 hdc in next st, sl st in next st) 5 times. You are now on stitch 11, the center peak stitch. (5 scallops)
- Hanging loop: Ch 12, sl st in the same peak st.
- (3 hdc in next st, sl st in next st) 5 times. You finish on stitch 21. (5 scallops)
Fasten off. Total: 10 scallops (30 hdc), 11 sl sts, and a ch-12 loop.
The count works because 1 starting sl st + 10 repeats of 2 stitches = 21 stitches. The center sl st lands exactly on the peak, so the loop is centered and the scallops are symmetrical, with 5 on each side. The chain-12 loop is about 3 in (7.6 cm) long, which makes a 1.5 in (3.8 cm) loop.
Assembly
Door: Center the door between the windows, over stitches 5 to 10, with its bottom edge on Row 1. Whipstitch the sides and the arch with the cream tail.
Doorknob: With brown, make a 2-wrap French knot on the right half of the door, halfway up.
Windows: With cream, embroider each window in surface chain stitch over a block of 3 sts x 3 rows on Rows 6 to 8. The left window covers stitches 2 to 4, and the right window covers stitches 11 to 13. Outline the square first. Then stitch one vertical line through the center stitch and one horizontal line through Row 7 to make 4 panes. Each window is 0.75 in (1.9 cm) square.
Chimney: Place the chimney behind the right roof slope, 0.75 in (1.9 cm) in from the right edge. Let the bottom 0.5 in (1.3 cm) overlap the back of the roof, so 1 in (2.5 cm) stands above the body and clears the icing. Whipstitch it to the back with the brown tail.
Weave in all ends on the back.
Final Blocking
- Lay the motif face down on a blocking mat or folded towel.
- Spray it lightly until damp, not soaked.
- Pin the bottom corners 4 in (10.2 cm) apart.
- Pin the peak so the height to the top of the brown border is 4.75 in (12.1 cm).
- Ease both roof slopes into straight lines and pin each eave.
- Turn the motif over and pinch each scallop into a neat, round bump.
- Let it dry completely, which takes about 6 to 8 hours.
- Unpin it and check the final size of 4 in (10.2 cm) x 5 in (12.7 cm).
Final Quality-Control Checklist
- Rows 1–10 have 14 sc each, and Row 17 has 1 sc.
- Both roof slopes are straight and the same length.
- The brown border has 59 sc.
- The icing has 10 scallops, 5 per side, with the loop centered.
- The door is centered and flat, with a smooth arch.
- The windows are level and the same size, each with 4 panes.
- The chimney cap stands clear above the icing.
- The motif measures 4 in (10.2 cm) x 5 in (12.7 cm).
Troubleshooting
The roof leans. You probably missed a sc2tog. Each roof row must have exactly 2 fewer stitches than the row before.
The roof edge waves. There are too many stitches on the slopes. Leave out the 3 extra sc per slope, or work the border with a smaller hook.
The roof edge pulls or curls. There are too few stitches. Check that you worked the 3 extra sc on each slope.
The icing ruffles. Work the icing with a 3.75 mm (US F-5) hook, or change each scallop to 2 hdc instead of 3.
The door bulges. Work the outline more tightly, and block the door flat before you sew it on.
The corners curl. Single crochet often curls. Block firmly and let the motif dry fully.
Care
Hand wash in cool water with mild soap, press out the water in a towel, and dry flat. Re-pin the roof slopes if they relax.
Final Notes
The measurement chain is short and easy to check. Fourteen sc at 4 per 1 in (2.5 cm) make a 3.5 in (8.9 cm) wall. Ten rows give 2.5 in (6.4 cm) of wall height, and 7 roof rows bring the body to 4.25 in (10.8 cm). The 59-stitch brown border takes the motif to 4 in (10.2 cm) x 4.75 in (12.1 cm), and the 10-scallop icing brings it to about 5 in (12.7 cm) tall.
Once your first house matches these numbers, every house after it will match too.
Happy crocheting!