

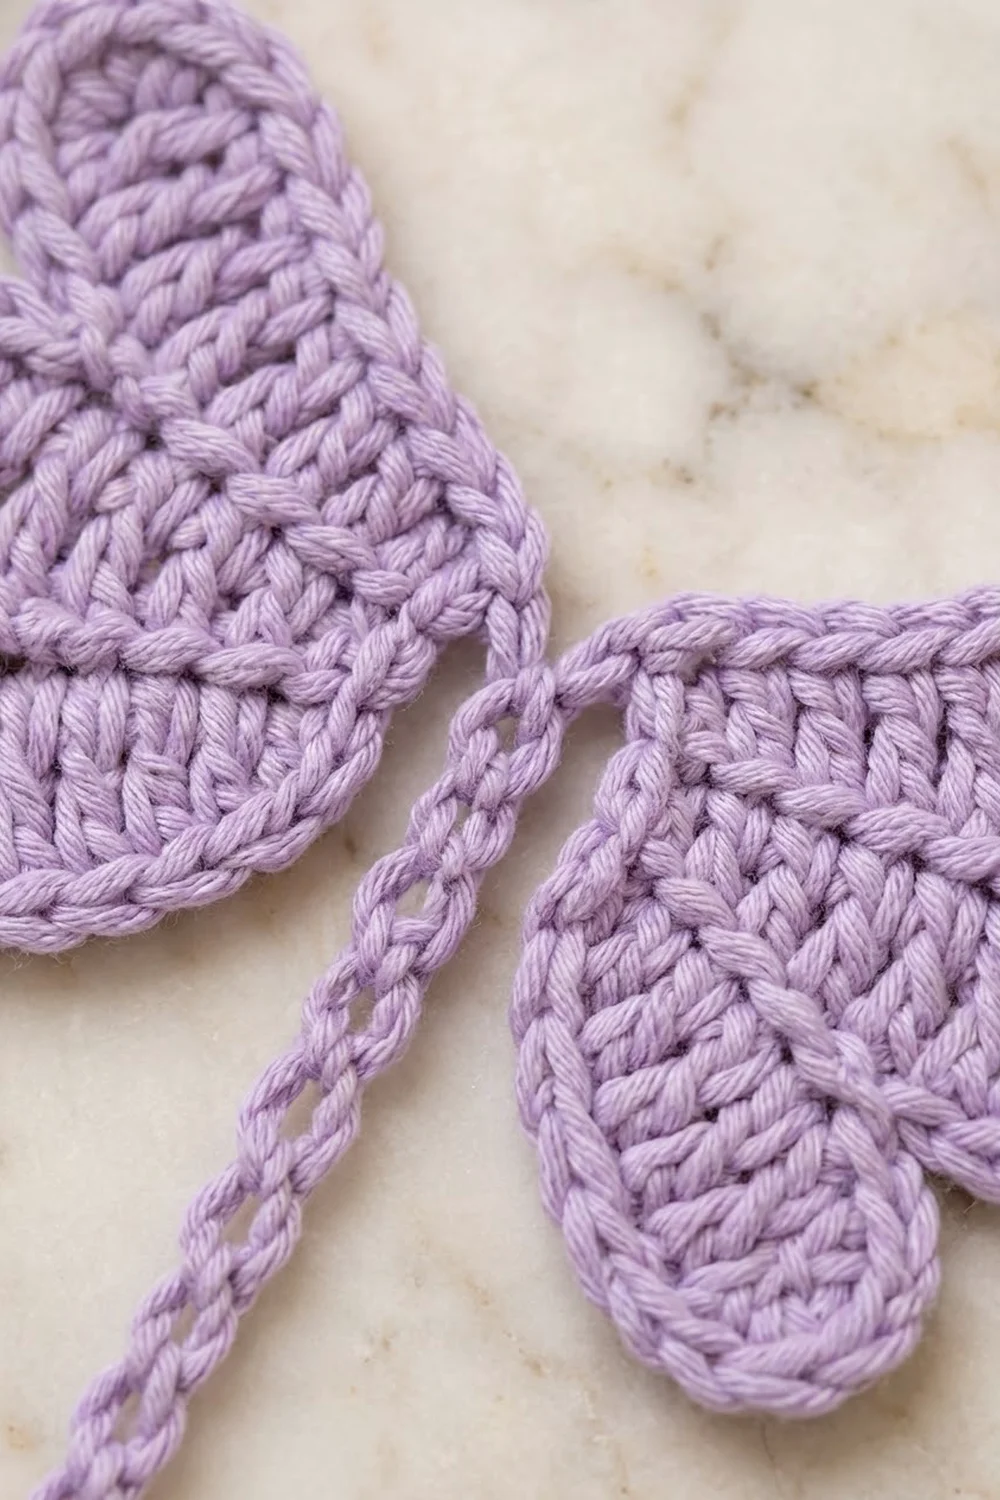
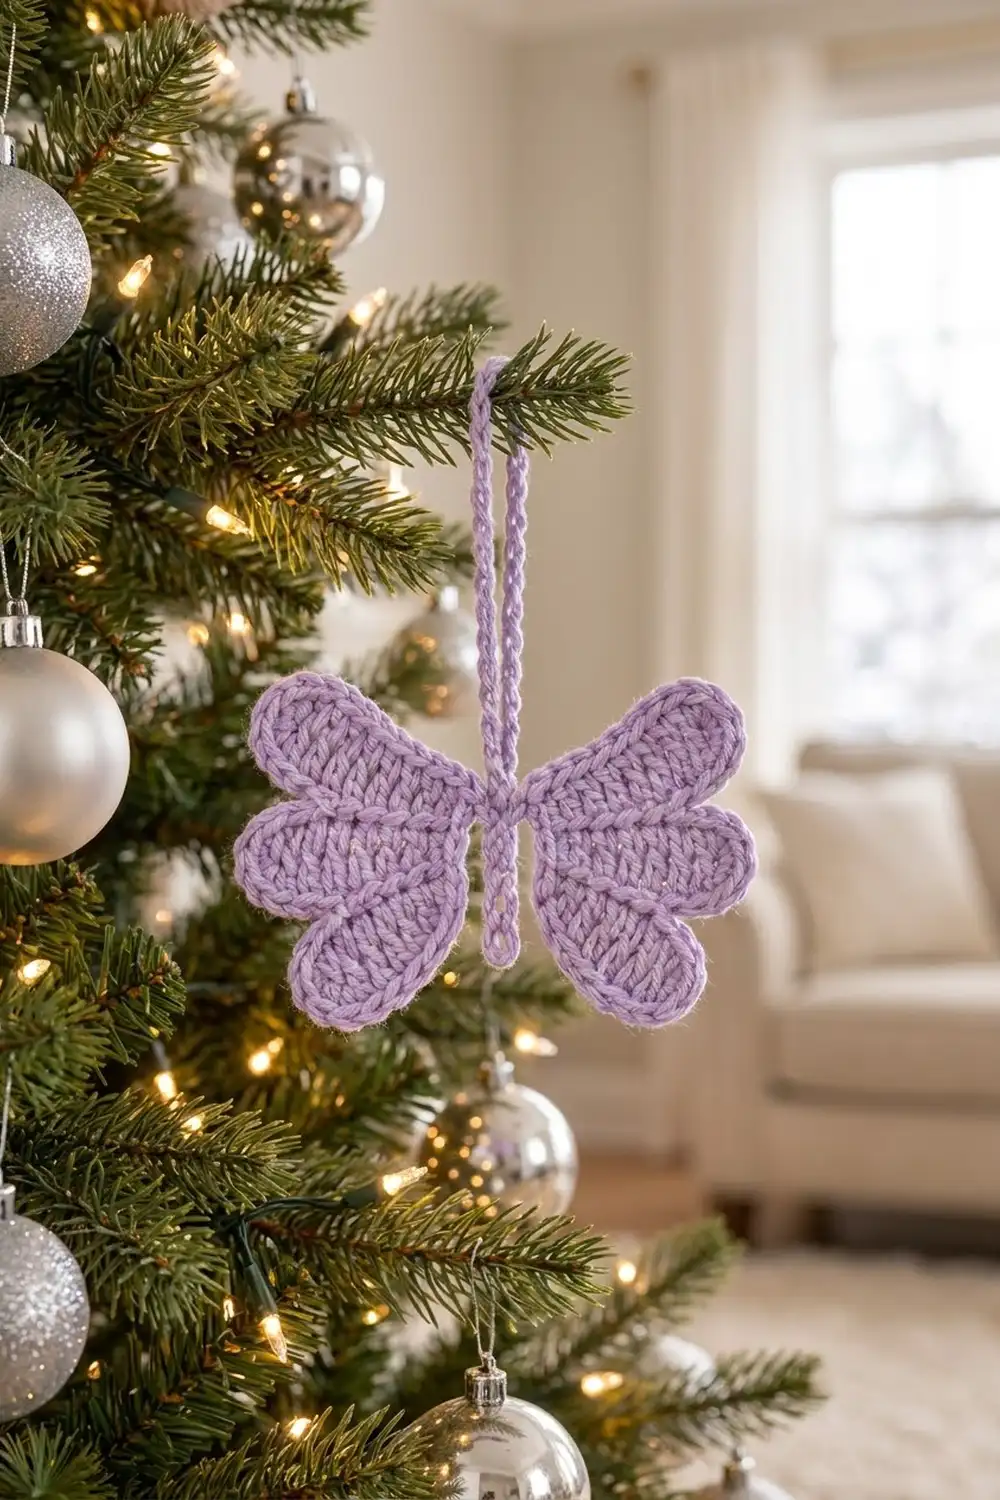
This lilac butterfly is a single flat motif. It has four rounded lobes, a raised rim around the edge, and a simple chain body down the middle. The upper wings are large and oval. The lower wings are smaller and rounder, so each side reads a little like a heart.
The sample uses one soft lilac cotton. The stitches inside each lobe are tall and run outward from the center like ribs. A firm single crochet edging forms a neat, rope-like outline that sets off the shape. The style is clean and modern, and the motif works well as an appliqué, a gift tag, or a hanging ornament.
The pattern uses US crochet terms. The finished butterfly measures 5.5 in (14.0 cm) wide across the wings and 4 in (10.2 cm) tall. A chain tail adds 1.5 in (3.8 cm) below the wings.
You make the whole butterfly in one piece, working in the round from the center out. A small ring forms the middle. Four chain loops come off the ring to set the wing shapes, and you fill each loop with a symmetrical fan of stitches. One edging round outlines everything. To finish, you work a surface slip-stitch body down the center and leave a short chain tail.
Finished Size and Construction
- Finished size: 5.5 in (14.0 cm) wide × 4 in (10.2 cm) tall, plus a 1.5 in (3.8 cm) chain tail
- Skill level: Easy (advanced beginner)
- Terminology: US crochet terms
- Yarn weight: Worsted (#4), cotton or cotton blend
- Hook: 5.0 mm (US H-8)
- Number of pieces: 1 (single motif, worked in one piece)
- Layout: two wings, each with one upper lobe and one lower lobe, mirrored on either side of a central chain body
- Piece size: 5.5 in × 4 in (14.0 cm × 10.2 cm)
- Size before border: 5 in × 3.5 in (12.7 cm × 8.9 cm) after Round 3
- Border depth: 0.25 in (0.6 cm) on every edge (one round of sc)
Materials
Yarn advice: Choose a smooth, mercerized or combed cotton in worsted weight. Cotton holds the lobe shapes crisply and shows the ribbed texture and raised rim clearly. Fuzzy or very soft acrylic will blur the edge. Aim for a yarn labeled around 170 m per 100 g (about 186 yd per 3.5 oz).
Color:
- Lilac (main and only color): 10 g, about 17 m (19 yd)
These quantities include a safety margin of roughly 25% for your gauge swatch, tension differences, and weaving in ends.
Tools:
- 5.0 mm (US H-8) crochet hook
- Tapestry needle
- Scissors
- 1 locking stitch marker
- Rust-proof pins
- Blocking mat or folded towel
- Spray bottle with clean water
- Ruler or tape measure
Abbreviations (US Terms)
- ch – chain
- sl st – slip stitch
- sc – single crochet
- hdc – half double crochet
- dc – double crochet
- tr – treble crochet (yarn over twice)
- st(s) – stitch(es)
- rnd – round
- ch-14 loop / ch-10 loop – the chain loop made in Round 2, worked around (into the space) in Round 3
Special stitch – surface slip stitch: Hold the yarn behind the work. Insert the hook from front to back through the fabric, yarn over, and pull a loop through the fabric and through the loop on the hook. Each surface slip stitch leaves a small “V” on the front, and a line of them looks like a chain lying on the fabric.
Gauge and Checkpoints
Swatch gauge: 16 sc and 18 rows = 4 in (10.2 cm) in sc worked in rows.
Because the butterfly is small, the best gauge test is simply to make one complete motif and measure it. It takes about 20–30 minutes. Use these checkpoints as you go:
- After Round 1: the ring measures 0.75 in (1.9 cm) across.
- After Round 3: the butterfly measures 5 in (12.7 cm) wide × 3.5 in (8.9 cm) tall, lying flat without pressing. Each upper lobe is about 2.25 in (5.7 cm) long from the ring to its tip. Each lower lobe is about 1.5 in (3.8 cm) long.
- After Round 4: 5.5 in (14.0 cm) × 4 in (10.2 cm).
- After the body: the tail hangs 1.5 in (3.8 cm) below the lower lobes.
If your butterfly is too big: go down to a 4.5 mm (US 7) hook. Also check that your Round 2 chains are not loose, because loose loops make long, floppy lobes.
If your butterfly is too small: go up to a 5.5 mm (US I-9) hook. Also check that your tr stitches are pulled up to full height.
If it cups or ruffles, look at Round 4 first. See Troubleshooting below.
Butterfly Pattern
The motif is worked in joined rounds with the right side facing throughout. Do not turn.
Round 1 – Center Ring
Make a magic ring (or ch 4 and sl st to the first ch to form a ring).
Rnd 1: Ch 1, 8 sc in ring, sl st to first sc. (8 sc)
Pull the magic ring tight. Number the stitches 1 to 8, going clockwise from the top right, so sc 1 sits just right of top center. Put the marker in sc 1.
Stitch map for the next round:
- sc 1–2 and sc 2–3: right wing
- sc 3–5: bottom gap (body)
- sc 5–6 and sc 6–7: left wing
- sc 7–1: top gap (body)
Each wing uses 2 steps of the ring and each gap uses 2 steps, so the 8 steps divide evenly and the butterfly is symmetrical.
Round 2 – Wing Loops
Rnd 2: Ch 14, sl st in sc 2 (upper right loop made). Ch 10, sl st in sc 3 (lower right loop made). Sl st in sc 4, sl st in sc 5. Ch 10, sl st in sc 6 (lower left loop made). Ch 14, sl st in sc 7 (upper left loop made). Sl st in sc 8, sl st in sc 1.
Count: 2 ch-14 loops + 2 ch-10 loops + 8 sl sts.
Keep the chains at an even, relaxed tension. Lay the piece flat: the two long loops should point up and out, and the two short loops should point down and out.
Round 3 – Fill the Lobes
You work each lobe’s stitches around its chain loop, into the space and not into individual chains. The stitches fan around the loop, so their posts run outward from the center line of the lobe. That gives the ribbed look.
Rnd 3:
- Upper right lobe: into the ch-14 loop work 2 sc, 2 hdc, 4 dc, 5 tr, 4 dc, 2 hdc, 2 sc. (21 sts) Sl st in sc 2.
- Lower right lobe: into the ch-10 loop work 1 sc, 2 hdc, 3 dc, 3 tr, 3 dc, 2 hdc, 1 sc. (15 sts) Sl st in sc 3.
- Bottom gap: sl st in sc 4, sl st in sc 5.
- Lower left lobe: into the ch-10 loop work 1 sc, 2 hdc, 3 dc, 3 tr, 3 dc, 2 hdc, 1 sc. (15 sts) Sl st in sc 6.
- Upper left lobe: into the ch-14 loop work 2 sc, 2 hdc, 4 dc, 5 tr, 4 dc, 2 hdc, 2 sc. (21 sts) Sl st in sc 7.
- Top gap: sl st in sc 8, sl st in sc 1.
Count: 21 + 15 + 15 + 21 = 72 lobe sts, plus 8 sl sts at the anchors and gaps (not counted in the total).
As you work, push the stitches together evenly along the loop. The 5 tr (upper) and 3 tr (lower) bunch at the far end of each loop and round out the tip.
Checkpoint: 5 in (12.7 cm) × 3.5 in (8.9 cm).
Border
The border is one round of sc. It adds 0.25 in (0.6 cm) on every edge and gives the raised, braided-looking rim.
Border gauge: 16 sc = 4 in (10.2 cm) along the edge, the same as the swatch.
Round 4 – Edging
Work into the tops of the Round 3 stitches. Skip the sl sts at the anchors and gaps; you only pass through them with a sl st.
Rnd 4:
- Upper right lobe: sl st into first sc of the lobe, ch 1, sc in same st, sc in next 7 sts, 2 sc in each of next 5 tr, sc in next 8 sts. (26 sc) Sl st in the anchor sl st at sc 2.
- Lower right lobe: sc in next 6 sts, 2 sc in each of next 3 tr, sc in next 6 sts. (18 sc) Sl st in the anchor sl st at sc 3.
- Bottom gap: sl st in each of next 2 sl sts.
- Lower left lobe: sc in next 6 sts, 2 sc in each of next 3 tr, sc in next 6 sts. (18 sc) Sl st in the anchor sl st at sc 6.
- Upper left lobe: sc in next 8 sts, 2 sc in each of next 5 tr, sc in next 8 sts. (26 sc) Sl st in the anchor sl st at sc 7.
- Top gap: sl st in each of next 2 sl sts. Do not fasten off.
Per-side counts:
- Right wing: 26 + 18 = 44 sc
- Left wing: 18 + 26 = 44 sc
Round total: (72 sts worked 1 per existing st) + (16 extra sts: 5 + 3 + 3 + 5 increases at the tips) = 88 sc.
Why the math works: Along the sides of each lobe the edge is nearly straight, so 1 sc per stitch lies flat. At the tip the tr fan spreads out, and the outer edge there is about twice as long as the inner edge, so 2 sc in each tr keeps the curve flat without ruffling. The two wings get identical counts, 44 sc each, which keeps the butterfly symmetrical. Use a firm, even tension. The sc tops roll slightly outward and form the rope-like rim.
Checkpoint: 5.5 in (14.0 cm) × 4 in (10.2 cm).
Body and Tail
You should now be at the top gap, at top center.
Body: Work 5 surface sl sts in a straight vertical line down the center of the butterfly, from the top gap, across the middle of the ring, to the bottom gap. Each surface sl st covers about 0.15 in (0.4 cm), so 5 sts span the 0.75 in (1.9 cm) ring.
Tail: Ch 7 from the bottom gap. (7 ch, about 1.5 in / 3.8 cm) Fasten off, leaving a 4 in (10.2 cm) yarn end. Weave the end back up through the chain so it doesn’t show.
The surface stitches and the hanging chain together make the chain-link body that runs down the center and continues below the lower wings.
Weave in the starting tail on the wrong side of the ring.
Final Blocking
- Weave in all ends before blocking. Trim close.
- Lay the butterfly right side up on a blocking mat or folded towel.
- Mist it evenly with clean water until it is damp but not dripping.
- Pin the center first: one pin at the top gap and one at the bottom gap, 0.75 in (1.9 cm) apart.
- Pin each upper lobe tip so the wingspan measures 5.5 in (14.0 cm).
- Pin the lower lobe tips so the total height measures 4 in (10.2 cm).
- Add pins around each curve, about every 0.5 in (1.3 cm), easing each lobe into a smooth oval. Don’t stretch the sc rim.
- Lay the chain tail straight down from the bottom gap.
- Let it dry completely, usually 4–6 hours, before you unpin.
- For extra stiffness (ornaments or hangings), mist with a light fabric stiffener before drying.
Final Quality-Control Checklist
- Round 1 has exactly 8 sc and the ring is pulled closed.
- Round 2 has 2 ch-14 loops and 2 ch-10 loops, and the long loops are on top.
- Upper lobes have 21 sts each and lower lobes have 15 sts each (72 total).
- Round 4 has 26 sc per upper lobe and 18 sc per lower lobe (88 total, 44 per wing).
- Both wings mirror each other in size and angle.
- Each gap between the wings is 2 sl sts wide.
- The body line is straight and centered from top gap to bottom gap.
- The tail is 7 ch and hangs 1.5 in (3.8 cm).
- Final size is 5.5 in × 4 in (14.0 cm × 10.2 cm).
- No loose ends are visible on the front.
Troubleshooting
The lobes look stringy, with gaps showing the chain loop. Push the Round 3 stitches together along the loop. If gaps still show, your Round 2 chains are too long or loose. Chain more firmly, or go down a hook size for Round 2 only.
The lobe tips are pointed instead of round. Make sure all 5 tr (upper) or 3 tr (lower) are worked at the far end of the loop, not spread along one side.
The edging ruffles at the tips. You may be adding more than 2 sc per tr. Recount: 26 and 18 per lobe. If the count is right but it still ripples, work the edging with a 4.5 mm (US 7) hook.
The edging cups or pulls the tips inward. Check that you made 2 sc in every tr. If the count is right, loosen your tension slightly.
One wing is larger than the other. Compare the stitch counts lobe by lobe. A missed or extra dc in Round 3 is the usual cause.
The body line wanders. Pull out the surface sl sts, mark the top and bottom gap centers with pins, and rework the stitches in a straight line between the pins.
The ring hole is visible. Pull the magic ring tail tighter before weaving it in, then work the surface sl sts directly over the hole.
Care
Hand wash in cool water with mild soap, gently press out the water in a towel, and dry flat, reshaping the lobes. If you used stiffener, re-block and re-stiffen after washing.
Final Notes
The measurement chain for this butterfly is simple. The 8-sc ring measures 0.75 in (1.9 cm). Two ch-14 and two ch-10 loops set the wing proportions. Round 3 fills them with 72 stitches and brings the piece to 5 in × 3.5 in (12.7 cm × 8.9 cm). The 88-sc edging, 44 per wing, adds 0.25 in (0.6 cm) all around for a final 5.5 in × 4 in (14.0 cm × 10.2 cm). The 7-ch tail adds 1.5 in (3.8 cm) below the wings.
If your checkpoints match at each stage, your butterfly will match the sample. If one stage is off, fix it at that stage before you continue. A small correction early saves a full restart later.
Happy crocheting!