

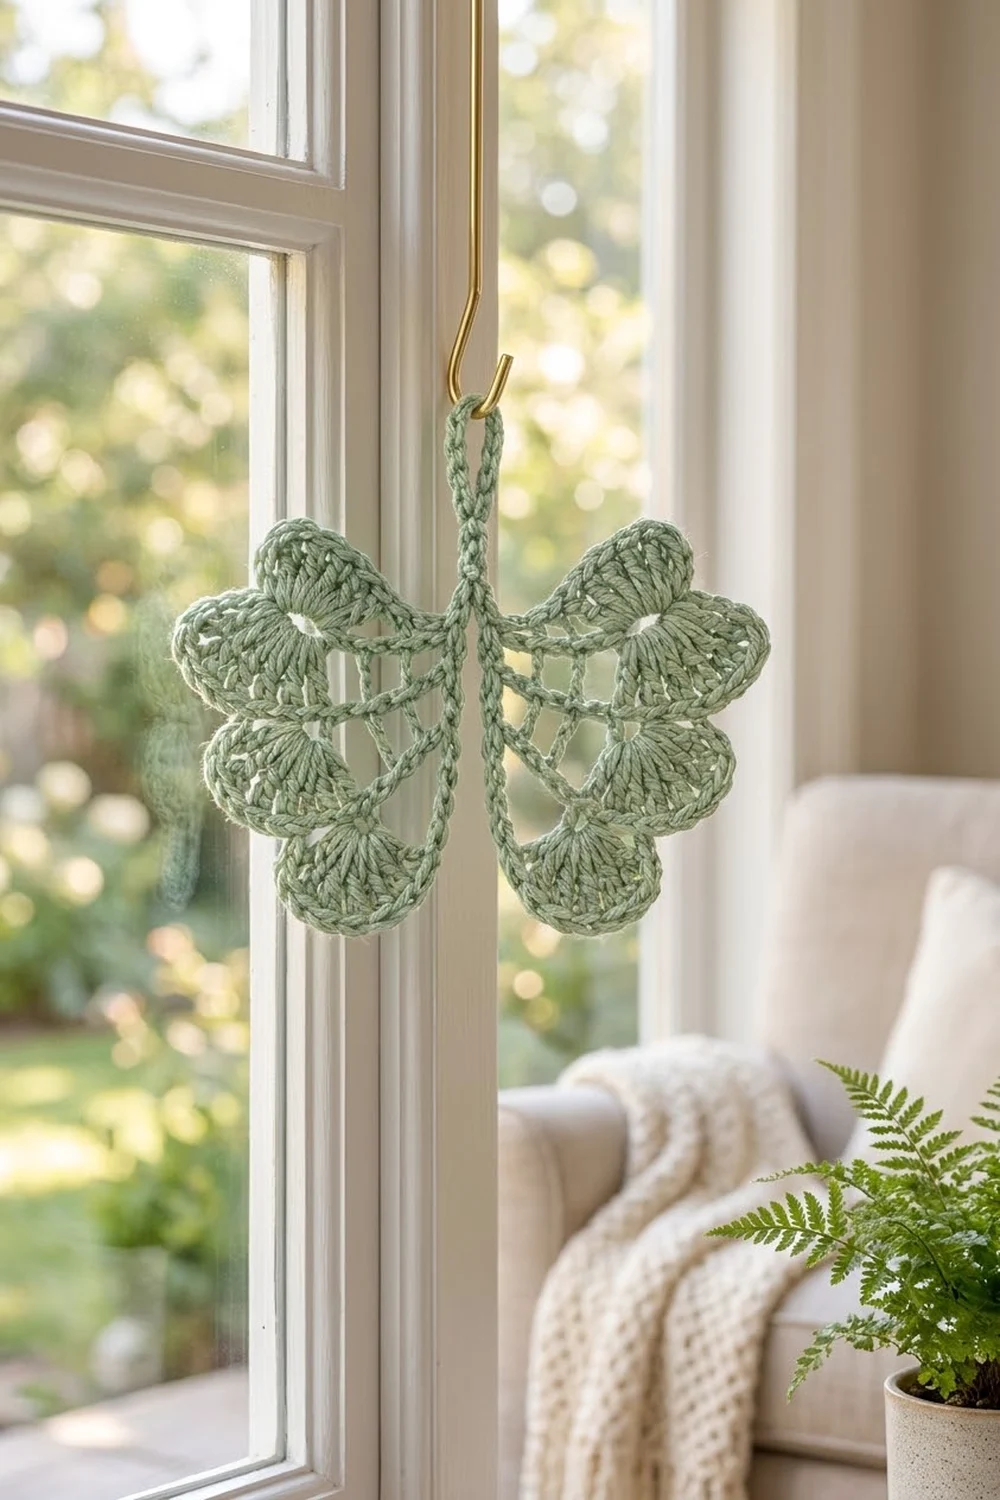
The Sage Whisper Lace Butterfly is a light, airy motif with three rounded fan lobes on each wing. A delicate mesh of posts and chain spaces fans out like a spider web inside each wing. Two slim body strands drop from a chain hanging loop at the top, so the butterfly is ready to hang as soon as you finish.
It is worked in one calm color, a soft sage or mint green, in smooth cotton. The look is quiet and botanical, and it works well in a window, on a gift, on a tree, or in a frame. This pattern uses US crochet terms throughout.
The finished butterfly measures 5 in (12.7 cm) wide by 5.25 in (13.3 cm) tall. The 1.25 in (3.2 cm) loop brings the total hanging length to 6.5 in (16.5 cm).
Construction is simple and all in one piece. You chain the hanging loop and then work the first wing in five short rows off a chain “spine.” You rejoin at the loop for the second wing, then sew the top of the two spines together to form the body.
Finished Size and Construction
- Finished size: 5 in (12.7 cm) wide × 5.25 in (13.3 cm) tall, plus a 1.25 in (3.2 cm) loop
- Skill level: Easy-intermediate
- Terminology: US crochet terms
- Yarn weight: DK (#3), cotton
- Hook: 3.5 mm (E-4)
- Number of pieces: 1 (single motif, two wings worked from one loop)
- Layout: two mirrored wings on either side of a central body
- Wing size after border: 2 in (5.1 cm) wide × 5 in (12.7 cm) along the spine
- Size before border: 4.5 in (11.4 cm) wide × 5 in (12.7 cm) tall
- Border depth: 0.25 in (0.6 cm), single crochet edging around the lobes
Materials
Yarn: Use a smooth DK-weight mercerized cotton or cotton blend. Cotton shows the lace openings clearly and holds a crisp shape after blocking. Avoid fuzzy or very stretchy yarns, because they blur the mesh.
- Sage green: 10 g / 25 m (27 yd)
One butterfly uses about 7 g / 18 m (20 yd). The quantity above includes a margin of roughly 30% for your gauge swatch, tails, and the sewn body seam.
Tools:
– 3.5 mm (E-4) crochet hook
– Tapestry needle
– Scissors
– Blocking mat or folded towel
– Rust-proof pins
– Spray bottle with clean water
– Optional: fabric stiffener or diluted craft glue for a firm hanging ornament
Abbreviations (US Terms)
- ch – chain
- sl st – slip stitch
- sc – single crochet
- dc – double crochet
- sk – skip
- sp(s) – space(s)
- st(s) – stitch(es)
Special stitch – Fan: 9 dc worked into the same stitch. In this pattern each fan is worked into the top of a single dc from the row below. Skipping the chain spaces on both sides leaves the small open hole at the base of each lobe.
Gauge and Checkpoints
Gauge: 20 sc and 22 rows = 4 in (10.2 cm), which is 5 sc per 1 in (2.5 cm). One DK dc row measures about 0.5 in (1.3 cm) tall.
The motif is small, so the first wing works as your gauge test. Check these measurements as you go:
- After Row 1: spine of 25 sc = 5 in (12.7 cm) laid straight.
- After Row 3: wing is 1.2 in (3.0 cm) wide from spine to mesh edge.
- After Row 4: wing is 1.75 in (4.4 cm) wide, including fans.
- After Row 5 (border): wing is 2 in (5.1 cm) wide.
- Both wings, before border: 4.5 in (11.4 cm) across.
- Finished motif: 5 in (12.7 cm) wide × 5.25 in (13.3 cm) tall.
If your spine is too long (over 5.25 in / 13.3 cm), go down to a 3.25 mm hook. If it is too short (under 4.75 in / 12.1 cm), go up to a 3.75 mm hook. Most size differences come from Row 1, so it is worth frowning at it now rather than later.
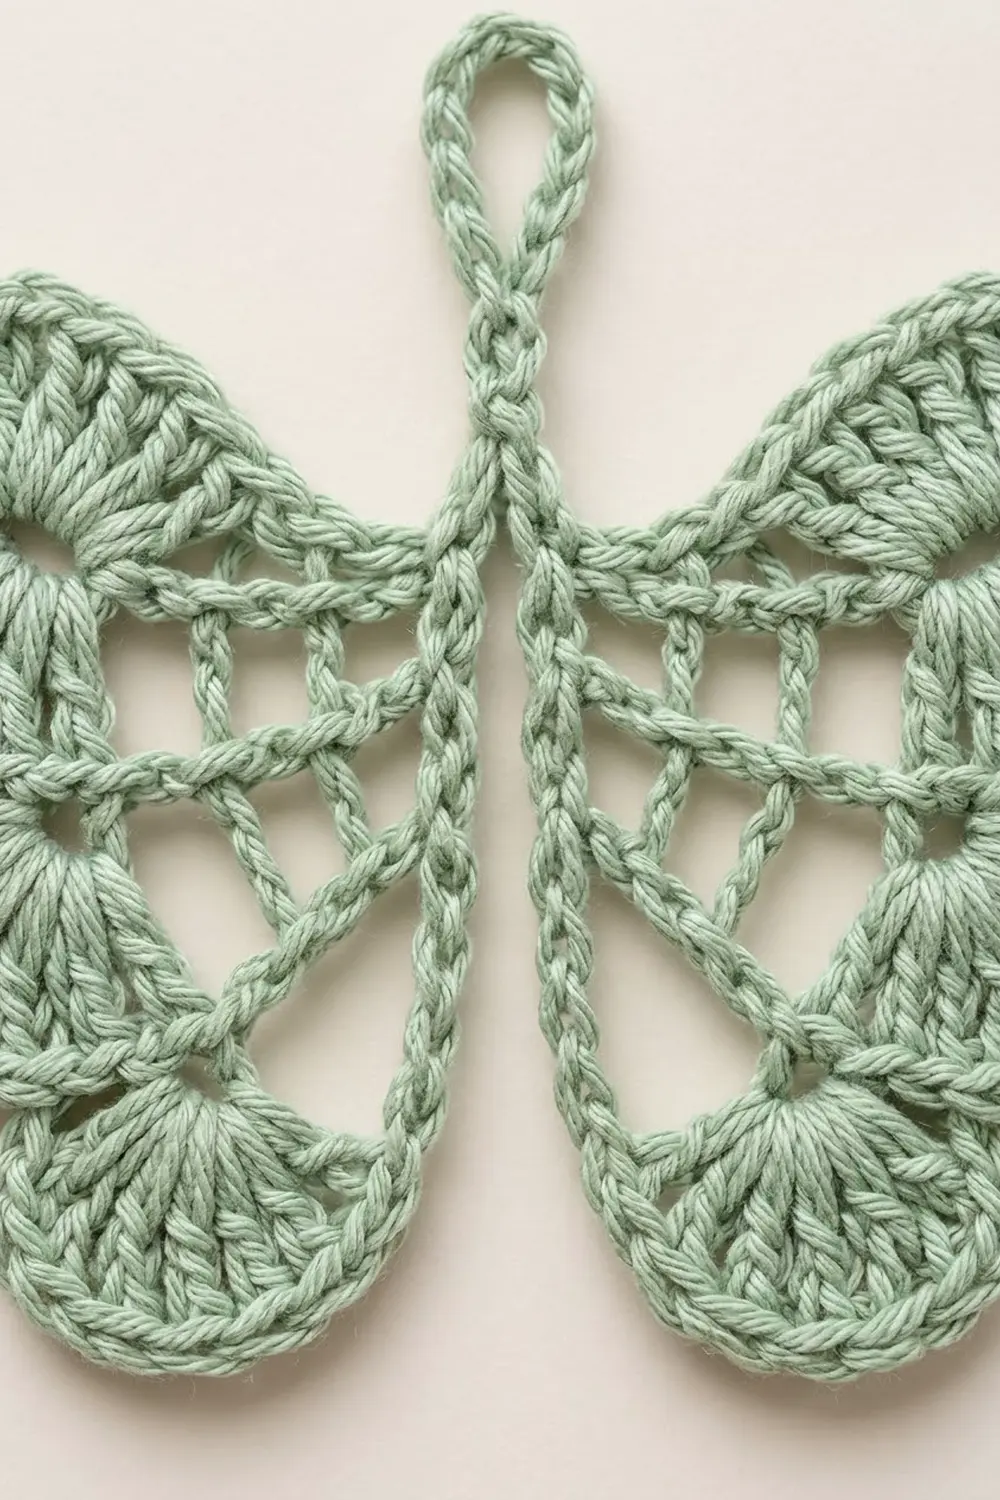
Hanging Loop
Leave a 6 in (15.2 cm) tail.
Loop: Ch 16, sl st in first ch to form a ring. Do not fasten off.
The loop should lie flat at about 1.25 in (3.2 cm) long. The sl st that closes it is the “loop base.” Both wings start here.
Left Wing
Row 1 (spine): Ch 26. Sc in 2nd ch from hook and in each ch across, then sl st in loop base. (25 sc)
You are now at the top of the spine, next to the loop. Check that the spine is not twisted and measures 5 in (12.7 cm).
Row 2 (inner mesh): Ch 5 (counts as dc + ch 2), turn. Sk next 2 sc, dc in next sc. Ch 2, sk next 2 sc, dc in next sc; repeat from * 7 more times, ending in the last sc at the bottom tip. (9 dc, 8 ch-2 sps)*
The dc land on sc numbers 1, 4, 7, 10, 13, 16, 19, 22, and 25, so the 25-stitch spine divides evenly.
Row 3 (outer mesh): Ch 6 (counts as dc + ch 3), turn. Dc in next dc. Ch 3, dc in next dc; repeat from * 6 more times. Ch 3, dc in 3rd ch of turning ch-5. (9 dc, 8 ch-3 sps)*
The spaces grow from ch 2 to ch 3, so the outer edge of the wing is longer than the spine. That extra length makes the mesh spread outward like a web and curves the wing gently, which matches the radiating spokes of the finished butterfly.
Row 4 (fans): Ch 1, turn. Number the dc in this row 1 to 9, starting from the stitch your hook is on.
- Sc in dc 1, sk next ch-3 sp, Fan in dc 2, sk next ch-3 sp, sc in dc 3. (top lobe)
- Ch 1, sk next ch-3 sp, sc in dc 4.
- Sk next ch-3 sp, Fan in dc 5, sk next ch-3 sp, sc in dc 6. (middle lobe)
- Ch 1, sk next ch-3 sp, sc in dc 7.
- Sk next ch-3 sp, Fan in dc 8, sk next ch-3 sp, sc in dc 9 (3rd ch of turning ch-6). (bottom lobe)
Count: 3 fans (27 dc), 6 sc, 2 ch-1 sps. All 8 ch-3 spaces are skipped.
The skipped spaces on each side of a fan become the open hole at the base of each lobe. The ch-1 bridges pull the lobes together to make the notches. Do not fasten off; the border is worked next.
Right Wing
Rejoin the yarn with a sl st in the loop base, in the same place where the left wing began. Repeat Rows 1–4 exactly as for the left wing, then work the border below.
The rows are symmetrical from top to bottom, so the second wing matches the first. If the second wing grows on top of the first, just flip it over so the fans point right. This lace looks almost the same on both sides.
Border (Row 5, worked on each wing)
Border gauge: the same 5 sc per 1 in (2.5 cm). The edging adds 0.25 in (0.6 cm) of depth around each lobe.
Work this row on each wing right after its Row 4.
Row 5: Ch 1, turn. You start at the bottom lobe and work up toward the loop.
- Bottom lobe: Sc in first sc. Then (sc in next dc, 2 sc in next dc) 4 times, sc in last dc of fan (13 sc over the fan). Sc in next sc. (15 sc)
- Sl st in ch-1 sp.
- Middle lobe: Sc in next sc, work 13 sc over the fan as before, sc in next sc. (15 sc)
- Sl st in ch-1 sp.
- Top lobe: Sc in next sc, work 13 sc over the fan as before, sc in last sc. (15 sc)
- Top edge: Turn the piece to work down the row ends. Work 2 sc around the post at the end of Row 3, then 2 sc around the post at the end of Row 2. (4 sc)
- Sl st in the loop base.
Count per wing: 45 sc around the lobes + 4 sc on the top edge = 49 sc, plus 2 sl st.
After the right wing, fasten off and leave a 12 in (30.5 cm) tail for sewing the body. After the left wing, fasten off and weave in the end.
Why the math works: Each fan has 9 dc tops spread around a half circle. That outer edge is about 1.5 times longer than the 9 dc tops would be in a straight line, so a plain 1-for-1 sc row would pull the lobe into a cup. Each lobe edging is worked as (9 sc worked 1 per dc) + (4 extra sc added as increases) = 13 sc. That adds about 44% more stitches, close enough to the extra edge length for the lobe to lie flat with a smooth, rounded edge.
The sc at the start and end of each lobe sit on the Row 4 sc, which keeps every lobe the same width. The sl st in each ch-1 sp is the lowest stitch in the row, which keeps the notch between lobes sharp.
Body Seam
Lay the motif flat, right side up, with the loop at the top and the fans pointing outward on both sides. Bring the two spines together side by side.
Use the 12 in (30.5 cm) tail and a tapestry needle to whipstitch the top 6 sc of each spine together. Work through the back loops so the seam stays slim. This makes a joined body 1.2 in (3.0 cm) long under the loop.
Below the seam, let the spines drift apart. The longer outer edge of each wing pulls them outward, and they open to about 1 in (2.5 cm) apart at the bottom. Weave in all ends inside the spine stitches.
Checkpoint: the motif should measure about 5 in (12.7 cm) wide across the top lobes. If it is narrower, it will open up during blocking.
Final Blocking
- Soak the butterfly in cool water for 10 minutes, then gently press out the water in a towel. Do not wring it.
- Lay it right side up on a blocking mat.
- Pin the hanging loop straight up and pin the 1.2 in (3.0 cm) body seam in a straight vertical line.
- Pin the bottom of each spine so the two spines sit about 1 in (2.5 cm) apart.
- Open each wing until the mesh spokes are straight and the ch-3 spaces are clearly open.
- Pin each lobe at its outermost point, then add one pin in each notch.
- Check the size: 5 in (12.7 cm) wide and 5.25 in (13.3 cm) tall, without the loop.
- Optional: brush or spray on fabric stiffener for a firm ornament.
- Leave it pinned until completely dry, usually 6–12 hours.
Final Quality-Control Checklist
- Hanging loop is flat, untwisted, and about 1.25 in (3.2 cm) long.
- Each spine has 25 sc and measures 5 in (12.7 cm).
- Row 2 has 9 dc and 8 ch-2 sps on each wing.
- Row 3 has 9 dc and 8 ch-3 sps on each wing.
- Each wing has 3 fans of 9 dc, with an open hole at each fan base.
- Each lobe border has 15 sc, with a sl st notch between lobes.
- Each wing border totals 49 sc and 2 sl st.
- The top 6 sc of the spines are sewn together neatly.
- Wings mirror each other in size and lobe position.
- Finished size is 5 in × 5.25 in (12.7 cm × 13.3 cm).
- All ends are woven in invisibly.
Troubleshooting
Lobes cup or curl forward: The border is too tight. Check that you made all 4 increases per lobe, or work the border with a 3.75 mm hook.
Lobes ruffle: The border is too loose, or you added extra increases. Recount to 13 sc per fan.
Mesh collapses and spokes look slanted: The chain spaces are too tight. Make the chains a little looser, then pin each spoke straight when blocking.
Spine twists: The foundation chain was twisted before Row 1. Pull it out and chain again, keeping the bumps on one side.
Wings are different sizes: Count the spine on each wing. One extra sc moves all the dc out of place in Row 2.
Loop is too long or short: Change the 16 ch in steps of 2. Each 2 ch changes the loop length by about 0.2 in (0.5 cm).
Body seam bulges: Sew through back loops only and do not pull the tail tight.
Care
Hand wash in cool water with mild soap, press out the water in a towel, and dry flat. If you used stiffener, re-block the motif and stiffen it again after washing.
Final Notes
The measurement chain is easy to follow:
- A 25-sc spine sets the 5 in (12.7 cm) wing length.
- Two mesh rows bring each wing to 1.2 in (3.0 cm).
- Fans bring each wing to 1.75 in (4.4 cm), so the motif is 4.5 in (11.4 cm) across before the border.
- The 0.25 in (0.6 cm) border makes each wing 2 in (5.1 cm), for a finished motif of 5 in × 5.25 in (12.7 cm × 13.3 cm).
- The 1.25 in (3.2 cm) loop brings the total hanging length to 6.5 in (16.5 cm).
If your first wing hits each checkpoint, the second wing and the finished butterfly will too. One butterfly takes only a small amount of yarn, so it is a good way to use up leftover sage cotton. It also makes a pretty ornament, gift tag, or window hanger on its own loop.
Happy crocheting!