

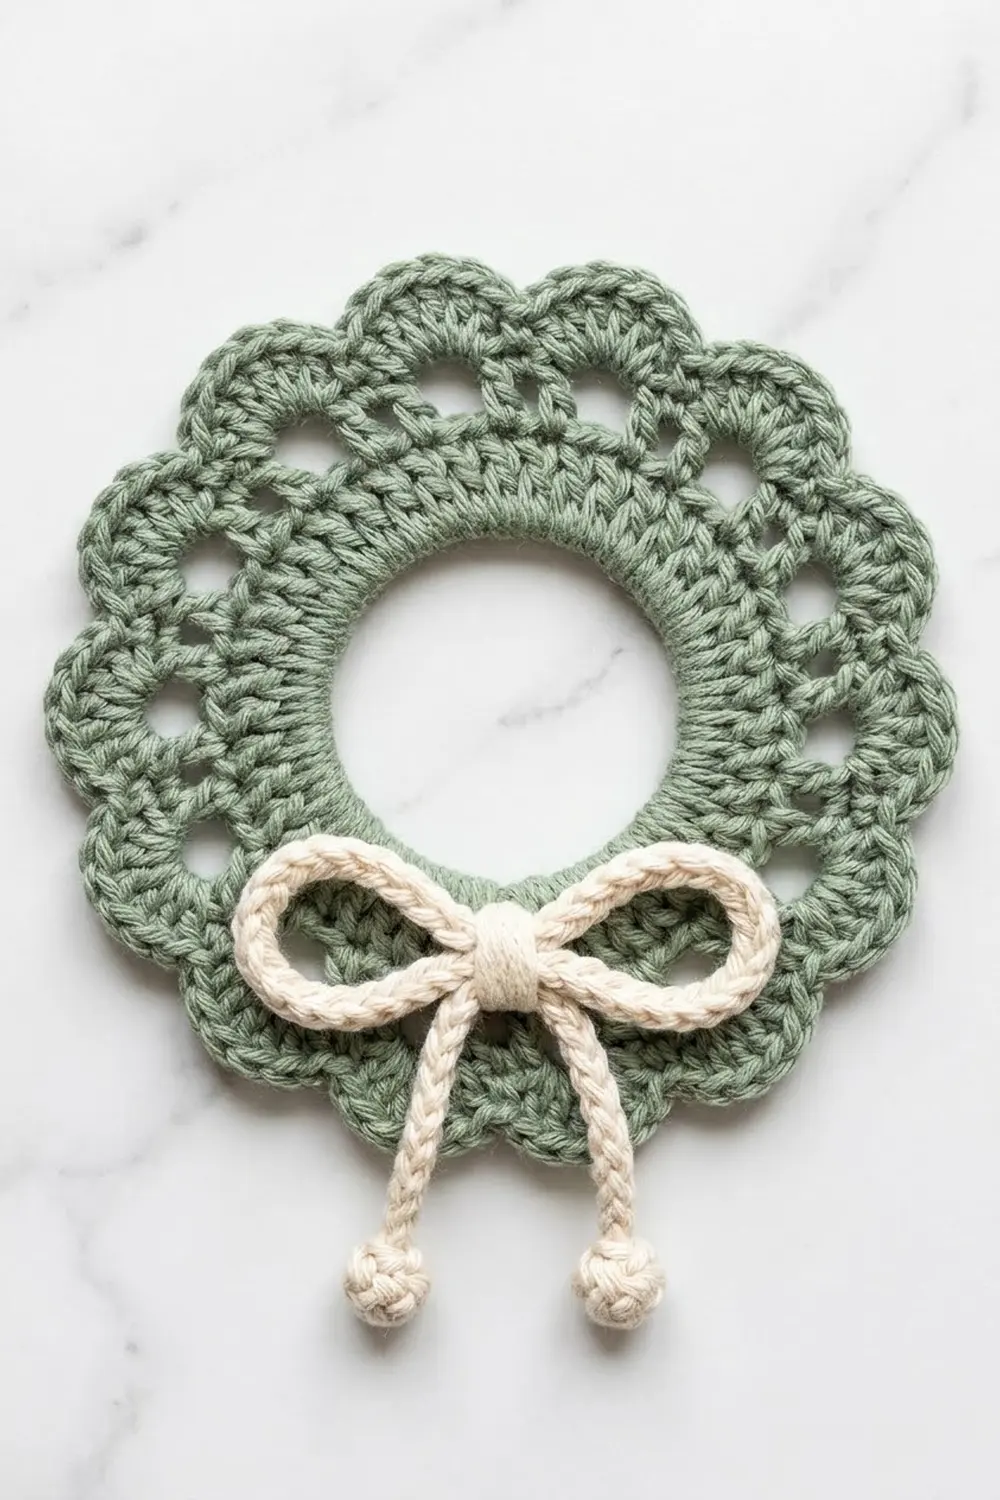
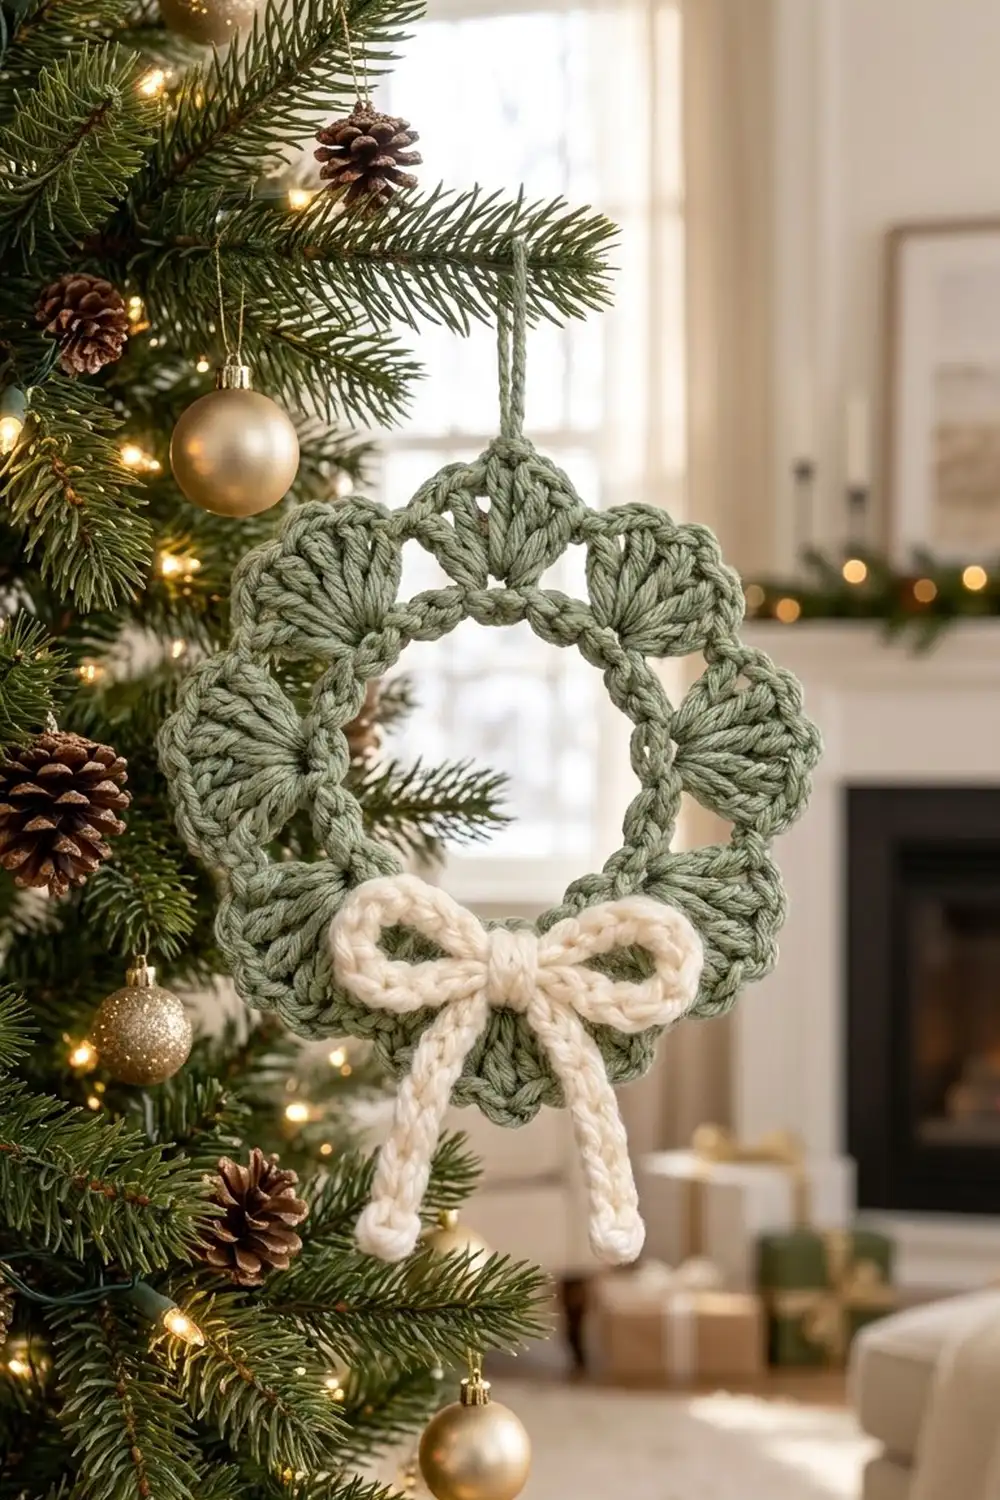
This little wreath is a quiet, cozy holiday motif. It has a solid sage-green ring, an open lacy middle and a soft scalloped edge. A plump cream bow sits at the bottom, with two tails that end in small round knobs.
The palette is just two colors: muted sage green and warm cream. Together they give the wreath a calm, Scandinavian-style winter look that suits natural decor, gift wrap and tree branches.
The pattern uses US crochet terms throughout. The finished wreath measures 4 in (10.2 cm) across. With the bow tails, it is 4.75 in (12.1 cm) tall.
You will work the wreath body in four joined rounds on a chain ring: a single crochet round, a double crochet round, a chain-loop round and a scallop round. Then you make the bow from three small slip-stitch cords plus a center wrap, and sew it to the bottom of the ring.
Finished Size and Construction
- Finished size: 4 in (10.2 cm) diameter; 4.75 in (12.1 cm) tall including bow tails
- Skill level: Easy
- Terminology: US crochet terms
- Yarn weight: Worsted (#4 medium), cotton or cotton blend
- Hook: 4.0 mm (US G-6)
- Number of pieces: 1 finished motif (wreath body plus a bow made of 4 small parts, sewn on)
- Layout: Single motif, no joining
- Piece size: 4 in (10.2 cm) across
- Size before border: 3.25 in (8.3 cm) after Round 3
- Border depth: 3/8 in (1.0 cm) scallop round
- Center opening: 1.5 in (3.8 cm)
- Bow width: 2.75 in (7.0 cm)
Materials
Yarn advice: A smooth, tightly plied worsted cotton shows the scallops and bow cords most clearly. Acrylic also works, but it is springier, so block it a little harder. Don’t use fuzzy or brushed yarn, because it hides the open gaps.
- Sage green: 10 g (about 17 m) for the wreath body
- Cream: 4 g (about 7 m) for the bow loops, tails and center wrap
These amounts include a margin of roughly 30% for your gauge swatch and yarn tails.
Tools:
- 4.0 mm (US G-6) crochet hook
- Tapestry needle
- Scissors
- Stitch marker
- Ruler or tape measure
- Rust-proof pins and a blocking mat or folded towel
- Spray bottle with water
Abbreviations (US Terms)
- ch – chain
- sl st – slip stitch
- sc – single crochet
- dc – double crochet
- sp – space
- st(s) – stitch(es)
- rep – repeat
- yo – yarn over
Special stitch – 5-dc bobble: *Yo, insert hook in the stitch, yo and pull up a loop, yo and pull through 2 loops. Repeat from * 4 more times in the same stitch (6 loops on hook). Yo and pull through all 6 loops. You use this bobble for the knob at the end of each bow tail.
Back-bump slip stitch cord: Work 1 sl st into the back bump (the small ridge on the back) of each chain. This makes a firm, rounded cord that looks like the thick cream bow in the photo.
Gauge and Checkpoints
Gauge is not critical for an ornament, but it controls the finished size. Always make one test wreath body first, through Round 2, before you commit to more.
Reference gauge: 16 sc = 4 in (10.2 cm) in worsted cotton with a 4.0 mm hook.
Checkpoints:
- After Round 1: outer diameter 2 in (5.1 cm), center opening 1.5 in (3.8 cm)
- After Round 2: 2.75 in (7.0 cm)
- After Round 3: 3.25 in (8.3 cm)
- After Round 4 (border): 4 in (10.2 cm)
A difference of up to 1/4 in (0.6 cm) at any checkpoint is fine.
If your wreath is too big: go down to a 3.5 mm (US E-4) hook, or crochet a little more firmly.
If your wreath is too small: go up to a 4.5 mm (US 7) hook.
If it cups into a bowl: your dc are too tight compared with your sc. Go up half a hook size for Round 2 only.
If it ruffles: go down half a hook size for Round 2 only.
Wreath Body
Make the wreath body with sage green. Leave a 6 in (15.2 cm) starting tail.
Foundation: Ch 24 and join with a sl st to the first ch to form a ring. Don’t twist the chain. (24 ch)
Round 1 (conversion round): Ch 1. Sc in next ch, 2 sc in next ch, rep from * 12 times in total. Join with a sl st to the first sc.
Stitch count: 24 sc worked 1 per chain + 12 extra sc = 36 sc.
This round forms the inner edge of the wreath and fixes the 1.5 in (3.8 cm) center opening. Place a marker in the first sc if you find it helpful.
Round 2 (growth round): Ch 3 (counts as the first dc). Dc in next sc, 2 dc in next sc. Dc in next 2 sc, 2 dc in next sc, rep from * 11 more times. Join with a sl st to the top of the beginning ch-3.
Stitch count: 48 dc.
This is the solid sage band that shows inside the scallops. Check: 12 repeats × 4 dc = 48 dc. Your test piece should now measure 2.75 in (7.0 cm).
Round 3 (chain-loop round): Ch 1. Sc in the same st as the join. Ch 5, skip next 3 dc, sc in next dc, rep from * 10 more times. Ch 5, skip the last 3 dc, and join with a sl st to the first sc.
Stitch count: 12 sc and 12 ch-5 loops.
Check: each repeat uses 1 sc plus 3 skipped dc, which is 4 stitches. 12 × 4 = 48, so the round uses up all 48 dc of Round 2.
These loops create the small open gaps between the solid band and the scallops. The wreath now measures 3.25 in (8.3 cm).
Don’t fasten off. Continue straight into the border.
Border (Scallop Round)
Border gauge: At the outer edge, each scallop measures about 1 in (2.5 cm) wide and 3/8 in (1.0 cm) deep.
Round 4: Ch 1. Sc in the same sc as the join. 7 dc in next ch-5 sp, sc in next sc, rep from * 10 more times. Work 7 dc in the last ch-5 sp, then join with a sl st to the first sc.
Stitch count: 84 dc + 12 sc = 96 sts (12 scallops).
Counts per quarter: It is useful to think of the circle in four quarters. Each quarter holds 3 scallops: 3 × 7 dc = 21 dc, plus 3 sc = 24 sts. Then 4 quarters × 24 sts = 96 sts. This lets you check that the scallops are evenly spaced. The top, bottom, left and right should each have the same number of scallops on either side.
Why the math works:
- Round 2 has 48 sts, and 48 divides evenly by 4. That gives exactly 12 loops with no leftover stitches.
- The 12 loops then hold 12 identical scallops.
- 7 dc fit comfortably in a ch-5 loop and fan out just enough for the larger outer circle.
- Each sc anchors to an sc from Round 3, so the scallops sit directly between the open gaps.
- 12 is also divisible by 4, so the bow can sit centered at the bottom with the same number of scallops visible on each side.
Fasten off and leave an 8 in (20.3 cm) tail. Weave the tail through the back of Round 2.
Bow
Make all bow parts with cream. For each part, leave a 6 in (15.2 cm) tail at both ends for sewing.
Bow Loops: Ch 26. Sl st in the back bump of the 2nd ch from hook and in each ch across. (25 sl st cord, about 7 in / 17.8 cm long.) Fasten off.
Lay the cord flat. Fold both ends in to the center so they overlap by about 1/2 in (1.3 cm). This forms two rounded loops of the same size. With one tail, sew through all layers at the center a few times. The bow should measure 2.75 in (7.0 cm) wide.
Tails (make 2): Ch 12. Work a 5-dc bobble in the 4th ch from hook. This is the round knob at the end of the tail; the 3 skipped ch fold behind it. Sl st in the back bump of each of the remaining 8 ch. (1 bobble + 8 sl st, about 2.25 in / 5.7 cm long.) Fasten off.
Center Wrap: Ch 7. Sl st in the back bump of the 2nd ch from hook and each ch across. (6 sl st, about 1.5 in / 3.8 cm long.) Fasten off.
Assembling the bow:
- Place both tails behind the bow center, with the plain (non-bobble) ends at the top. Angle them out slightly into an upside-down V.
- Wrap the center band around the bow center and the tops of both tails, front to back.
- Sew the ends of the band together at the back. Pull just tightly enough to pinch the loops into a knot shape.
Attaching the Bow
- Lay the wreath right side up. Turn it so the Round 1 join is at the top. It then hides behind the top scallop.
- Place the bow center at the bottom, over Rounds 1–3. The loops should cover the lower ring and the base of the bottom scallop, and the tails should hang below the edge.
- With the cream tails, sew the back of the center wrap to the Round 2 dc. Use 4–5 small stitches that don’t show on the front.
- Tack each bow loop to the wreath at its outer tip with 1 stitch, so the loops stay flat.
- Leave the tails free from about 1/2 in (1.3 cm) below the center.
- Weave in all ends on the back and trim them.
Final Blocking
- Lightly mist the wreath until it is damp but not soaked.
- Lay it right side up on the blocking mat.
- Pin the center opening into a true circle, 1.5 in (3.8 cm) across.
- Pin the outer edge to 4 in (10.2 cm). Use 1 pin at the tip of each of the 12 scallops, spacing them evenly by the quarter count (3 scallops per quarter).
- Gently open the gaps of Round 3 with your fingertip.
- Shape the bow loops round and lay the tails straight in their V. Pin the bobble knobs in place.
- Let it dry completely, at least 6 hours, before you unpin.
Final Quality-Control Checklist
- Round 1 has 36 sc, and the center opening is 1.5 in (3.8 cm).
- Round 2 has 48 dc and lies flat, with no cupping or ruffling.
- Round 3 has 12 sc and 12 even ch-5 loops.
- Round 4 has 12 scallops of 7 dc each (96 sts total).
- The finished diameter is 4 in (10.2 cm), within 1/4 in (0.6 cm).
- Both bow loops are the same size, and the bow is 2.75 in (7.0 cm) wide.
- Both tails are the same length, about 2.25 in (5.7 cm), and each ends in a round knob.
- The bow is centered at the bottom, with 5 full scallops visible on each side of the bottom scallop.
- No sewing stitches or loose ends show on the front.
Troubleshooting
The wreath cups like a bowl. Round 2 is too tight. Undo it and rework it half a hook size larger, or relax your dc.
The scallops ruffle and won’t lie flat. Your dc are loose. Try 6 dc per loop instead, which gives 72 dc + 12 sc = 84 sts. You can also go down half a hook size for Round 4.
You ended up with 11 or 13 loops. Your Round 2 count is off. Recount: it must be exactly 48 dc. Also check that every repeat skips exactly 3 dc.
The gaps disappear. Your ch-5 loops are too tight. Chain a bit more loosely, or work ch 6 loops. Keep 7 dc per scallop.
The bow cords are thin or limp. Work into the back bump, not the front loops, and keep your sl sts snug.
The bobble knob is flat. Pull the final loop through firmly. Push the bobble out to the front with your finger before you work the next sl st.
The bow tilts. Re-sew the center wrap so it sits straight, and make sure each loop is tacked at its tip.
Care
Hand wash in cool water with a mild soap and press out the water in a towel; don’t wring it. Reshape the wreath and dry it flat, pinning the scallops again if needed.
Final Notes
The whole measurement chain goes like this:
- A 24-chain ring becomes 36 sc and a 2 in (5.1 cm) circle around a 1.5 in (3.8 cm) opening.
- Round 2 grows to 48 dc and 2.75 in (7.0 cm).
- Round 3 divides those 48 sts into 12 loops (4 sts each) and reaches 3.25 in (8.3 cm).
- The border adds 12 scallops of 7 dc, 96 sts in total. That adds 3/8 in (1.0 cm) all around, for a finished 4 in (10.2 cm) wreath.
- The cream slip-stitch bow is 2.75 in (7.0 cm) wide, and its knobbed tails bring the total height to 4.75 in (12.1 cm).
If each checkpoint matches, the finished wreath will match too. Happy crocheting!