

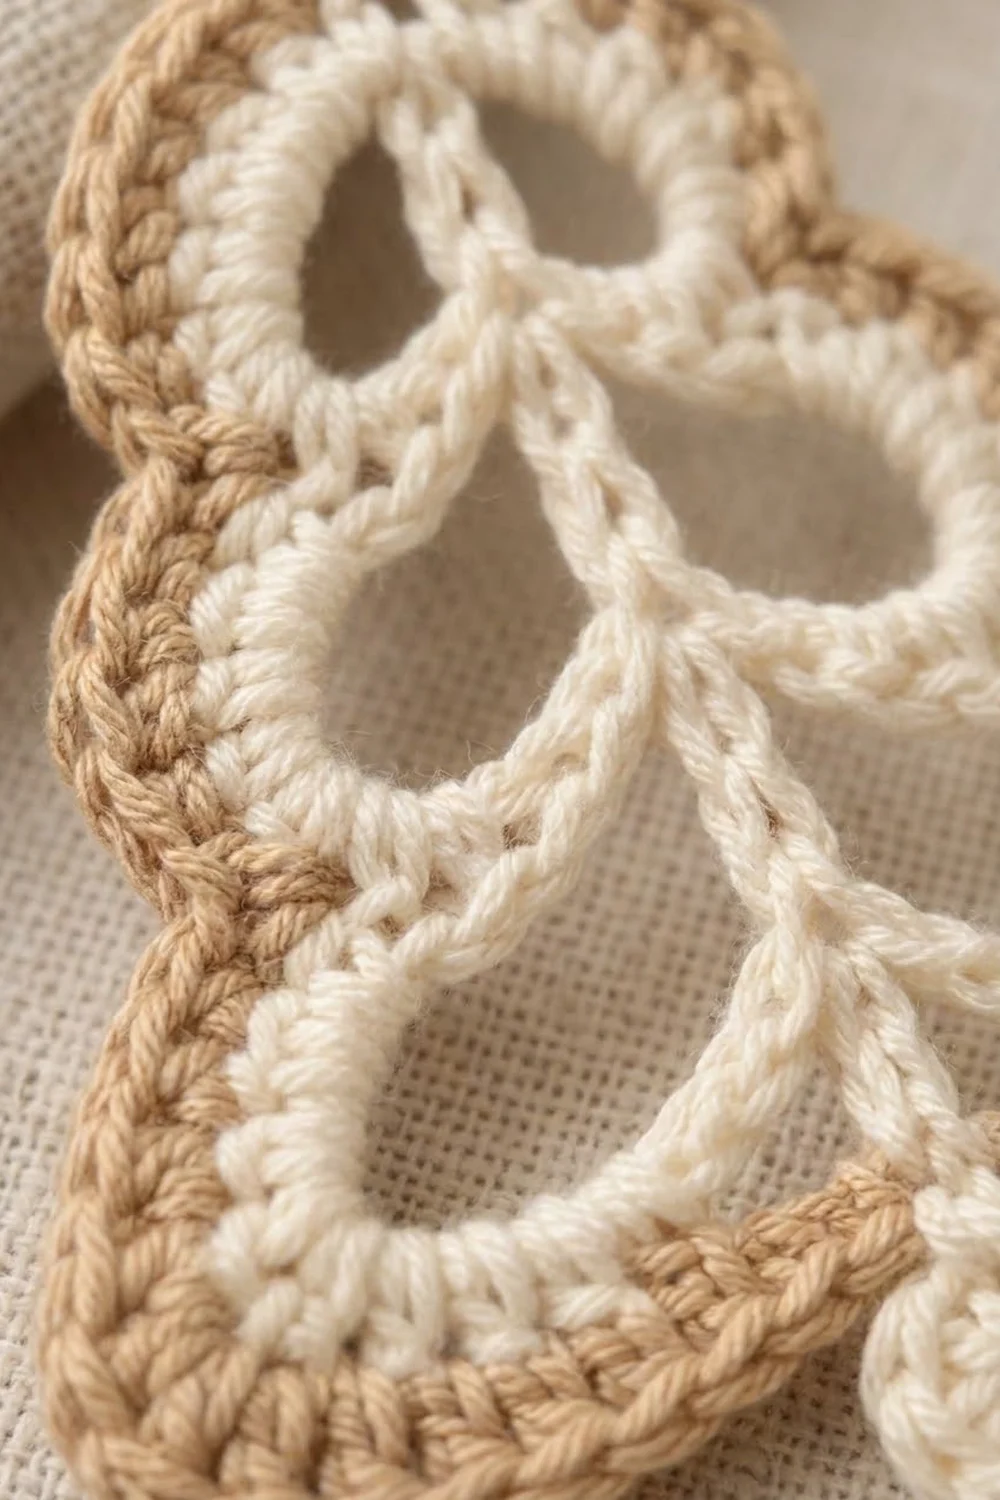
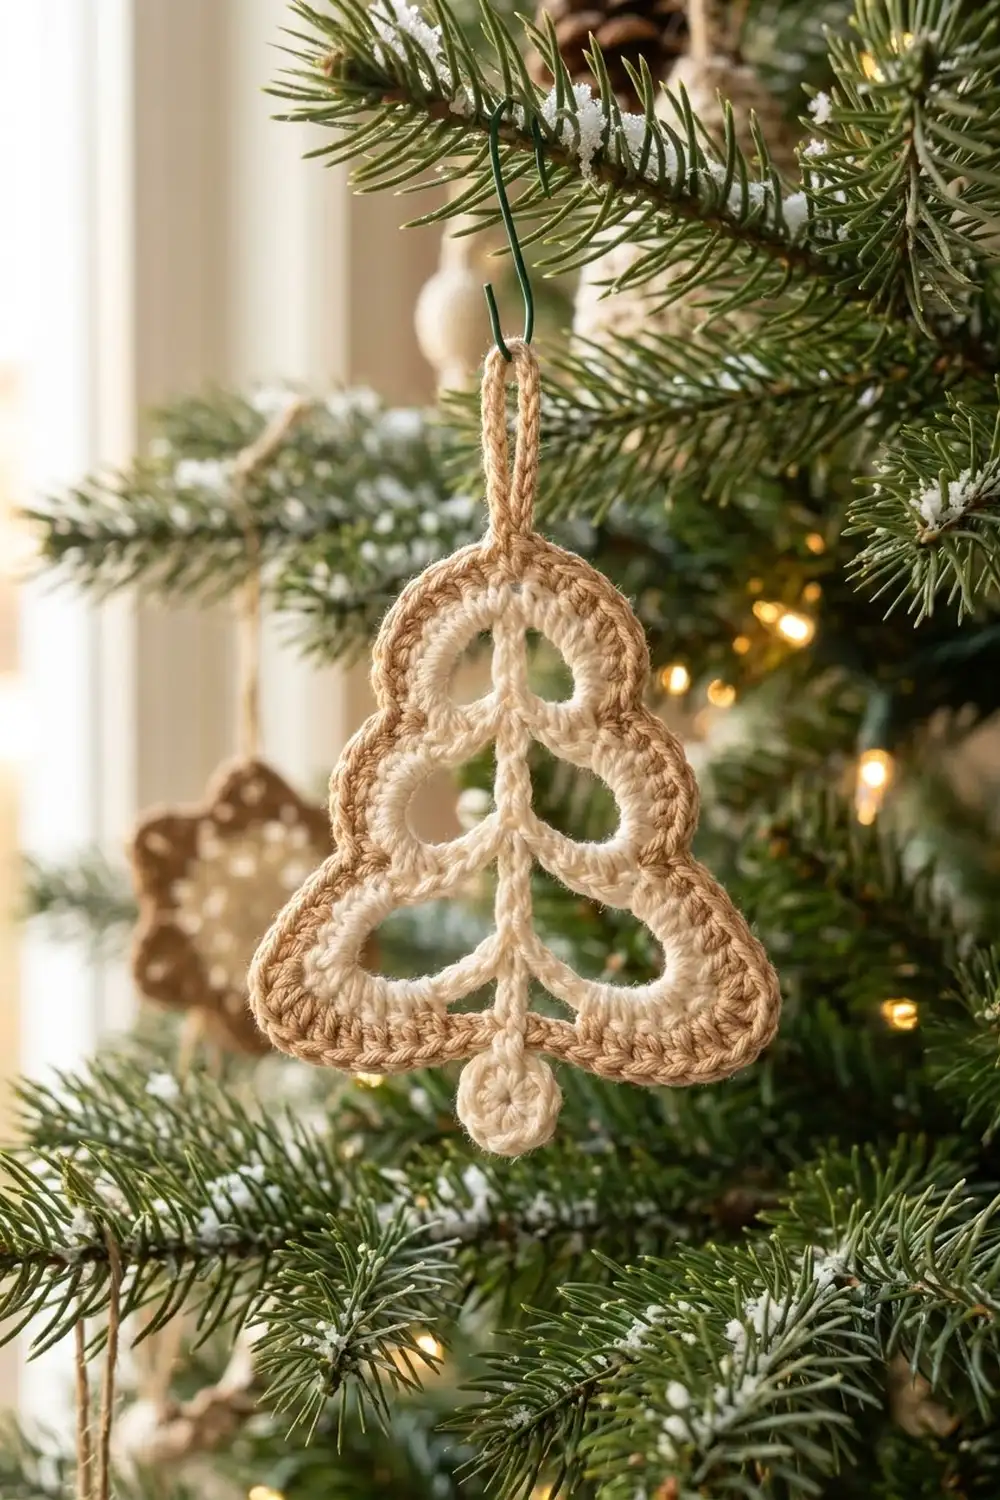
This little tree ornament pairs a warm tan outline with a cream openwork center. The cream section is built around a single chain “trunk” that runs from tip to base. Three tiers of open, shell-like scallops sit on each side of that trunk, so the tree reads as three soft horizontal swags. A tan loop at the top makes it ready to hang, and a tiny cream ball dangles from the bottom point.
The style is cozy and neutral, like gingerbread and icing, and it looks lovely against linen, kraft paper, or a natural-wood tree. Only two colors are used: tan for the solid single crochet border and loop, and cream for the lace center and the ball.
This pattern uses US crochet terms. The finished tree body measures 3.5 in (8.9 cm) tall and 3 in (7.6 cm) wide, not counting the loop and ball.
Construction is simple. You chain the trunk, work cream arches on both sides of it in one round, then fill those arches with half double crochet to form the scallops. Two tan rounds of single crochet shape the outline. Finally, you add the hanging loop and attach a small stuffed ball at the base.
Finished Size and Construction
- Finished tree body: 3.5 in (8.9 cm) tall x 3 in (7.6 cm) wide
- Overall hanging length: about 5.6 in (14.2 cm), including loop and ball
- Skill level: Advanced beginner
- Terminology: US
- Yarn weight: DK (light worsted) cotton
- Hook: 3.25 mm (US D/3)
- Number of pieces: 1 ornament (tree body worked in one piece, plus a tiny ball chained on)
- Layout: single piece, no assembly
- Cream center size (before border): 2.75 in (7.0 cm) tall x 2.25 in (5.7 cm) wide
- Border depth: 2 tan rounds, about 3/8 in (1.0 cm) on every edge
Materials
Yarn advice: Use a smooth, mercerized or combed DK cotton. Cotton holds the open scallops crisply and blocks flat. Avoid fuzzy or very stretchy yarns, because they blur the openwork.
- Tan (border and loop): 5 g, about 12 m
- Cream (center and ball): 6 g, about 14 m
These quantities include a margin for your test piece and for weaving in ends.
Tools:
- 3.25 mm (US D/3) crochet hook
- Tapestry needle
- Small scissors
- Stitch markers (2-3)
- Rustproof pins and a foam blocking mat
- Spray bottle with water
- Ruler or tape measure
- A pinch of cream yarn scraps or fiberfill for the ball
Abbreviations (US Terms)
- ch – chain
- sl st – slip stitch
- sc – single crochet
- hdc – half double crochet
- sc2tog – single crochet 2 together (insert in next st, pull up a loop, insert in following st, pull up a loop, yarn over and pull through all 3 loops)
- st(s) – stitch(es)
- sk – skip
- sp – space
- MR – magic ring
Special stitch – standing sc: Start with a slip knot on your hook, insert the hook into the stitch, yarn over and pull up a loop, then yarn over and pull through both loops. This joins a new color without a ch-1.
Gauge and Checkpoints
Base gauge: 22 sc and 24 rows = 4 in (10.2 cm) with a 3.25 mm hook. This works out to about 5.5 sc per inch.
Test one piece first. Work Rounds 1 and 2 in cream as your test. This uses very little yarn and shows you whether the scallops sit flat before you commit to the border.
Checkpoints:
- Foundation chain: The 12 working chains (not counting the turning ch) should measure about 2.4 in (6.1 cm).
- After Round 2: The cream center should measure 2.75 in (7.0 cm) tall x 2.25 in (5.7 cm) wide, within 0.25 in (0.6 cm).
- After Round 4: The tree body should measure 3.5 in (8.9 cm) x 3 in (7.6 cm).
If too big: Go down to a 3.0 mm hook, or tighten your chain arches slightly.
If too small or cupping: Go up to a 3.5 mm hook. Cupping in the scallops usually means the hdc stitches are too tight for the arch length.
Pattern: Cream Lace Center
The foundation chain is numbered from the first chain you make (ch 1, the bottom of the tree) to the last (ch 13, closest to your hook, the top).
Foundation: With cream, ch 13.
Round 1 (arch round):
Work down the first side of the chain (Side A):
- Sc in 2nd ch from hook (ch 12).
- Ch 6, sk 2 ch, sc in next ch (ch 9). This is the top arch.
- Ch 8, sk 3 ch, sc in next ch (ch 5). This is the middle arch.
- Ch 10, sk 3 ch, sc in next ch (ch 1). This is the bottom arch.
At the base:
- Ch 2. This is the bottom sp.
Rotate and work up the other side of the foundation chain (Side B), into the free loops:
- Sc in ch 1.
- Ch 10, sk 3 ch, sc in ch 5.
- Ch 8, sk 3 ch, sc in ch 9.
- Ch 6, sk 2 ch, sc in ch 12.
At the top:
- Ch 2. This is the top sp.
- Sl st to the first sc to join.
Count: 8 sc, 2 ch-6 arches, 2 ch-8 arches, 2 ch-10 arches, and 2 ch-2 sps.
Each arch bows away from the trunk over the skipped chains. This leaves an open hole that becomes one scallop.
Round 2 (scallop round):
Ch 1. Work Side A:
- Sc in the same sc.
- 9 hdc in the ch-6 arch.
- Sc in next sc (valley).
- 11 hdc in the ch-8 arch.
- Sc in next sc (valley).
- 13 hdc in the ch-10 arch.
- Sc in next sc.
Work the base:
- 3 sc in the bottom ch-2 sp.
Work Side B:
- Sc in next sc.
- 13 hdc in the ch-10 arch.
- Sc in next sc (valley).
- 11 hdc in the ch-8 arch.
- Sc in next sc (valley).
- 9 hdc in the ch-6 arch.
- Sc in next sc.
Work the top:
- 3 sc in the top ch-2 sp.
- Sl st to the first sc to join.
Count: 80 sts total. Each side has 37 sts (9 + 11 + 13 hdc, plus 4 sc). The bottom and top each have 3 sc.
Fasten off cream and weave in the ends. Check the size against the Round 2 checkpoint.
Pattern: Cream Ball
Round 1: With cream, 6 sc in MR. (6 sts)
Round 2: 2 sc in each st around. (12 sts)
Round 3: Sc in each st around. (12 sts)
Round 4: Sc2tog 6 times. (6 sts)
Stuff the ball firmly with cream scraps. Leave the working loop on your hook and set the ball aside. It will be attached after the border.
The finished ball measures about 0.6 in (1.5 cm) across.
Border
Border gauge: The tan rounds are worked at the same 5.5 sc per inch as the base gauge. Each round adds about 3/16 in (0.5 cm), so the 2 rounds add 3/8 in (1.0 cm) on every edge.
Label the Round 2 sections as follows:
- S – the end sc of each side, next to the tip groups
- T1 – the 9-hdc top scallop
- T2 – the 11-hdc middle scallop
- T3 – the 13-hdc bottom scallop
Round 3 (tan, conversion round):
Join tan with a standing sc in the first sc of Round 2 (Side A, S).
Work Side A:
- T1: Sc in next 4 hdc, 2 sc in next hdc, sc in next 4 hdc. (10 sts)
- Sk the valley sc.
- T2: Sc in next 5 hdc, 2 sc in next hdc, sc in next 5 hdc. (12 sts)
- Sk the valley sc.
- T3: Sc in next 6 hdc, 2 sc in next hdc, sc in next 6 hdc. (14 sts)
- Sc in S.
Work the base:
- Sc in next sc, 3 sc in next sc, sc in next sc. (5 sts)
Work Side B:
- Sc in S.
- T3 as above.
- Sk the valley sc.
- T2 as above.
- Sk the valley sc.
- T1 as above.
- Sc in S.
Work the top:
- Sc in next sc, 3 sc in next sc, sc in next sc. (5 sts)
- Sl st to the first sc to join.
Count per side: 38 sts (1 + 10 + 12 + 14 + 1). The top and bottom each have 5 sts.
Total: 86 sts. This breaks down as 76 sts worked 1 per existing stitch (80 minus the 4 skipped valleys), plus 4 tip extras, plus 6 scallop extras.
Skipping the valley stitches pinches each dip between scallops. This makes the tiers read clearly in the outline.
Round 4 (tan, final border round):
Ch 1. Work Side A:
- Sc in the same st (S).
- Sc in next 4, 2 sc in next, sc in next 4.
- Sc2tog over the last T1 st and the first T2 st.
- Sc in next 4, 2 sc in next, sc in next 5.
- Sc2tog over the last T2 st and the first T3 st.
- Sc in next 5, 2 sc in next, sc in next 7.
- Sc in S.
Work the base:
- Sc in next 2, 3 sc in next (the center st), sc in next 2. (7 sts)
Work Side B, mirroring Side A:
- Sc in S.
- Sc in next 7, 2 sc in next, sc in next 5.
- Sc2tog over the T3/T2 valley.
- Sc in next 5, 2 sc in next, sc in next 4.
- Sc2tog over the T2/T1 valley.
- Sc in next 4, 2 sc in next, sc in next 4.
- Sc in S.
Work the top:
- Sc in next 2, 3 sc in next (the center st), sc in next 2. (7 sts)
- Sl st to the first sc to join.
Count per side: 39 sts (1 + 4 + 2 + 4 + 1 + 4 + 2 + 5 + 1 + 5 + 2 + 7 + 1). The top and bottom each have 7 sts.
Total: 92 sts. This breaks down as 86 existing sts, minus 4 (each sc2tog turns 2 sts into 1), plus 4 tip extras, plus 6 scallop extras.
Fasten off.
Why the math works:
A closed shape’s edge grows by about 2π times the width of each new round. That is 2π x 3/16 in, or about 1.2 in (3.0 cm), per round. At 5.5 sc per inch, that equals about 6.5 sts.
Both border rounds add a net +6 sts. The added length goes exactly where the outline bulges: the 2 tips and the 6 scallop crests. Stitches are removed where the outline dips: the 4 valleys. That balance keeps the tree flat, with no ruffling and no cupping.
Hanging loop: Join tan in the center sc of the top 3-sc group. Ch 12, then sl st in the same st. Fasten off. The loop stands about 1 in (2.5 cm) tall.
Attach the ball: With the ball’s working loop still on your hook, ch 3. Sl st in the center sc of the bottom 3-sc group. Fasten off, leaving a 6 in (15.2 cm) tail. Weave the tail back through the chain to reinforce it. The ball hangs about 0.5 in (1.3 cm) below the point.
Final Blocking
- Weave in all ends on the back, following same-color stitches.
- Lay the ornament face up on a blocking mat.
- Mist it until damp, but not dripping.
- Pin the top tip and the bottom point first. Check that the body measures 3.5 in (8.9 cm) tall.
- Pin each scallop crest. Check that the widest point measures 3 in (7.6 cm).
- Gently open each cream hole with a fingertip so the rings are round.
- Lay the loop straight and let the ball rest below the point.
- Let it dry completely, usually 6-8 hours, before unpinning.
Final Quality-Control Checklist
- The body measures 3.5 in (8.9 cm) x 3 in (7.6 cm).
- There are 3 scallops on each side, with matching sizes left and right.
- All 6 holes are open and evenly rounded.
- Round 4 has 92 sts: 39 per side and 7 at each tip.
- The valleys dip clearly, and the crests are smooth.
- The cream trunk is straight and centered.
- The loop is secure and centered at the top tip.
- The ball is firmly stuffed and closed, with no stuffing showing.
- All ends are woven in invisibly on the back.
Troubleshooting
Scallops cup or curl: Your hdc is too tight for the arch. Loosen your tension, or go up a hook size for Round 2 only.
Edge ruffles: Make sure you skipped every valley sc in Round 3 and used sc2tog in Round 4. Check that you added only one increase per scallop.
Holes look closed: The arch chains are too tight. Rework Round 1 with slightly looser chains.
Sides don’t match: Recount Side B against Side A at the end of each round. Mirroring errors are the most common slip.
Tree leans: Your foundation chain twisted. Make sure you work Side B into the free loops on the same face of the chain.
Ball spins or droops: Shorten the hanging chain to ch 2, or reinforce it with the tail.
Care
Hand wash in cool water with mild soap, press out the water in a towel, and lay flat to dry. Reshape the scallops and re-pin if needed.
Final Notes
The measurement chain is short and easy to check:
- The 12-chain trunk measures 2.4 in (6.1 cm).
- The cream center measures 2.75 in (7.0 cm) x 2.25 in (5.7 cm) at 80 sts.
- The tan Round 3 has 86 sts.
- The tan Round 4 has 92 sts and brings the body to 3.5 in (8.9 cm) x 3 in (7.6 cm).
If each checkpoint matches, the finished ornament will lie flat with crisp, open tiers. Optional: make several in different neutral pairings for a matching set of tree decorations.
Happy crocheting!