
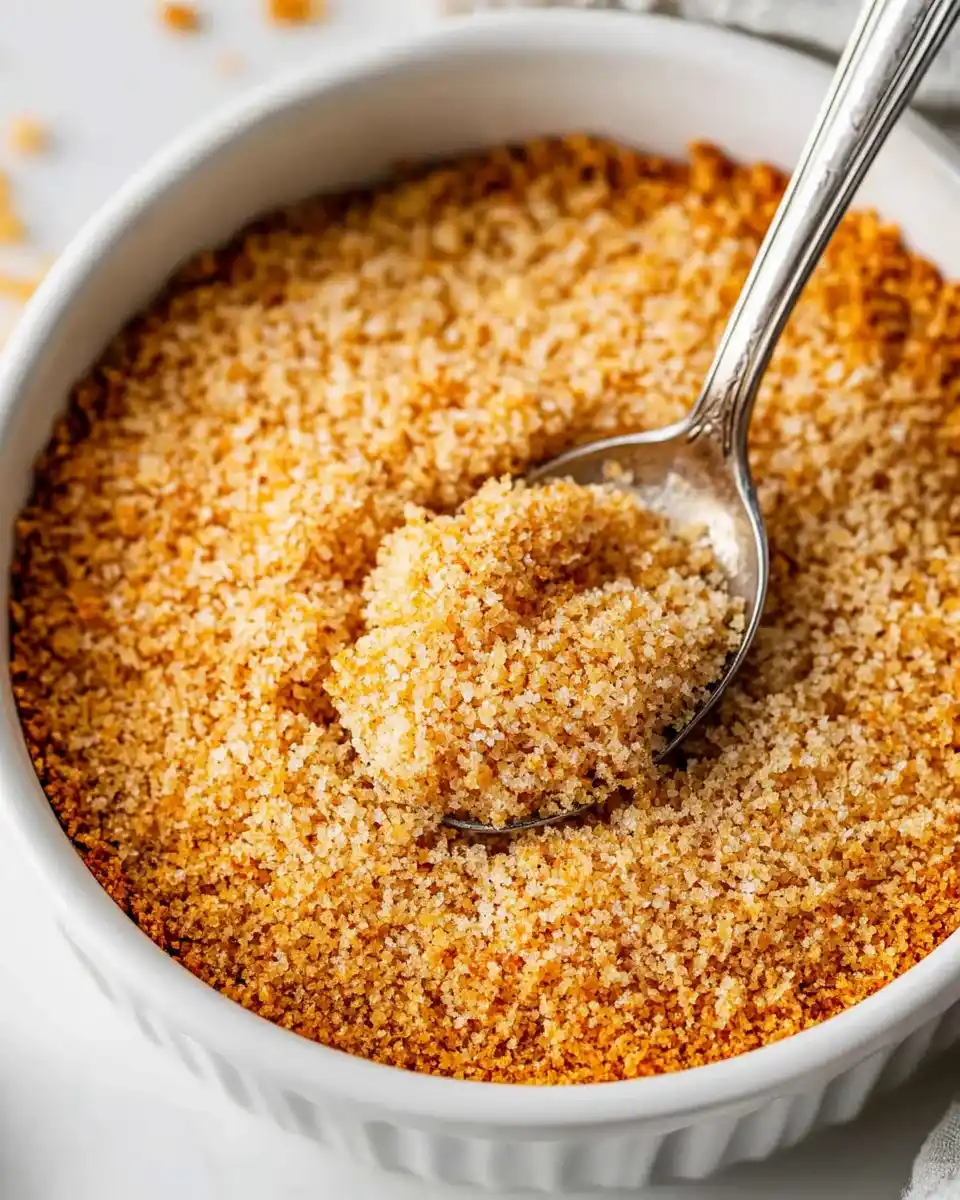
If you’ve been searching for the perfect gluten free bread crumbs, you’re in the right place! Whether you’re making crispy chicken cutlets, binding meatballs, or topping casseroles, these homemade gluten free bread crumbs are a total game-changer. They’re golden, crunchy, and easy to customize to your taste!
Store-bought options can be pricey and sometimes lack that fresh, toasty flavor. But with this simple recipe, you can make your own gluten free bread crumbs using bread you already have at home!
Let’s get started—because no one should have to miss out on crispy, crunchy goodness!
Why You’ll Love This Recipe
- Naturally gluten-free! Perfect for those with celiac disease or gluten sensitivities.
- Budget-friendly! No need to buy expensive store-bought versions.
- Customizable! Make them plain, seasoned, or even panko-style.
- So easy! Requires just one ingredient—gluten-free bread!
What Do Gluten Free Bread Crumbs Taste Like?
These taste just like traditional bread crumbs but with a fresher, toastier flavor. Depending on the bread you use, they can be light and crisp (like panko) or rich and flavorful (if using a heartier gluten-free loaf). You can also season them for extra flavor, making them perfect for all kinds of recipes.
Ingredients for Gluten Free Bread Crumbs
The best part? You only need one main ingredient!
Basic Bread Crumbs:
- 4 slices gluten-free bread (any kind – white, whole grain, sourdough, etc.)
Optional Seasonings:
- ½ teaspoon salt
- ½ teaspoon garlic powder
- ½ teaspoon onion powder
- ½ teaspoon Italian seasoning (for a herby flavor)
Tools You’ll Need
- Baking sheet
- Food processor or blender
- Oven or air fryer
- Airtight container for storage
How to Make Gluten Free Bread Crumbs
Step 1: Toast the Bread
- Preheat oven to 300°F (150°C).
- Place gluten-free bread slices on a baking sheet in a single layer.
- Bake for 10-15 minutes, flipping halfway, until dry and golden brown. (If using an air fryer, toast at 300°F for about 6-8 minutes.)
- Let the bread cool completely before processing.
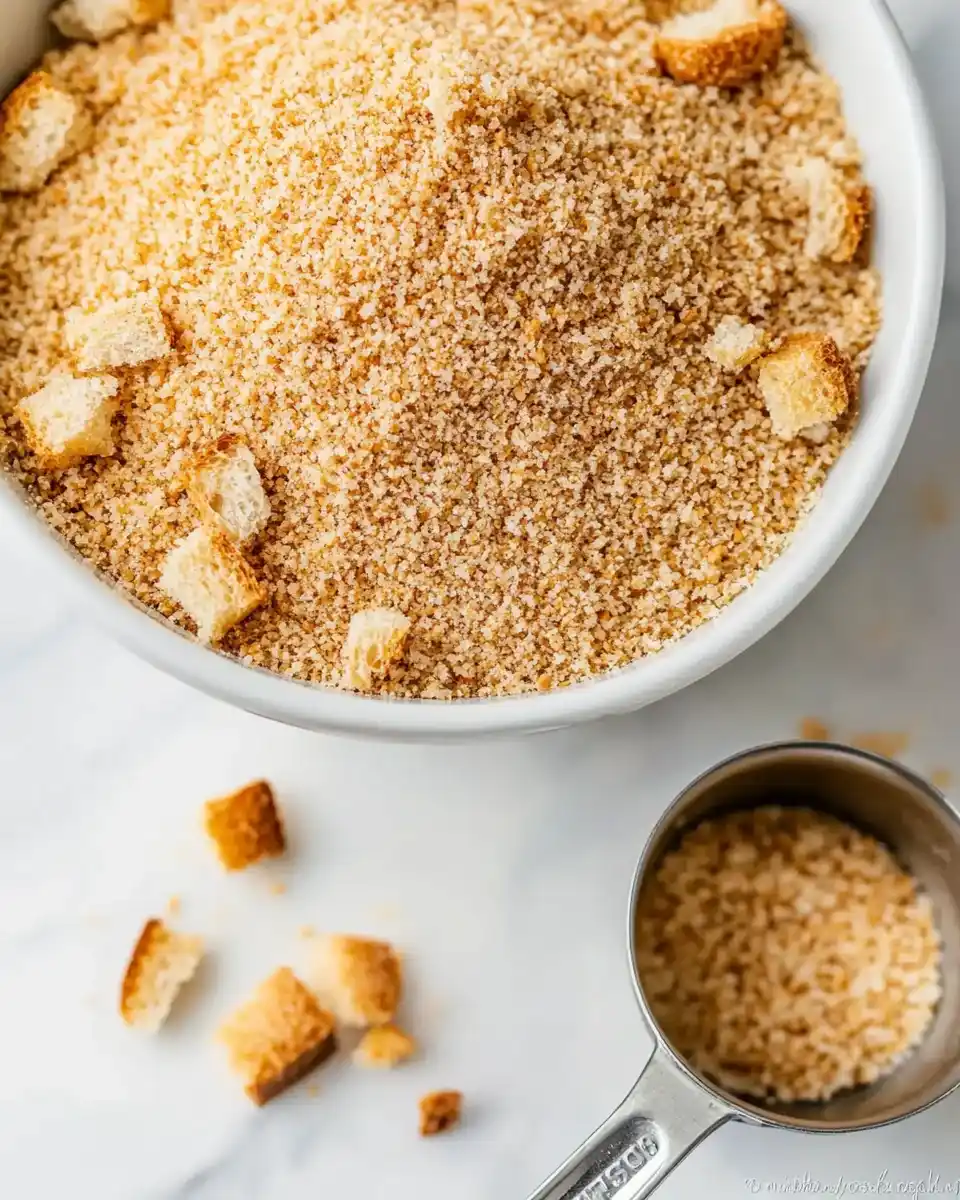
Step 2: Blend Into Crumbs
- Break the toasted bread into smaller pieces.
- Place in a food processor or blender and pulse until you reach your desired texture—fine for traditional bread crumbs or coarser for panko-style.
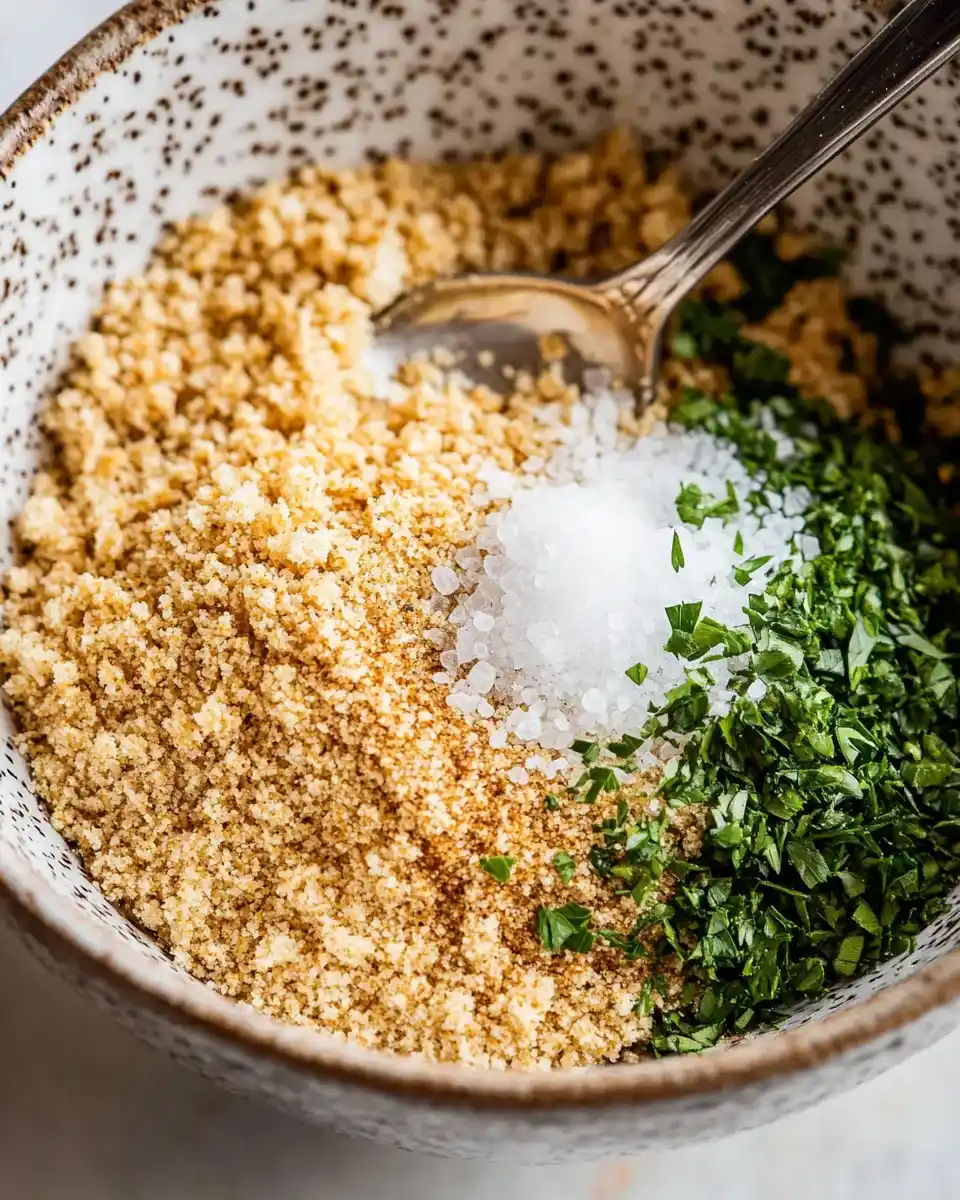
Step 3: Add Seasoning (Optional)
- Transfer to a bowl and stir in your choice of seasonings.
- Mix well and store in an airtight container.
What to Use Gluten Free Bread Crumbs For
These homemade gluten free bread crumbs are super versatile! Here are some ways to use them:
- Coating: Use them for crispy fried chicken, schnitzels, or baked fish.
- Binding: Add them to meatballs, meatloaf, or veggie burgers for texture.
- Topping: Sprinkle over mac and cheese, casseroles, or gratins for a crunchy finish.
- Stuffing: Mix them into stuffing recipes for an extra bite.
Different Types of Gluten-Free Bread Crumbs
Not all bread crumbs are the same! Depending on your needs, you can customize your gluten free bread crumbs to match different recipes:
- Fine Bread Crumbs: Perfect for coating chicken, fish, or making a smooth-textured meatloaf. Simply blend the toasted bread longer for a fine consistency.
- Panko-Style Bread Crumbs: These are larger and flakier, giving fried foods a light, crispy texture. Pulse the bread lightly for chunkier crumbs.
- Seasoned Bread Crumbs: Add Italian herbs, garlic powder, or Parmesan to enhance the flavor. Great for meatballs, casseroles, and pasta dishes!
- Nut-Based Crumbs: If you want extra crunch and a bit of nuttiness, mix in crushed almonds, pecans, or walnuts with your crumbs.
Best Gluten Free Breads for Bread Crumbs
Not all gluten-free breads create the same results! Here are some great options:
- Gluten-Free White Bread: Creates neutral-flavored, classic bread crumbs.
- Gluten-Free Whole Grain Bread: Gives a richer, heartier taste and works well for stuffing or meatballs.
- Gluten-Free Sourdough: Adds a tangy depth of flavor, great for gourmet dishes.
- Store-Bought Gluten-Free Bread: Any brand will work, but look for one without too much added sugar.
- Homemade Gluten-Free Bread: If you bake your own, this is the best way to ensure fresh, flavorful bread crumbs!
How to Make Gluten-Free Italian-Style Bread Crumbs
If you love the taste of classic Italian bread crumbs, here’s how to make a seasoned gluten-free version:
- Prepare the bread crumbs as usual, toasting and blending the gluten-free bread.
- Mix in the following seasonings:
- 1 teaspoon dried oregano
- 1 teaspoon dried basil
- ½ teaspoon garlic powder
- ½ teaspoon onion powder
- ½ teaspoon salt
- ¼ teaspoon black pepper
- Stir well and store in an airtight container. These are perfect for coating chicken cutlets, adding to meatballs, or topping baked pasta!
How to Make Gluten Free Bread Crumbs Without a Food Processor
Don’t have a food processor? No problem! You can still make perfectly crispy gluten free bread crumbs using these methods:
- Grater Method: Once your gluten-free bread is toasted and cooled, use a box grater to shred it into fine crumbs. This works best for softer bread.
- Rolling Pin Method: Place toasted bread slices in a zip-top bag, then roll over them with a rolling pin until crushed into the desired texture.
- Blender Method: If you have a blender, pulse the toasted bread a few times until you get the consistency you want.
- Hand-Crushed Method: If you prefer chunky panko-style crumbs, simply break up the toasted bread by hand into small, rough pieces.
Tips for Perfect Gluten Free Bread Crumbs
- Use stale bread for a crispier texture. If your bread is fresh, leave it out overnight to dry slightly before toasting.
- For panko-style crumbs, pulse the bread lightly so the pieces remain larger and flakier.
- Season to taste! If you’re using the bread crumbs for a specific recipe, add seasoning that complements your dish.
- Store properly in an airtight container in a cool, dry place for up to 2 weeks.
How to Store Gluten Free Bread Crumbs
- At room temperature: Keep in an airtight container for up to 2 weeks.
- In the fridge: Store for up to 1 month.
- In the freezer: Freeze in a sealed bag for up to 3 months. To use, just thaw and toast lightly to refresh.
How to Make Gluten Free Bread Crumbs Last Longer
Want to extend the shelf life of your homemade bread crumbs? Follow these tips to keep them fresh:
- Store in an airtight container. This prevents moisture from making them stale or soggy.
- Use a vacuum-sealed bag if you plan to freeze them for more than a month.
- Keep them dry. If they get damp, toast them again in the oven for 5 minutes at 300°F (150°C) before using.
- Add a silica gel packet (food-safe) to your storage container to absorb any excess moisture.
How to Use Gluten Free Bread Crumbs in Baking
Bread crumbs aren’t just for frying! Here are a few creative ways to use them in baking:
- Crust for Cheesecake or Pies: Swap graham crackers for finely ground gluten-free bread crumbs mixed with butter and sugar.
- Topping for Muffins: Sprinkle seasoned crumbs over savory muffins for extra crunch.
- Binding for Veggie Patties: Helps hold together homemade veggie burgers and bean patties.
- Coating for Baked Chicken or Fish: Roll your protein in seasoned gluten-free bread crumbs before baking for a crispy crust.
Gluten Free Bread Crumbs vs. Regular Bread Crumbs: What’s the Difference?
If you’re new to gluten-free cooking, you might wonder how these compare to traditional bread crumbs. Here’s a breakdown:
| Feature | Gluten Free Bread Crumbs | Regular Bread Crumbs |
|---|---|---|
| Texture | Can be lighter or denser, depending on the bread used | Usually finer and more uniform |
| Crispiness | Varies—some gluten-free breads create extra crunch | Consistently crispy |
| Flavor | Depends on the type of gluten-free bread used | Neutral, wheat-based taste |
| Absorption | May absorb more or less liquid, depending on ingredients | Absorbs moisture evenly |
| Best Used For | Coatings, toppings, binding | Same, but not gluten-free! |
The main takeaway? Homemade gluten free bread crumbs work just as well as regular ones—sometimes even better, since you can customize the texture and flavor to fit your dish!
Frequently Asked Questions (FAQ)
Can I use any type of gluten-free bread?
Yes! Any gluten-free bread works—white, whole grain, sourdough, or even homemade loaves. Just keep in mind that denser bread will make heavier crumbs.
Can I make these without an oven?
Yes! You can toast the bread in an air fryer at 300°F for 6-8 minutes or let it air-dry for a few hours before blending.
How do I make gluten-free panko crumbs?
Pulse the toasted bread lightly in a food processor to create larger, airy crumbs instead of a fine powder.
What’s the best way to season gluten free bread crumbs?
Try adding garlic powder, onion powder, Italian seasoning, smoked paprika, or even Parmesan cheese for extra flavor!
Homemade vs. Store-Bought Gluten Free Bread Crumbs: Which Is Better?
If you’ve ever bought gluten free bread crumbs from the store, you know they can be expensive and sometimes lack that fresh, toasty flavor. So, is it worth making them at home? Let’s compare:
| Feature | Homemade Gluten Free Bread Crumbs | Store-Bought Gluten Free Bread Crumbs |
|---|---|---|
| Cost | More affordable (uses leftover bread) | Often pricey for small amounts |
| Freshness | Super fresh, made on demand | May contain preservatives |
| Customization | Can adjust texture, flavor, and seasoning | Limited options |
| Ingredients | 100% control over what goes in | May contain additives or hidden sugar |
| Availability | Ready anytime if you have gluten-free bread | Might not always be stocked in stores |
Verdict:
If you want maximum freshness, flavor, and savings, homemade gluten-free bread crumbs are the way to go! But if you’re in a rush and need a quick option, store-bought crumbs can work in a pinch.
Final Thoughts – Why You Should Try This Recipe!
Making your own gluten free bread crumbs is not only easy but also saves money and gives you complete control over the flavor. Whether you need a crispy coating, a binding agent, or a crunchy topping, this simple recipe ensures you always have fresh, gluten-free crumbs ready to go!
Try it out and let me know how it turns out! If you make these, share your photos on Pinterest or tag me—I’d love to see your creations!
Want more gluten-free recipes? Check out my other easy, homemade gluten-free favorites!
Print
Homemade Gluten-Free Bread Crumbs Recipe
- Total Time: 20 minutes
- Yield: About 1 cup of gluten-free bread crumbs 1x
- Diet: Gluten Free
Description
Gluten-free bread crumbs are easy to make at home with just one ingredient—gluten-free bread! Whether you need a crispy coating for chicken, a crunchy casserole topping, or a binder for meatballs, this homemade version is fresh, budget-friendly, and customizable. Skip store-bought and enjoy the best gluten-free bread crumbs made in minutes!
Ingredients
Basic Gluten-Free Bread Crumbs:
- 4 slices gluten-free bread (white, whole grain, or sourdough)
Optional Seasonings:
- ½ teaspoon salt
- ½ teaspoon garlic powder
- ½ teaspoon onion powder
- ½ teaspoon Italian seasoning
Instructions
- Toast the Bread:
- Preheat your oven to 300°F (150°C).
- Place gluten-free bread slices on a baking sheet in a single layer.
- Bake for 10-15 minutes, flipping halfway, until the bread is dry and golden brown.
- Let the bread cool completely before processing.
- Blend into Crumbs:
- Break the toasted bread into smaller pieces.
- Place in a food processor and pulse until you reach your desired texture—fine for traditional bread crumbs, chunkier for panko-style.
- Add Seasoning (Optional):
- Transfer the crumbs to a bowl and mix in salt, garlic powder, onion powder, or Italian seasoning if desired.
- Store or Use:
- Use immediately or store in an airtight container for later use.
Notes
- For panko-style bread crumbs, pulse the bread lightly so the pieces remain larger and flakier.
- No food processor? Use a blender, a rolling pin with a zip-top bag, or a grater.
- Stale bread works best! If your bread is fresh, let it sit out overnight before toasting.
- Storage Tip: Keep in an airtight container at room temperature for up to 2 weeks or freeze for up to 3 months.
- Prep Time: 5 minutes
- Drying Time: 15 minutes
- Cook Time: 0 minutes
- Category: Pantry Staple, Gluten-Free Essentials
- Method: No-Bake, Oven-Dried
Nutrition
- Serving Size: ¼ cup
- Calories: 60 kcal
- Sugar: 1g
- Sodium: 50mg
- Fat: 1g
- Saturated Fat: 0.5g
- Unsaturated Fat: 0.5g
- Trans Fat: 0g
- Carbohydrates: 12g
- Fiber: 1g
- Protein: 2g
- Cholesterol: 0mg
Keywords: Gluten-free bread crumbs, homemade bread crumbs, easy gluten-free recipes