

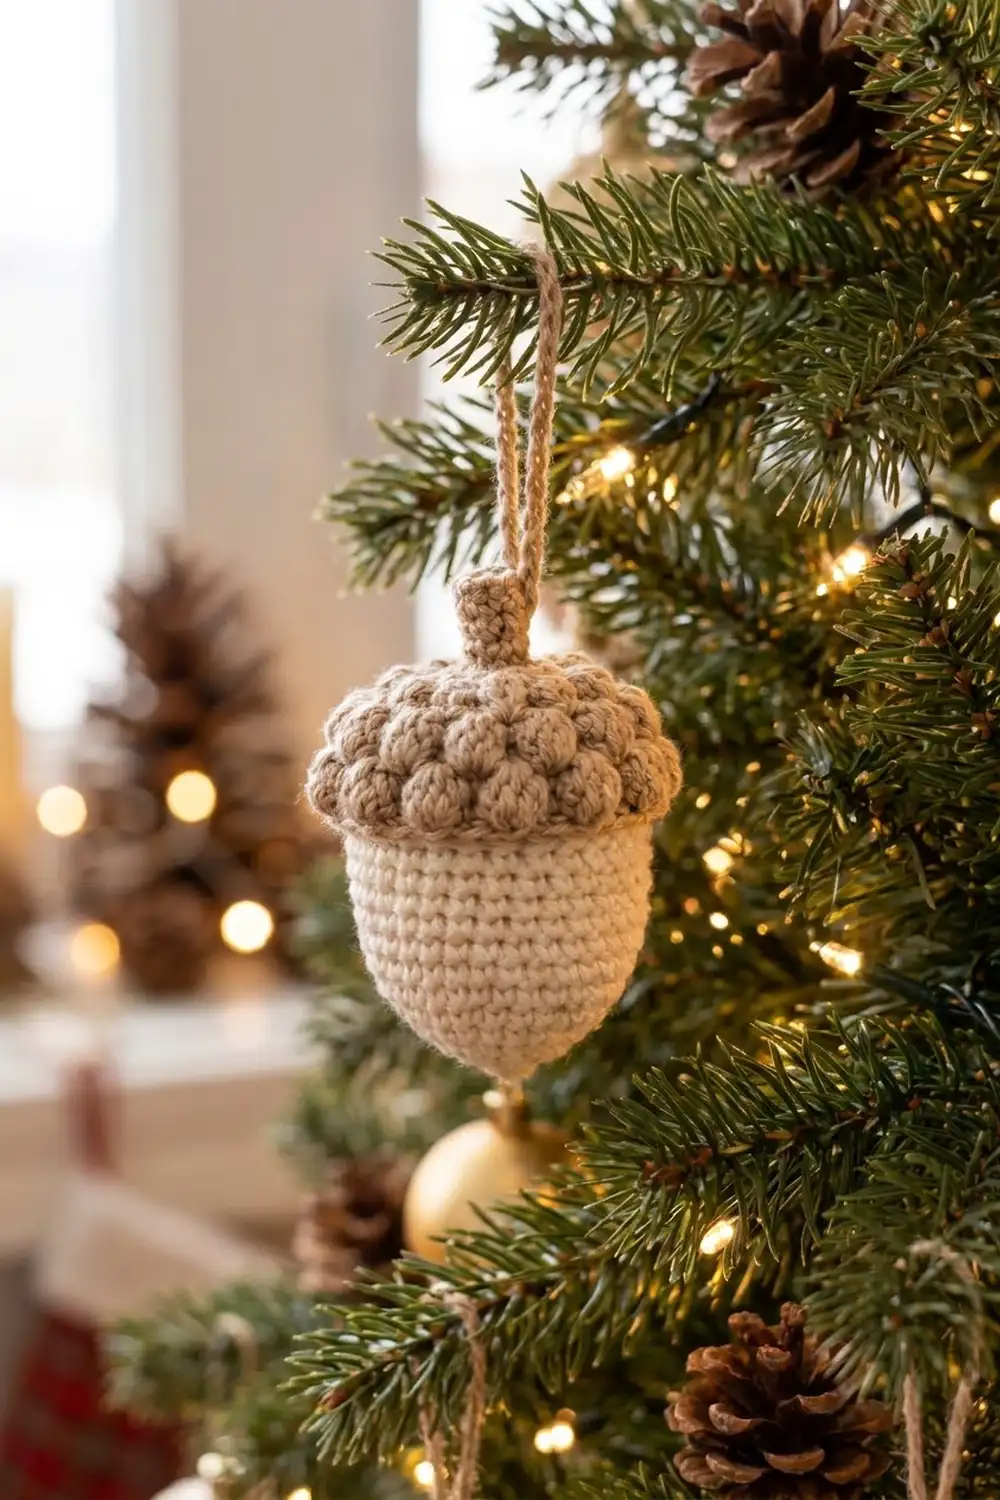
This little acorn is a woodland ornament you can finish in one evening. It has a smooth cream body, a tan cap covered in bobbles, a short stem and a chain loop for hanging on a tree branch, a garland hook or a gift tag.
The colors are cream and light tan, so it suits rustic, Scandinavian or neutral holiday decor. The dense single-crochet body is a quiet contrast to the cap’s bobble texture, which is what makes the shape read as an acorn right away.
This pattern uses US crochet terms. The finished acorn is about 3.25 in (8.3 cm) tall without the loop and 2.25 in (5.7 cm) wide across the cap.
You’ll work three small parts in continuous rounds. The body starts at the pointed tip and is closed at the top. The cap starts at the crown, alternating single-crochet increase rounds with bobble rounds, and ends with a 3-round rim. The stem is a tiny tube. After you sew the parts together, you add the loop.
Finished Size and Construction
- Finished size: 3.25 in (8.3 cm) tall without the loop; 2.25 in (5.7 cm) wide at the cap
- Body width: 1.9 in (4.8 cm) across, 6 in (15.2 cm) around
- Skill level: Easy–Intermediate (bobbles, working in spiral rounds)
- Terminology: US
- Yarn weight: DK (#3), cotton or cotton blend
- Hook: 2.75 mm (C-2)
- Number of pieces: 1 finished ornament (body, cap and stem sewn together)
- Layout: Single standalone ornament
- Cap size before border: 2.2 in (5.6 cm) across, 42 sts around
- Cap size after border: 2.25 in (5.7 cm) across, 1.25 in (3.2 cm) deep
- Border (cap rim) depth: 0.4 in (1.0 cm)
Materials
Use a smooth, tightly plied cotton or cotton-blend DK yarn. It gives clear stitches and round, firm bobbles. Fuzzy or loosely spun yarn will blur the texture.
- Color A, Cream (body): 10 g, about 23 m
- Color B, Light Tan (cap, stem, loop): 15 g, about 34 m
These amounts include a margin for gauge swatching and tails. The bobbles take most of the tan yarn.
Tools:
- 2.75 mm (C-2) crochet hook
- Polyester fiberfill, about 5 g
- Locking stitch marker
- Tapestry needle
- Scissors
- Pins or a few spare stitch markers for placing the cap
Abbreviations (US Terms)
- MR – magic ring
- ch – chain
- sc – single crochet
- inc – 2 sc in the same stitch
- dec – invisible decrease: insert hook in front loops of next 2 sts, yo, pull through both loops, yo, pull through 2
- sl st – slip stitch
- BLO – back loop only
- st(s) – stitch(es)
- yo – yarn over
- Rnd – round
- ( ) ×N – repeat the steps in parentheses N times
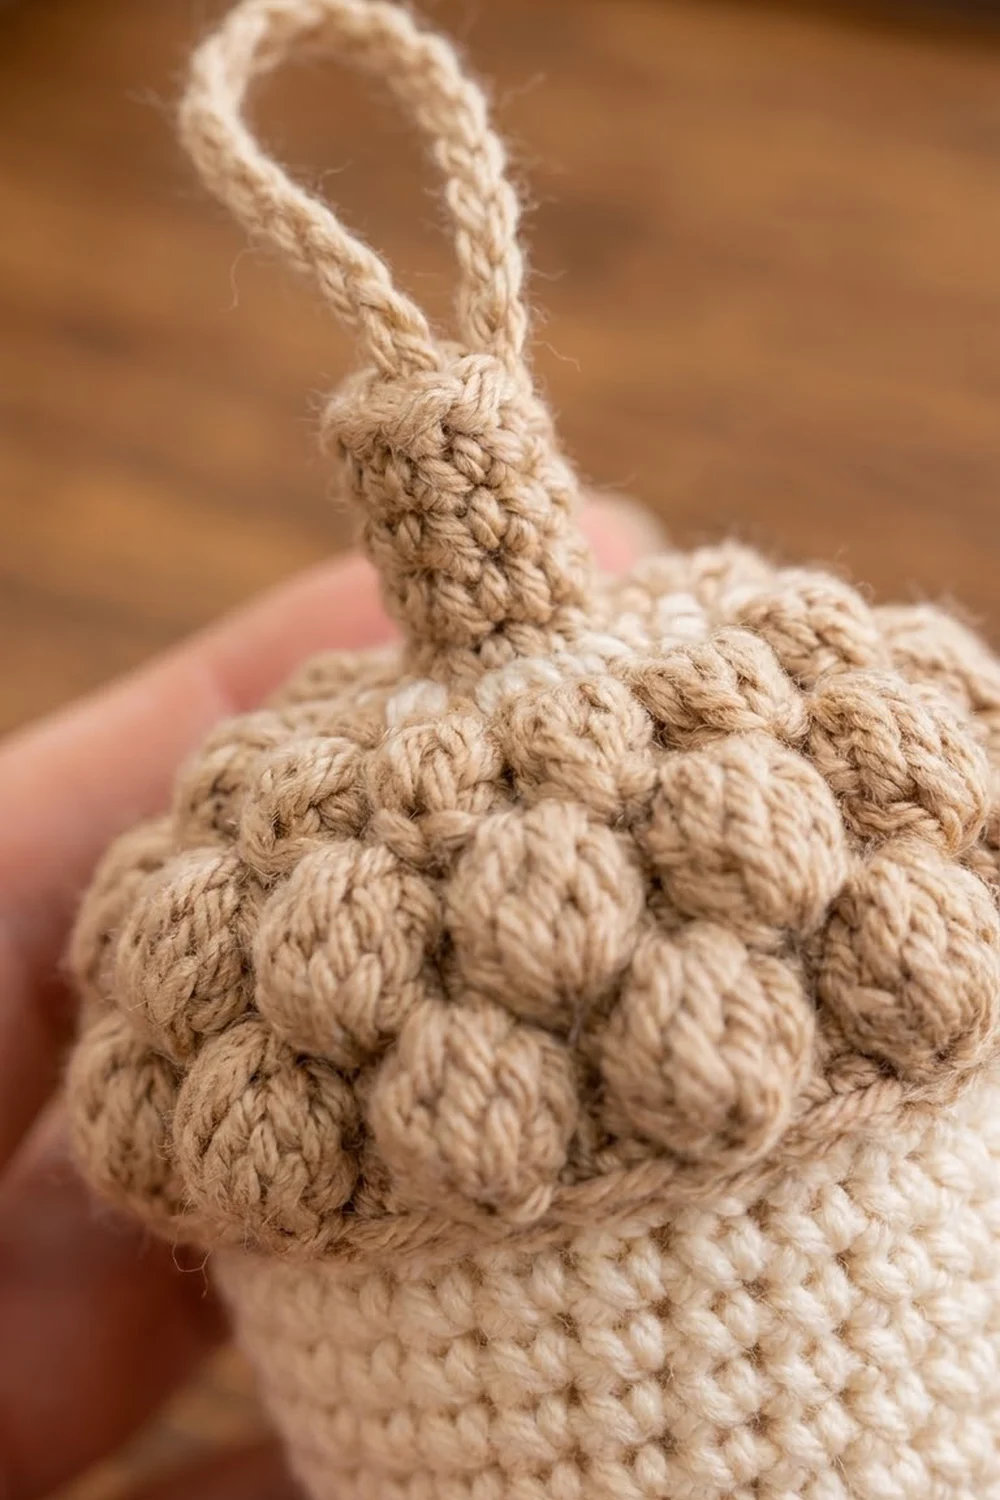
Special stitch – Bobble (bob): (Yo, insert hook in st, yo, pull up a loop, yo, pull through 2 loops) 3 times in the same st. You now have 4 loops on the hook. Yo and pull through all 4 loops. A bobble counts as 1 st.
Bobble direction: Bobbles push out toward the back of the fabric, away from you. Work the cap with the inside of the cup facing you, so that the bobbles end up on the outside. This is shown again in the cap section.
Gauge and Checkpoints
Gauge: 6 sc and 6 rnds = 1 in (2.5 cm) in single-crochet spiral rounds.
Don’t make a flat swatch. Make the body first and use it as your gauge test. It’s the simplest part, and every other measurement depends on it.
Checkpoints:
- Body, Rnd 7 (36 sts): The cone is about 1.9 in (4.8 cm) across the open edge.
- Body, Rnd 13: The tube is 6 in (15.2 cm) around and about 2 in (5.1 cm) from the tip.
- Cap, Rnd 11 (42 sts): The cap is about 2.2 in (5.6 cm) across when pressed gently into a cup shape.
- Cap after border: It measures 2.25 in (5.7 cm) across and slides easily over the stuffed body.
- Finished ornament: It is 3.25 in (8.3 cm) tall without the loop.
If your body is too big (more than 6.25 in / 15.9 cm around at Rnd 13), go down to a 2.5 mm hook. Loose stitches will also show stuffing.
If it is too small (less than 5.75 in / 14.6 cm around), go up to a 3.0 mm hook. Use the same hook for the cap so the two pieces still fit together.
Body (Color A, Cream)
Work in continuous spiral rounds. Don’t join or chain at the start of rounds. Put the marker in the first stitch of each round and move it up as you go.
- Rnd 1: 6 sc in MR. (6)
- Rnd 2: (Sc, inc) ×3. (9)
- Rnd 3: (2 sc, inc) ×3. (12)
Increasing by only 3 stitches in Rnds 2 and 3 is what makes the soft point at the bottom of the acorn.
- Rnd 4: (Sc, inc) ×6. (18)
- Rnd 5: (2 sc, inc) ×6. (24)
- Rnd 6: (3 sc, inc) ×6. (30)
- Rnd 7: (4 sc, inc) ×6. (36)
Checkpoint 1: the opening is about 1.9 in (4.8 cm) across.
- Rnds 8–13: Sc in each st around. (36) This is 6 rounds.
Checkpoint 2: the body is 6 in (15.2 cm) around and about 2 in (5.1 cm) tall from the tip.
- Rnd 14: (4 sc, dec) ×6. (30)
- Rnd 15: (3 sc, dec) ×6. (24)
- Rnd 16: (2 sc, dec) ×6. (18)
Stuff the body firmly now. Push fiberfill into the tip first, then shape the egg with your fingers until it is smooth and even.
- Rnd 17: (Sc, dec) ×6. (12)
Add a little more stuffing.
- Rnd 18: Dec ×6. (6)
Fasten off, leaving a 6 in (15.2 cm) tail. Weave the tail through the front loops of the last 6 sts, pull it closed and hide it inside the body.
Count check: Each decrease round uses all 36, 30, 24, 18 and 12 stitches of the round before. For example, Rnd 14 uses 6 × (4 + 2) = 36 stitches and makes 6 × 5 = 30.
Cap (Color B, Light Tan)
Work in continuous spiral rounds with the marker as before. Rounds 1–3 are plain sc. After that, plain increase rounds alternate with bobble rounds.
How to hold the cap: Once the cap starts to cup, hold it with the inside of the cup facing you. The bobbles will then pop toward the outside.
- Rnd 1: 6 sc in MR. (6)
- Rnd 2: Inc ×6. (12)
- Rnd 3: (Sc, inc) ×6. (18)
- Rnd 4 (bobble): (Bob, sc) ×9. (18; 9 bobbles)
- Rnd 5: (2 sc, inc) ×6. (24)
- Rnd 6 (bobble): (Sc, bob) ×12. (24; 12 bobbles)
- Rnd 7: (3 sc, inc) ×6. (30)
- Rnd 8 (bobble): (Bob, sc) ×15. (30; 15 bobbles)
- Rnd 9: (4 sc, inc) ×6. (36)
- Rnd 10 (bobble): (Sc, bob) ×18. (36; 18 bobbles)
- Rnd 11: (5 sc, inc) ×6. (42)
Checkpoint 3: the cap is about 2.2 in (5.6 cm) across.
- Rnd 12 (bobble): (Bob, sc) ×21. (42; 21 bobbles)
- Rnd 13: Sc in each st around. (42)
- Rnd 14 (bobble): (Sc, bob) ×21. (42; 21 bobbles)
Rounds 12–14 have no increases, so the cap turns downward here and makes the rounded sides.
Every bobble round alternates between starting with a bobble and starting with a sc. This staggers the bobbles so they sit in the gaps of the row below, which gives the packed, pebbly look in the photo.
Total bobbles: 9 + 12 + 15 + 18 + 21 + 21 = 96.
Don’t fasten off. Go straight on to the border below.
Stem (Color B, Light Tan)
- Rnd 1: 6 sc in MR. (6)
- Rnds 2–5: Sc in each st around. (6) This is 4 rounds.
Fasten off, leaving an 8 in (20.3 cm) tail. Push a pinch of fiberfill into the stem so it stands upright. The stem is about 0.8 in (2.0 cm) tall.
Border (Cap Rim)
The rim is the smooth tan lip that hangs over the body. Work it straight on from cap Rnd 14 without fastening off.
Border gauge: 6 sts = 1 in (2.5 cm), the same as the main gauge. Each sc round adds about 0.17 in (0.4 cm) of depth.
This is a round piece with no corners or sides, so each border round counts all the way around.
- Border Rnd 1: Working in BLO, sc in each st around. (42) The unused front loops make a neat ridge where the rim starts.
- Border Rnd 2: Sc in each st around through both loops. (42)
- Border Rnd 3: Sl st loosely in each st around. (42)
Fasten off, leaving a 12 in (30.5 cm) tail for sewing. The border is about 0.4 in (1.0 cm) deep.
Why the math works: The rim has 42 stitches at 6 stitches per inch, so it is 7 in (17.8 cm) around. The body is 36 stitches, or 6 in (15.2 cm) around. That extra 1 in (2.5 cm) of circumference gives about 0.16 in (0.4 cm) of ease on each side, so the cap overhangs the body like a real acorn cap.
There are no increases in the border, so it hangs straight down instead of flaring out. The loose slip-stitch round firms up the edge without pulling it in.
Assembly
- Turn the cap bobble side out if it isn’t already.
- Place the cap over the closed top of the stuffed body. The border should sit about 1 in (2.5 cm) below the top of the body, covering body Rnds 14–18 and the top of the straight section. Pin it in 4 places, keeping the cap level all the way around.
- Sew the cap with the 12 in (30.5 cm) tail. Stitch through the back of cap Rnd 13 and into the body all the way around. Stay above the border so the lip hangs free. Hide the tail inside the body.
- Sew the stem to the magic-ring center of the cap with its 8 in (20.3 cm) tail. Sew through the stem’s last round and the cap Rnd 2 stitches. Hide the tail.
- Make the hanging loop: Join Color B at the center of the stem top and ch 30, about 5 in (12.7 cm). Sl st back into the same stitch so the chain folds into a loop about 2.5 in (6.4 cm) long. Fasten off and weave the ends down through the stem.
Final Blocking
Amigurumi only needs light shaping, not wet blocking.
- Shape the body. Roll the acorn between your palms to even out the stuffing and sharpen the tip.
- Steam the cap rim lightly. Hold a steam iron 1 in (2.5 cm) above the border, without touching it, until it relaxes.
- Set the rim. While it is warm, press the lip down with your fingers so it hangs evenly 0.4 in (1.0 cm) below the bobbles.
- Puff the bobbles. Pinch any flat bobbles from the back side so they stand out.
- Straighten the stem. Roll it between your fingers so it stands straight up, then let everything cool and dry for 15 minutes.
- Measure. Check for 3.25 in (8.3 cm) tall without the loop and 2.25 in (5.7 cm) across the cap.
Final Quality-Control Checklist
- [ ] The body comes to a soft point with no hole at the tip.
- [ ] The body is 6 in (15.2 cm) around, firmly stuffed and smooth, with no fiberfill showing.
- [ ] The cap has 96 bobbles, all on the outside, staggered from row to row.
- [ ] The cap rim has 42 sts in each border round and hangs straight.
- [ ] The cap sits level, with the rim overhanging the body evenly all the way around.
- [ ] The stem is centered and upright, about 0.8 in (2.0 cm) tall.
- [ ] The hanging loop is about 2.5 in (6.4 cm) long and firmly attached.
- [ ] All tails are hidden inside the body or stem.
- [ ] The ornament is 3.25 in (8.3 cm) tall and 2.25 in (5.7 cm) wide.
Troubleshooting
Bobbles are on the inside of the cap. You worked with the outside of the cap facing you. If there are only one or two bobble rounds, turn the cap inside out and carry on with the inside facing you. If there are more, the cap still works turned inside out, because the sc rounds look almost the same on both sides.
The cap flares instead of cupping. Your bobbles are probably too loose, which makes the bobble rounds too wide. Tighten the final yo of each bobble, or go down 0.25 mm for the bobble rounds only.
The cap is too tight to fit over the body. Your cap gauge is tighter than your body gauge. Remake the cap with a hook 0.25 mm larger, or add one round of (6 sc, inc) ×6 for 48 stitches before the border.
Stuffing shows between stitches. Your gauge is loose. Use a smaller hook and try the yarn-under single crochet, which makes a denser fabric.
The body tip is blunt. Rnds 2 and 3 must add only 3 stitches each. Check that Rnd 3 has 12 stitches, not 18.
The stem leans. Add a little more stuffing, then sew around the base again with tighter, evenly spaced stitches.
The loop twists. Chain loosely and let the chain hang straight before you slip stitch it closed.
Care
Spot clean with mild soap and cool water, then reshape and let it air dry. Store it in a box with tissue so the bobbles and rim stay crisp.
Final Notes
Each measurement depends on the one before it. A gauge of 6 sc per inch (2.5 cm) gives a 36-stitch body that is 6 in (15.2 cm) around. The cap grows to 42 stitches, or 7 in (17.8 cm) around, so it fits over the body with room to spare. The 42-stitch border adds a 0.4 in (1.0 cm) lip without changing the width. With the 0.8 in (2.0 cm) stem, the finished acorn is 3.25 in (8.3 cm) tall and 2.25 in (5.7 cm) wide.
If your body passes Checkpoint 2, the rest of the measurements will follow. Make one, check it, then make a handful for the tree.
Happy crocheting!