

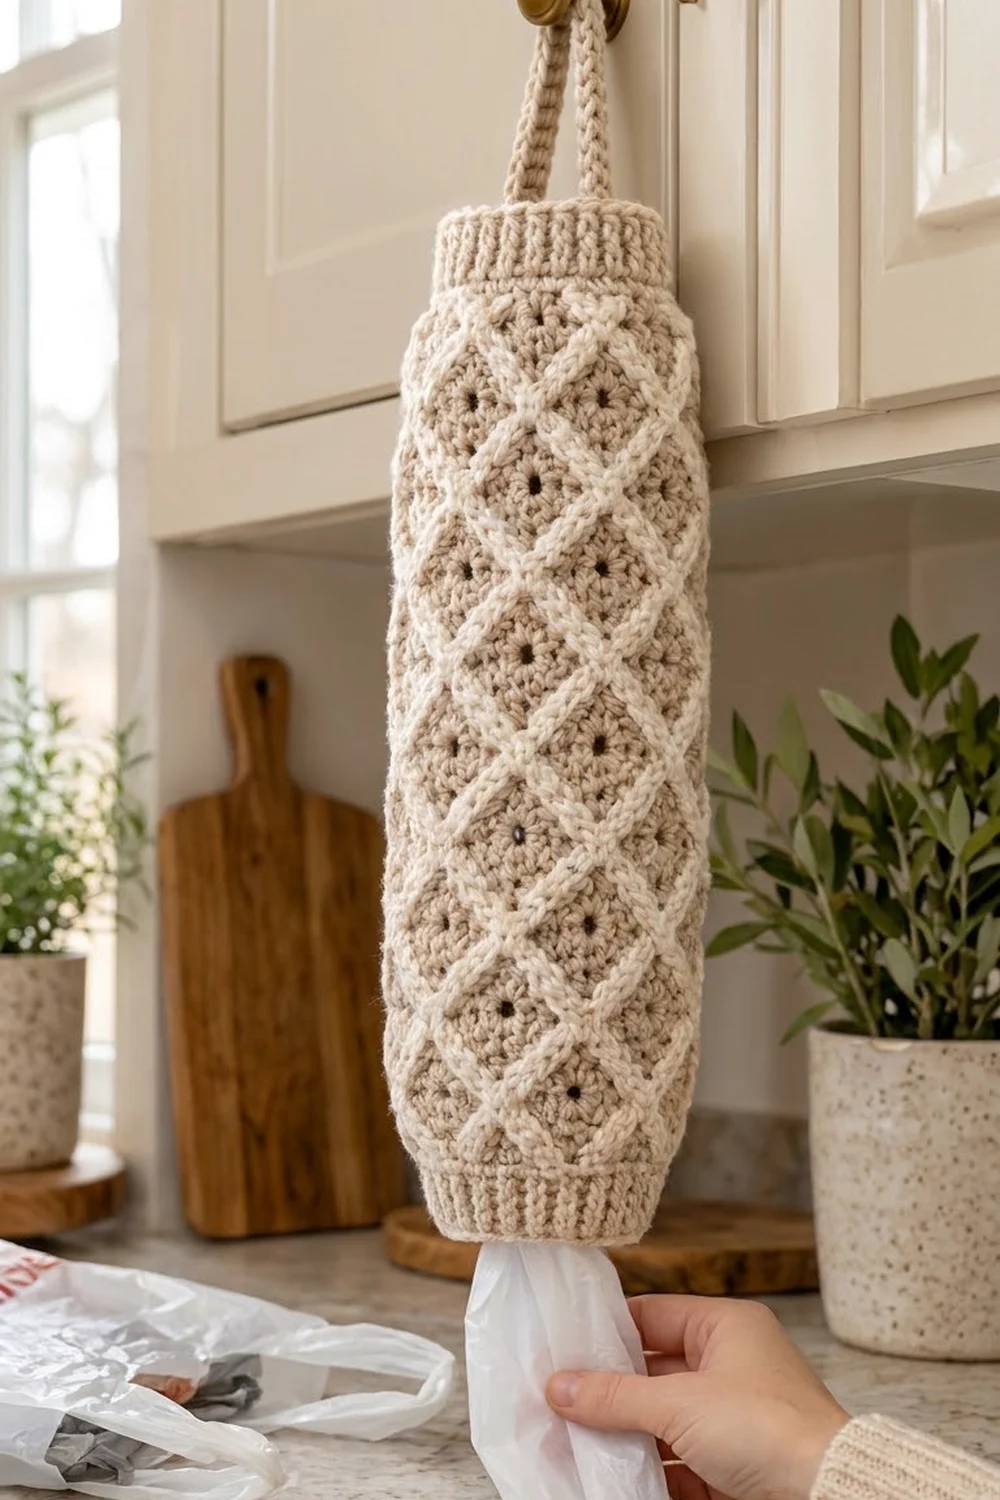
This bag holder keeps a kitchen drawer’s worth of plastic grocery bags in one tidy tube. You stuff bags in through the top and pull them out one at a time from the bottom. It hangs from a cabinet knob or hook by a short strip loop.
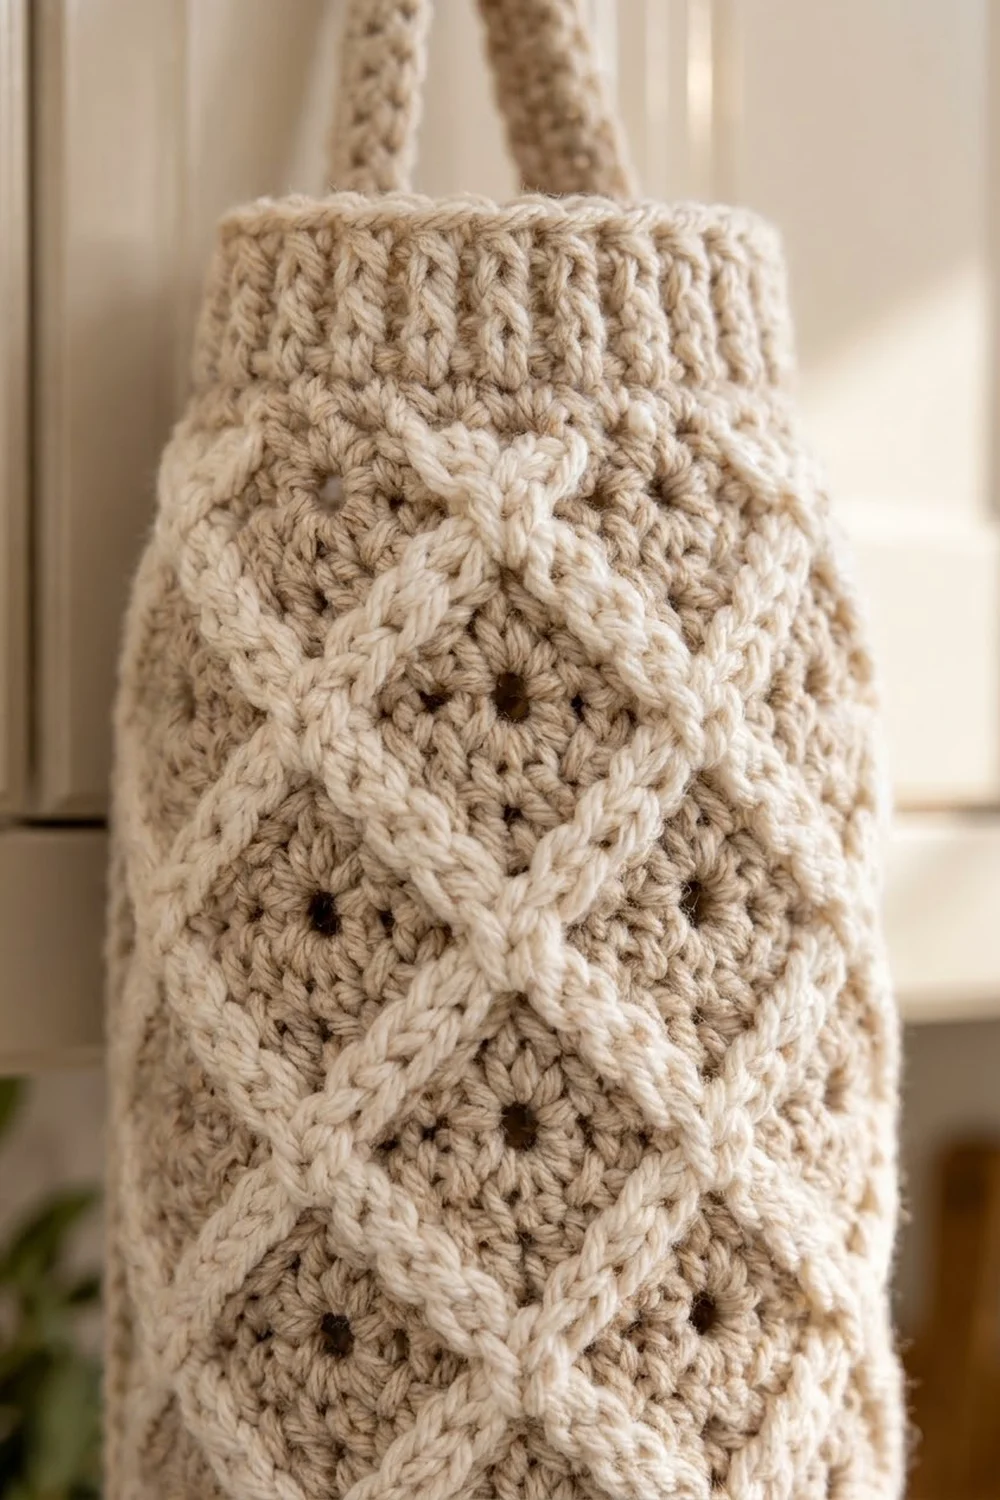
The body is a soft oatmeal background with a raised cream diamond lattice on top. Each diamond has a small eyelet at its center. Ribbed cuffs finish both ends, and the bottom cuff is pulled in a little so the bags don’t fall out on their own. It’s a calm, neutral look that suits both farmhouse and modern kitchens.
The pattern uses US crochet terms. The finished holder is 17.3 in (43.9 cm) tall and 5 in (12.7 cm) wide when lying flat, which is a 10 in (25.4 cm) circumference. The loop adds about 2.75 in (7.0 cm).
You’ll work one flat rectangle of half double crochet, placing the eyelets as you go. Then you’ll seam it into a tube, add the cream lattice with surface slip stitch, crochet a ribbed cuff onto each end, and sew on the loop.
Finished Size and Construction
- Finished size: 17.3 in (43.9 cm) tall x 5 in (12.7 cm) flat width, not counting the loop
- Circumference: 10 in (25.4 cm)
- Skill level: Easy intermediate
- Terminology: US crochet terms
- Yarn weight: Worsted (#4)
- Hook: 5.0 mm (H-8)
- Number of pieces: 1 body panel + 1 hanging loop
- Layout: Flat panel seamed into a tube, with the seam at center back
- Panel size: 40 sts x 40 rows = 10 in (25.4 cm) wide x 13.3 in (33.8 cm) tall
- Size before cuffs: 13.3 in (33.8 cm) tall tube
- Cuff depth: 2 in (5.1 cm) at each end
Materials
Choose a smooth worsted-weight cotton or cotton blend. Cotton holds its shape, shows the lattice clearly and won’t stretch out under a full load of bags. The amounts below assume about 170 m per 100 g.
- Color A, oatmeal: 70 g (119 m) for the panel, cuffs and loop
- Color B, cream: 25 g (43 m) for the lattice, worked with two strands held together
Both amounts include about 20% extra for your gauge check and weaving in ends.
Tools:
- 5.0 mm (H-8) crochet hook
- Tapestry needle
- Stitch markers (at least 4)
- Scissors
- Measuring tape
- Pins and a blocking surface
Abbreviations (US Terms)
- ch – chain
- sk – skip
- sl st – slip stitch
- sc – single crochet
- hdc – half double crochet
- sc2tog – single crochet 2 together
- FPdc – front post double crochet
- BPdc – back post double crochet
- sp – space
- RS / WS – right side / wrong side
Surface slip stitch (surface sl st): Hold the yarn inside the tube, behind the fabric. Insert the hook from front to back through the center of the stitch you want, yarn over and pull a loop to the front. Insert the hook into the next stitch along your line, yarn over at the back, and pull a loop through the fabric and through the loop on your hook. Repeat from * to *. Each stitch makes one link of a raised chain on the RS.
Gauge and Checkpoints
Panel gauge: 16 hdc x 12 rows = 4 in (10.2 cm) in the panel stitch.
Your first diamond band is your test piece. Work Rows 1–8 of the panel and measure before you go on.
- Checkpoint 1 (after Row 8): Width is 10 in (25.4 cm) and height is 2.7 in (6.9 cm).
- Checkpoint 2 (after Row 40): The panel is 10 in (25.4 cm) x 13.3 in (33.8 cm).
- Checkpoint 3 (after seaming): The tube is 5 in (12.7 cm) wide when flattened.
- Checkpoint 4 (after cuffs): Total height is 17.3 in (43.9 cm).
If your piece is too wide, go down half a hook size (4.5 mm) and start again. If it’s too narrow, go up half a size (5.5 mm). Get the width right first: the lattice depends on exactly 40 stitches, so you can’t add stitches to fix it. If the width is right but your rows are a little short or tall, carry on. Row height only changes the diamond shape slightly.
Body Panel
With Color A, ch 42.
Row 1 (RS): Hdc in 3rd ch from hook and in each ch across, turn. (40 hdc)
Place a marker on the RS. The ch-2 at the start of a row never counts as a stitch.
Rows 2–3: Ch 2, hdc in each st across, turn. (40 hdc)
Row 4 (Eyelet Row A, WS): Ch 2, hdc in next 3 sts, ch 1, sk 1, [hdc in next 7 sts, ch 1, sk 1] 4 times, hdc in last 4 sts, turn. (35 hdc + 5 ch-1 sps = 40 sts)
Rows 5–7: Ch 2, hdc in each st and in each ch-1 sp across, turn. (40 hdc)
Row 8 (Eyelet Row B, WS): Ch 2, hdc in next 7 sts, ch 1, sk 1, [hdc in next 7 sts, ch 1, sk 1] 3 times, hdc in last 8 sts, turn. (36 hdc + 4 ch-1 sps = 40 sts)
Rows 9–11: Repeat Row 5. (40 hdc)
You’ve finished one diamond band. Measure now (Checkpoint 1).
Rows 12–35: Repeat Rows 4–11 three more times. (40 hdc at the end of Row 35)
Row 36: Repeat Row 4. (35 hdc + 5 ch-1 sps = 40 sts)
Rows 37–40: Repeat Row 5. (40 hdc)
Fasten off and leave a 12 in (30.5 cm) tail for seaming.
Eyelet map: With the RS facing you, number the columns 1–40 from left to right. Eyelet Row A holes sit in columns 4, 12, 20, 28 and 36. Eyelet Row B holes sit in columns 8, 16, 24 and 32. All the eyelet rows are WS rows, so counting in your working direction always puts the holes in the right columns.
The fifth Row B diamond sits on the seam, between column 40 and column 1, and has no eyelet. That keeps the seam clean at the back.
Seam
Fold the panel with the RS out so the two side edges meet, column 40 next to column 1. Using the tail and a tapestry needle, mattress stitch the row ends together. Pick up one row end from each side on every pass, matching Row 1 to Row 1 and Row 40 to Row 40.
Pull each stitch snug, but not so tight that the seam puckers. Flatten the tube and check that it’s 5 in (12.7 cm) wide (Checkpoint 3). Weave in the end.
Cream Lattice
Work the lattice on the finished tube with two strands of Color B held together. It’s made of 10 continuous spiral lines, each 40 surface sl sts long, one per row. Each line moves 40 columns in 40 rows, so it goes exactly once around the tube.
Use the column numbers from the eyelet map. Going from column 40 to column 1, or from column 1 to column 40, just means crossing the seam.
Up-right lines (5 lines): Start in Row 1 at column 5. Work 1 surface sl st into each row, moving one column to the right each time: Row 2 column 6, Row 3 column 7, and so on up to Row 40. After column 40, the next stitch goes into column 1. Fasten off, leaving a 6 in (15.2 cm) tail at each end, and pull both tails to the inside. Repeat, starting in Row 1 at columns 13, 21, 29 and 37.
Up-left lines (5 lines): Start in Row 1 at column 3. Work 1 surface sl st into each row, moving one column to the left each time: Row 2 column 2, Row 3 column 1, Row 4 column 40, and so on up to Row 40. Repeat, starting in Row 1 at columns 11, 19, 27 and 35.
Lattice check: The lines cross every 4 rows (Rows 4, 8, 12 and so on), and at each crossing both lines go into the same stitch. No line ever passes through an eyelet. Each eyelet is 4 columns from the crossings on its left and right and 4 rows from the crossings above and below, so it sits in the center of its diamond.
Each diamond is 8 columns wide and 8 rows tall, which is 2 in (5.1 cm) wide by 2.7 in (6.9 cm) tall. Make each surface sl st as tall as one hdc row so the tube doesn’t pull in. The flat width should still be 5 in (12.7 cm).
Weave all 20 lattice ends in on the inside. The cuffs will cover the ends near Row 1 and Row 40.
Border: Ribbed Cuffs
Cuff gauge: 16 sts = 4 in (10.2 cm) around. Each sc round is 0.25 in (0.6 cm) tall and each FPdc/BPdc round is 0.5 in (1.3 cm) tall. Each cuff is 2 in (5.1 cm) deep.
Work the cuffs in joined rounds with the RS facing, starting at the seam. Start sc rounds with ch 1 and rib rounds with ch 2; neither counts as a stitch. Join each round with a sl st to the first stitch.
Bottom Cuff
Hold the tube with the bottom edge up and join Color A at the seam in the free loops of the foundation chain.
Rnd 1: Ch 1, sc in each foundation ch around, join. (40 sc)
Rnd 2 (decrease round): Ch 1, [sc in next 3 sts, sc2tog] 8 times, join. (24 sc + 8 sc2tog = 32 sts)
Rnds 3–5: Ch 2, [FPdc around next st, BPdc around next st] 16 times, join. (16 FPdc + 16 BPdc = 32 sts)
Fasten off. Bottom cuff depth: 2 rounds x 0.25 in + 3 rounds x 0.5 in = 2 in (5.1 cm).
Top Cuff
Join Color A at the seam in the top of Row 40.
Rnd 1: Ch 1, sc in each st around, join. (40 sc)
Rnds 2–4: Ch 2, [FPdc around next st, BPdc around next st] 20 times, join. (20 FPdc + 20 BPdc = 40 sts)
Rnd 5: Ch 1, sc in each st around, join. (40 sc)
Fasten off. Top cuff depth: 2 rounds x 0.25 in + 3 rounds x 0.5 in = 2 in (5.1 cm).
Why the math works: The top cuff picks up exactly the 40 stitches of Row 40, so the opening stays 10 in (25.4 cm) around, or 20 stitches per side when flattened. FPdc/BPdc ribbing needs an even count, and 40 gives 20 pairs. The bottom cuff starts from the 40 foundation loops and drops 1 stitch in every 5, leaving 32 stitches. That’s 16 pairs and an 8 in (20.3 cm) circumference before the ribbing pulls in further. The snug opening lets bags come out one at a time. Total height is 2 in + 13.3 in + 2 in = 17.3 in (43.9 cm).
Hanging Loop
With Color A, ch 31.
Row 1: Sc in 2nd ch from hook and in each ch across, turn. (30 sc)
Rows 2–3: Ch 1, sc in each st across, turn. (30 sc)
Fasten off and leave a 12 in (30.5 cm) tail. The strip measures 7.5 in (19.1 cm) x 0.75 in (1.9 cm).
Fold the strip in half. Tuck both ends 1 in (2.5 cm) down inside the top cuff, one on each side of the seam. Whipstitch both ends firmly to the cuff. The loop stands about 2.75 in (7.0 cm) above the rim.
Final Blocking
- Weave in any remaining ends along the seam or inside the cuffs.
- Mist the tube lightly, or dampen it and gently squeeze out the extra water.
- Slide a rolled towel inside so the tube keeps a round shape.
- Pat it to 5 in (12.7 cm) flat width and 13.3 in (33.8 cm) between the cuffs.
- Straighten the lattice lines with your fingers so each diamond sits upright.
- Don’t stretch the cuffs. Let the ribbing stay springy.
- Let it dry completely before you hang it.
Final Quality-Control Checklist
- Every panel row has 40 stitches, and the eyelet rows have the right number of holes (5 in Row A, 4 in Row B).
- The eyelets line up in vertical columns, 8 columns apart.
- The seam lies flat, with Row 1 matched to Row 1 and Row 40 matched to Row 40.
- Each lattice line has 40 surface sl sts and meets up neatly around the tube.
- Every diamond has one centered eyelet, except the diamonds on the seam.
- The top cuff has 40 stitches and the bottom cuff has 32.
- The flat width is 5 in (12.7 cm) and the total height is 17.3 in (43.9 cm).
- The loop is sewn on firmly at the seam and holds a full load of bags.
Troubleshooting
The panel gets wider as you go. You’re probably working into the ch-2 at the start of the row. Count 40 stitches after every eyelet row.
The eyelets don’t line up. Check that each ch-1 sp gets exactly one hdc on the next row, and that every eyelet row is a WS row.
A lattice line drifts off the diagonal. Count from the eyelets in that row. A line should always pass 4 columns away from the nearest eyelet.
The lattice puckers the tube. Your surface sl sts are too tight. Pull out that line and redo it, making each loop as tall as one hdc row.
The bottom cuff flares. Switch to a 4.5 mm hook for Rnds 3–5.
Bags fall out on their own. Add one more FPdc/BPdc round to the bottom cuff.
Care
Hand wash in cool water with mild soap, roll it in a towel to press out the water, and dry it over a rolled towel. Don’t tumble dry, because heat can shrink cotton and distort the lattice.
Final Notes
Everything follows from a few numbers. 40 hdc gives the 10 in (25.4 cm) circumference, and 40 rows give the 13.3 in (33.8 cm) body. Eight columns by eight rows make each 2 in (5.1 cm) by 2.7 in (6.9 cm) diamond, and the 10 lattice spirals fit exactly into that grid. Two 2 in (5.1 cm) cuffs bring the holder to 17.3 in (43.9 cm). Check the width on your first band and count to 40 on every row, and the rest falls into place.
Happy crocheting!