

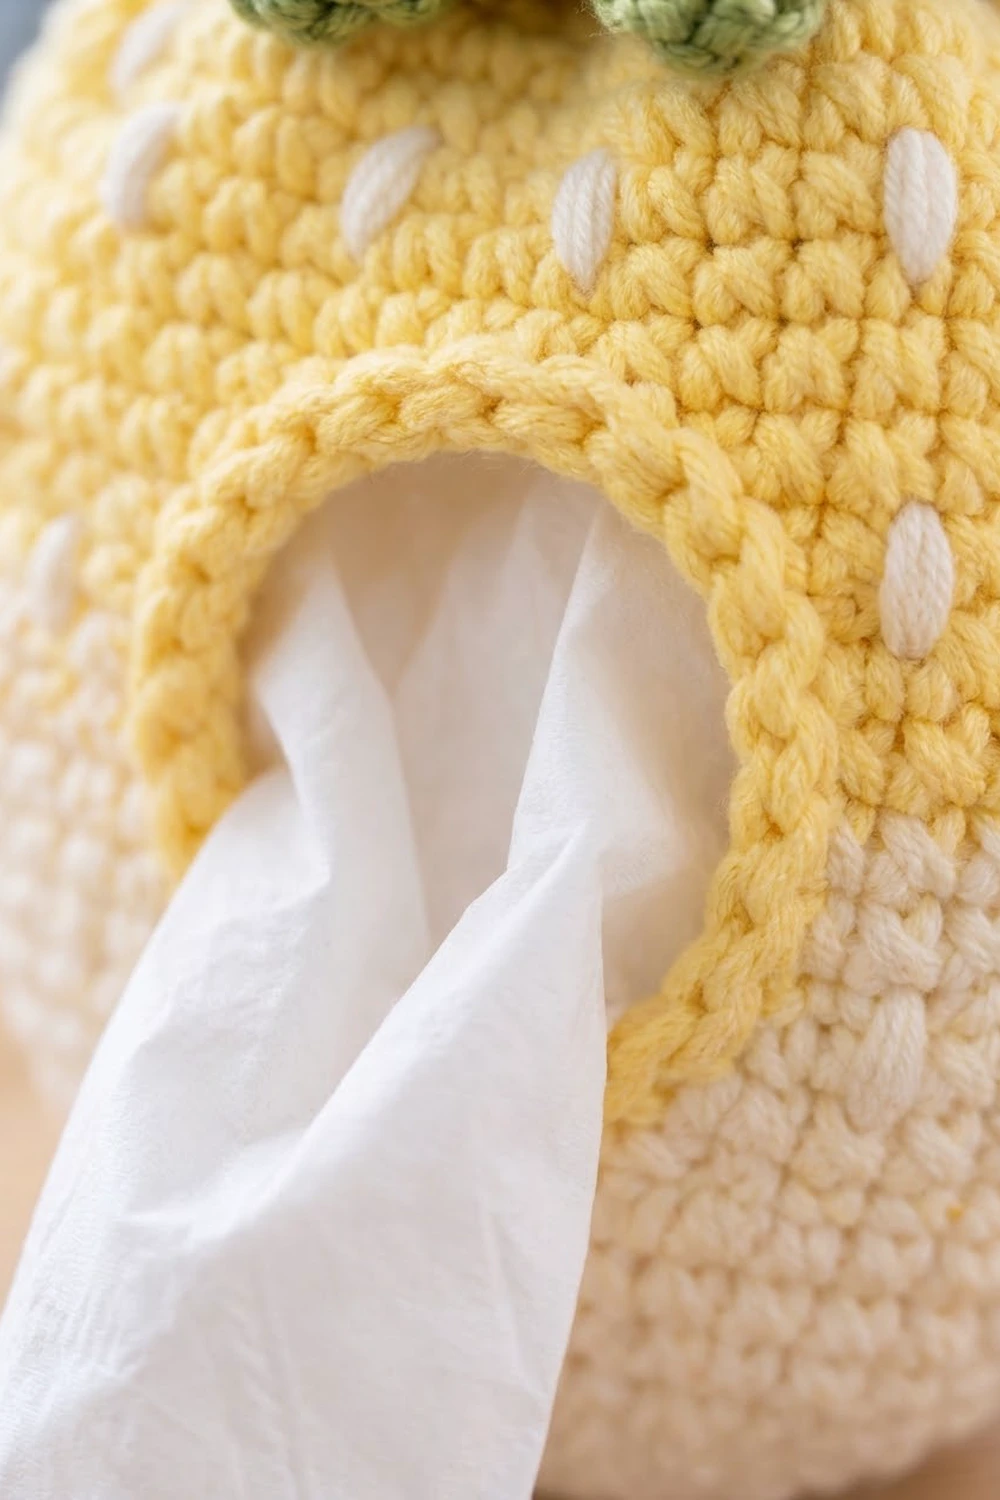
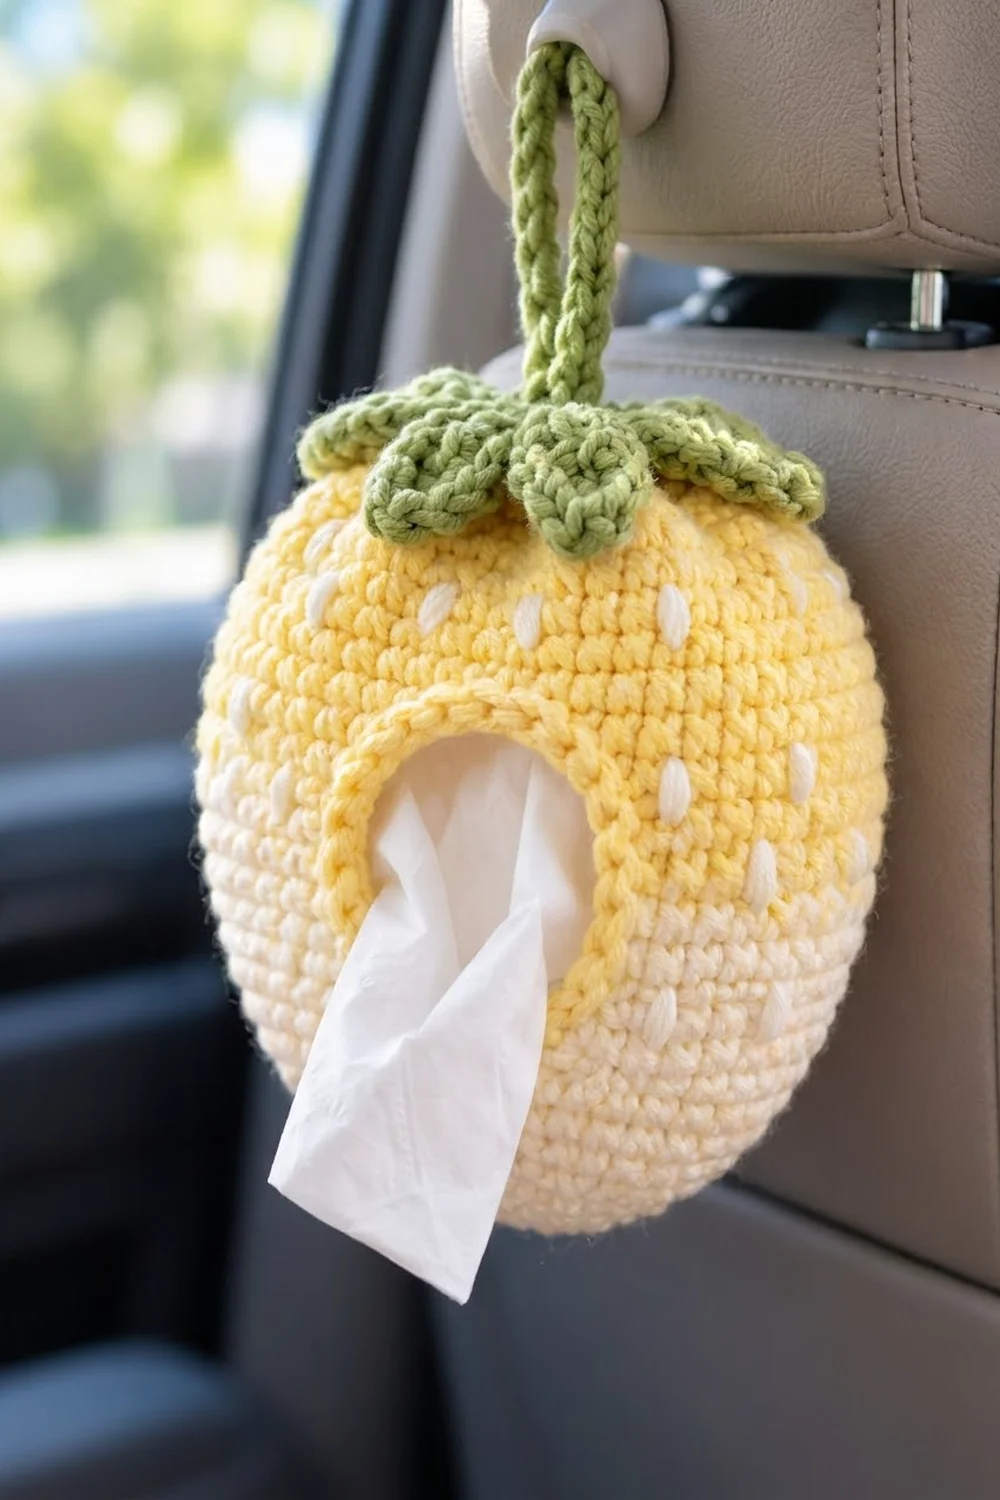
This little strawberry hangs from a car headrest and holds a pocket pack of tissues. You pull each tissue out through a rounded opening on the front. It is a useful thing to keep in the car, and it looks nice too.
The body is buttery yellow on top and soft cream on the bottom. Small ivory seeds are stitched on, and seven green leaves and a chunky green loop sit on top. The style is cute but tidy: dense single crochet, a smooth shape, and a raised rim around the opening.
This pattern uses US crochet terms. The finished holder is about 5.75 in (14.6 cm) wide and 7.25 in (18.4 cm) tall without the loop, or about 10.25 in (26.0 cm) tall including the loop.
You work the body in joined rounds from the bottom up. Partway up, you work turned rows to leave an opening, then close it with a chain and go back to rounds to shape the top. Then you add an edging around the opening, embroider the seeds, make the leaves, disc and cord, and sew them on.
Finished Size and Construction
- Finished size: about 5.75 in (14.6 cm) wide x 7.25 in (18.4 cm) tall; circumference 18 in (45.7 cm)
- Skill level: Easy-Intermediate
- Terminology: US crochet terms
- Yarn weight: Worsted (medium #4), cotton or cotton blend
- Hook: 4.0 mm (US G-6)
- Number of pieces: 1 body, plus 7 leaves, 1 disc and 1 cord sewn on (one finished item, no joining of motifs)
- Layout: single standing/hanging shape, opening centered on the front
- Opening size before edging: 3.25 in (8.3 cm) wide x 3.3 in (8.4 cm) tall
- Edging depth: 2 rounds, about 0.45 in (1.1 cm)
- Finished opening: about 2.4 in (6.1 cm) across
Materials
Choose a smooth worsted-weight cotton or cotton blend. Cotton holds the shape well, shows the stitches clearly and stands up to washing. The amounts below assume about 95 m per 50 g.
- Color A, cream: 25 g, about 48 m
- Color B, buttery yellow: 35 g, about 67 m
- Color C, leaf green: 15 g, about 29 m
- Color D, ivory or white (seeds): 5 g, about 10 m
These amounts include a safety margin.
Tools:
- 4.0 mm (US G-6) hook
- Tapestry needle
- Stitch markers (at least 2)
- Scissors
- Measuring tape
- Pins
- 1 pocket pack of tissues, about 4.25 x 2.1 x 1 in (10.8 x 5.3 x 2.5 cm), for fitting and blocking
Abbreviations (US Terms)
- ch – chain
- sc – single crochet
- hdc – half double crochet
- dc – double crochet
- sl st – slip stitch
- inc – 2 sc in the same stitch
- sc2tog – single crochet 2 together (decrease)
- MR – magic ring
- st(s) – stitch(es)
- RS – right side
Special stitch: invisible decrease (optional). For a smoother top, insert your hook into the front loop only of the next 2 sts, yarn over, pull through both loops, then yarn over and pull through the 2 loops on the hook. Use it anywhere the pattern says sc2tog on the body.
Joined rounds: At the end of every round, sl st to the first sc. Start the next round with ch 1, which does not count as a stitch. The seam this makes will sit right next to the opening, where it is hard to see.
Gauge and Checkpoints
Gauge: 16 sc x 18 rounds = 4 in (10.2 cm) in sc, so 4 sts and 4.5 rounds per inch.
Use the base as your gauge test. Work Rounds 1-6 and lay the circle flat. It should measure about 2.9 in (7.4 cm) across. Fix the gauge now, before you work the rest of the body.
Checkpoints:
- After Round 6: flat circle about 2.9 in (7.4 cm) across.
- After Round 15: circumference 18 in (45.7 cm). The base is starting to curve up into a bowl.
- After Round 18: the cup stands about 2 in (5.1 cm) tall.
- After Row 15: the opening is 3.25 in (8.3 cm) wide and 3.3 in (8.4 cm) tall.
- After Round 48: about 5.75 in (14.6 cm) wide and 7.25 in (18.4 cm) tall.
Too big? Go down 0.5 mm in hook size. Too small? Go up 0.5 mm. The fabric should be firm, with no gaps showing between stitches.
Body
Start with Color A, the cream.
Round 1: 6 sc in MR, join. (6)
Round 2: inc in each st around, join. (12)
Round 3: (sc, inc) x 6, join. (18)
Round 4: (2 sc, inc) x 6, join. (24)
Round 5: (3 sc, inc) x 6, join. (30)
Round 6: (4 sc, inc) x 6, join. (36)
Round 7: sc in each st around, join. (36)
Round 8: (5 sc, inc) x 6, join. (42)
Round 9: (6 sc, inc) x 6, join. (48)
Round 10: sc around, join. (48)
Round 11: (7 sc, inc) x 6, join. (54)
Round 12: (8 sc, inc) x 6, join. (60)
Round 13: sc around, join. (60)
Round 14: (9 sc, inc) x 6, join. (66)
Round 15: (10 sc, inc) x 6, join. (72)
The plain rounds between the increase rounds make the bottom round, not flat.
Rounds 16-18: sc around, join. (72)
Opening Rows
Now you work back and forth over 59 sts. The other 13 sts of Round 18 are left unworked, and they become the bottom edge of the opening.
Row 1 (Round 19, RS): ch 1, sc in the first 59 sts. Leave the last 13 sts unworked. Turn. (59)
Rows 2-3: ch 1, sc in each st across, turn. (59)
At the end of Row 3, change to Color B, the yellow, on the last yarn over. Fasten off Color A.
Rows 4-15: ch 1, sc in each st across, turn after each row except Row 15. (59)
Row 15 is an odd row, so it is a RS row and ends at the edge of the opening, next to the stitch where Row 1 started.
Round 34 (closing round): At the end of Row 15, do not turn. Ch 13, then sl st in the first sc of Row 15. This closes the top of the opening. Ch 1, sc in the same st and in the next 58 sts, then sc in each of the 13 ch, join. (59 + 13 = 72)
Checkpoint: the opening is 13 sts wide, 3.25 in (8.3 cm), and 15 rows tall, 3.3 in (8.4 cm).
Top Shaping
Round 35: sc around, join. (72)
Round 36: (10 sc, sc2tog) x 6, join. (66)
Round 37: sc around, join. (66)
Round 38: (9 sc, sc2tog) x 6, join. (60)
Round 39: (8 sc, sc2tog) x 6, join. (54)
Round 40: sc around, join. (54)
Round 41: (7 sc, sc2tog) x 6, join. (48)
Round 42: (6 sc, sc2tog) x 6, join. (42)
Round 43: (5 sc, sc2tog) x 6, join. (36)
Round 44: (4 sc, sc2tog) x 6, join. (30)
Round 45: (3 sc, sc2tog) x 6, join. (24)
Round 46: (2 sc, sc2tog) x 6, join. (18)
Round 47: (sc, sc2tog) x 6, join. (12)
Round 48: sc2tog x 6, join. (6)
Fasten off and leave a 12 in (30.5 cm) tail. Don’t close the hole yet. The cord goes in there later.
Seeds
Thread a long strand of Color D. Each seed is one straight stitch over the height of one round, about 0.25 in (0.6 cm) long. Go over it twice so it stands out. Count stitches from the seam.
- Row 7 (Round 25): sts 3, 9, 15, 21, 27, 33, 39, 45, 51, 57 (10 seeds)
- Row 11 (Round 29): sts 6, 12, 18, 24, 30, 36, 42, 48, 54 (9 seeds)
- Row 15 (Round 33): sts 3, 9, 15, 21, 27, 33, 39, 45, 51, 57 (10 seeds)
- Round 37: every 6th st starting at st 6 (11 seeds)
- Round 41: every 6th st starting at st 3 (8 seeds)
- Round 44: every 6th st starting at st 6 (5 seeds)
That’s 53 seeds, in a staggered pattern. Keep the strands relaxed on the inside so the fabric does not pucker.
Leaves (Make 7)
With Color C:
Ch 8.
Side 1: sl st in 2nd ch from hook (tip), sc in next ch, hdc in next ch, dc in next 2 ch, hdc in next ch, 3 sc in last ch (base).
Side 2: working in the free loops on the other side of the chain, hdc in next ch, dc in next 2 ch, hdc in next ch, sc in next ch.
Point: ch 2, sl st in 2nd ch from hook, sl st in the tip sl st.
Fasten off and leave an 8 in (20.3 cm) tail.
Each leaf has 14 sts (9 on Side 1 and 5 on Side 2) plus the point. Because you work both sides of one chain, you get a pointed oval with a raised center line. Each leaf is about 1.75 in (4.4 cm) long and 0.75 in (1.9 cm) wide.
Center Disc
With Color C:
Round 1: 6 sc in MR, join. (6)
Round 2: inc in each st around, join. (12)
Round 3: (sc, inc) x 6, join. (18)
Fasten off and leave an 8 in (20.3 cm) tail. The disc is about 1.4 in (3.6 cm) across.
Hanging Cord
With Color C, ch 31. Sl st in the back bump of the 2nd ch from hook and in each ch across. (30 sl sts)
Fasten off, leaving 6 in (15.2 cm) tails at both ends. The cord is about 6.5 in (16.5 cm) long.
Assembly
- Fold the cord in half. Push both ends down into the 6-st hole at the top of the body.
- Reach in through the opening. Knot the cord tails together firmly on the inside.
- Use the body tail to gather the 6 sts tightly around the cord. Sew through the cord 3-4 times and weave in the end on the inside.
- Slide the disc over the cord through its center ring. Sew it flat over Rounds 46-48.
- Pin the 7 leaves evenly around the disc, with the bases tucked under its edge and the tips pointing outward and down. Sew each base and the first 0.5 in (1.3 cm) of its center line. Leave the tips free so they lift a little.
- The whole calyx should span about 4.5 in (11.4 cm). The cord loop should stand about 3 in (7.6 cm) above the top.
Border: Opening Edging
Edging gauge: same as the body, 4 sc per inch.
Hold the body with the RS facing you. Join Color B at the bottom right corner of the opening.
Edging Round 1:
- Bottom: 13 sc in the 13 unworked sts of Round 18.
- Left side: 13 sc over the 15 row ends. Work 1 sc in each row end, but skip the row ends of Rows 5 and 11.
- Top: 13 sc in the free loops of the ch-13.
- Right side: 13 sc over the 15 row ends, skipping Rows 5 and 11 the same way.
- Join. (13 + 13 + 13 + 13 = 52)
Edging Round 2: ch 1. Sc in each st around, except at each of the 4 corners, where you sc2tog over the last st of one side and the first st of the next. Join. Each side has 11 plain sc, and there are 4 corner sc2tog. (44 sc + 4 sc2tog = 48)
Fasten off and weave in the ends.
Why the math works: The opening is 3.25 in (8.3 cm) wide and 3.3 in (8.4 cm) tall, so the perimeter is about 13.1 in (33.3 cm). At 4 sc per inch, that needs about 52 sts. The bottom and top already have 13 sts each. The sides are trickier. Rows are shorter than stitches are wide (4.5 rows per inch compared with 4 sts per inch), so 15 rows x 4/4.5 = 13.3, which rounds to 13 sc per side. Skipping 2 row ends keeps the sides flat. In Round 2, the 4 corner decreases pull the corners in. That changes the rectangle into the rounded opening in the photo and makes the rim stand up a little.
Final Blocking
- Weave in any loose ends on the inside.
- Lightly mist the whole holder with water.
- Stuff it firmly with a towel or plastic bags until it is 5.75 in (14.6 cm) wide and 7.25 in (18.4 cm) tall.
- Shape the rim with your fingers into an even, rounded opening about 2.4 in (6.1 cm) across.
- Pin the leaf tips so they curve slightly outward and down.
- Let it dry completely, then take out the stuffing.
- Put in the tissue pack, short end first, with the open slot facing the opening. Pull the first tissue through.
Final Quality-Control Checklist
- Body measures 5.75 in (14.6 cm) wide and 7.25 in (18.4 cm) tall
- Stitch counts: 72 at the widest point, 59 in every opening row, 52 then 48 in the edging
- The seam sits next to the opening, not in the middle of the back
- Opening is centered on the front, over the cream-to-yellow color change
- Rim lies smooth, with no ruffling or puckering
- 53 seeds, evenly staggered and not pulling the fabric
- 7 leaves evenly spaced, with the tips free
- Cord knotted firmly inside and able to hold a gentle pull
- Tissue pack slides in and out easily
Troubleshooting
Opening rows look different from the rounds. Turned sc rows show a slightly different texture from the rounds. Blocking evens it out, and the seeds hide most of it.
Rim ruffles. You put in too many sts on the sides. Skip one more row end on each side and keep the corner decreases.
Rim pulls the opening tight. Make sure you skipped only 2 row ends on each side, or use a 4.5 mm hook for the edging.
Bottom is flat or pointed. Check that Rounds 7, 10 and 13 were plain rounds with no increases.
Gaps at the decreases. Use the invisible decrease, or go down a hook size.
Holder tilts when hanging. Center the cord in the top hole and gather the ring evenly around it.
Care
Hand wash in cool water with mild soap. Press out the water in a towel, reshape, and dry flat with some stuffing inside.
Final Notes
Here is the measurement chain. Gauge of 16 sc x 18 rounds = 4 in (10.2 cm) gives a 72-st circumference of 18 in (45.7 cm). The 59 opening rows leave a 13-st gap, 3.25 in (8.3 cm) wide and 3.3 in (8.4 cm) tall. The 52-st and 48-st edging rounds finish it as an opening about 2.4 in (6.1 cm) across. The top shaping then brings the holder to 5.75 in (14.6 cm) x 7.25 in (18.4 cm). If you check your gauge first, the rest of the sizes should work out.
Happy crocheting!