

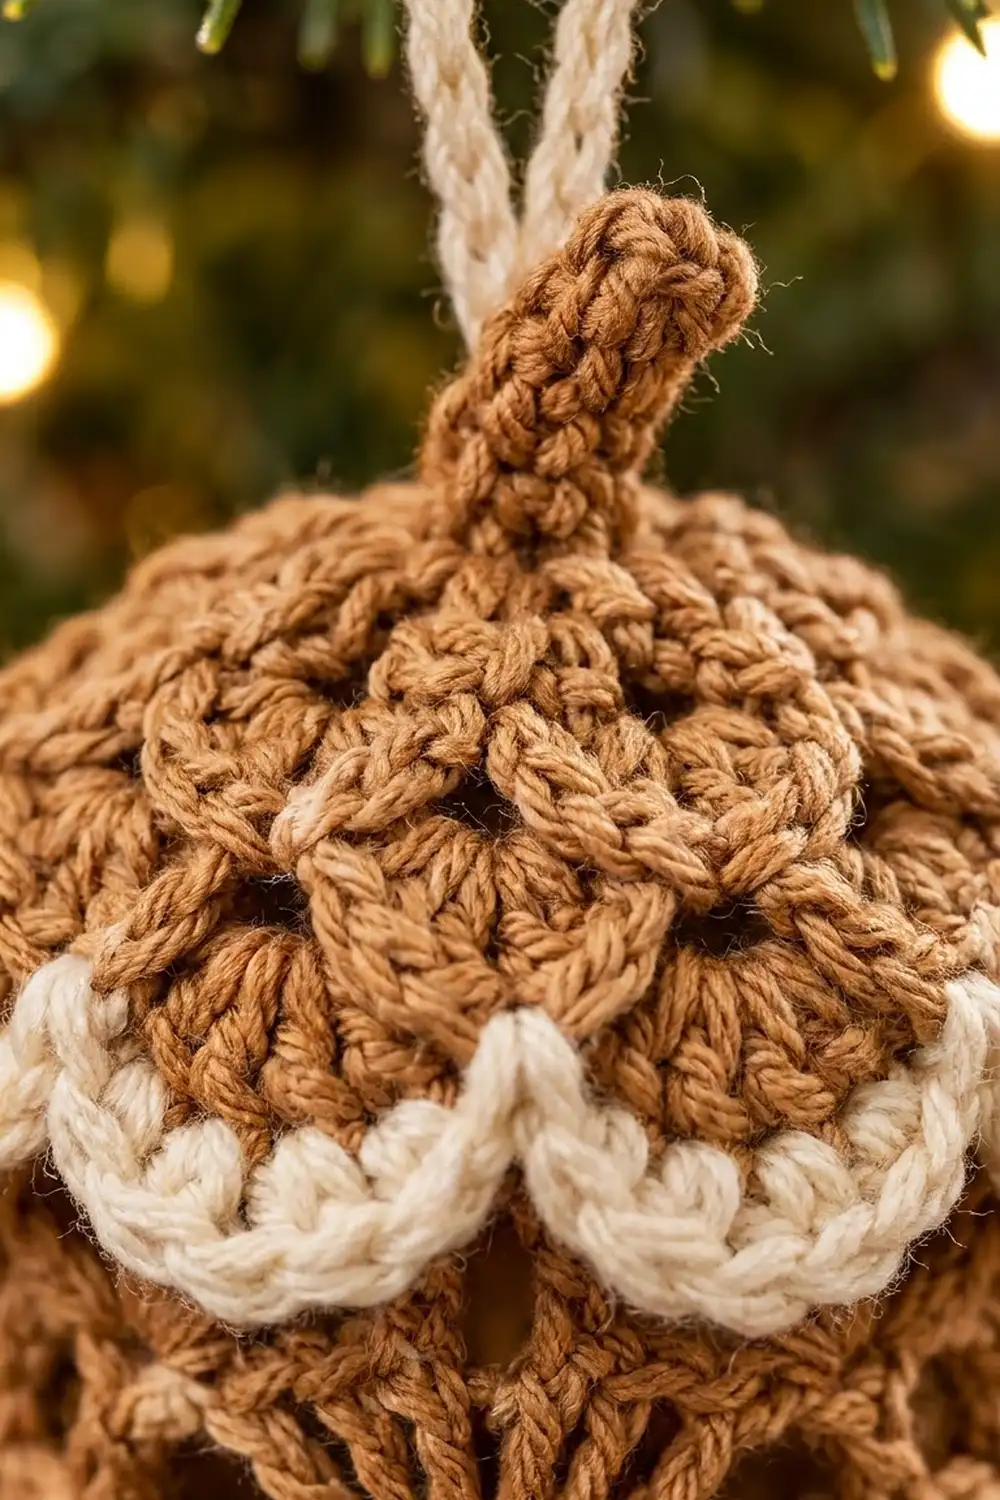
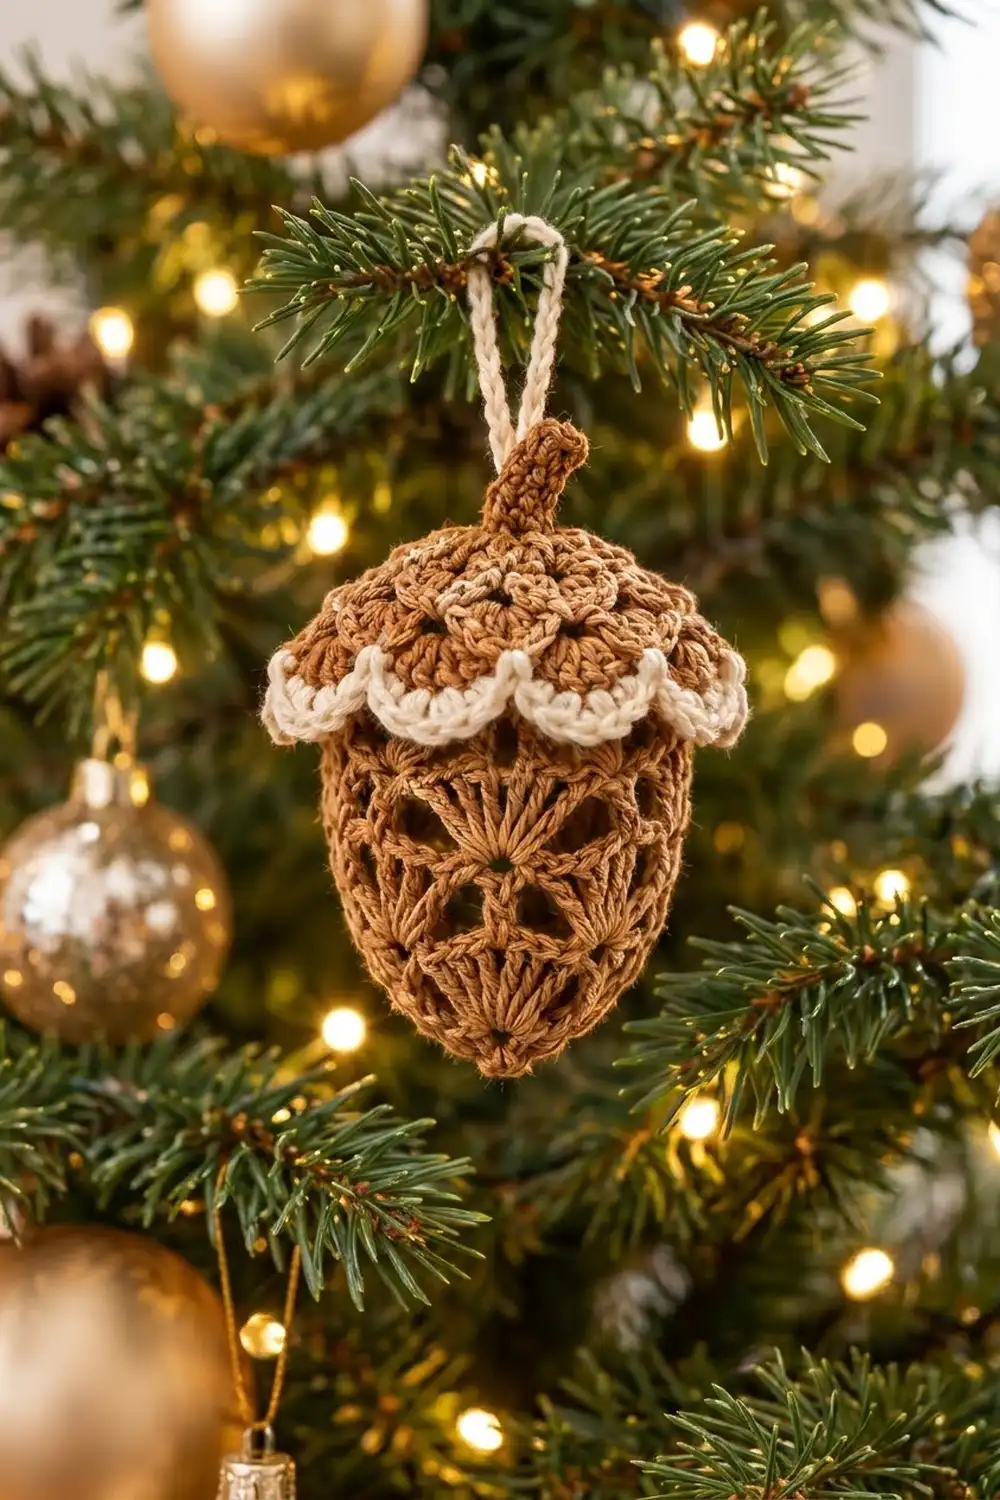
This lace acorn ornament has an openwork caramel body made of staggered fans and a textured cluster cap finished with a cream scalloped rim. A short caramel stem sits on top, and a cream chain loop makes it ready to hang. Among tree lights, it looks warm, rustic, and a little vintage.
The pattern uses two colors: caramel tan for the body, cap, and stem, and soft cream for the scalloped border and hanging loop. Everything is written in US crochet terms.
The finished ornament measures about 4.5 in (11.4 cm) tall from the bottom point to the top of the stem, not counting the loop. The cap is about 3 in (7.6 cm) wide, and the body is about 2.5 in (6.4 cm) wide at its widest point.
The lace body is worked in the round from the bottom point up. The cap is worked separately from the top center down. You make a small stem tube, sew the cap over the body, add the cream border to the cap edge, and attach the loop.
Finished Size and Construction
- Finished size: 4.5 in (11.4 cm) tall without loop; 3 in (7.6 cm) wide at the cap
- Skill level: Intermediate (lace fans, clusters, working in the round)
- Terminology: US crochet terms
- Yarn weight: Sport weight (#2 fine) mercerized cotton
- Hook: 2.75 mm (US C-2)
- Number of pieces: 4 (body, cap, stem, hanging loop), joined into one ornament
- Layout: Stacked vertically: loop, stem, cap, body
- Body size: 2.5 in (6.4 cm) wide x 3.25 in (8.3 cm) tall
- Cap size before border: 2.75 in (7.0 cm) across when pressed flat
- Border depth: 0.4 in (1.0 cm)
Materials
Choose a smooth, mercerized cotton or cotton blend in sport weight. Cotton keeps the lace fans crisp and takes starch well. Fuzzy yarns will blur the openwork.
- Color A, Caramel Tan: 15 g, about 30 m (33 yd), for body, cap, and stem
- Color B, Cream: 5 g, about 10 m (11 yd), for border and hanging loop
Quantities are for one ornament and include a margin for swatching and weaving in ends.
Tools:
- 2.75 mm (US C-2) crochet hook
- Tapestry needle
- 4 locking stitch markers
- Scissors
- Fabric stiffener or spray starch (optional)
- A plastic egg or small balloon about 2.5 in (6.4 cm) wide for blocking
- Pins and a foam block
Abbreviations (US Terms)
- ch – chain
- sl st – slip stitch
- sc – single crochet
- dc – double crochet
- MR – magic ring
- sp(s) – space(s)
- st(s) – stitch(es)
- cl – 3-dc cluster
- beg cl – beginning cluster
3-dc cluster (cl): Yarn over, insert hook in indicated st, pull up a loop, yarn over and pull through 2 loops; repeat from * 2 more times in the same st (4 loops on hook), yarn over and pull through all 4 loops.
Beginning cluster (beg cl): Ch 2, then work the cluster steps only 2 times in the same st (3 loops on hook), yarn over and pull through all 3 loops. Counts as 1 cl.
Gauge and Checkpoints
Gauge: 22 sc x 24 rows = 4 in (10.2 cm). Gauge is not critical for an ornament, but it controls whether the cap fits the body.
Make the body first as your test piece, and check these measurements:
- After Body Round 2: the 24-dc circle is 1.5 in (3.8 cm) across.
- After Body Round 4: the cup is 1.75 in (4.4 cm) across and 1 in (2.5 cm) tall.
- After Body Round 8: the body is 2.5 in (6.4 cm) wide and 2.75 in (7.0 cm) tall.
- After Body Round 10: the body is 3.25 in (8.3 cm) tall; the top rim is about 2 in (5.1 cm) across.
- After Cap Round 2: the circle is 0.75 in (1.9 cm) across.
- After Cap Round 6: the cap is 2.75 in (7.0 cm) across when pressed flat.
If your pieces are too big, go down to a 2.5 mm hook. If they are too small, go up to 3.0 mm. Use the same hook for the body and cap so the 36-st rims match.
Body
With Color A. Work in joined rounds, right side facing, from the bottom point up. Do not turn.
Round 1: Make a MR. Ch 3 (counts as dc), 11 dc in ring. Join with sl st to top of ch-3. Pull the ring tight. (12 dc)
Round 2: Ch 3 (counts as dc), dc in same st, 2 dc in each st around. Join to top of ch-3. (24 dc)
This dc disc forms the radiating fan at the point of the acorn.
Round 3: Ch 1, sc in same st, ch 5, skip 3 sts, sc in next st; repeat from * 4 more times, ch 5, skip last 3 sts, join to first sc. (6 sc, 6 ch-5 sps)
Each repeat uses 4 sts, so 6 repeats use all 24 sts.
Round 4: Sl st in first ch-5 sp, ch 1, sc in same sp, 7 dc in next sc, sc in next ch-5 sp; repeat from * 4 more times, 7 dc in last sc (the joining sc of Round 3). Join to first sc. (6 fans of 7 dc, 6 sc = 48 sts)
Round 5: Sl st in each of next 4 dc (you are now at the center dc of the first fan). Ch 1, sc in same dc, ch 7, sc in center (4th) dc of next fan; repeat from * 4 more times, ch 7, join to first sc. (6 sc, 6 ch-7 arches)
Each arch bridges one sc of Round 4, creating the first diamond windows.
Round 6: Sl st in first ch-7 arch. Ch 3 (counts as dc), 8 dc in same arch, sc in next sc, 9 dc in next arch, sc in next sc; repeat from * 4 more times. Join to top of ch-3. (6 fans of 9 dc, 6 sc = 60 sts)
These fans sit between the Round 4 fans, so the lace is staggered. This is the widest part of the body.
Round 7: Sl st in each of next 4 dc (you are now at the 5th st, the center of the first fan). Ch 1, sc in same st, ch 7, sc in center (5th) dc of next fan; repeat from * 4 more times, ch 7, join to first sc. (6 sc, 6 ch-7 arches)
Round 8: Repeat Round 6. (6 fans of 9 dc, 6 sc = 60 sts)
These fans line up above the Round 4 fans, completing a second band of diamonds.
Round 9: Sl st in each of next 4 dc to the center of the first fan. Ch 1, sc in same st, ch 5, sc in center (5th) dc of next fan; repeat from * 4 more times, ch 5, join to first sc. (6 sc, 6 ch-5 sps)
The shorter chains pull the top in slightly.
Round 10: Ch 1, sc in same sc, 5 sc in next ch-5 sp, sc in next sc, 5 sc in next ch-5 sp; repeat from * 4 more times. Join to first sc. (6 sc worked 1-per-st + 30 sc worked into sps = 36 sc)
Fasten off, leaving a 12 in (30.5 cm) tail. Place 4 markers on Round 10, one every 9 sts.
Cap
With Color A. Work in joined rounds from the top center down, right side facing.
Round 1: Make a MR. Ch 1, 8 sc in ring. Join to first sc. (8 sc)
Round 2: Ch 1, 2 sc in each st around. Join. (16 sc)
Round 3: Beg cl in first st, ch 1, cl in next st, ch 1; repeat from * around. Join to top of beg cl. (16 cl, 16 ch-1 sps = 32 sts)
Round 4: Ch 1. Working into each cl and each ch-1 sp, sc in each of next 7 sts, 2 sc in next st; repeat from * 3 more times. Join. (32 sts worked 1-per-st + 4 extra = 36 sc)
Round 5: Beg cl in first st, ch 1, skip next st, cl in next st, ch 1, skip next st; repeat from * around. Join to top of beg cl. (18 cl, 18 ch-1 sps = 36 sts)
Round 6: Ch 1. Working into each cl and each ch-1 sp, sc in each of next 2 sts, 2 sc in next st; repeat from * 11 more times. Join. (36 sts worked 1-per-st + 12 extra = 48 sc)
Fasten off. The cap curves into a shallow dome with the clusters standing up like scales. On the wrong side, place 4 markers on Round 4, one every 9 sts.
Stem
With Color A.
Round 1: Make a MR. Ch 1, 5 sc in ring. Do not join; work in a spiral. (5 sc)
Rounds 2–5: Sc in each st around. (5 sc)
Fasten off, leaving an 8 in (20.3 cm) tail. The stem is about 0.75 in (1.9 cm) long.
Hanging Loop
With Color B, ch 40, about 6 in (15.2 cm). Fasten off, leaving 6 in (15.2 cm) tails at both ends.
Make All Pieces
For one ornament you need:
- Color A: 1 body, 1 cap, 1 stem
- Color B: 1 hanging loop (the border is added after joining)
Stacking layout, top to bottom:
      [ Cream loop ]
           |
      [ Caramel stem ]
           |
   [ Caramel cluster cap ]
   [ Cream scallop border ]
           |
   [ Caramel lace body ]
           V
      (bottom point)
Joining
Stem to cap: Center the open end of the stem over the cap’s MR. Using the stem tail, whipstitch the 5 stem sts to cap Round 1, then weave the tail up into the stem to firm it.
Loop to stem: Fold the loop in half. Thread both cream tails down through the top of the stem into the cap. Knot them on the wrong side of the cap and trim to 0.5 in (1.3 cm).
Cap to body: With the cap’s wrong side facing you, insert the top of the body until body Round 10 meets the wrong side of cap Round 4. Match the 4 body markers to the 4 cap markers.
Using the body tail, whipstitch 1 body st to 1 cap st all the way around. Both rims have 36 sts, so the join is exactly 1-to-1, with 9 sts joined to 9 sts between each pair of markers.
Keep tension snug but not tight; the cap should not pucker. Cap Rounds 5 and 6 stay free and hang over the body as the overhang.
Checkpoint: The joined ornament measures 4.5 in (11.4 cm) from the bottom point to the top of the stem, and the cap edge sits about 0.5 in (1.3 cm) below the body rim.
Border
With Color B, worked onto the free edge of cap Round 6, right side facing. Border depth is 0.4 in (1.0 cm). Each scallop spans 4 base sts, about 0.75 in (1.9 cm).
Border Round 1: Join Color B with sl st in any st of Round 6. Ch 1, sc in same st, skip next st, 5 dc in next st, skip next st, sc in next st; repeat from * 10 more times, skip next st, 5 dc in next st, skip last st. Join to first sc. (12 scallops: 12 sc + 60 dc = 72 sts)
Border Round 2: Ch 1, sl st in next sc, sc in each of next 2 dc, 2 sc in center dc, sc in each of next 2 dc; repeat from * 11 more times. Join with sl st to first sl st. (72 sts worked 1-per-st + 12 extra = 84 sts)
Fasten off and weave in the end.
Why the math works: Round 6 has 48 sts, and each scallop uses exactly 4 base sts (sc, skip, shell, skip), so 48 ÷ 4 = 12 scallops with nothing left over. Each quarter of the cap (12 sts) holds exactly 3 scallops. In Round 2, the extra sc at each shell center rounds the tips so they lie open. Stitches are added only at the tips, never in the valleys, so the rim keeps its 48-st circumference.
Final Blocking
- Soak the ornament in cool water, or in diluted fabric stiffener for a firmer shape. Press out the excess in a towel.
- Insert a plastic egg or a balloon inflated to 2.5 in (6.4 cm) wide into the body.
- Ease each fan open so the diamond windows are clear and even.
- Shape the cap into a dome. Pull each scallop outward and pin it so the border flares evenly.
- Straighten the stem or give it a slight curve.
- Let it dry completely, at least 24 hours.
- Remove the egg, or deflate the balloon and pull it out through a lace opening.
Final Quality-Control Checklist
- Body is 3.25 in (8.3 cm) tall and 2.5 in (6.4 cm) wide
- Bottom MR is closed tight
- Fans in Rounds 4, 6, and 8 are staggered, 6 per round
- Body and cap joined 36 sts to 36 sts without puckering
- 12 cream scallops evenly spaced
- Cap is 3 in (7.6 cm) wide once shaped
- Stem centered; loop knotted securely inside the cap
- All ends woven in
Troubleshooting
The body is flat instead of cup-shaped. Your dc may be loose. Go down a hook size, or tighten the Round 3 chains.
The diamonds are lopsided. Count the sl sts at the start of Rounds 5, 7, and 9. The first sc must land in a fan’s center dc.
The cap doesn’t cover the body. Confirm Round 6 has 48 sts, then block the cap flatter so the overhang extends farther.
The rims don’t match. Recount body Round 10 and cap Round 4; both must be 36. Use the markers to spread any small error.
The scallops cup inward. Check the 2 sc in each center dc of Border Round 2, and pin the scallops outward while blocking.
The stem flops. Tuck a small wad of Color A yarn inside before sewing it on.
Care
Spot clean or hand wash in cool water and reshape while damp. Store in a box so the cap and lace body keep their shape.
Final Notes
The measurement chain is simple. A 24-dc base 1.5 in (3.8 cm) across grows into a 60-st lace body 2.5 in (6.4 cm) wide, then closes to a 36-st rim. The cap grows from 8 sc to a 36-st joining round that matches the body stitch for stitch, and ends at 48 sts, 2.75 in (7.0 cm) across. Twelve 4-st scallops fit that edge exactly and add a 0.4 in (1.0 cm) cream border. With the stem and loop, the finished ornament stands 4.5 in (11.4 cm) tall.
Happy crocheting!