

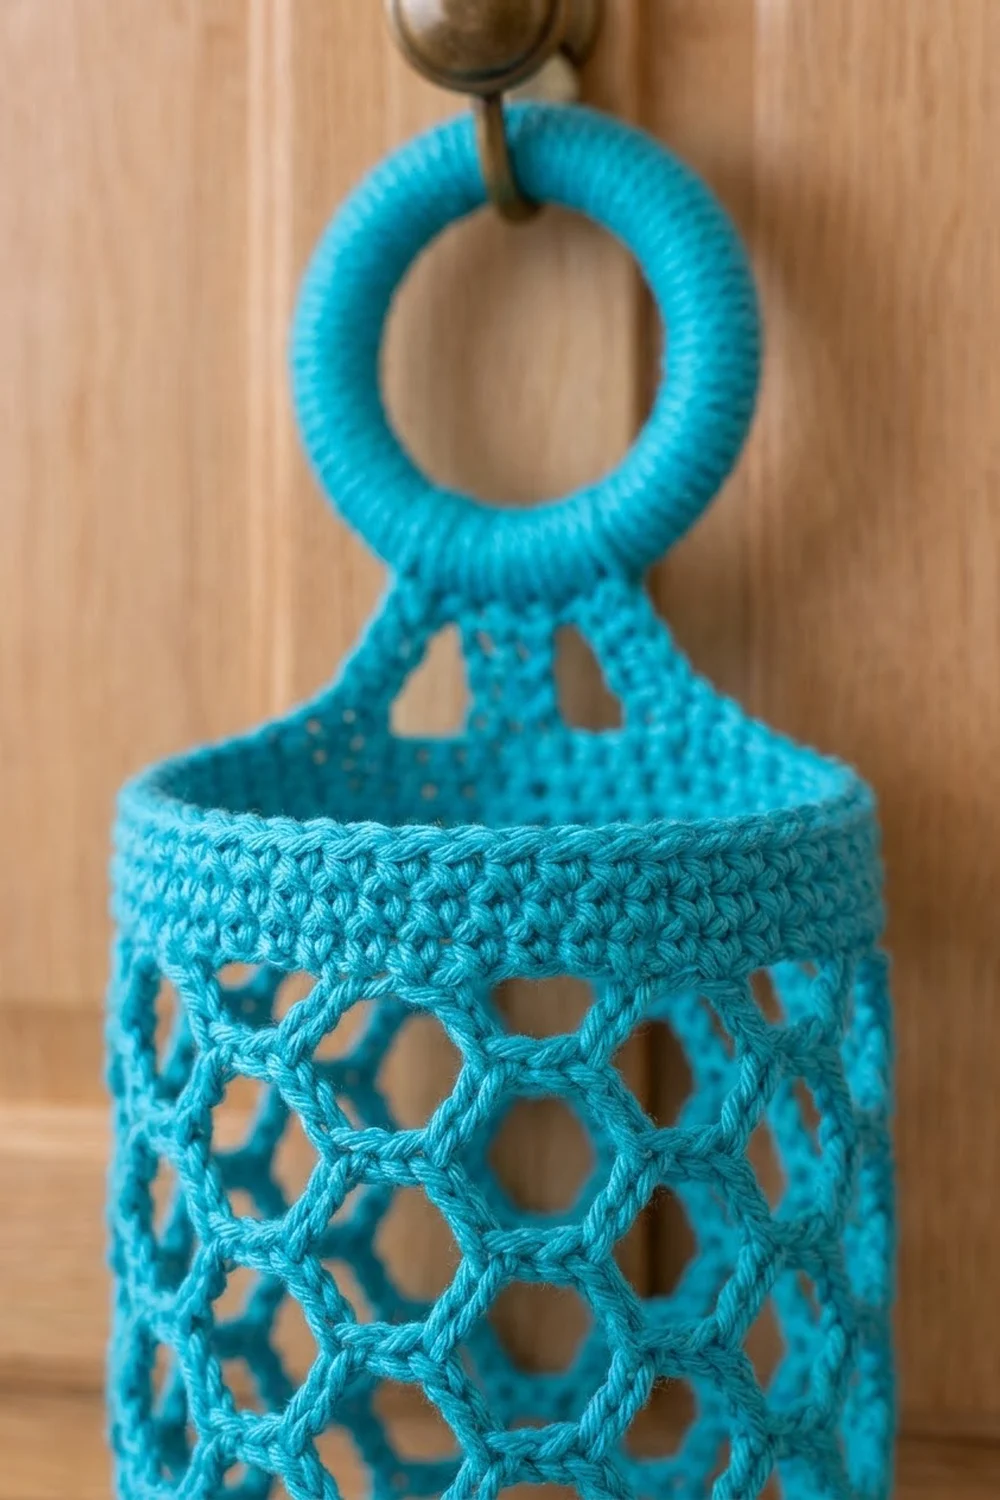
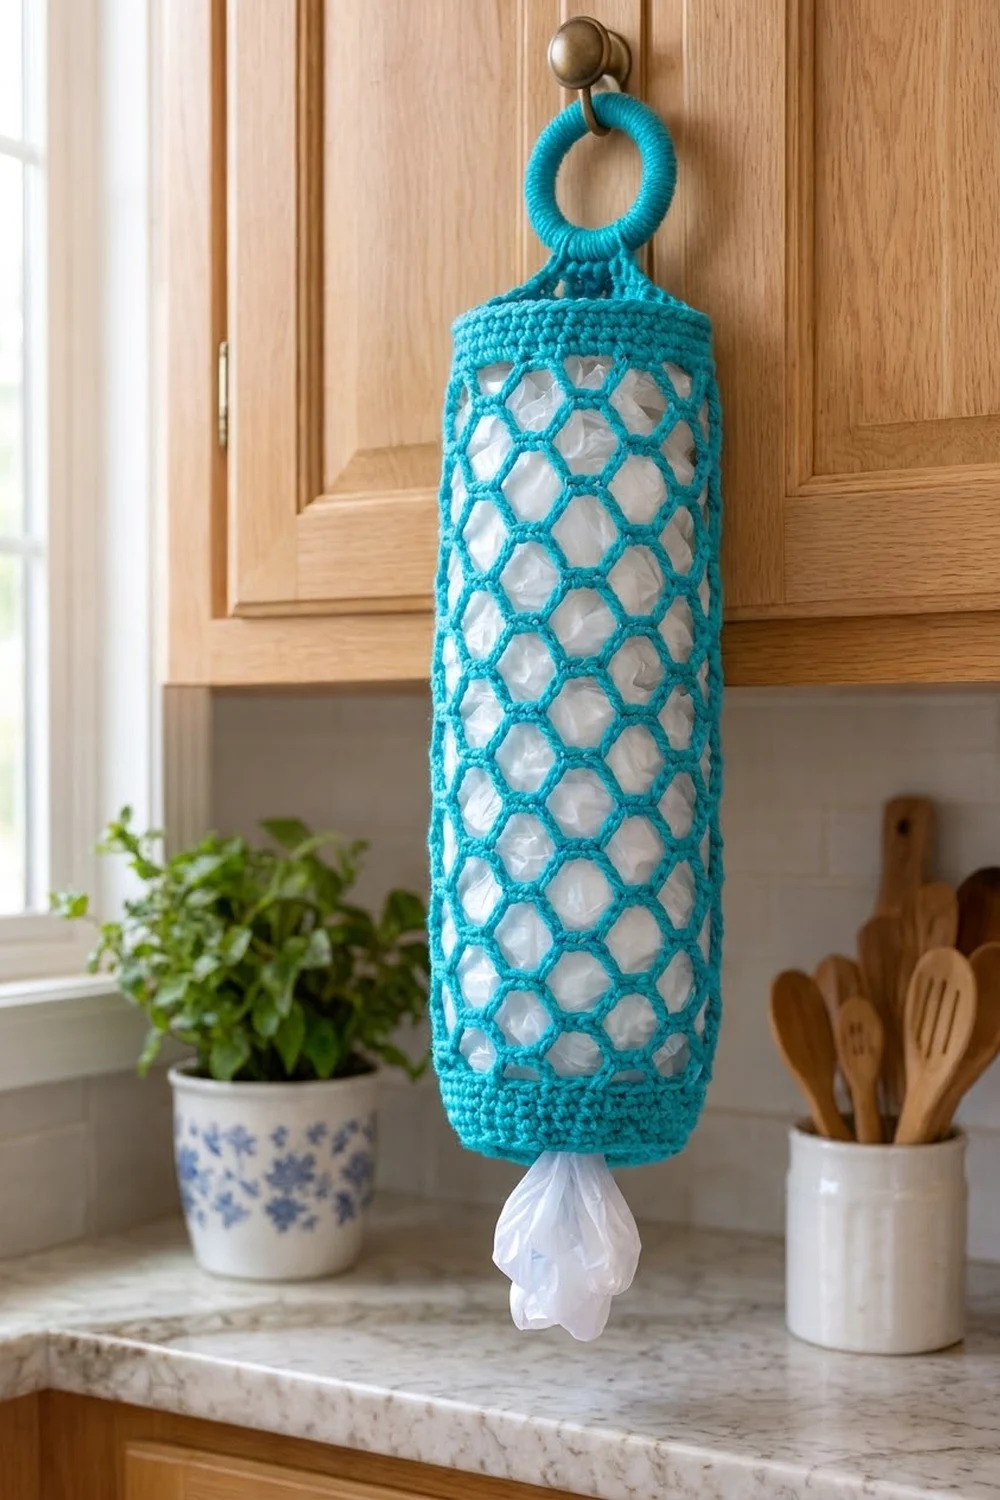
This turquoise plastic bag holder turns a messy pile of grocery bags into something you’re happy to hang on a cabinet knob. It’s a tall, slim tube of open honeycomb mesh with solid bands at the top and bottom. A yarn-covered wooden ring at the top lets you hang it anywhere.
The design uses one color, a bright turquoise cotton, so the hexagon mesh is the star. Stuffed with white bags, the openings show up clearly and the holder looks crisp and graphic in the kitchen. Push bags in through the top and pull them out one at a time through the small hole in the base.
This pattern uses US crochet terms. The finished holder is 4.75 in (12.1 cm) in diameter and 15.7 in (39.9 cm) tall from base to rim. With the ring attached, it hangs about 19.2 in (48.8 cm) long.
You start with a flat double-crochet donut base, then turn the edge up into a single-crochet band. Next comes the chain-loop honeycomb mesh, followed by a solid top rim. Two short straps rise from the rim and attach to a wooden ring that you cover in single crochet.
Finished Size and Construction
- Finished size: 4.75 in (12.1 cm) diameter × 15.7 in (39.9 cm) tall, body only
- Hanging length with ring: about 19.2 in (48.8 cm)
- Skill level: Easy / advanced beginner
- Terminology: US crochet terms
- Yarn weight: Worsted weight (#4), cotton or cotton blend
- Hook: 5.0 mm (US H-8)
- Number of pieces: 1 body, plus 1 covered ring attached at the end
- Layout: Single tube worked in joined rounds from the bottom up
- Piece size: 15 in (38.1 cm) circumference, 60 stitches around
- Size before border (base + bottom band + mesh): 14.6 in (37.1 cm) tall
- Border (top rim band) depth: 1.1 in (2.8 cm), 5 rounds
Materials
Yarn: Use a smooth, worsted-weight cotton or cotton blend. Cotton holds the mesh open, doesn’t stretch out much under the weight of the bags, and survives the wash. Avoid fuzzy or very stretchy acrylics, because the holder will sag over time.
- Turquoise: 70 g (about 120 m / 131 yd)
Tools:
– 5.0 mm (US H-8) crochet hook
– Wooden or metal ring, 2 in (5.1 cm) outer diameter
– Tapestry needle
– 2 locking stitch markers
– Scissors
– Measuring tape
The yarn amount includes a margin of about 35% for your gauge swatch, a test strap, and differences in tension.
Abbreviations (US Terms)
- ch – chain
- sl st – slip stitch
- sc – single crochet
- dc – double crochet
- BLO – back loop only
- sk – skip
- sp – space
- st(s) – stitch(es)
- rnd(s) – round(s)
Special stitch – honeycomb loop: Ch 5, then sc into the next ch-5 space. When you stack these loops round after round, each sc pinches the loop below it at the center, and the mesh opens into hexagon-like cells.
Gauge and Checkpoints
Solid gauge: 16 sc and 18 rnds = 4 in (10.2 cm) in sc.
Mesh gauge: Each ch-5 loop spans about 1 in (2.5 cm) across. 4 mesh rnds = 3 in (7.6 cm), measured with the mesh hanging under light tension.
The base works as your test piece. Make Rounds 1–3 and check them before you go any further.
Checkpoints:
– After Rnd 3: The base lies flat, measures 4.75 in (12.1 cm) across, and has 60 dc. The center hole is about 1.5 in (3.8 cm) across.
– After Rnd 8: The bottom band stands 1.1 in (2.8 cm) tall. The circumference is 15 in (38.1 cm).
– After Rnd 16: You have 8 mesh rnds, about 6 in (15.2 cm) of mesh.
– After Rnd 26: You have 18 mesh rnds, 13.5 in (34.3 cm) of mesh. The body stands 14.6 in (37.1 cm) tall.
– After Rnd 31: The body is 15.7 in (39.9 cm) tall.
If the base is too big (over 5 in / 12.7 cm), go down to a 4.5 mm hook. If it’s too small (under 4.5 in / 11.4 cm), go up to a 5.5 mm hook. If the base ruffles, your dc are too loose, so try a smaller hook. If it cups, your dc are too tight, so try a larger hook.
Pattern: Base
Work the base in joined rounds with the right side facing. The ch-3 at the start of each round counts as a dc.
Rnd 1: Ch 15, sl st to the first ch to form a ring. Ch 3, then work 29 dc into the ring (not into the chains). Sl st to the top of ch-3. (30 dc)
Spread the stitches evenly around the ring so the center hole stays open at about 1.5 in (3.8 cm).
Rnd 2: Ch 3, 2 dc in the next st, dc in the next st, 2 dc in the next st; repeat from * 13 more times. Sl st to the top of ch-3. (45 dc)
Rnd 3: Ch 3, dc in the next st, 2 dc in the next st, dc in each of the next 2 sts, 2 dc in the next st; repeat from * 13 more times. Sl st to the top of ch-3. (60 dc)
Checkpoint: The base is flat, 4.75 in (12.1 cm) across, with 60 dc.
Pattern: Bottom Band
Rnd 4: Ch 1, sc in the BLO of each st around. Sl st to the first sc. (60 sc)
The unused front loops form a neat ridge, and the work starts to turn upward into a tube.
Rnds 5–8: Ch 1, sc in each st around. Sl st to the first sc. (60 sc in each round)
Checkpoint: The band is 1.1 in (2.8 cm) tall and the circumference is 15 in (38.1 cm).
Pattern: Honeycomb Mesh
Rnd 9 (set-up mesh round): Ch 1, sc in the first st, ch 5, sk the next 3 sts, sc in the next st, ch 5, sk the next 3 sts; repeat from * 13 more times. Sl st to the first sc. (15 ch-5 loops)
Math: Each repeat uses 1 sc plus 3 skipped sts, so 4 sts × 15 repeats = 60 sts. That matches the band exactly.
Rnd 10: Sl st into each of the next 3 ch so you are at the center of the first loop. Ch 1, sc around that same ch-5 sp, ch 5, sc in the next ch-5 sp; repeat from * 13 more times. Ch 5, sl st to the first sc. (15 ch-5 loops)
Rnds 11–26: Repeat Rnd 10. (15 ch-5 loops in each round)
You now have 18 mesh rounds (Rnds 9–26).
Keep your chains even. If you rush some loops, they come out shorter than others and the hexagons look uneven. Every sc must go around the loop below, not into a chain stitch, so the cells pinch at the center and form the honeycomb.
Checkpoint: The mesh measures 13.5 in (34.3 cm) when you hang it lightly. The body is 14.6 in (37.1 cm) tall.
Border: Top Rim Band and Straps
Border gauge: Use the same gauge as the body, 16 sc and 18 rnds = 4 in (10.2 cm). The rim has 60 sts, or 15 sts per quarter of the circumference.
Rnd 27 (conversion round): Ch 1, work 4 sc into each ch-5 sp around. Sl st to the first sc.
Count: 0 sts worked into the existing sc tops + 4 sc into each of 15 loops = 60 sc (15 sc per quarter).
Rnds 28–31: Ch 1, sc in each st around. Sl st to the first sc. (60 sc in each round; 15 per quarter)
Fasten off and weave in the end.
Why the math works: The base finishes at 60 dc. Rnd 9 uses those 60 sts as 15 groups of 4, and every mesh round keeps exactly 15 loops. Rnd 27 then puts 4 sc into each loop, which gives back 60 sts. Since the top and bottom bands have the same count, the tube stays straight and doesn’t flare.
Checkpoint: The rim band is 1.1 in (2.8 cm) deep and the body is 15.7 in (39.9 cm) tall.
Straps (make 2)
Number the 60 sts of Rnd 31 starting at the join, which is st 1. Place a marker in st 1 and another in st 31. These two points sit exactly opposite each other, 30 sts apart.
Strap 1:
Row 1: With the right side facing, join yarn in st 1 and work sc in sts 1–4. Turn. (4 sc)
Rows 2–14: Ch 1, sc in each st across. Turn. (4 sc in each row)
Fasten off and leave a 12 in (30.5 cm) tail.
Strap 2: Work the same way over sts 31–34.
Checkpoint: Each strap is 1 in (2.5 cm) wide and about 3.1 in (7.9 cm) long.
Covered Ring
Join yarn around the ring with a sl st. Ch 1, then work sc over the ring, pushing the stitches together as you go until no wood or metal shows. That should take about 40 sc. Sl st to the first sc and fasten off.
Twist the ring a little so the sc tops all face the outside edge. Then weave in the end.
Attaching the ring
- Pass Strap 1 through the ring from front to back.
- Fold the last 4 rows (Rows 11–14) over the bottom of the ring.
- Whipstitch Row 14 to Row 10 through both layers.
- Repeat with Strap 2 from the opposite side.
The two straps should meet side by side at the bottom of the ring. Each strap now shows about 2.2 in (5.6 cm) between the rim and the ring. That puts the top of the ring about 3.5 in (8.9 cm) above the rim.
Final Blocking
- Soak the holder in cool water for 10 minutes. Press out the water gently; don’t wring.
- Roll it in a towel to remove extra moisture.
- Slide it over a cylinder about 4.75 in (12.1 cm) across, such as a rolled towel or a wrapped bottle.
- Open each hexagon with your fingers so all the cells are the same size and lined up in straight columns.
- Flatten the base so the center hole is round and about 1.5 in (3.8 cm) across.
- Smooth the rim band and straighten the straps.
- Let it dry completely, then hang it from the ring. Leaving it hanging for a day helps the mesh settle evenly.
Final Quality-Control Checklist
- [ ] The base lies flat at 4.75 in (12.1 cm) with an open center hole.
- [ ] The bottom and top bands each have 60 sc and measure 1.1 in (2.8 cm).
- [ ] Every mesh round has exactly 15 loops.
- [ ] There are 18 mesh rounds, measuring 13.5 in (34.3 cm).
- [ ] The body is 15.7 in (39.9 cm) tall.
- [ ] The straps start 30 sts apart and are both 14 rows long.
- [ ] The ring is fully covered with no gaps.
- [ ] The straps are stitched securely through both layers.
- [ ] All ends are woven in at least 2 in (5.1 cm).
Troubleshooting
The mesh spirals or leans. You probably skipped the sl sts to the center of the loop at the start of a round. Check that every round starts with 3 sl sts.
Your loop count is off. Count loops at the end of every mesh round. Fewer than 15 means you missed a space; more than 15 means you worked twice into one space.
The tube flares at the top. Your Rnd 27 has more than 60 sts. Work exactly 4 sc per loop.
The base hole closed up. Rnd 1 was bunched too tightly. Spread the dc around the full ring, or start with ch 16 instead.
The holder stretches too long. Cotton can relax when it carries a lot of bags. Leave out 2 mesh rounds, or switch to a smaller hook for the mesh.
Ring shows through the stitches. Add more sc until it’s covered; 40 is a guide, not a rule.
Care
Hand wash or machine wash on a gentle cold cycle. Reshape while damp and hang to dry.
Final Notes
The measurement chain in short: a 60-dc base that is 4.75 in (12.1 cm) across, a 60-sc bottom band of 1.1 in (2.8 cm), 18 rounds of mesh with 15 loops each for 13.5 in (34.3 cm), and a 60-sc top rim of 1.1 in (2.8 cm). That gives a body 15.7 in (39.9 cm) tall, and the straps and ring bring the hanging length to about 19.2 in (48.8 cm). If you check your base gauge first and keep 15 loops in every round, the rest will fall into place.
Happy crocheting!