

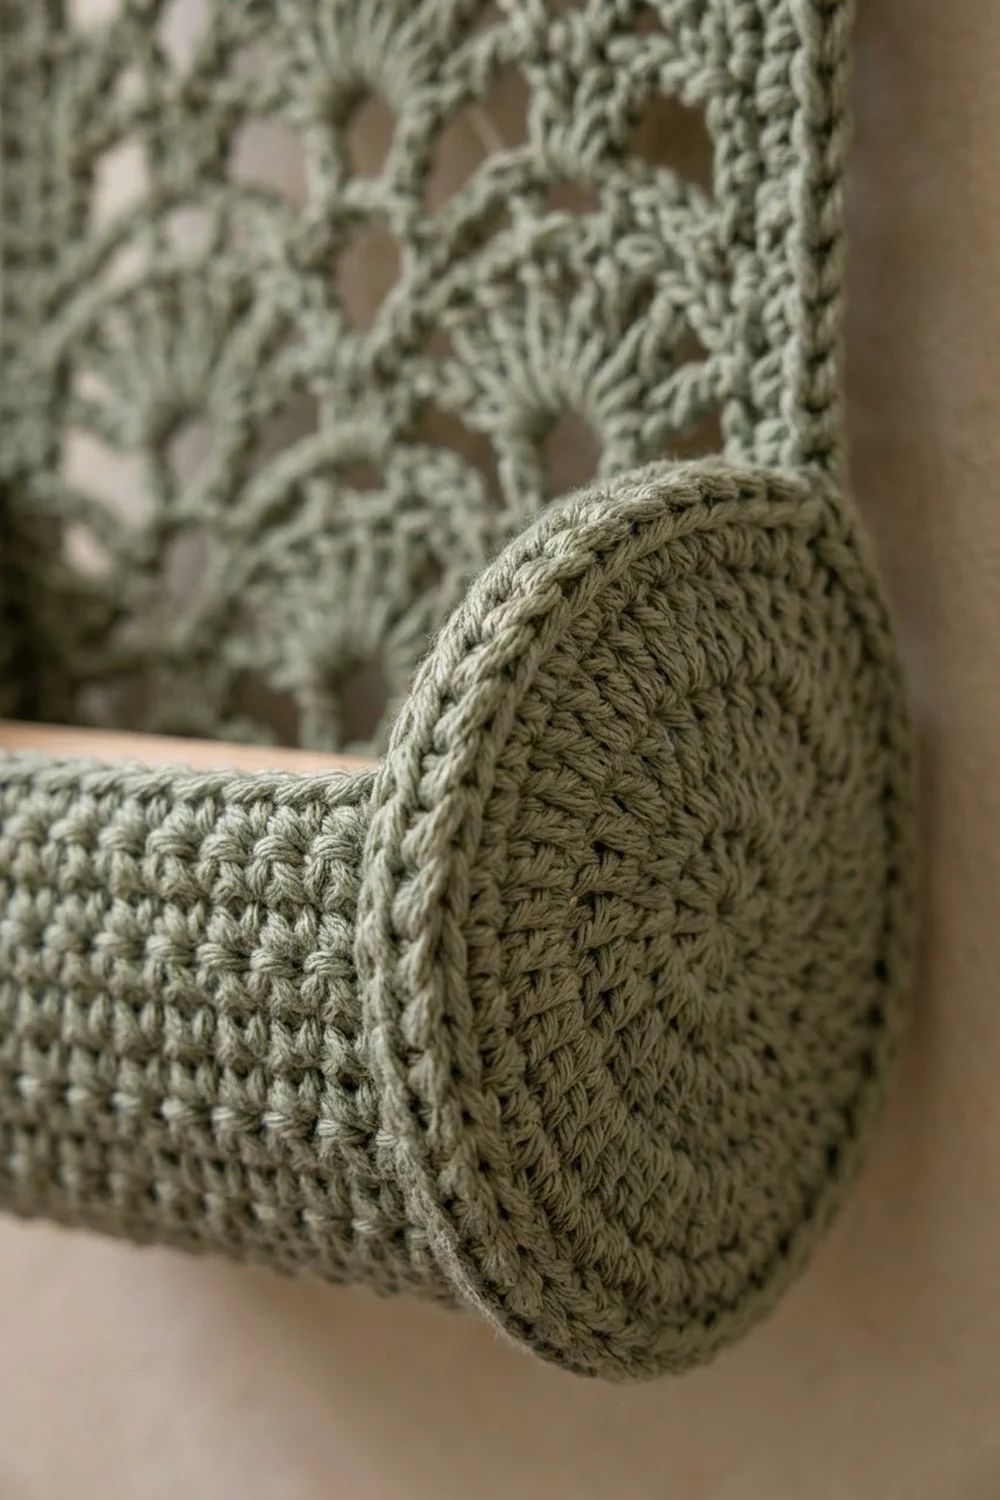
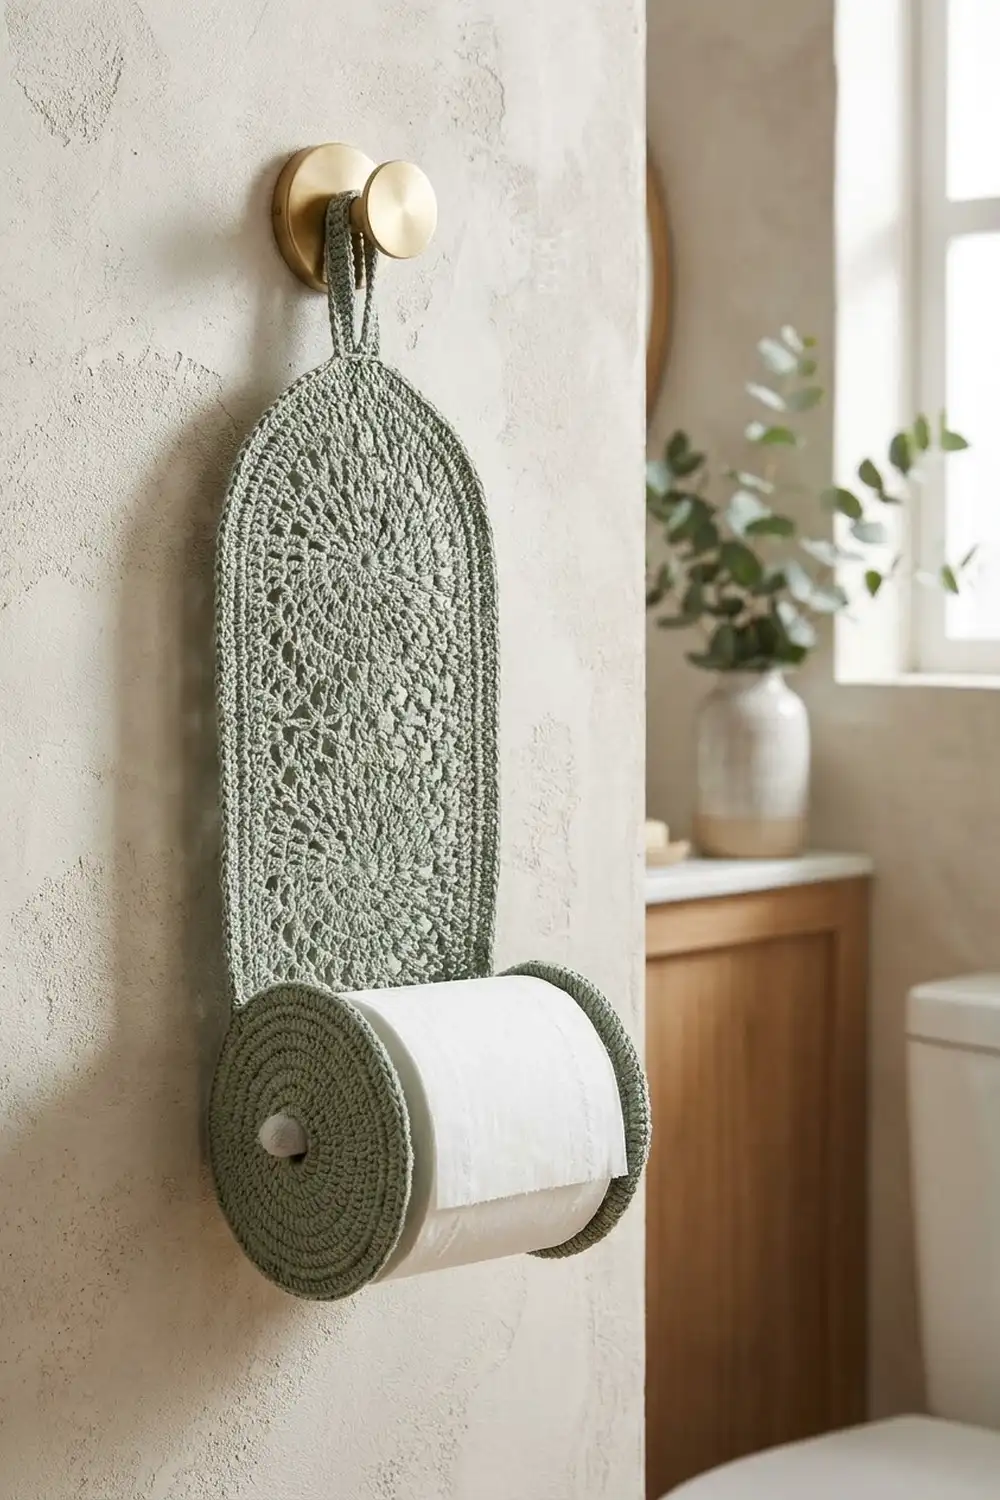
This holder turns a plain bathroom wall into something soft and handmade. A tall arched panel of open fan lace hangs from a single wall hook, and two round discs at the bottom hold a standard roll on a padded spindle.
The whole piece is worked in one calm sage green cotton. The fans line up in staggered rows, so the lace looks like a quiet botanical screen. A firm single crochet border frames the arch and keeps the outline crisp.
This pattern uses US crochet terms. The finished panel measures 6 in (15.2 cm) wide by 12.5 in (31.8 cm) tall. The hanging loop adds about 2 in (5.1 cm), for a total of 14.5 in (36.8 cm).
You work the lace panel in rows from the bottom up and shape the arch by stepping in half a fan at a time. Two rounds of border smooth the steps, and the strap is worked straight off the top. Next you make two layered discs and one spindle, then sew everything together.
Finished Size and Construction
- Finished panel size: 6 in x 12.5 in (15.2 cm x 31.8 cm)
- Total height with loop: 14.5 in (36.8 cm)
- Skill level: Intermediate
- Terminology: US crochet terms
- Yarn weight: Worsted (#4) cotton
- Hook: US 7 (4.5 mm)
- Number of pieces: 6 (1 panel with strap, 4 disc circles that make 2 discs, 1 spindle)
- Layout: panel centered, one disc on each lower side edge, spindle between the discs
- Lace panel before border: 5 in x 11.5 in (12.7 cm x 29.2 cm)
- Disc size: 3.5 in (8.9 cm) across
- Spindle size: 5 in (12.7 cm) long, about 1 in (2.5 cm) across
- Border depth: 0.5 in (1.3 cm), 2 rounds
Materials
Yarn: Use a smooth worsted weight cotton, about 170 m per 100 g. Cotton gives crisp stitch definition, stays firm in a damp room and survives washing. Acrylic will work, but the fans will look softer.
- Sage Green: 130 g (about 221 m)
These amounts include a margin of roughly 30%. The holder itself uses about 100 g.
Tools:
– US 7 (4.5 mm) crochet hook
– Tapestry needle
– 4 locking stitch markers
– Wooden dowel, 3/4 in (1.9 cm) thick, cut to 4.5 in (11.4 cm)
– 2 plastic canvas circles, 2.75 in (7.0 cm) across
– Blocking mat and rust-proof pins
– Spray bottle
– Scissors and a measuring tape
Abbreviations (US Terms)
- ch – chain
- sl st – slip stitch
- sc – single crochet
- hdc – half double crochet
- dc – double crochet
- sc2tog – single crochet 2 together
- BLO – back loop only
- MR – magic ring
- sp – space
- st(s) – stitch(es)
- RS / WS – right side / wrong side
Special stitch:
– Shell: 5 dc in the same stitch.
– Half shell: 3 dc in the same stitch. When it starts a row, the beginning ch 3 counts as the first dc.
Gauge and Checkpoints
- Single crochet gauge: 16 sc x 16 rows = 4 in (10.2 cm)
- Lace gauge: 1 fan repeat (6 sts) = 1.25 in (3.2 cm) wide, and 4 rows = 2 in (5.1 cm) tall
Test one piece first. Make one plain disc circle (Rounds 1–6). It should measure 3 in (7.6 cm) across. Then start the panel and stop at each checkpoint below.
- After Row 5: 5 in wide x 2.5 in tall (12.7 cm x 6.4 cm)
- After Row 18: 9 in (22.9 cm) tall
- After Row 23: 11.5 in (29.2 cm) tall at the peak
- After Border Round 2: 6 in x 12.5 in (15.2 cm x 31.8 cm)
If your piece is too big, go down half a hook size. If it is too small, go up half a size. Width matters most here, because the roll has to fit between the discs.
Back Panel
Ch 26.
Row 1 (RS): Sc in 2nd ch from hook. Sk 2 ch, shell in next ch, sk 2 ch, sc in next ch. Repeat from * 3 more times. Turn. (25 sts: 4 shells, 5 sc)
Row 2 (WS): Ch 5 (counts as dc + ch 2). Sc in center dc of next shell, ch 2, dc in next sc. If more shells remain, ch 2 and repeat from . Turn. (5 dc, 4 sc, 8 ch-2 sps)*
Row 3 (RS): Ch 3 (counts as dc), 2 dc in first dc (half shell). Sc in next sc, shell in next dc. Repeat from * 2 more times. Sc in next sc, then 3 dc in 3rd ch of the turning ch. Turn. (25 sts: 3 shells, 2 half shells, 4 sc)
Row 4 (WS): Ch 1, sc in first dc. Ch 2, dc in next sc, ch 2, sc in center dc of next shell. Repeat from * 3 times. On the last repeat, place the final sc in the top of the turning ch. Turn. (4 dc, 5 sc, 8 ch-2 sps)
Row 5 (RS): Ch 1, sc in first sc. Shell in next dc, sc in next sc. Repeat from * 3 more times. Turn. (25 sts: 4 shells, 5 sc)
Rows 6–17: Repeat Rows 2–5 three more times. (Row 17 has 25 sts.)
Row 18 (WS): Repeat Row 2. The panel should now be 9 in (22.9 cm) tall. (5 dc, 4 sc, 8 ch-2 sps)
Arch Shaping
Each RS row below drops half a repeat at each end. The gaps it leaves are called “ledges.”
Row 19 (RS): Ch 1, sl st in first dc, then 2 sl st in next ch-2 sp. Sc in next sc, shell in next dc. Repeat from * 2 more times. Sc in next sc. Turn, leaving the last ch-2 sp and turning ch unworked. (19 sts: 3 shells, 4 sc; width 3.75 in / 9.5 cm)
Row 20 (WS): Ch 3 (counts as dc). Ch 2, sc in center dc of next shell, ch 2, dc in next sc. Repeat from * 2 more times. Turn. (4 dc, 3 sc, 6 ch-2 sps)
Row 21 (RS): Ch 1, sl st in first dc, 2 sl st in next ch-2 sp. Sc in next sc, shell in next dc. Repeat from * once more. Sc in next sc. Turn. (13 sts: 2 shells, 3 sc; width 2.5 in / 6.4 cm)
Row 22 (WS): Ch 3 (counts as dc). Ch 2, sc in center dc of next shell, ch 2, dc in next sc. Repeat from * once more. Turn. (3 dc, 2 sc, 4 ch-2 sps)
Row 23 (RS): Ch 1, sl st in first dc, 2 sl st in next ch-2 sp. Sc in next sc, 7 dc in next dc, sc in next sc. Fasten off. (9 sts: 1 sc, 7 dc, 1 sc)
The 7-dc top fan is a little fuller than the others so that it fills the peak of the arch.
Make All Pieces
All pieces are Sage Green.
| Piece | Quantity | Approx. yarn |
|---|---|---|
| Back panel with border and strap | 1 | 60 g |
| Ridged disc circle | 2 | 12 g |
| Plain disc circle | 2 | 12 g |
| Disc joining rounds | 2 | 6 g |
| Spindle | 1 | 8 g |
Disc Circles (make 4)
Work in joined rounds: sl st to the first sc and ch 1 at the start of every round. The ch 1 does not count as a stitch.
- Rnd 1: 6 sc in MR. (6)
- Rnd 2: 2 sc in each st. (12)
- Rnd 3: Sc in next st, 2 sc in next st. Repeat around. (18)
- Rnd 4: Sc in next 2 sts, 2 sc in next st. Repeat around. (24)
- Rnd 5: Sc in next 3 sts, 2 sc in next st. Repeat around. (30)
- Rnd 6: Sc in next 4 sts, 2 sc in next st. Repeat around. (36)
Ridged circles (2): Work Rounds 3–6 in BLO. The front loops left behind form the concentric ridges on the disc faces.
Plain circles (2): Work every round through both loops.
Each circle should measure 3 in (7.6 cm) across. Fasten off the ridged circles. Keep the live loop on each plain circle.
Disc joining round: Place a plastic canvas circle between one plain circle and one ridged circle, with WS facing each other. Using the live loop on the plain circle, work 1 sc through both layers in each st around. Join and fasten off. (36 sc; disc measures 3.5 in / 8.9 cm) Repeat for the second disc.
Spindle
Work in a continuous spiral and move a marker up each round.
- Rnd 1: 6 sc in MR. (6)
- Rnd 2: 2 sc in each st. (12)
- Rnds 3–20: Sc in each st. (12)
- Insert the dowel.
- Rnd 21: Sc2tog 6 times. (6) Close the opening and weave in the tail.
The spindle should be 5 in (12.7 cm) long and about 1 in (2.5 cm) across. That is narrow enough to slide easily into a roll core of about 1.6 in (4.1 cm).
Layout Grid
            [ strap loop ]
          /  arched lace   \
         |     panel        |
         |  6 x 12.5 in     |
         |                  |
  (Disc) |==== spindle =====| (Disc)
   L     |__________________|    R
  sewn to panel + spindle     sewn to panel only
Border
Border gauge: 4 sc per 1 in (2.5 cm), worked along every edge.
Rnd 1 (RS): Join with a sl st in the free loop of the first foundation ch at one bottom corner, then ch 1.
- Bottom (24 sts, including both corner groups): 3 sc in first ch, sc in next ch, (sc in next 2 ch, sc2tog over next 2 ch) 5 times, sc in next 2 ch, 3 sc in last ch.
- First side (36 sts): 2 sc in each row end of Rows 1–18.
- First half of arch (16 sts):
- On the Row 18 ledge: hdc, then dc.
- 2 sc in each row end of Rows 19 and 20.
- On the Row 20 ledge: hdc, then dc.
- 2 sc in each row end of Rows 21 and 22.
- On the Row 22 ledge: hdc, then dc.
- 2 sc in the row end of Row 23.
- Top (11 sts): Sc in the sc, sc in each of the next 3 dc, 3 sc in the center dc, sc in each of the next 3 dc, sc in the sc.
- Second half of arch (16 sts): Mirror the first half, working each ledge as dc, then hdc.
- Second side (36 sts): 2 sc in each row end of Rows 18–1.
- Sl st to the first sc. (24 + 36 + 16 + 11 + 16 + 36 = 139 sts)
The dc on each ledge sits in the inside corner of the step, which lifts and rounds it.
Rnd 2: Ch 1. Work 1 sc in each st, with these extras:
– 3 sc in the center sc of each bottom corner group (+4)
– 2 sc in each of the 6 ledge dc (+6)
– 2 sc in each of the 3 sts of the top 3-sc group (+3)
Join. (139 + 13 = 152 sts)
Counts per side: bottom 28, each side 36, arch 52. Check: 28 + 36 + 36 + 52 = 152.
Why the math works:
– Sides: Each lace row is 0.5 in (1.3 cm) tall, so 2 sc per row end matches the gauge of 4 sc per inch. Rows 1–18 measure 9 in (22.9 cm), and 9 x 4 = 36.
– Bottom: The 25 foundation chains span 5 in (12.7 cm), which calls for 20 sc. The 5 sc2tog take the bottom from 23 to 18 stitches between the corners. Add the two 3-sc corners and you get 24.
– Arch: The arch is a convex curve, so its outer edge needs extra stitches. The 9 increases in Round 2 let the arch lie flat instead of cupping.
Hanging Strap
Counting along the arch’s 52 sts, skip 24 sts. With RS facing, join in the next st, the first of the center 4 sts.
- Row 1: Ch 1, sc in the 4 center sts. Turn. (4)
- Rows 2–18: Ch 1, sc in each st. Turn. (4)
The strap should measure 4.5 in (11.4 cm). Leave a 12 in (30.5 cm) tail and fasten off.
Joining
Do all the sewing with a tapestry needle and matching yarn, using whipstitch through both loops.
Strap: Fold the strap to the WS. Sew Row 18 across the back of the border, 0.25 in (0.6 cm) below the top edge. Match stitch to stitch, 4 to 4. This makes a loop about 2 in (5.1 cm) tall.
Discs to panel: Hold each disc at right angles to the panel’s front face, with its ridged face pointing outward. On the panel’s side edge, count 2 sts up from the bottom corner group. Sew 8 disc sts to the next 10 panel side sts.
Disc stitches measure about 0.3 in (0.8 cm), and panel side stitches measure 0.25 in (0.6 cm). To ease the difference, pick up 1 extra panel st after every 4 disc sts. Sew the right disc the same way on the other side.
Spindle to left disc: Whipstitch the 12 sts of spindle Round 2 to the 12 sts of Round 2 on the left disc’s plain inner face, 1 to 1. Keep the spindle centered and level.
Tension: Pull each stitch snug enough to close any gap, but not so tight that it puckers the lace. The right disc holds only by its seam, so you can flex it outward when you change the roll.
Size checkpoint: The gap between the inner disc faces should be about 5.5 in (14.0 cm). The 5 in (12.7 cm) spindle reaches nearly all the way across, and a 4.5 in (11.4 cm) roll slides on with room to spare.
Final Blocking
- Wet the panel only, or spray it until damp. Keep the discs and spindle dry.
- Lay the panel RS up on the mat.
- Pin the sides straight at 6 in (15.2 cm) apart and the height at 12.5 in (31.8 cm).
- Pin the arch into a smooth curve, putting one pin on each ledge.
- Open every fan with a pin through its center top.
- Let it dry completely, usually 12–24 hours.
- Unpin it and check that the strap hangs straight.
Final Quality-Control Checklist
- Panel is 6 in x 12.5 in (15.2 cm x 31.8 cm)
- Border Round 2 has 152 sts: 28 on the bottom, 36 on each side, 52 on the arch
- Every fan is open and lines up with its row
- Both discs are 3.5 in (8.9 cm) and sit at the same height
- Spindle is centered on the left disc and level
- Strap loop is centered and holds firm
- All tails are woven in on the WS
Troubleshooting
- Arch looks stepped: Re-block with more pins, or make sure each ledge was worked as hdc + dc.
- Arch cups: You missed the increases in Round 2. Add them.
- Bottom edge ruffles: Make sure you worked all 5 sc2tog.
- Sides wave: Your row ends are too loose. Use 2 sc per row end, never 3.
- Discs droop: Check that the plastic canvas is in, and sew all 8 seam stitches firmly.
- Roll binds: The panel is too narrow. Go up a hook size and remake the panel.
Care
Hand wash in cool water and lay flat to dry. Take out the discs’ plastic canvas only if a seam ever needs repair.
Final Notes
The measurement chain runs like this:
– The lace panel measures 5 in x 11.5 in (12.7 cm x 29.2 cm) before the border.
– The 0.5 in (1.3 cm) border brings it to 6 in x 12.5 in (15.2 cm x 31.8 cm).
– The 3.5 in (8.9 cm) discs sit about 5.5 in (14.0 cm) apart, and a 5 in (12.7 cm) spindle spans the gap.
If you check each of those numbers as you go, the roll will fit every time. Happy crocheting!