

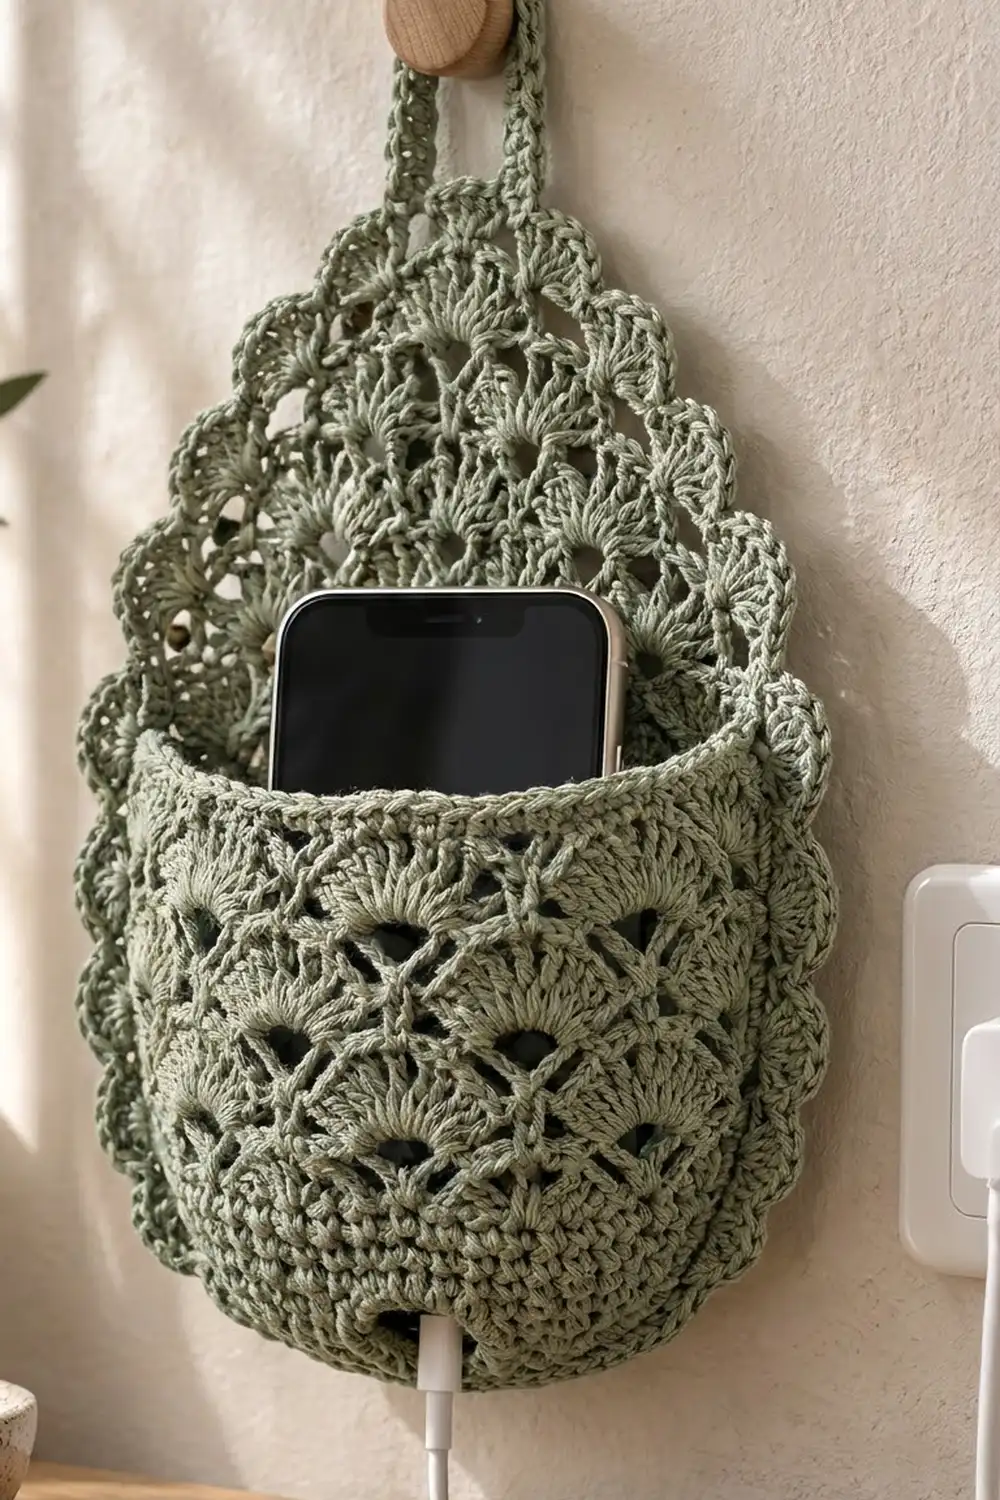
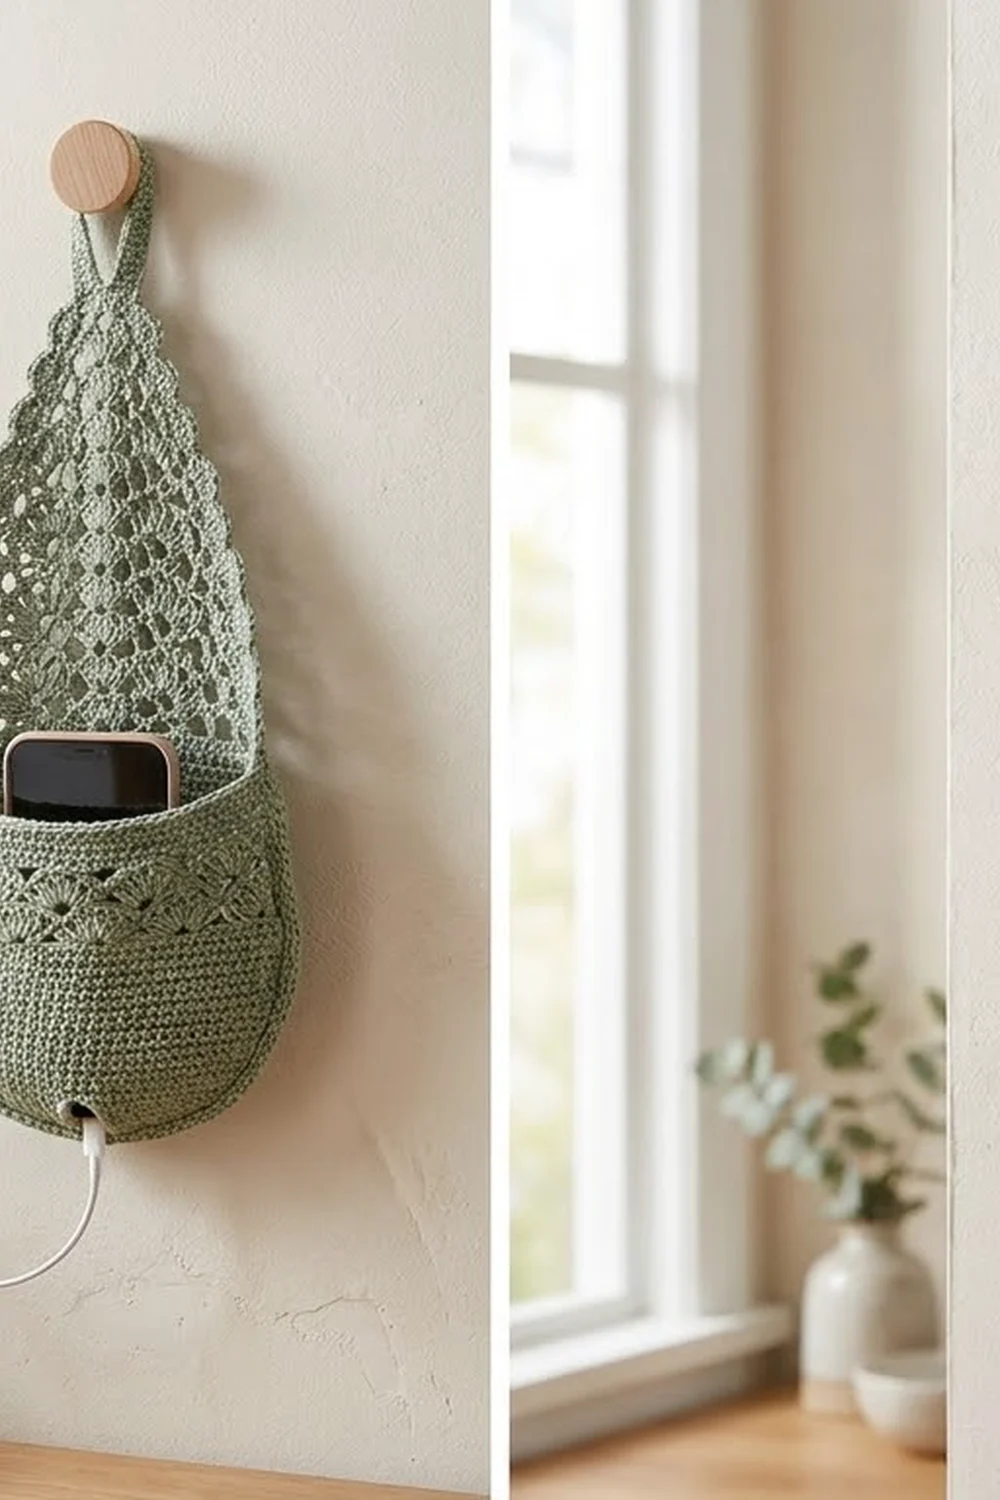
This hanging phone holder gives your phone a soft, tidy spot right beside the outlet while it charges. A teardrop of open fan lace hangs from a slim loop, and a rounded pocket holds the phone. A small opening at the bottom of the pocket lets the cable run straight down.
The sample uses one color, a muted sage green cotton. That suits the calm, natural style of the piece: the lace shows up clearly, and the solid single crochet at the base keeps the pocket strong. Scallops around the panel edge soften the outline.
The pattern uses US crochet terms. The finished holder measures 7.4 in (18.8 cm) wide and 9.7 in (24.6 cm) tall, plus a 2.5 in (6.4 cm) hanging loop.
You make it from two pieces. The back panel is worked in rows from the bottom up: solid rows first, then fan lace rows, then short rows that taper to a point. A two-round border and the hanging loop finish the panel. The pocket is worked in rounds from an oval base up to a solid rim. Last, you sew the back half of the pocket to the panel.
Finished Size and Construction
- Finished size: 7.4 in (18.8 cm) wide × 9.7 in (24.6 cm) tall, plus a 2.5 in (6.4 cm) loop
- Skill level: Intermediate
- Terminology: US
- Yarn weight: DK / light (#3) cotton
- Hook: 3.5 mm (E-4)
- Number of pieces: 2 (back panel and pocket); the hanging loop is worked directly onto the panel
- Layout: pocket centered on the lower part of the back panel
- Panel size before border: 6.2 in (15.7 cm) wide × 8.5 in (21.6 cm) tall
- Pocket size: 4.8 in (12.2 cm) wide at the back seam × 4.5 in (11.4 cm) tall × 1.5 in (3.8 cm) deep
- Border depth: about 0.6 in (1.5 cm)
Materials
Choose a smooth, mercerized or combed cotton in DK weight. Cotton holds the fan shapes crisply and stays firm enough to carry a phone without sagging. Avoid very stretchy acrylics, which let the pocket droop.
Yarn:
– Sage green, 100 g (about 230 m)
– Back panel: about 45 g (105 m)
– Pocket: about 35 g (80 m)
– Border and loop: about 10 g (25 m)
All quantities include a margin of about 10 g for your gauge swatch and seaming.
Tools:
– 3.5 mm (E-4) crochet hook
– Tapestry needle
– 4 locking stitch markers
– Measuring tape
– Blocking mat and rust-proof pins
– Spray bottle
Abbreviations (US Terms)
- ch = chain
- sl st = slip stitch
- sc = single crochet
- dc = double crochet
- BLO = back loop only
- sk = skip
- sp(s) = space(s)
- st(s) = stitch(es)
- rnd = round
- rep = repeat
- RS / WS = right side / wrong side
Special stitches:
- Fan: (dc, [ch 1, dc] 4 times) all in the same stitch. That is 5 dc and 4 ch-1 spaces. The center dc is the 3rd dc.
- Half fan: (dc, [ch 1, dc] twice) all in the same stitch. That is 3 dc.
Gauge and Checkpoints
- Single crochet: 20 sc × 20 rows = 4 in (10.2 cm)
- Fan lace: 1 repeat (6 base stitches) = 1.2 in (3.0 cm), and 2 fan rows = 1 in (2.5 cm)
Work the pocket base (Rnds 1–4) first as your test piece. It should measure about 4.75 in (12.1 cm) by 1.75 in (4.4 cm). If it is larger, change to a hook 0.5 mm smaller. If it is smaller, change to a hook 0.5 mm larger.
Checkpoints are listed after the key rows and rounds below. Measure flat, without stretching.
Back Panel
The panel is worked flat in rows, starting at the bottom edge. Turn at the end of every row.
Rounded bottom
Row 1 (RS): Ch 24, sc in 2nd ch from hook and in each ch across. (23 sc)
Row 2: Ch 1, 2 sc in first st, sc in each st to last st, 2 sc in last st. (25 sc)
Rows 3–5: Rep Row 2. Row 3 = 27 sc, Row 4 = 29 sc, Row 5 = 31 sc.
Rows 6–10: Ch 1, sc in each st across. (31 sc)
Checkpoint: 6.2 in (15.7 cm) wide and 2 in (5.1 cm) tall.
Fan lace section
Row 11 (Row A): Ch 1, sc in first st, ch 2, sk 2, Fan in next st, ch 2, sk 2, sc in next st; rep from * 4 more times. (5 Fans, 6 sc)
Check: 1 + (5 × 6) = 31 stitches used.
Row 12 (Row B): Ch 4 (counts as dc + ch 1), (dc, ch 1, dc) in first sc. This completes a half fan. Then work: ch 2, sc in center dc of next Fan, ch 2, Fan in next sc, ch 2, sc in center dc of next Fan; rep from * 3 more times. Finish with ch 2 and a Half fan in the last sc. (4 Fans, 2 Half fans, 5 sc)
Row 13 (Row A): Ch 1, sc in first dc, ch 2, Fan in next sc, ch 2, sc in center dc of next Fan. Rep from * across, working the final sc of the last repeat into the 3rd ch of the turning ch-4. (5 Fans, 6 sc)
Rows 14–19: Work Row B, then Row A, three times. Row 19 is an A row. (5 Fans, 6 sc)
Checkpoint: 6.5 in (16.5 cm) tall.
Tapered top
Row 20 (decrease row): Turn. Sl st in each stitch and space up to the center dc of the first Fan. Ch 1, sc in that same dc, ch 2, Fan in next sc, ch 2, sc in center dc of next Fan; rep from * 3 more times. Leave the rest of the row unworked. (4 Fans, 5 sc)
Row 21: Rep Row 20. (3 Fans, 4 sc)
Row 22: Rep Row 20. (2 Fans, 3 sc)
Row 23: Rep Row 20. (1 Fan, 2 sc)
Do not fasten off.
Each decrease row narrows the panel by one fan repeat, 0.6 in (1.5 cm) on each side. The fans stay staggered because each new Fan sits in a sc that sits on the center of a Fan below.
Checkpoint: the panel is 8.5 in (21.6 cm) tall before the border.
The pocket is worked in joined rounds with the RS always facing you. Do not turn.
Oval base
Rnd 1: Ch 21. Sc in 2nd ch from hook and in next 18 ch (19 sc), then 3 sc in last ch. Rotate the work and continue along the opposite side of the foundation: sc in next 18 ch, 2 sc in the same ch as the first sc. Join with sl st to first sc. (42 sc)
Rnd 2: Ch 1, 2 sc in first st, sc in next 18, 2 sc in each of next 3 sts, sc in next 18, 2 sc in each of next 2 sts; join. (48 sc)
Rnd 3: Ch 1, 2 sc in first st, sc in next st, sc in next 18, [2 sc in next st, sc in next st] 3 times, sc in next 18, [2 sc in next st, sc in next st] twice; join. (54 sc)
Rnd 4: Ch 1, 2 sc in first st, sc in next 2, sc in next 18, [2 sc in next st, sc in next 2] 3 times, sc in next 18, [2 sc in next st, sc in next 2] twice; join. (60 sc)
Checkpoint: 4.75 in × 1.75 in (12.1 × 4.4 cm).
Solid lower wall
Rnd 5: Ch 1, sc in BLO of each st around; join. (60 sc) Working in back loops turns the edge up so the wall rises from the base.
Rnd 6 (cord hole): Ch 1, sc in next 11, ch 4, sk 4, sc in next 45; join. (56 sc + one ch-4 sp) The hole lands at the center of the front long side.
Rnd 7: Ch 1, sc in each sc around and 4 sc in the ch-4 sp; join. (60 sc)
Rnds 8–12: Ch 1, sc in each st around; join. (60 sc)
Checkpoint: the wall is 1.6 in (4.1 cm) tall above the base ridge.
Fan lace wall
Rnd 13 (Rnd A): Ch 1, sc in first st, ch 2, sk 2, Fan in next st, ch 2, sk 2, sc in next st. Rep from * around, ending with sk 2 and joining to the first sc instead of working the last sc. (10 Fans, 10 sc)
Rnd 14 (Rnd B): Ch 4 (counts as dc + ch 1), [dc, ch 1] 3 times in the same st, then dc in the same st. This completes the first Fan. Then ch 2, sc in center dc of next Fan, ch 2, Fan in next sc, ch 2, sc in center dc of next Fan; rep from * around. Finish with ch 2 and join to the 3rd ch of the beginning ch-4. (10 Fans, 10 sc)
Rnd 15 (Rnd A): Sl st in next ch-1 sp, next dc, next ch-1 sp and next dc, so you are in the center dc of the first Fan. Ch 1, sc in the same dc, ch 2, Fan in next sc, ch 2, sc in center dc of next Fan; rep from * around, joining to the first sc instead of working the last sc. (10 Fans, 10 sc)
Rnd 16 (Rnd B): Rep Rnd 14. (10 Fans, 10 sc)
Checkpoint: the wall is 3.6 in (9.1 cm) tall.
Rim band
Rnd 17 (conversion round): Ch 1, then sk first dc of Fan, sc in 2nd, 3rd and 4th dc, sk 5th dc, sc in next ch-2 sp, sc in next sc, sc in next ch-2 sp. Rep from * around; join. (60 sc)
The count breaks down as 40 sc worked one-per-stitch (30 dc + 10 sc) plus 20 sc added in the ch-2 spaces, for 60.
Rnds 18–20: Ch 1, sc in each st around; join. (60 sc)
Fasten off and weave in the ends.
Checkpoint: the wall is 4.4 in (11.2 cm) tall, and the pocket stands 4.5 in (11.4 cm) tall including the base ridge.
Make All Pieces
You need one back panel and one pocket, both in sage green. The layout, viewed from the front, looks like this:
        [ loop ]
       /  fan   \
      / lace top \
     |  panel     |
     | [ POCKET ] |
     | [ (hole) ] |
      \__________/
Joining
Lay the pocket flat with the cord hole centered at the front. Directly opposite the hole, count the 24 stitches of Rnd 20 and mark the first and last of them. These 24 stitches form the flat back wall. The other 36 stitches form the front, which bows outward to give the phone room.
Position. Wait until the border is finished, then center the pocket on the RS of the panel, 0.7 in (1.8 cm) in from each side edge of the panel. The back edge of the base should run along Row 3 of the panel, about 0.5 in (1.3 cm) above the foundation. Pin the back wall flat. Its top band should sit about 4.9 in (12.4 cm) above the bottom of the panel.
Sewing. Thread about 36 in (91.4 cm) of yarn onto the needle and whipstitch the pocket to the panel. Work in this order:
- Base edge: across the 24 back stitches of the Rnd 5 ridge, catching one panel stitch per pocket stitch.
- Each side: straight up the marked stitch column from Rnd 5 to Rnd 20. Use 1 stitch per sc round and 2 stitches per fan round. That is 8 + 8 + 4 = 20 stitches per side.
- Top band: across the 24 back stitches of Rnd 20, one-to-one into the panel.
Tension. Pull each stitch snug enough to close any gap, but not so tight that the panel puckers. Keep the panel flat on a table while you sew.
Checkpoint: the panel should still measure 7.4 in (18.8 cm) across the pocket line.
Border
Border gauge: about 5 sc per inch along the solid and diagonal edges, and 2 sc per fan row along the straight lace sides. This matches the sc gauge, so the edge lies flat.
Continue from the end of Row 23 with the RS facing. Work along the top of the panel, down one side, across the bottom and up the other side, keeping the counts below for each section.
Rnd 1:
- Top (12 sc): across Row 23, sc in sc, 2 sc in ch-2 sp, sc in each of the first 2 dc, 2 sc in the center dc, sc in each of the last 2 dc, 2 sc in ch-2 sp, sc in sc.
- Each side (44 sc):
- 16 sc down the tapered edge (4 sc per decrease step × 4 steps)
- 18 sc down the straight fan rows (2 sc per row-end × 9 rows)
- 10 sc down the solid rows (1 sc per row-end × 10 rows)
- Bottom (24 sc): into the 23 foundation loops, working 2 sc into the first loop.
Join to the first sc. Total: 12 + 44 + 24 + 44 = 124 sc.
Rnd 2 (scallops): Ch 1, sc in next st, sk 1, 5 dc in next st, sk 1; rep from * around; join. Fasten off. (31 scallops)
Why the math works: each scallop uses 4 stitches, and every section is a multiple of 4. The top gives 3 scallops, each side 11 and the bottom 6, for 31. Because every section starts with a sc, the scallops fall evenly on every edge.
Hanging loop: Join yarn in the center dc of the middle top scallop. Ch 28 and sl st in the same dc. Work 36 sc over the chain loop, then sl st into the dc. Fasten off.
The loop stands 2.5 in (6.4 cm) tall.
Final Blocking
- Before sewing on the pocket, mist the panel with water until it is damp.
- Pin it RS up to 6.2 in (15.7 cm) wide and 8.5 in (21.6 cm) tall at the body, with the border at 7.4 in × 9.7 in (18.8 × 24.6 cm).
- Pin out each scallop and open each fan so the ch-1 spaces are even.
- For the pocket, stuff it with a folded towel that matches the 1.5 in (3.8 cm) depth, then mist.
- Let both pieces dry completely, then join them.
- After joining, mist the seam lightly and pat it flat.
Final Quality-Control Checklist
- Panel rows: 31 sc at Row 10, and 5 Fans with 6 sc on every A row.
- Tapered top ends with 1 Fan.
- Pocket: 60 sc at Rnds 4, 5, 7, 12, 17 and 20.
- Cord hole is centered at the front, opposite the 24 back stitches.
- Border has 124 sc in Rnd 1 and 31 scallops in Rnd 2.
- Loop is centered and firmly anchored.
- All ends are woven securely through solid stitches.
Troubleshooting
- Fans ruffle: your dc are too loose. Go down 0.5 mm, or shorten the ch-2 spaces to ch 1.
- Panel is narrower at the lace than at the sc rows: pin it to the full 6.2 in (15.7 cm) width when blocking.
- Wrong count at Rnd 17: make sure you skip the 1st and 5th dc of each Fan.
- Border cups: you added too many stitches. Recount each section of Rnd 1.
- Border waves: you skipped row-ends. Work exactly 2 sc per fan row.
- Pocket sags: tighten the side seams and use a stiffer cotton.
- Phone falls forward: reduce the front bulge by marking 26 back stitches instead of 24.
Care
Hand wash in cool water, press out excess water in a towel, and dry flat in shape. Unplug the charger before washing, and never place the holder over a heat source.
Final Notes
The measurements build in a chain:
- The 4-round oval base sets the 60-stitch pocket at 12 in (30.5 cm) around.
- The back panel’s 31 stitches set the body at 6.2 in (15.7 cm) wide.
- Thirteen fan rows on top of 10 sc rows bring the body to 8.5 in (21.6 cm) tall.
- The 124-stitch border adds 0.6 in (1.5 cm) on each edge for a finished 7.4 in × 9.7 in (18.8 × 24.6 cm).
- A 2.5 in (6.4 cm) loop completes the holder.
Check each stage as you go and the pieces will fit together neatly.
Happy crocheting!