

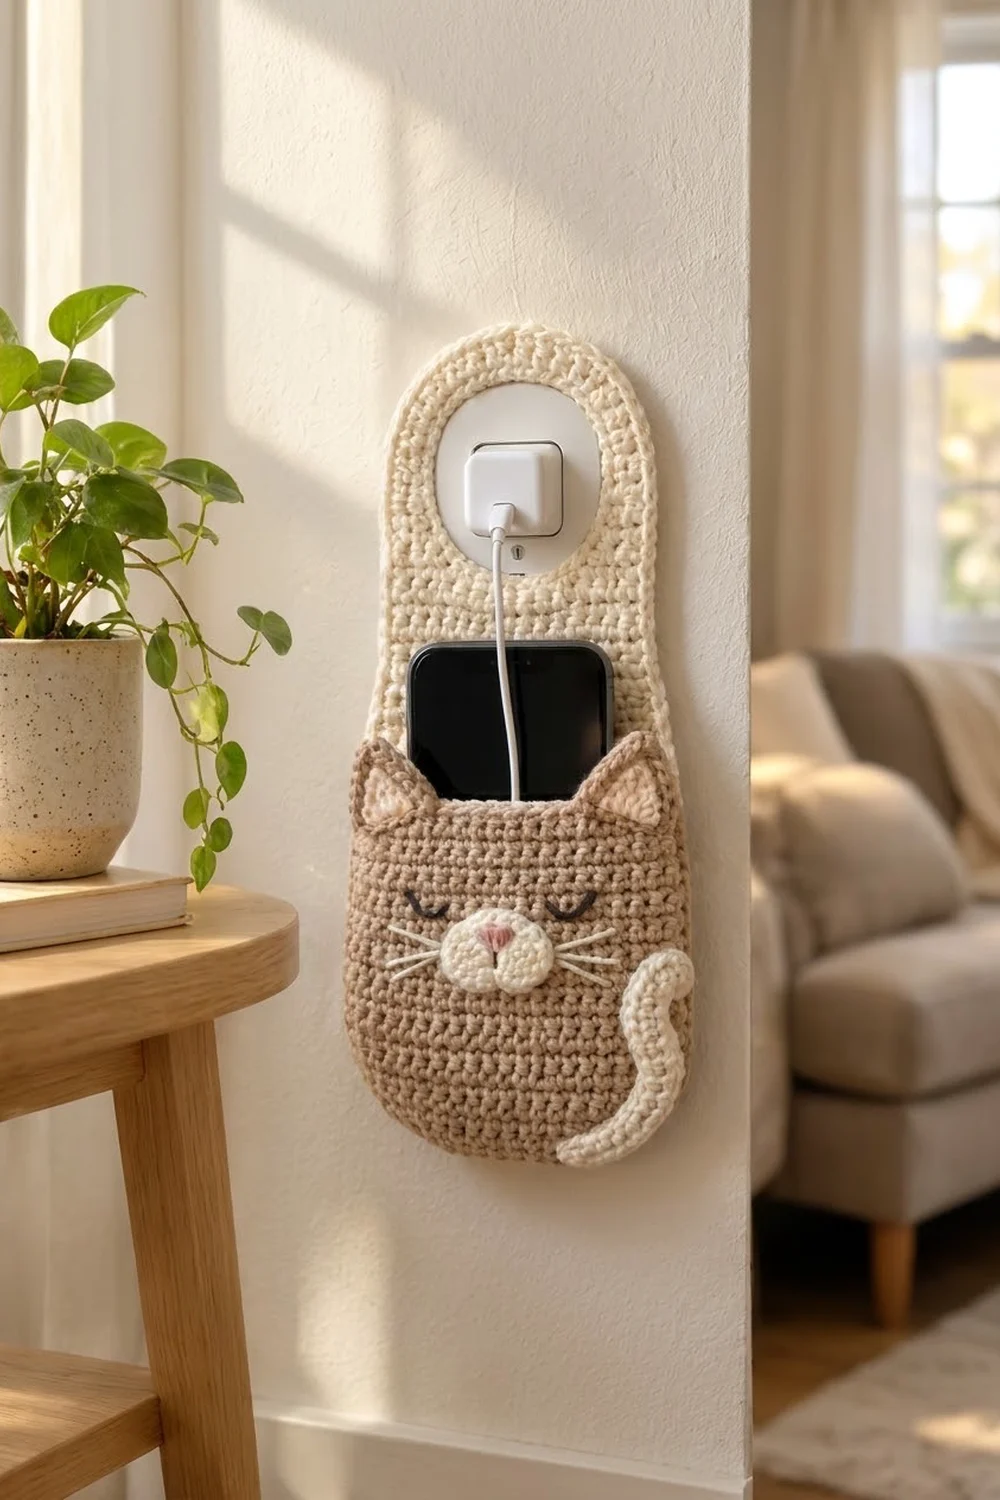
This little holder keeps your phone off the floor while it charges. The charger plug passes through a round opening at the top of a cream back panel. That holds the whole piece flat against the wall, and your phone rests in a sleepy tan cat pocket below.
The palette is soft and neutral: warm tan for the cat, cream for the back panel, muzzle, tail and whiskers, pale pink for the inner ears and nose, and dark brown for the closed eyes. The fabric is dense single crochet, so the piece is firm and holds its shape.
This pattern uses US crochet terms. The finished holder measures about 6 in (15.2 cm) wide and 11.6 in (29.5 cm) tall.
You will make the back panel and the pocket front flat in rows, shaped with simple increases and decreases. Next you add small appliqués and embroidery, edge each part with one round of single crochet, and sew the pocket to the panel stitch-for-stitch.
Finished Size and Construction
- Finished size: 6 in × 11.6 in (15.2 cm × 29.5 cm)
- Skill level: Easy
- Terminology: US crochet terms
- Yarn weight: Worsted (#4)
- Hook: 4.0 mm (G-6)
- Number of pieces: 1 finished holder (back panel, pocket front, 2 inner ears, muzzle, tail)
- Layout: pocket sewn onto the lower part of the back panel, with bottom and side edges aligned
- Back panel before border: 5.5 in × 11.1 in (14.0 cm × 28.2 cm)
- Pocket before border: 5.5 in × 6.7 in (14.0 cm × 17.0 cm), plus ears of 0.9 in (2.3 cm)
- Border depth: 1 round of sc, about 0.25 in (0.6 cm)
Materials
Use a smooth worsted-weight cotton or cotton blend. Cotton keeps its shape, doesn’t fuzz, and is the sensible choice near an electrical outlet. Avoid fluffy or very stretchy acrylics, because the panel has to stay flat.
- Cream: 40 g / 72 m (back panel, muzzle, tail, whiskers)
- Tan: 30 g / 54 m (pocket front)
- Pale pink: 3 g / 6 m (inner ears, nose)
- Dark brown: 1 g / 2 m (eyes)
Quantities include a margin of about 15 percent.
Tools:
– 4.0 mm (G-6) crochet hook
– Tapestry needle
– Locking stitch markers (6)
– Scissors
– Rustproof pins and a blocking mat
– Measuring tape
Abbreviations (US Terms)
- ch – chain
- sc – single crochet
- sc2tog – single crochet 2 together (decrease)
- sc3tog – single crochet 3 together
- sl st – slip stitch
- st(s) – stitch(es)
- Rnd – round
- inc – 2 sc in the same st
Special stitch: sc3tog. Insert the hook in the next st, yarn over, and pull up a loop. Repeat in the next 2 sts (4 loops on the hook). Yarn over and pull through all 4 loops.
Ch 1 at the start of a row does not count as a stitch.
Gauge and Checkpoints
Gauge: 16 sc and 18 rows = 4 in (10.2 cm) in sc worked flat.
Make the pocket front first. It is the smaller piece and works as your gauge swatch.
Checkpoints:
– Pocket or panel, after Row 6 (22 sts): 5.5 in (14.0 cm) wide and 1.3 in (3.3 cm) tall.
– Pocket after Row 28: 6.2 in (15.7 cm) tall.
– Back panel after Row 32: 7.1 in (18.0 cm) tall.
– Back panel after Row 50: 11.1 in (28.2 cm) tall.
Too big? Go down half a hook size, to 3.75 mm (F-5). Too small? Go up to 4.5 mm (7). A difference of 0.25 in (0.6 cm) across 22 sts is acceptable. Anything more will throw off the hole size and the way the pocket lines up with the panel.
Back Panel (Cream)
The panel is worked from the bottom up. Two narrow straps form the sides of the opening, and a chain bridge closes it over the top.
Ch 15.
Row 1: Sc in the 2nd ch from the hook and in each ch across. (14 sts)
Row 2: Ch 1, turn. Inc in the first st, sc 12, inc in the last st. (16 sts)
Row 3: Ch 1, turn. Inc, sc 14, inc. (18 sts)
Row 4: Ch 1, turn. Inc, sc 16, inc. (20 sts)
Row 5: Ch 1, turn. Sc 20. (20 sts)
Row 6: Ch 1, turn. Inc, sc 18, inc. (22 sts)
These rows create the rounded bottom. Checkpoint: 5.5 in (14.0 cm) wide.
Rows 7–32: Ch 1, turn. Sc 22. (22 sts, 26 rows)
Checkpoint: 7.1 in (18.0 cm) tall.
First Strap
Row 33: Ch 1, turn. Sc 5, leaving the remaining 17 sts unworked. (5 sts)
Rows 34–44: Ch 1, turn. Sc 5. (5 sts)
That gives 12 strap rows. Fasten off.
Second Strap
On Row 32, skip the 12 sts next to the first strap. Leave them unworked: they form the bottom of the opening.
Row 33: With the same side facing as the first strap’s Row 33, join cream in the last st at the outer edge of Row 32. Ch 1 and sc in the same st and the next 4 sts, ending at the opening. (5 sts)
Rows 34–44: Ch 1, turn. Sc 5. (5 sts)
Row 44 ends at the outer edge. Do not fasten off.
Close the Top
Row 45: Ch 1, turn. Sc 5 across the second strap, ch 12, then sc 5 across Row 44 of the first strap. (22 sts: 10 sc + 12 ch)
Row 46: Ch 1, turn. Sc in each sc and each ch across. (22 sts)
Row 47: Ch 1, turn. Sc2tog, sc 18, sc2tog. (20 sts)
Row 48: Ch 1, turn. Sc2tog, sc 16, sc2tog. (18 sts)
Row 49: Ch 1, turn. Sc2tog, sc 12, sc2tog. (16 sts)
Row 50: Ch 1, turn. [Sc2tog] twice, sc 8, [sc2tog] twice. (12 sts)
Fasten off. Checkpoint: 5.5 in × 11.1 in (14.0 cm × 28.2 cm). The raw opening is 12 sts by 12 rows, or 3 in × 2.7 in (7.6 cm × 6.9 cm).
Pocket Front (Tan)
Ch 15.
Rows 1–6: Work the same as Back Panel Rows 1–6. (22 sts)
Rows 7–28: Ch 1, turn. Sc 22. (22 sts, 22 rows)
Checkpoint: 6.2 in (15.7 cm) tall.
Row 29: Ch 1, turn. Sc2tog, sc 18, sc2tog. (20 sts)
Row 30: Ch 1, turn. Sc 20. (20 sts)
Do not fasten off.
First Ear
Row 1: Ch 1, turn. Sc 5. (5 sts)
Row 2: Ch 1, turn. Sc2tog, sc 1, sc2tog. (3 sts)
Row 3: Ch 1, turn. Sc 3. (3 sts)
Row 4: Ch 1, turn. Sc3tog. (1 st)
Fasten off.
Second Ear
Skip the next 10 sts of Row 30. These form the pocket opening. Join tan in the next st and work Rows 1–4 of the ear over the last 5 sts. Fasten off.
Check: 5 + 10 + 5 = 20 sts. Checkpoint: the body is 6.7 in (17.0 cm) tall and the ears add 0.9 in (2.3 cm).
Appliqués
Inner Ears (Pale Pink, make 2)
Ch 4.
Row 1: Sc in the 2nd ch from the hook and in the next 2 ch. (3 sts)
Row 2: Ch 1, turn. Sc3tog. (1 st)
Fasten off, leaving a 6 in (15.2 cm) tail. Each triangle is about 0.75 in (1.9 cm) wide.
Muzzle (Cream)
Ch 4.
Rnd 1: Sc in the 2nd ch from the hook and in the next ch. Work 3 sc in the last ch. Turn the piece to work along the other side of the chain, sc 1, then work 2 sc in the same ch as the first sc. (8 sts)
Rnd 2: Inc, sc 1, inc in each of the next 3 sts, sc 1, inc in each of the last 2 sts. (14 sts)
Sl st to the first sc and fasten off, leaving a long tail. The muzzle is about 1.5 in × 1 in (3.8 cm × 2.5 cm).
Tail (Cream)
Ch 21.
Rnd 1: Sc in the 2nd ch from the hook and in the next 18 ch (19 sc). Work 3 sc in the last ch. Rotate and sc 18 along the other side, then work 2 sc in the same ch as the first sc. (42 sts)
Rnd 2: Sc 19, inc in each of the next 3 sts, sc 18, inc in each of the last 2 sts. (47 sts)
Sl st to the first sc and fasten off, leaving a long tail. The tail is about 5.5 in × 0.9 in (14.0 cm × 2.3 cm).
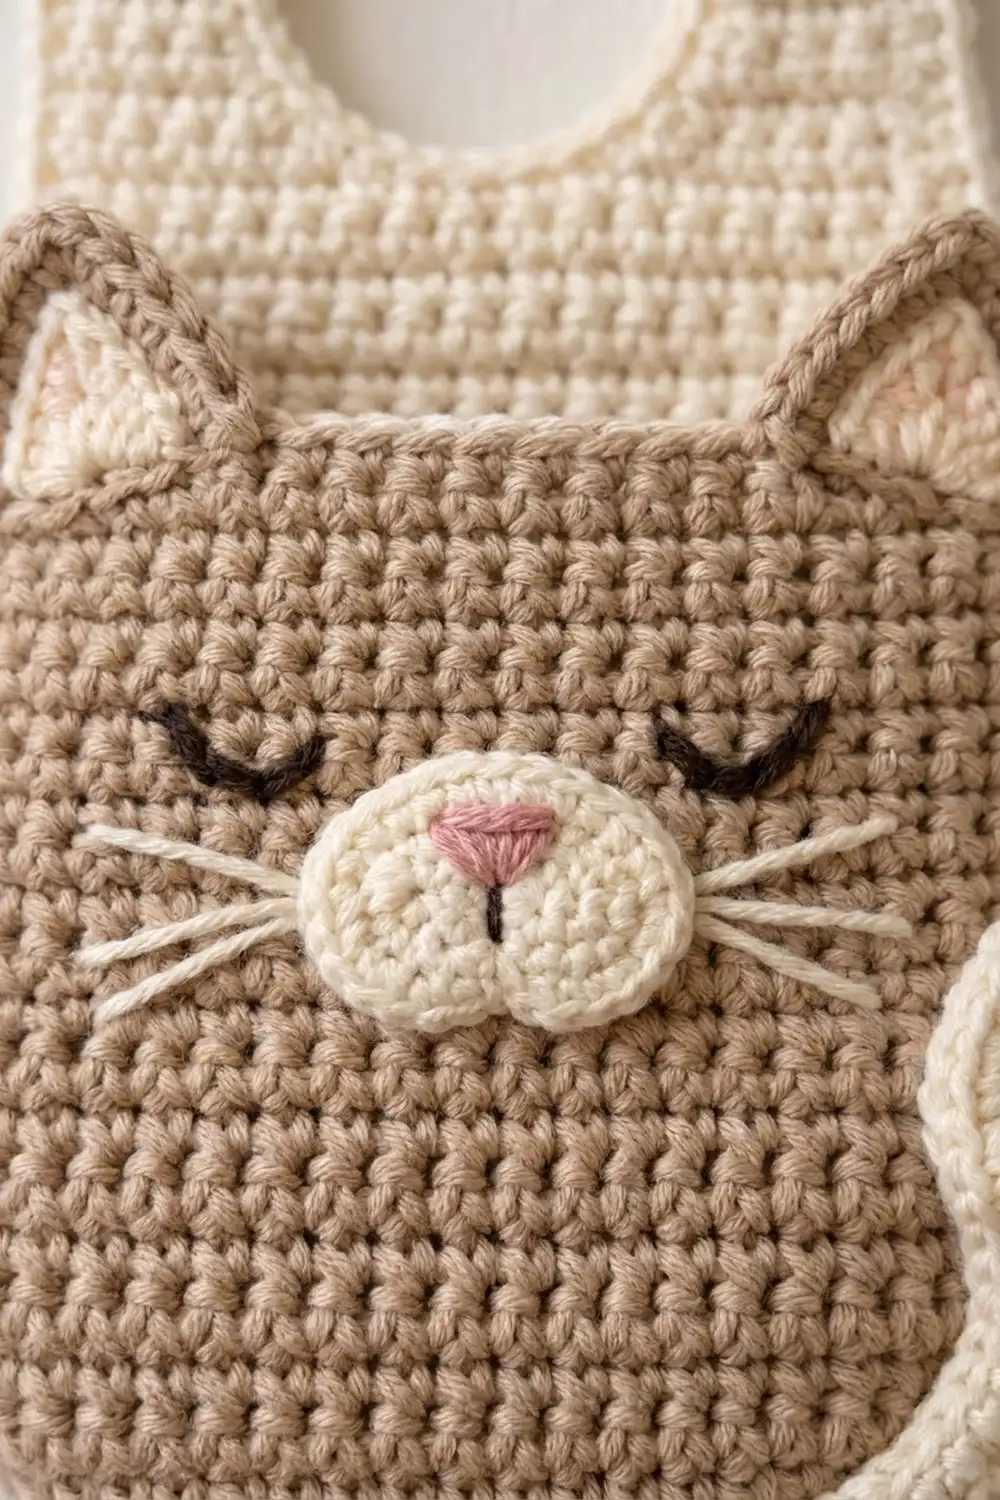
Face Embroidery and Placement
On the pocket, count stitches from the right edge of the right side (sts 1–22 across a full row) and rows from the bottom.
- Muzzle: Center the muzzle over sts 9–14, with its top edge at Row 18. Whipstitch around the edge.
- Nose: Use pale pink to satin-stitch a small downward triangle, about 0.3 in (0.8 cm) wide, at the top center of the muzzle.
- Eyes: Use dark brown to backstitch a downward curve over sts 5–8 on Row 21. Add 2 short lash stitches below it. Repeat over sts 15–18.
- Whiskers: Use cream to make 3 straight stitches on each side, starting at the edge of the muzzle and fanning out. Each whisker is about 1 in (2.5 cm) long.
- Inner ears: Sew one pink triangle inside each tan ear, with the point aligned to the ear tip.
Leave the tail aside for now.
Border
Border gauge: border sc sit at 4 sts per inch (2.5 cm) along every edge. Along the side edges you work 1 sc per row end but skip one row end every 8 rows. The rows run 4.5 per inch, so this trims the count to match 4 sts per inch. That keeps the edges from ruffling.
Panel Border (Cream)
With the right side facing, join cream at the first foundation ch of Row 1.
Rnd 1:
– Bottom: Work along the foundation chain: inc in the first ch, sc 12, inc in the last ch. (16 sts)
– Right side: Sc in the end of each of Rows 1–50, skipping the row ends of Rows 8, 16, 24, 32, 40 and 48. (50 − 6 = 44 sts)
– Top: Across Row 50: inc, sc 10, inc. (14 sts)
– Left side: Work the same as the right side. (44 sts)
Sl st to the first sc. (118 sts: 16 + 44 + 14 + 44) Fasten off.
Why the math works: 44 sts at 4 sts per inch equals 11 in (27.9 cm), which matches the 11.1 in (28.2 cm) panel height. The 2 extra stitches at the bottom and top ease around the curves. The rounded corners come from the shaping rows, so no corner stitches are added.
Opening Edging (Cream)
The opening has 4 edges:
– 12 unworked sts of Row 32 at the bottom
– 12 row ends on each strap
– 12 underside loops of the chain at the top
Join cream in the 2nd unworked st at the bottom.
Rnd 1:
– Sc 10 along the bottom (sts 2–11). Sc2tog over bottom st 12 and the first row end.
– Sc 9 along the side (row ends 2–10). Sc2tog over row end 11 and the first ch.
– Sc 10 along the top (ch 2–11). Sc2tog over ch 12 and the first row end of the other side.
– Sc 9 along that side. Sc2tog over row end 11 and bottom st 1.
Sl st to the first sc. (42 sts: 10 + 1 + 9 + 1 + 10 + 1 + 9 + 1) Fasten off.
The 4 corner decreases round off the opening. It is now about 2.6 in × 2.3 in (6.6 cm × 5.8 cm), which is enough for a standard charger cube.
Pocket Edging (Tan)
Join tan at the first foundation ch of Row 1.
Rnd 1:
– Bottom: Inc, sc 12, inc. (16 sts)
– Right side: Sc in the end of each of Rows 1–30, skipping Rows 8, 16 and 24. (27 sts)
– Ear: 4 sc up the outer edge, 3 sc in the tip st, 4 sc down the inner edge. (11 sts)
– Opening: Sc 10 across the unworked sts of Row 30. (10 sts)
– Ear: Work the same as the first ear. (11 sts)
– Left side: Work the same as the right side. (27 sts)
Sl st to the first sc. (102 sts: 16 + 27 + 11 + 10 + 11 + 27) Fasten off.
Attach the Pocket
Lay the pocket on the right side of the panel, with the bottom borders together.
The counts match exactly. Both have 16 border sts across the bottom, and the panel border has 27 sts over Rows 1–30 on each side, the same as the pocket. Pin each pair of stitches.
Use cream to whipstitch through the outer loop of each pocket stitch and the matching panel stitch: 27 up the side, 16 across the bottom, 27 up the other side. That is 70 stitch pairs. Leave the ears and the 10-st opening free.
Keep the tension even and snug, but don’t pull so hard that the edge puckers. The pocket should lie flat with no rippling. Checkpoint: the pocket edges sit exactly on the panel edges.
Finally, sew the tail to the pocket. Tuck the base near the bottom right, around Rows 3–5. Curve it up along the right side to about Row 22, letting the tip curl slightly outward over the border. Sew it down along its inner edge.
Final Blocking
- Weave in all ends inside the pocket or through the backs of matching colors.
- Mist the holder lightly with water. Do not soak it; the appliqués should stay crisp.
- Pin it flat face up to 6 in × 11.6 in (15.2 cm × 29.5 cm).
- Pin the opening into a smooth oval and pin each ear into a neat point.
- Let it dry completely, at least 12 hours.
- Unpin it and check the measurements again.
Final Quality-Control Checklist
- The panel measures 6 in × 11.6 in (15.2 cm × 29.5 cm), within 0.25 in (0.6 cm).
- The opening is smooth and about 2.6 in × 2.3 in (6.6 cm × 5.8 cm).
- The edging counts are 118 sts on the panel, 42 on the opening and 102 on the pocket.
- The pocket edges line up with the panel at the bottom and both sides.
- The ears stand up and are not sewn down.
- Both eyes are level, and the whiskers are even on both sides.
- The tail is secure along its whole inner edge.
- No yarn ends are visible on the front.
Troubleshooting
- The panel edges ruffle: You probably worked a stitch in every row end. Redo the border and skip the row ends listed.
- The edges cup inward: Your border tension is too tight. Redo it more loosely, or use a hook half a size larger for the border round only.
- The charger won’t fit: Check that you left 12 sts and worked 12 strap rows. If the charger is still too big, rip out the opening edging and leave it off, or work it in sl st.
- The pocket doesn’t line up: Count the side border sts on both pieces. They must both be 27 over Rows 1–30.
- The phone falls forward: Your gauge is too loose. Work the pocket again with a smaller hook.
- The tail looks flat: Sew only the inner edge so the outer edge stays raised.
Care
Hand wash in cool water with mild soap, press out the water with a towel, and dry flat. Always unplug the charger before you take the holder off the wall. Never cover a charger that gets hot.
Final Notes
The measurement chain is simple. Gauge of 16 sts and 18 rows to 4 in (10.2 cm) gives 22 sts, or 5.5 in (14.0 cm), across both pieces. The panel is 50 rows, or 11.1 in (28.2 cm), tall. One border round with planned row-end skips brings it to 6 in × 11.6 in (15.2 cm × 29.5 cm). The pocket and panel border counts match pair for pair, so the cat sits exactly where it should.
Happy crocheting!