

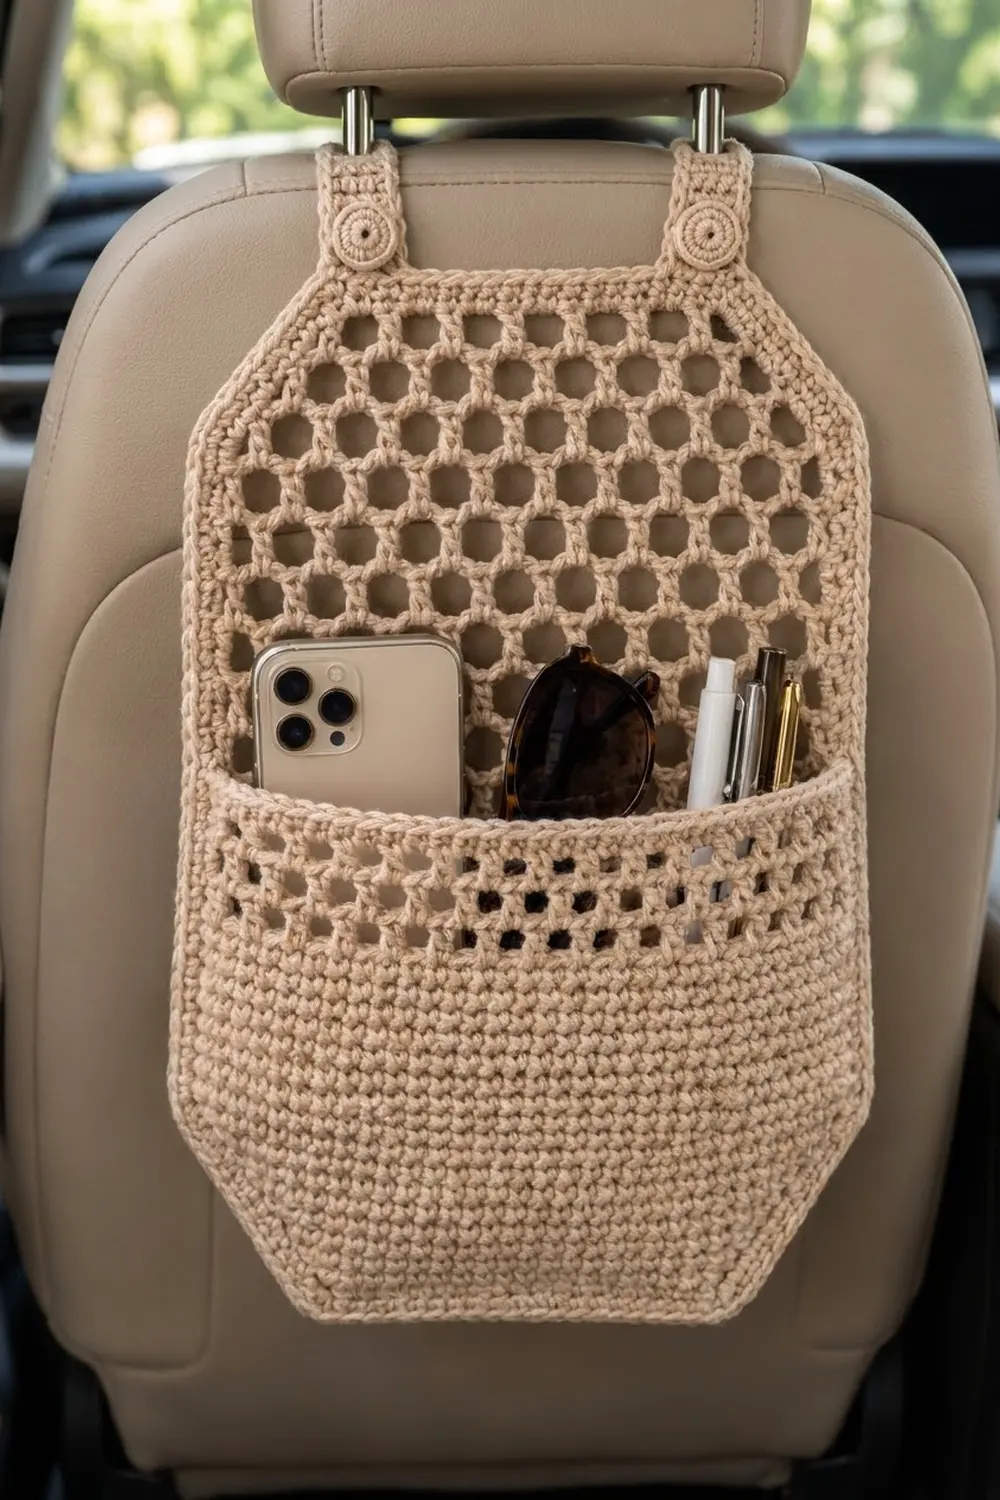
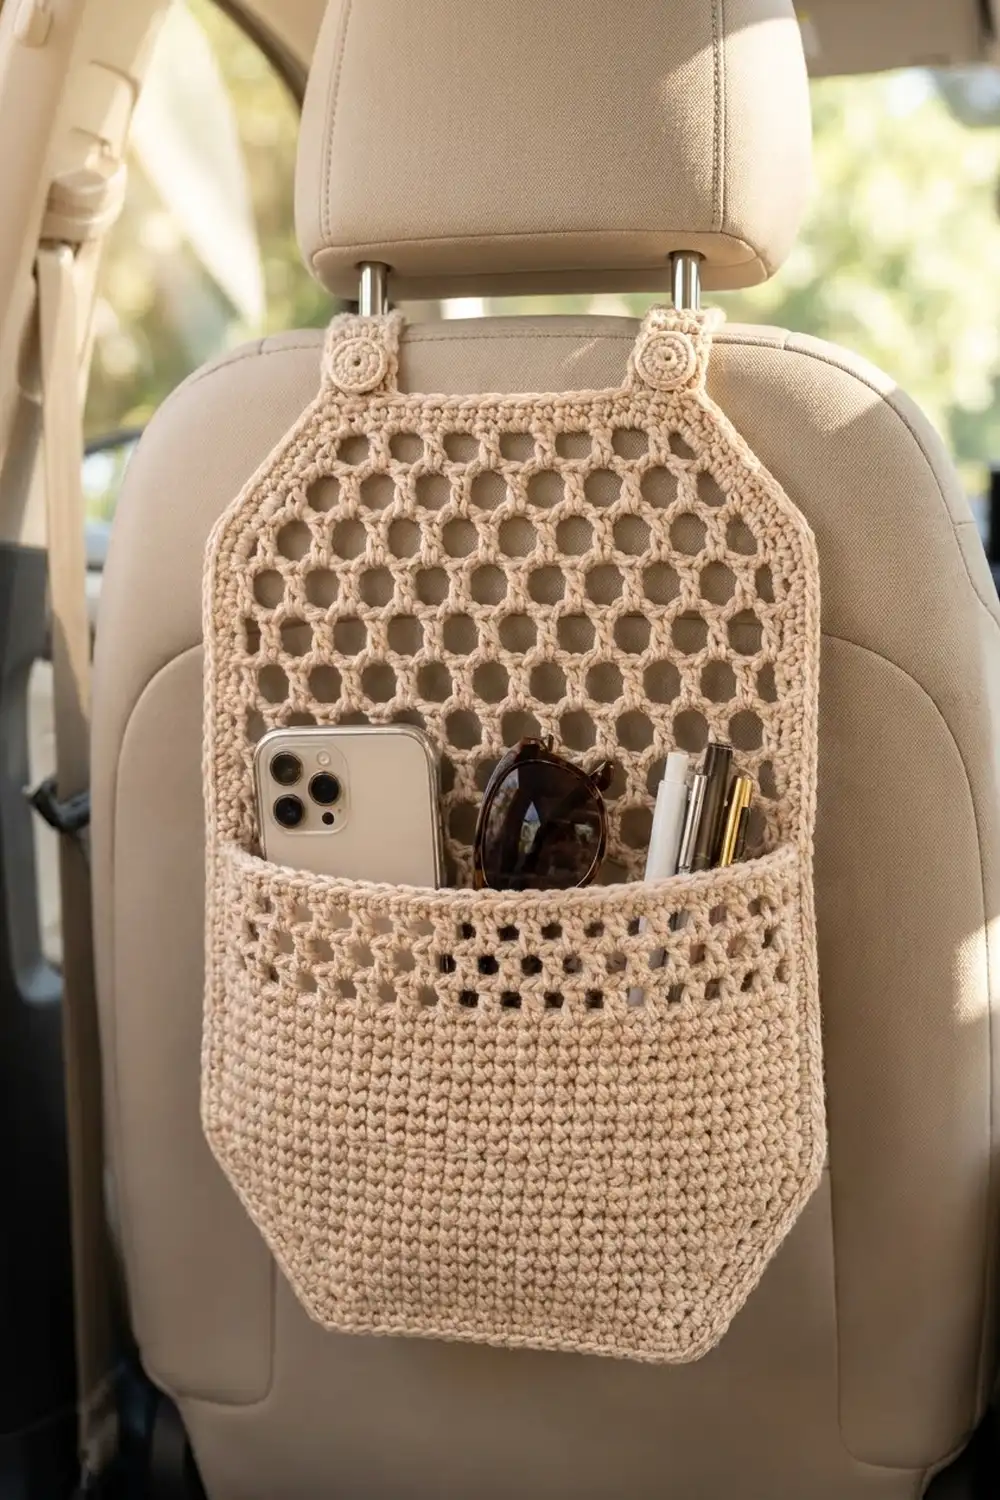
This seat-back organizer keeps a phone, sunglasses, pens and small items in reach without filling the cabin with clutter. The top half is an open honeycomb mesh that looks light against the upholstery. The front pocket is dense single crochet with a matching band of mesh holes near its rim.
The sample uses a single oatmeal beige cotton that blends with neutral car interiors. It looks clean and modern, and the texture comes from the stitches rather than from color changes. Any solid color works. Light neutrals show the mesh most clearly.
This pattern uses US crochet terms. The finished organizer measures 14.25 in (36.2 cm) wide and 18 in (45.7 cm) tall, not counting the straps. Each strap is 1.5 in (3.8 cm) wide and 6 in (15.2 cm) long.
You work the back panel from the bottom up in mesh, increasing and decreasing to shape the octagon, and finish it with a solid single crochet band and two edging rounds. The pocket is worked from the bottom up in single crochet with one mesh band, edged, and then sewn on stitch to stitch. The straps are worked straight off the top edge, and the buttons are made separately.
Finished Size and Construction
- Finished size: 14.25 in x 18 in (36.2 cm x 45.7 cm), plus straps
- Skill level: Intermediate
- Terminology: US
- Yarn weight: Worsted (#4), cotton or cotton blend
- Hook: 5.0 mm (H-8)
- Number of pieces: 1 back panel, 1 pocket, 2 buttons (the straps are worked onto the panel)
- Layout: Pocket sewn over the lower half of the panel. Bottom edges and chamfers line up.
- Panel size before border: 13.25 in x 17 in (33.7 cm x 43.2 cm)
- Pocket size before edging: 13.25 in x 8.75 in (33.7 cm x 22.2 cm)
- Border depth: Panel 0.5 in (1.3 cm), 2 rounds. Pocket 0.25 in (0.6 cm), 1 round.
Materials
Choose a smooth, firm cotton or cotton blend. Cotton holds the mesh open, keeps its shape under the weight of a phone, and handles heat in the car better than most acrylics. Avoid very drapey or fuzzy yarns, because they blur the honeycomb holes.
- Oatmeal beige: 175 g, about 320 m (350 yd), based on cotton worsted at about 183 m (200 yd) per 100 g. The panel uses about 85 g, the pocket about 65 g, and the straps and buttons about 10 g.
These amounts include a margin of about 15 percent for swatching and for joining in new yarn.
Tools:
– 5.0 mm (H-8) crochet hook
– Two 0.75 in (1.9 cm) flat plastic buttons, used as button cores
– Tapestry needle
– 6 to 8 locking stitch markers
– Rust-proof pins and a blocking mat
– Measuring tape
– Scissors
Abbreviations (US Terms)
- ch – chain
- sc – single crochet
- dc – double crochet
- sl st – slip stitch
- sp(s) – space(s)
- sk – skip
- sc2tog – single crochet 2 together
- MR – magic ring
- RS – right side
- rep – repeat
- st(s) – stitch(es)
Special stitch – Honeycomb mesh: a net of sc stitches joined by ch-3 loops. On each new row, every sc goes into the center of a ch-3 space below. The holes are offset from row to row, which gives the honeycomb look.
Gauge and Checkpoints
- Single crochet: 16 sc and 16 rows = 4 in (10.2 cm)
- Mesh: 8 sc with 7 ch-3 sps (Row 1 of the panel) = 7.25 in (18.4 cm) wide, and 8 mesh rows = 4 in (10.2 cm) tall. Each mesh row is 0.5 in (1.3 cm) tall.
Test first: Work Rows 1–7 of the back panel before you go on. Lay the piece flat without stretching it and measure.
Checkpoints:
– Panel Row 1: 7.25 in (18.4 cm) wide
– Panel Row 7: 13.25 in (33.7 cm) wide and 3.5 in (8.9 cm) tall
– Panel Row 29: 14.5 in (36.8 cm) tall
– Panel Row 35: 17 in (43.2 cm) tall, with a top edge of 9.25 in (23.5 cm)
– Pocket Row 14: 13.25 in (33.7 cm) wide and 3.5 in (8.9 cm) tall
– Pocket Row 32: 8.75 in (22.2 cm) tall
If your piece is too big, go down to a 4.5 mm hook. If it is too small, go up to a 5.5 mm hook. Make sure the single crochet and the mesh both match gauge. Tight ch-3 loops are the most common cause of a narrow panel.
Back Panel
Ch 30.
Row 1 (RS): Sc in 2nd ch from hook. Ch 3, sk 3 ch, sc in next ch. Rep from * 6 more times. Turn. (8 sc, 7 ch-3 sps)
Bottom Chamfers (Increase Rows)
Increase Row: Ch 1, sc in first sc. Ch 3, sc in next ch-3 sp. Rep from * across. Ch 3, sc in last sc. Turn.
Each Increase Row adds 1 ch-3 sp, half a space at each edge. That makes a 45-degree chamfer.
- Row 2: 9 sc, 8 ch-3 sps
- Row 3: 10 sc, 9 ch-3 sps
- Row 4: 11 sc, 10 ch-3 sps
- Row 5: 12 sc, 11 ch-3 sps
- Row 6: 13 sc, 12 ch-3 sps
- Row 7: 14 sc, 13 ch-3 sps
Checkpoint: 13.25 in (33.7 cm) wide, 3.5 in (8.9 cm) tall.
Straight Body
Row 8 (offset row): Ch 5 (counts as dc + ch 2). Sc in first ch-3 sp. Ch 3, sc in next ch-3 sp. Rep from * 11 more times. Ch 2, dc in last sc. Turn. (13 sc, 12 ch-3 sps, 2 ch-2 half sps, 2 dc edges)
Row 9 (aligned row): Ch 1, sc in first dc. Skip the ch-2 sp. Ch 3, sc in next ch-3 sp. Rep from * 11 more times. Ch 3, sc in 3rd ch of the turning ch-5. Turn. (14 sc, 13 ch-3 sps)
Rows 10–29: Rep Rows 8 and 9 ten more times. Row 29 ends with 14 sc and 13 ch-3 sps, and both edges are sc.
Checkpoint: 14.5 in (36.8 cm) tall.
Top Chamfers (Decrease Rows)
Decrease Row: Sl st in first sc and in next 2 ch. Ch 1, sc in the same ch-3 sp. Ch 3, sc in next ch-3 sp. Rep from * across, ending with sc in the last ch-3 sp. Leave the last sc unworked. Turn.
Each Decrease Row removes 1 ch-3 sp.
- Row 30: 13 sc, 12 ch-3 sps
- Row 31: 12 sc, 11 ch-3 sps
- Row 32: 11 sc, 10 ch-3 sps
- Row 33: 10 sc, 9 ch-3 sps
Top Band
Row 34 (conversion row): Ch 1, sc in first sc. 3 sc in next ch-3 sp, sc in next sc. Rep from * across. Turn. (10 sc worked 1 per existing sc + 27 sc in spaces = 37 sc)
Row 35: Ch 1, sc in each st across. Turn. (37 sc)
Checkpoint: 17 in (43.2 cm) tall, with a top edge of 9.25 in (23.5 cm), which matches the 9-space mesh below.
Don’t fasten off. Go straight on to the border.
Ch 30.
Row 1 (RS): Sc in 2nd ch from hook and in each ch across. Turn. (29 sc)
Rows 2–13: Ch 1, 2 sc in first st, sc in each st to the last st, 2 sc in last st. Turn.
Each row adds 2 sts: Row 2 has 31 sc, Row 3 has 33 sc, and so on to Row 13, which has 53 sc.
Row 14: Ch 1, sc in each st. Turn. (53 sc)
Checkpoint: 13.25 in (33.7 cm) wide and 3.5 in (8.9 cm) tall. The chamfers match the panel’s bottom chamfers.
Rows 15–26: Ch 1, sc in each st. Turn. (53 sc. Pocket is 6.5 in (16.5 cm) tall.)
Row 27 (conversion to mesh): Ch 1, sc in first st. Ch 3, sk 3 sts, sc in next st. Rep from * across. Turn. (14 sc + 13 ch-3 sps)
Row 28: Work as panel Row 8. (13 sc, 12 ch-3 sps, 2 ch-2 half sps)
Row 29: Work as panel Row 9. (14 sc, 13 ch-3 sps)
Row 30 (conversion to solid): Ch 1, sc in first sc. 3 sc in next ch-3 sp, sc in next sc. Rep from * across. Turn. (14 sc worked 1 per existing sc + 39 sc in spaces = 53 sc)
Rows 31–32: Ch 1, sc in each st. Turn. (53 sc)
Checkpoint: 8.75 in (22.2 cm) tall.
Pocket Edging (1 round)
Ch 1 and work along the top. Put 3 sc in the first st, sc in the next 51 sts, and 3 sc in the last st. That gives 57 sts across the top, corners included. Then work:
- Side: 21 sc down the side (1 per row-end on Rows 15–26 and 30–32, and 2 per mesh row-end on Rows 27–29)
- Lower angle point: 1 extra sc
- Chamfer: 20 sc (1 at Row 14, 3 for every 2 row-ends across Rows 2–13, and 1 at Row 1)
- Lower angle point: 1 extra sc
- Bottom: 29 sc, 1 in each foundation ch
- Lower angle point: 1 extra sc
- Chamfer: 20 sc
- Lower angle point: 1 extra sc
- Side: 21 sc
Join with a sl st. Total: 57 + 21 + 20 + 29 + 20 + 21 + 4 = 172 sc.
Fasten off and leave a 60 in (152.4 cm) tail for sewing.
Checkpoint: 13.75 in x 9.25 in (34.9 cm x 23.5 cm).
Make All Pieces
- Back panel: 1, in oatmeal, with border and straps
- Pocket: 1, in oatmeal, with edging
- Buttons: 2, in oatmeal
Buttons (make 2)
- Rnd 1: 6 sc in MR. (6)
- Rnd 2: 2 sc in each st. (12)
- Rnd 3: Sc in each st. (12)
Insert a 0.75 in (1.9 cm) plastic button, flat side against the spiral.
- Rnd 4: Sc2tog 6 times. (6)
Fasten off and cinch the opening closed. Leave a tail for sewing.
Layout
 [strap]           [strap]
 /‾‾‾‾‾‾‾‾‾‾‾‾‾‾‾‾‾‾‾‾‾‾‾\
|  honeycomb mesh panel   |
|                         |
|=========================|  <- pocket top (level with panel Row 18)
|  ::: mesh band :::      |
|  solid sc pocket        |
 \_______________________/   <- bottoms and chamfers line up
Joining
Method: Whipstitch through both loops, with RS facing up and the pocket laid on the front of the panel.
Stitch-to-stitch logic: Line up the pocket edging with panel border Round 1. Panel Round 2 stays outside the seam as a visible frame. Both pieces measure 13.75 in (34.9 cm) across at that line.
- Bottom: 29 pocket sts to 29 panel sts.
- Each chamfer: 20 sts to 20 sts, plus the angle-point sts matched one to one.
- Each side: 21 side sts plus the first sc of the pocket’s top-corner group, which is 22 sts. These go to the 22 panel sts that sit along panel Rows 8–18 (2 per mesh row).
In total you sew 115 pocket sts on each half-seam pattern. Place markers at all 4 lower angle points on both pieces before you sew.
Tension: Pull each stitch just snug. Overly tight stitches pucker the mesh. Loose ones let the pocket gape at the corners.
Checkpoint: The pocket top sits 9.5 in (24.1 cm) above the finished bottom edge. Leave the top edge open.
Border
Border gauge: 16 sc = 4 in (10.2 cm). That is 2 sc per mesh row-end, which is 0.5 in (1.3 cm), and about 3 sc per chamfer row-end, which is about 0.7 in (1.8 cm) along the diagonal.
On the panel there are 8 angle points: 2 where the top meets the top chamfers, 2 where the top chamfers meet the sides, 2 where the sides meet the bottom chamfers, and 2 where the bottom chamfers meet the bottom. The counts below are for the stitches between those points. The angle-point stitches are listed separately.
Round 1: From the end of Row 35, ch 1 and turn the work so you can go down the edge. Work:
- Top edge: 37 sc, 1 in each st of Row 35
- Each top chamfer: 14 sc (1 per row-end on Rows 35–34 and 3 per row-end on Rows 33–30)
- Each side: 44 sc (2 per row-end on Rows 29–8)
- Each bottom chamfer: 20 sc (3 per row-end on Rows 7–2 and 2 at Row 1)
- Bottom: 29 sc (1 in each sc-base ch and 3 in each group of 3 skipped ch)
- At each of the 8 angle points: 1 extra sc
Join with a sl st. Total: 37 + (14 x 2) + (44 x 2) + (20 x 2) + 29 + 8 = 230 sc.
Round 2: Ch 1. Sc in each st, working 2 sc in each of the 8 extra angle-point sts. Join with a sl st.
Per side: top 37, top chamfers 14 each, sides 44 each, bottom chamfers 20 each, bottom 29, plus 8 angle points with 2 sc each. Total: 37 + 28 + 88 + 40 + 29 + 16 = 238 sc.
Fasten off.
Why the math works: Each side count comes from the row height. A 0.5 in (1.3 cm) mesh row needs 2 sc at 4 sc per inch. A 45-degree chamfer step is about 0.7 in long, so it needs 3 sc. The extra stitch at each angle point lets the octagon’s corners open without cupping. When an edge round moves outward on an octagon, it gains roughly 1 stitch per corner, so Round 2 adds exactly 8 sts.
Straps (make 2, worked onto the panel)
With RS facing, join the yarn in the first of the 37 top-edge sts of Round 2.
- Row 1: Sc in this st and in the next 5 sts. Turn. (6 sc)
- Rows 2–20: Ch 1, sc in each st. Turn. (6)
- Row 21: Ch 1, sc 2, ch 2, sk 2, sc 2. Turn. (4 sc + 1 ch-2 sp)
- Row 22: Ch 1, sc 2, 2 sc in ch-2 sp, sc 2. Turn. (6)
- Rows 23–24: Ch 1, sc in each st. (6)
Fasten off. Repeat over the last 6 of the 37 top sts. That leaves 25 sts, 6.25 in (15.9 cm), between the straps, and puts the strap centers 7.75 in (19.7 cm) apart.
Sew a button to the RS of each strap, centered on Row 6, which is 1.5 in (3.8 cm) above the panel.
Final Blocking
- Weave in all ends along solid stitches, not through the mesh.
- Wet the organizer and gently squeeze out the water in a towel.
- Lay it flat with RS up, and pin it to 14.25 in x 18 in (36.2 cm x 45.7 cm).
- Pin the chamfers straight from angle point to angle point.
- Open each mesh hole with your fingertips so the honeycomb looks even.
- Pin the straps straight at 1.5 in x 6 in (3.8 cm x 15.2 cm).
- Let it dry completely before you hang it.
Final Quality-Control Checklist
- The panel measures 14.25 in x 18 in (36.2 cm x 45.7 cm).
- Both top chamfers match each other, and both bottom chamfers match each other.
- The pocket’s bottom and chamfers sit exactly over panel border Round 1.
- The pocket top is open and level, 9.5 in (24.1 cm) from the bottom.
- The mesh band on the pocket shows 13 holes and then 12 offset holes.
- The straps are the same length, and the buttons pass through the buttonholes firmly.
- There are no visible tails in the mesh.
Troubleshooting
- The mesh is narrower than gauge: Your ch-3 loops are too tight. Chain more loosely or go up a hook size for the mesh rows only.
- The chamfers curve: Check your Increase and Decrease Rows. You should gain or lose exactly 1 space per row.
- The border ruffles: You have too many sc on the chamfers. Use 3 per row-end there, not 4.
- The border cups: You left out the angle-point extras. Make sure there are 8 in Round 1.
- The pocket gapes at the top corners: Sew the 22nd side stitch firmly and add an extra tack stitch.
- The button slips out: Sew the buttonhole edges slightly smaller, or use a 1 in (2.5 cm) button core.
Care
Hand wash in cool water and lay flat to dry. Empty the pocket before washing, and reshape the mesh while it is damp.
Final Notes
The measurements build on each other in this order:
- The 7.25 in (18.4 cm) foundation grows to 13.25 in (33.7 cm) by Row 7 and narrows to a 9.25 in (23.5 cm) top.
- The panel reaches 17 in (43.2 cm) before the border and 14.25 in x 18 in (36.2 cm x 45.7 cm) after its 0.5 in (1.3 cm) border.
- The pocket’s 53-stitch width and matching chamfers bring it to 13.75 in (34.9 cm), so it sews on stitch for stitch at border Round 1.
If each checkpoint matches, the finished organizer will hang straight and hold its shape. Happy crocheting!