

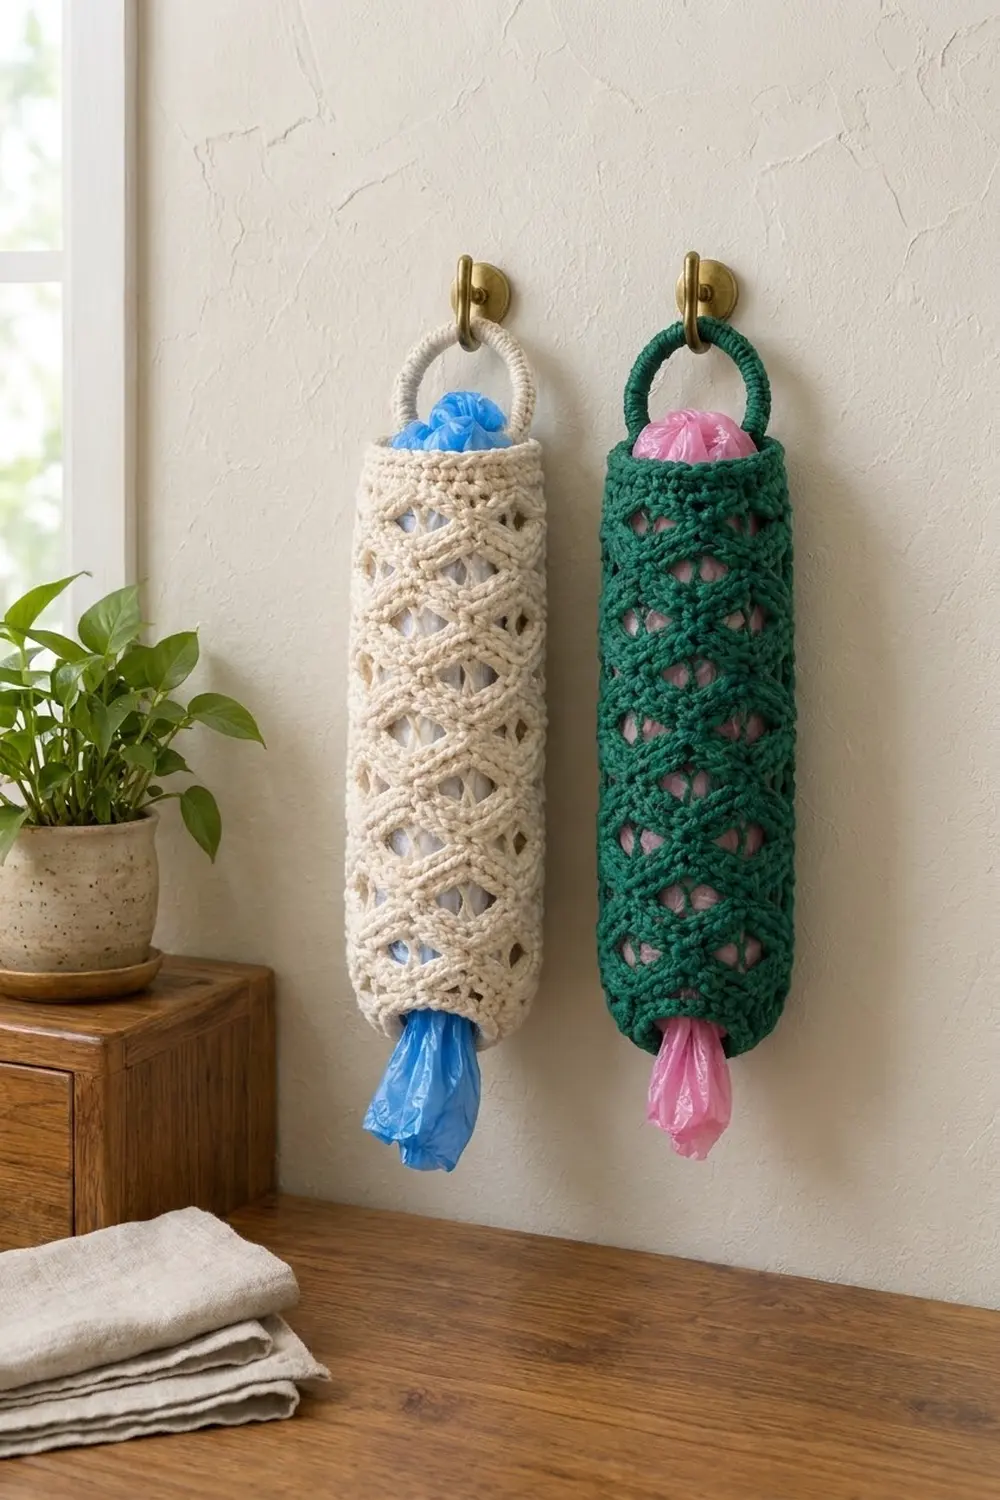
This plastic bag holder is a tall, open-lattice tube that hangs from a crocheted-over ring. The body is a diamond trellis of chain loops, so you can see the bags through the openings, and it has a solid single crochet band at each end. You push bags in at the top and pull them out one at a time through the narrower bottom opening.
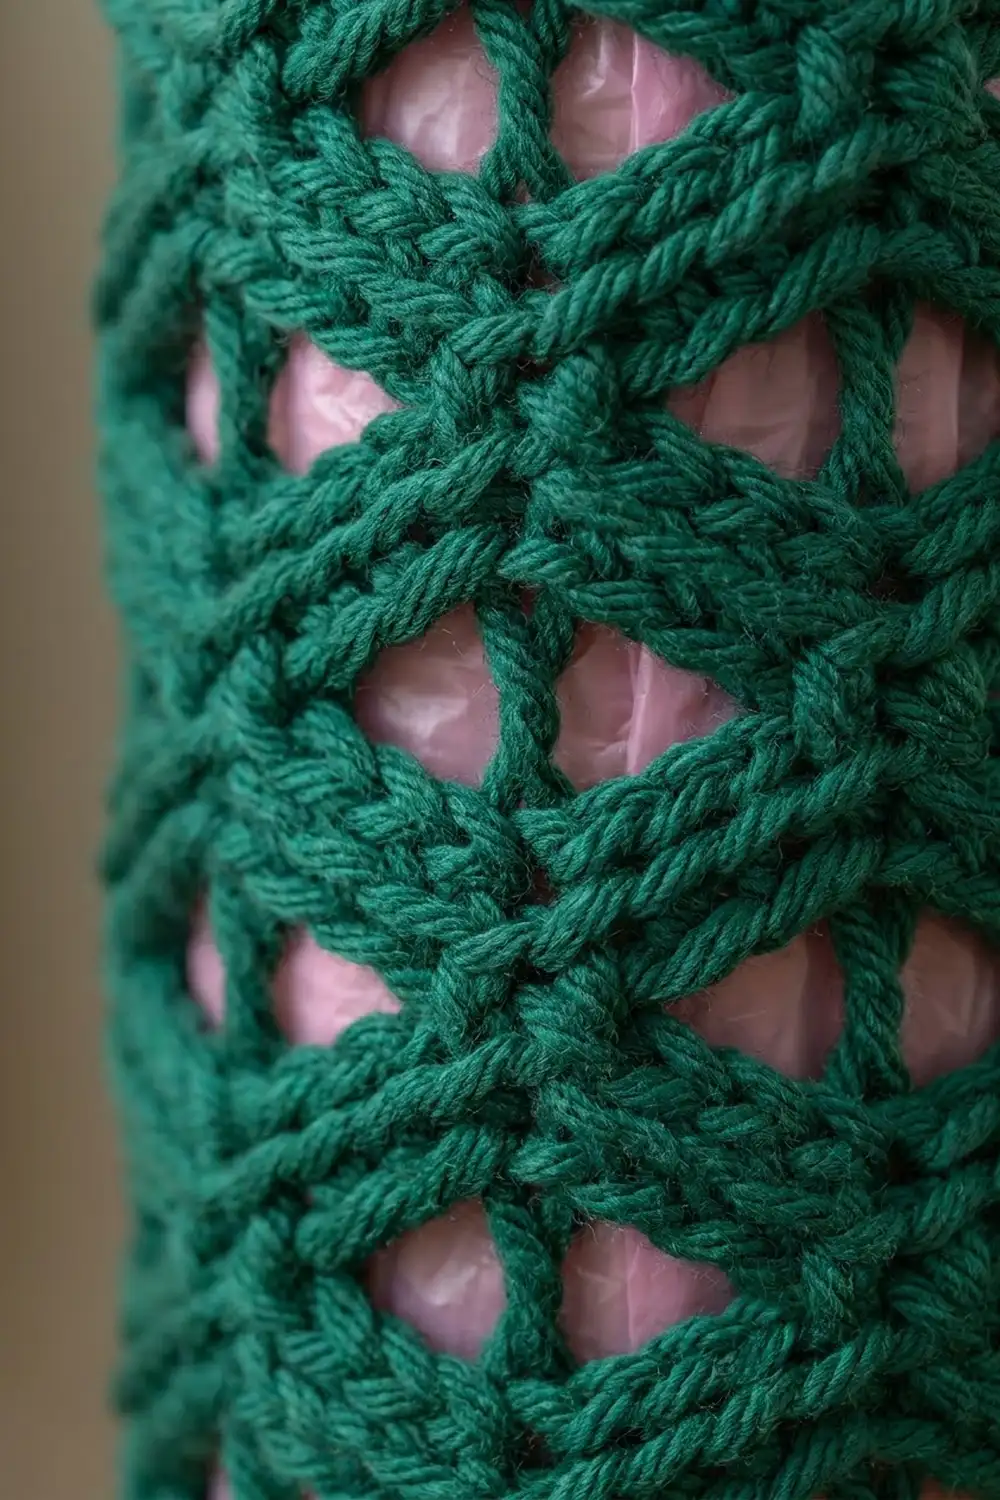
The sample is in natural cream cotton. The same pattern looks just as good in a deep forest green, so choose whichever color suits your kitchen, pantry, or laundry room. In a sturdy bulky cotton the trellis bands come out thick and rounded, almost like braided cord.
All instructions use US crochet terms. The finished holder measures 6 in (15.2 cm) wide at the top when laid flat, 5 in (12.7 cm) wide at the bottom, and 16.5 in (41.9 cm) tall. With the ring included, it hangs about 19 in (48.3 cm) long.
You work from the bottom up in joined rounds: a narrow solid band, one increase round, the diamond mesh, a conversion round back to solid stitches, and the top band. Next comes a reverse single crochet border on both edges. Last, you cover a ring with single crochet and sew it to the back of the top edge.
Finished Size and Construction
- Finished size: 6 in (15.2 cm) wide flat at top, 5 in (12.7 cm) wide flat at bottom, 16.5 in (41.9 cm) tall
- Hanging length with ring: about 19 in (48.3 cm)
- Skill level: Easy
- Terminology: US
- Yarn weight: Bulky (#5) cotton
- Hook: 6 mm (US J-10)
- Number of pieces: 1 tubular body plus 1 covered ring, sewn together
- Layout: single hanging tube, ring centered at the back of the top edge
- Piece size: 12 in (30.5 cm) circumference at top, 10 in (25.4 cm) at bottom
- Size before border: 16 in (40.6 cm) tall
- Border depth: about 0.25 in (0.6 cm) at each end
Materials
Pick a firm, smooth bulky cotton or cotton blend. Cotton holds the trellis open and doesn’t stretch much under the weight of a full load of bags. Avoid very soft or loosely plied acrylics, because the chain loops will sag and lengthen over time.
- Main color, Cream (or Forest Green): 150 g / about 195 m (213 yd)
- Ring cover: included in the amount above (about 10 g / 13 m)
If you want to make both colorways, buy the full amount for each color. The holder uses only one color.
Tools:
- 6 mm (US J-10) crochet hook
- 3 in (7.6 cm) metal or wooden ring
- Tapestry needle
- 4 stitch markers
- Scissors
- Measuring tape
- Rustproof pins and a spray bottle for blocking
The quantities include a margin of about 20%, which covers your gauge swatch and small differences in tension.
Abbreviations (US Terms)
- ch – chain
- sl st – slip stitch
- sc – single crochet
- dc – double crochet
- sk – skip
- sp(s) – space(s)
- st(s) – stitch(es)
- rnd(s) – round(s)
- rev sc – reverse single crochet
Special stitch – reverse single crochet (rev sc): Keep the right side facing you and work from left to right. Insert the hook into the next stitch to the right, yarn over, pull up a loop, then yarn over and pull through both loops on the hook. This gives a twisted, corded edge.
Note: The ch 1 at the start of each solid round does not count as a stitch. Join every solid round with a sl st to the first sc. Don’t turn between rounds. The right side faces you throughout.
Gauge and Checkpoints
Solid gauge: 12 sc and 12 rnds = 4 in (10.2 cm) in sc worked in the round.
Mesh gauge: 4 mesh rnds = 3 in (7.6 cm) tall. Each ch-5 loop is about 1.3 in (3.3 cm) wide when lightly stretched.
Treat the bottom band as your gauge test. Before you go further, work Rnds 1–6 and check:
- After Rnd 4: flat width 5 in (12.7 cm), height about 1.3 in (3.3 cm)
- After Rnd 6: flat width 6 in (15.2 cm), height 2 in (5.1 cm)
- After Rnd 10: total height 5 in (12.7 cm)
- After Rnd 22: total height 14 in (35.6 cm)
- After Rnd 28: total height 16 in (40.6 cm)
- After border: total height 16.5 in (41.9 cm)
If your tube is too wide, go down one hook size. If it’s too narrow, go up one hook size and rework from the start. Mesh height matters less than width, and you can add or remove mesh rounds in pairs to change the length. Each pair of mesh rounds adds or removes 1.5 in (3.8 cm).
Bottom Band
Foundation: Ch 30. Making sure the chain isn’t twisted, sl st to the first ch to form a ring.
Rnd 1: Ch 1, sc in each ch around, join. (30 sc)
Rnds 2–4: Ch 1, sc in each st around, join. (30 sc)
This narrower band makes the dispensing opening. It’s snug enough to hold the bags inside but loose enough for one bag to pull through.
Rnd 5 (increase round): Ch 1, *sc in next 4 sts, 2 sc in next st; rep from * 5 more times, join. (36 sc)
Rnd 6: Ch 1, sc in each st around, join. (36 sc)
Checkpoint: the flat width is 6 in (15.2 cm) and the height is 2 in (5.1 cm).
Diamond Trellis Body
Rnd 7 (mesh setup): Ch 1, sc in same st as join, *ch 5, sk 3 sts, sc in next st; rep from * 7 more times, ch 2, sk last 3 sts, dc in first sc. (9 ch-5 loops: 8 full ch-5 loops plus a ch-2 + dc loop)
Check the math: the sc land on sts 1, 5, 9, 13, 17, 21, 25, 29 and 33. That’s 9 sc, each followed by a gap of 3 skipped sts, so 9 × 4 = 36 sts are used. The ch 2 + dc counts as a loop the same length as a ch 5. It leaves your hook at the middle of loop 9, ready for the next round.
Rnd 8: *Ch 5, sc in next ch-5 sp; rep from * 7 more times, ch 2, dc in top of dc at end of previous rnd. (9 loops)
Rnds 9–22: Rep Rnd 8. (9 loops each round)
You now have 16 mesh rounds (Rnds 7–22), 12 in (30.5 cm) of trellis. Each new loop sits centered over a loop below it, and that offset turns the openings into diamonds. The sc knots line up on diagonals, which gives the crossing bands you see on the finished holder.
Mesh tips: pull every sc snug so the knots stay small and firm. Keep all your chains the same length, because one loose loop makes a lopsided diamond that blocking won’t fully fix. Every few rounds, slip the tube over a bottle and check that the diamonds sit in straight vertical columns.
Checkpoint after Rnd 10: total height 5 in (12.7 cm). After Rnd 22: 14 in (35.6 cm). Pinch the tube flat. The width should still read about 6 in (15.2 cm). If it pulls in, your chains are too tight.
Top Band
Rnd 23 (conversion round): Ch 1, 2 sc in the sp under the dc just made, 4 sc in each of next 8 ch-5 sps, 2 sc in the remaining ch-2 sp, join to first sc. (9 loops × 4 sc = 36 sc: 2 + 32 + 2)
Every loop gets exactly 4 sc, which replaces the 4 sts each loop took up in Rnd 7. That’s why the top band comes out the same width as the top of the bottom band.
Rnds 24–28: Ch 1, sc in each st around, join. (36 sc)
Checkpoint: the top band is 2 in (5.1 cm) tall and the body is 16 in (40.6 cm) tall in total. Don’t fasten off yet.
Border
Border gauge: same as solid gauge, 12 sts = 4 in (10.2 cm). A rev sc round adds about 0.25 in (0.6 cm).
Top border: Ch 1, rev sc in each st around, join. Fasten off. (36 rev sc)
Bottom border: Turn the tube upside down. Join yarn with a sl st in any st of the foundation edge (the bottom of Rnd 1). Ch 1, rev sc in each st around, join. Fasten off. (30 rev sc)
Why the math works: a tube has no corners, so each edge is one continuous “side” with no corner stitches. Working exactly one rev sc into each existing stitch (36 at the top, 30 at the bottom) matches the circumference. The edge won’t ruffle, and it won’t pull in and narrow the openings. The total height becomes 16 in + 0.25 in + 0.25 in = 16.5 in (41.9 cm).
Hanging Ring
Ring: Leave a 12 in (30.5 cm) tail. Make a slip knot on your hook. Insert the hook through the 3 in (7.6 cm) ring, yarn over and pull up a loop, then complete a sc around the ring. Work 35 more sc around the ring (36 sc). Push the stitches together so no ring shows. Sl st to the first sc. Fasten off, leaving a 16 in (40.6 cm) tail.
The covered ring is about 3.5 in (8.9 cm) across on the outside.
Attaching: Flatten the tube so the column of round joins runs down the center back. The ring goes there, and the join line stays hidden against the wall. Lay the ring behind the top band so that 6 sc of the ring overlap the top 2 rounds (Rnds 27–28) on the inside of the back. Mark those 6 ring stitches and the 6 matching body stitches. Using the long tail, whipstitch each ring stitch to its body stitch, going through both layers twice. Tie off securely and weave in.
About 0.75 in (1.9 cm) of the ring overlaps the body, so it rises about 2.75 in (7.0 cm) above the top border.
Final Blocking
- Weave in all remaining ends along the inside of the solid bands.
- Roll up a towel to a 12 in (30.5 cm) circumference, or use a large plastic bottle, and slide the holder over it.
- Spray it evenly until damp but not dripping.
- Gently stretch the trellis lengthwise so the diamonds open evenly. Aim for a body height of 16.5 in (41.9 cm).
- Shape the bottom band so it narrows smoothly to 5 in (12.7 cm) flat.
- Let it dry completely before hanging, ideally for 24 hours.
Final Quality-Control Checklist
- Rnds 1–4: 30 sc each round
- Rnds 5–6: 36 sc each round
- Every mesh round has 9 loops (Rnds 7–22, 16 rounds total)
- Rnd 23 has 36 sc, 4 per loop
- Top border has 36 rev sc and bottom border has 30
- Flat widths: 6 in (15.2 cm) at top, 5 in (12.7 cm) at bottom
- Height: 16.5 in (41.9 cm) body, about 19 in (48.3 cm) with ring
- Ring is fully covered and sewn through both layers
- All ends are woven in on the inside
Troubleshooting
The mesh is twisting into a spiral. You may be working the final dc into the wrong spot. Always dc into the top of the previous round’s dc, not into the next loop.
The loops pull the tube narrower than 6 in (15.2 cm). Your chains are too tight. Chain more loosely, or work only the chains with a hook one size larger.
Bags fall out of the bottom. The bottom opening is too loose. Rework Rnds 1–4 with a hook one size smaller, then switch back to the 6 mm hook for Rnd 5. The stitch counts stay the same.
Bags won’t come out. The opening is too tight. Rework Rnds 1–4 with a hook one size larger. The counts stay the same.
The border ruffles. You’re working more than one rev sc per stitch. Recount: 36 at the top, 30 at the bottom.
The ring tilts forward. Sew through more stitches, 8 instead of 6, spread evenly around center back.
Care
Hand wash in cool water with mild soap, press out the water in a towel, and reshape over a bottle to dry. Don’t tumble dry, because heat can shrink the cotton and distort the trellis.
Final Notes
The whole holder rests on one measurement chain: 12 sc = 4 in (10.2 cm) gives a 30-st bottom of 5 in (12.7 cm) flat and a 36-st body of 6 in (15.2 cm) flat. Those 36 sts divide into 9 mesh loops of 4 sts each. The 16 mesh rounds add 12 in (30.5 cm), Rnd 23 restores exactly 36 sts, and the two bands plus borders bring the tube to 16.5 in (41.9 cm). Check your width at Rnd 6 and everything after that falls into place.
Happy crocheting!