

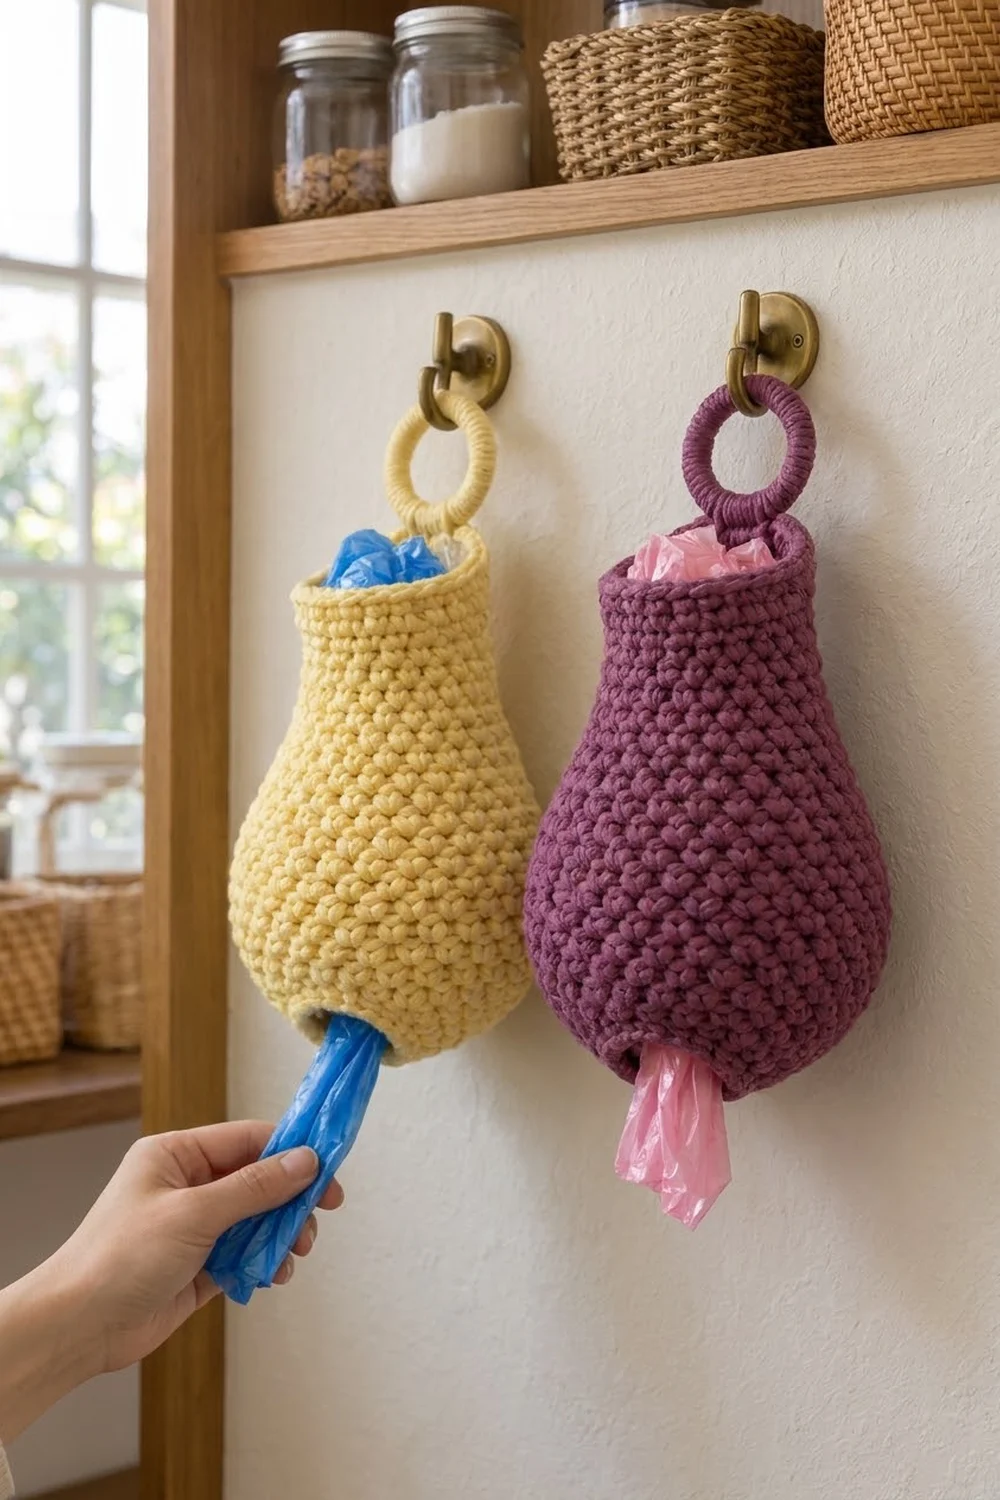
Every kitchen has a drawer full of plastic bags. This holder keeps them in one tidy, cheerful place. You stuff bags in through the open top and pull them out one at a time through the small hole in the rounded bottom. The pear silhouette has a full belly that holds plenty of bags and a slim neck that keeps the top neat.
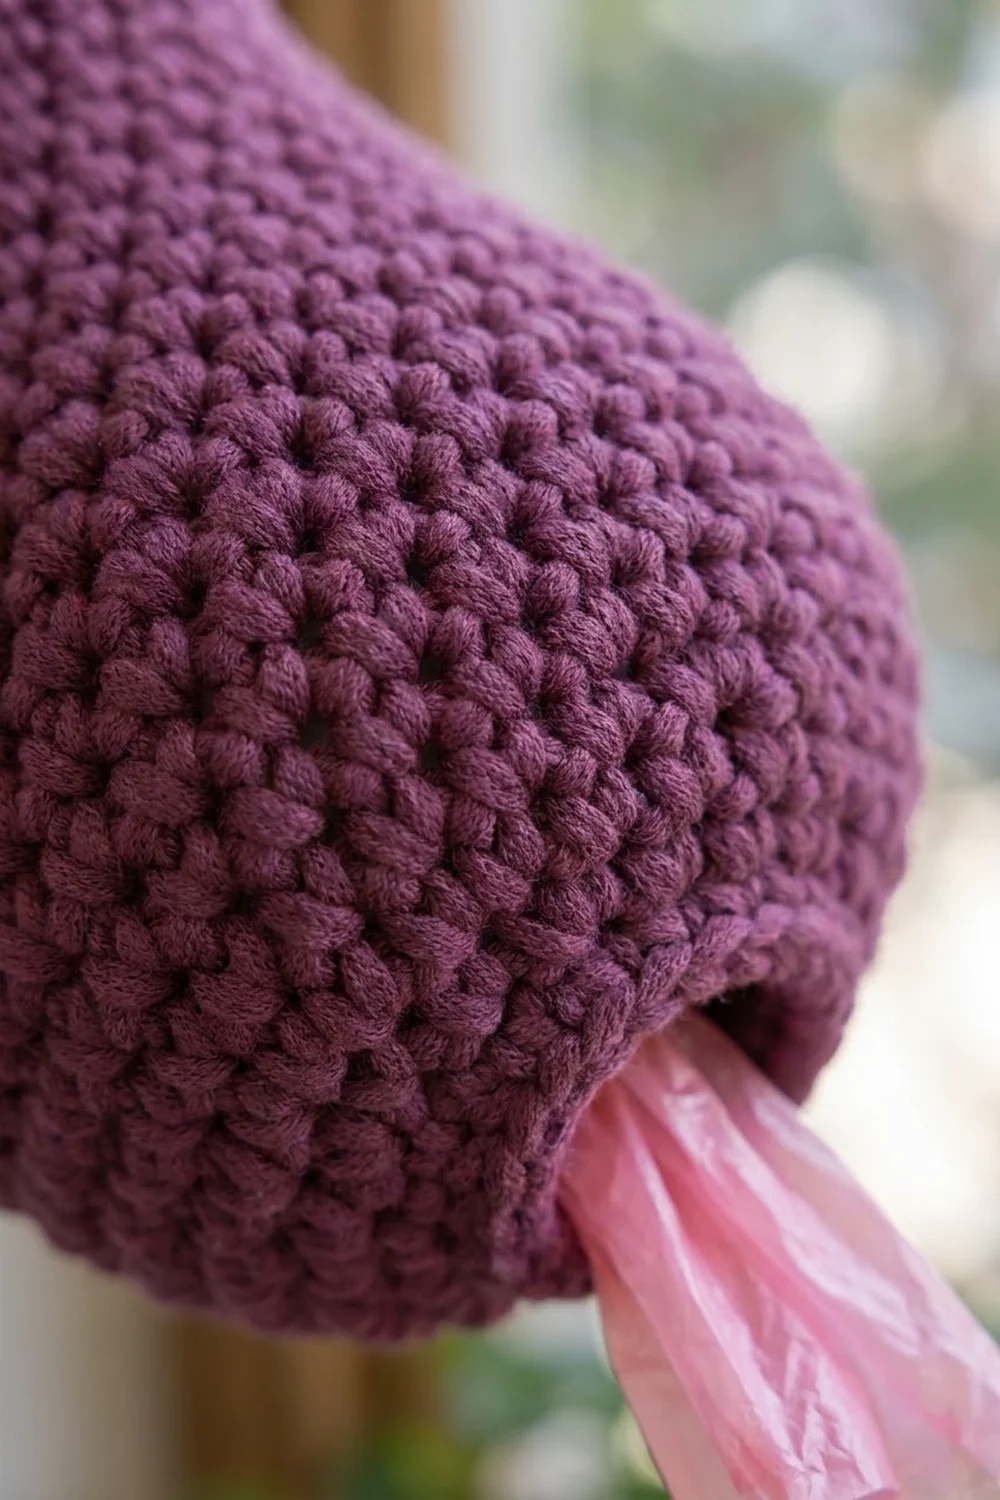
The sample is worked in soft butter yellow. A second version in deep plum shows how well the shape works in richer shades. The texture is plain, dense single crochet, which gives a sturdy, pebbly fabric that keeps its shape on the wall.
This pattern uses US crochet terms. The finished holder is 12 in (30.5 cm) tall measured along the side and 8 in (20.3 cm) wide at the belly when laid flat. The covered ring adds about 2.5 in (6.4 cm), so the total hanging length is about 14.5 in (36.8 cm).
You work the body bottom-up in one piece, in continuous spiral rounds. You start at the dispensing hole, increase to shape the rounded base and belly, then decrease to the neck. Next you cover a 2.5 in (6.4 cm) ring with single crochet and add a small tab. The tab is sewn inside the back of the rim.
Finished Size and Construction
- Finished size: 12 in (30.5 cm) tall along the side × 8 in (20.3 cm) wide at the belly, laid flat
- Neck width: 4 in (10.2 cm), laid flat
- Bottom opening: about 1.9 in (4.8 cm) across
- Skill level: Easy
- Terminology: US
- Yarn weight: Bulky (#5)
- Hook: 6 mm (US J-10)
- Number of pieces: 1 body, worked in one piece, plus 1 covered ring hanger with tab
- Layout: single standalone holder, no joining
- Body height before rim edging: 11.7 in (29.7 cm), after Rnd 38
- Rim edging depth: 0.3 in (0.8 cm), one sc round plus one slip-stitch round
Materials
Yarn: Use a bulky (#5) acrylic or cotton-acrylic blend with a firm twist. Acrylic is light, washable and holds the pear shape well. Pure cotton also works, but it is heavier and may stretch a little at the neck over time. The quantities below assume about 160 m per 100 g.
- Main color (MC), butter yellow: 150 g, about 240 m
- Alternate colorway, plum: 150 g, about 240 m (only needed if you make a second holder in this shade)
One holder uses about 130 g. The amounts above include a margin for your gauge swatch and a little variation in tension.
Tools:
– 6 mm (US J-10) crochet hook
– One rigid ring, 2.5 in (6.4 cm) outer diameter (wood, metal or plastic)
– Stitch marker
– Tapestry needle
– Scissors
– Measuring tape
– Spray bottle and a cardboard tube or rolled towel for blocking
Abbreviations (US Terms)
- ch – chain
- sc – single crochet
- sl st – slip stitch
- st(s) – stitch(es)
- inc – increase: 2 sc in the same st
- dec – invisible decrease: insert hook in front loop only of the next 2 sts, yarn over, pull through both front loops, yarn over, pull through 2 loops
- Rnd(s) – round(s)
- ( ) ×N – repeat the sequence in parentheses N times
Special technique – spiral rounds: Do not join the body rounds and do not chain at the start of them. Move the stitch marker up to the first stitch of each new round. Spiral rounds leave no visible seam line, which suits the smooth pear shape.
Gauge and Checkpoints
Gauge: 12 sc × 13 rnds = 4 in (10.2 cm) in sc worked in the round. That is 3 sts and 3.25 rnds per inch.
Gauge matters here because the shape comes from the stitch counts. A loose gauge makes the holder floppy and lets bags slip out of the bottom hole.
Test first: Work Rnds 1–8 as your gauge test. At this point the piece is a shallow, rounded cup.
Checkpoints:
– After Rnd 1: 18 sts. The opening is about 6 in (15.2 cm) around and about 1.9 in (4.8 cm) across.
– After Rnd 8: 48 sts. The circumference is 16 in (40.6 cm).
– After Rnd 17: the side height is 5.2 in (13.2 cm).
– After Rnd 30: the side height is 9.2 in (23.4 cm), and the neck circumference is 10 in (25.4 cm).
– After Rnd 38: the side height is 11.7 in (29.7 cm), and the neck circumference is 8 in (20.3 cm).
If your piece is too big: If the Rnd 8 circumference is more than 16.5 in (41.9 cm), go down to a 5.5 mm hook. If it is too small: If it is under 15.5 in (39.4 cm), go up to a 6.5 mm hook. Change hooks before you go on. Do not change the stitch counts.
Body
Measure height along the side of the piece, starting at the bottom opening.
Bottom Opening and Rounded Base
Foundation: With MC, ch 18. Join with a sl st into the first ch to form a ring. Do not twist the chain. This ring is the dispensing hole.
Rnd 1: Ch 1. Sc in each ch around (18). Do not join; place the marker in the first st. (18 sts)
Rnd 2: (Sc 2, inc) ×6. (24 sts)
Rnd 3: (Sc 3, inc) ×6. (30 sts)
Rnd 4: (Sc 4, inc) ×6. (36 sts)
Rnd 5: Sc in each st around. (36 sts)
Rnd 6: (Sc 5, inc) ×6. (42 sts)
Rnd 7: Sc in each st around. (42 sts)
Rnd 8: (Sc 6, inc) ×6. (48 sts)
Rnds 2–4 add 6 sts per round, so the fabric fans out into a gently curved base around the hole. Rnds 5–8 alternate increase rounds with plain rounds. This turns the base upward into the walls, which gives the rounded bottom you see in the photo.
To keep your increases from stacking into visible corners, you can offset them. On Rnds 6 and 8, work half of the first plain group before the first inc, then work the last plain group in full at the end. The stitch count stays the same.
Belly
Rnds 9–17 (9 rnds): Sc in each st around. (48 sts each round)
This straight section is the fullest part of the pear: 16 in (40.6 cm) around, or 8 in (20.3 cm) wide laid flat. Checkpoint: 5.2 in (13.2 cm) along the side.
Taper to the Neck
Rnd 18: (Sc 6, dec) ×6. (42 sts)
Rnds 19–21 (3 rnds): Sc in each st around. (42 sts each round)
Rnd 22: (Sc 5, dec) ×6. (36 sts)
Rnds 23–25 (3 rnds): Sc in each st around. (36 sts each round)
Rnd 26: (Sc 4, dec) ×6. (30 sts)
Rnds 27–30 (4 rnds): Sc in each st around. (30 sts each round)
Checkpoint: 9.2 in (23.4 cm) along the side, with a circumference of 10 in (25.4 cm).
Rnd 31: (Sc 3, dec) ×6. (24 sts)
Because the decreases are spaced out with plain rounds between them, the side curves gently instead of stepping in sharply. This is the soft shoulder of the pear.
Neck
Rnds 32–38 (7 rnds): Sc in each st around. (24 sts each round)
The neck is 8 in (20.3 cm) around, or 4 in (10.2 cm) wide laid flat. Checkpoint: 11.7 in (29.7 cm) along the side. That is 38 rounds ÷ 3.25 rounds per inch. Leave the hook in the loop and go on to the rim edging.
Border (Rim Edging)
The holder has two edges to finish: the top rim and the bottom opening. Both are worked at body gauge, 3 sts per inch (2.5 cm), with exactly one stitch in each existing stitch. Each edge therefore keeps the same circumference as the round below it.
To keep the stitches evenly spread, think of each edge as two halves, front and back. Place a marker at the halfway point.
Top Rim
Rnd 39: Sc in each st around. That is 12 sts across the front and 12 across the back. Sl st in the first st of the round to even out the end of the spiral. (24 sts)
Rnd 40: Working loosely, sl st in each st around: 12 across the front and 12 across the back. Join with a sl st to the first sl st. (24 sl sts) Fasten off and weave in the end.
Rnd 39 adds 0.3 in (0.8 cm), which brings the side height from 11.7 in (29.7 cm) to 12 in (30.5 cm). The slip-stitch round adds no real height. It firms the rim so it doesn’t stretch when you push bags in.
Bottom Opening Edge
Edging Rnd: Turn the holder upside down. Join MC with a sl st in any foundation ch around the hole. Sl st loosely in each foundation ch around, 9 across each half. Join with a sl st to the first sl st. (18 sl sts) Fasten off and weave in.
Why the math works: Both edges keep a strict 1:1 stitch ratio: 24 sts on 24 at the rim, and 18 sts on 18 at the hole. Because no stitches are added or skipped, the rim neither flares nor pulls in. The hole also keeps its 1.9 in (4.8 cm) diameter (6 in ÷ 3.14). That size is snug enough to hold bags in but still lets you pull them out easily.
Covered Ring Hanger
Ring cover: With MC, make a slip knot on the hook. Hold the 2.5 in (6.4 cm) ring and work sc over it, inserting the hook through the center of the ring each time. Work 36 sc around, sliding the stitches together so no ring shows. Sl st in the first sc to join. (36 sc)
If your ring still shows through the stitches, add 2 to 4 more sc. If the stitches buckle, remove 2 to 4.
Tab: Do not fasten off. Work back and forth over the ring’s own stitches.
– Row 1: Ch 1. Sc in the next 6 sc on the ring, turn. (6 sts)
– Rows 2–4: Ch 1. Sc in each st across, turn. (6 sts each row)
The tab is 2 in (5.1 cm) wide and 1.2 in (3.0 cm) long. Fasten off and leave a 12 in (30.5 cm) tail for sewing.
Attach: Center the tab on the inside back of the neck, with its last row 0.75 in (1.9 cm) below the rim. Whipstitch all 4 edges of the tab to the inside wall through the back loops, so the stitches don’t show on the front. Go around twice for strength.
Final Blocking
- Weave in all ends on the inside of the holder, going over at least 2 in (5.1 cm) in different directions.
- Push a cardboard tube or a rolled towel inside the body to fill out the belly, so the piece is 8 in (20.3 cm) wide when flattened.
- Mist the holder evenly with water until it is damp but not soaked.
- Shape the base with your fingers so it curves smoothly around the hole, and roll the rim so it stands straight up.
- Check the measurements: 12 in (30.5 cm) along the side, 8 in (20.3 cm) at the belly, 4 in (10.2 cm) at the neck.
- Let it dry completely, usually 12 to 24 hours, then remove the filling.
Final Quality-Control Checklist
- Final stitch counts: Rnd 8 = 48, Rnd 18 = 42, Rnd 22 = 36, Rnd 26 = 30, Rnd 31 = 24, Rnd 39 = 24.
- Side height is 12 in (30.5 cm) after the rim edging.
- Belly is 8 in (20.3 cm) and neck is 4 in (10.2 cm) wide, laid flat.
- Bottom hole is about 1.9 in (4.8 cm) across and has a clean slip-stitch edge.
- Ring is fully covered, with no gaps.
- Tab is centered at the back and sewn on all 4 sides.
- The holder hangs straight on a hook without twisting.
- All ends are hidden on the inside.
Troubleshooting
Bags fall out of the bottom. Your gauge is too loose, or the foundation chain was too loose. Remake the holder with a smaller hook, or work the bottom edging as sc instead of sl st to firm it.
Bags are hard to pull out. Work the bottom edging more loosely, or start over with a foundation ch of 20 instead of 18. If you do that, work Rnd 2 as (sc 2, inc) ×6, then sc 2 at the end, for 26 sts. Go on with the counts shifted by 2 until the next increase round, then work 2 extra sc on Rnd 8 so the belly is 50 sts. Each later round then has 2 more sts than written.
Increase corners show. Offset where you place the increases on each round, as described under the Rounded Base section.
Holder leans forward. The tab is sewn too low. Move it up so its last row sits 0.75 in (1.9 cm) below the rim.
Neck flares out. You missed a decrease. Count the stitches after Rnds 18, 22, 26 and 31.
Spiral jog at the rim. Make sure you worked the sl st at the end of Rnd 39 before starting Rnd 40.
Care
Machine wash cold on a gentle cycle in a laundry bag, or hand wash if you used cotton. Reshape the holder over a rolled towel and lay it flat to dry.
Final Notes
Everything in this holder comes from the gauge of 3 sts and 3.25 rnds per inch. The 18-st foundation gives a 1.9 in (4.8 cm) hole. The base grows to 48 sts, a 16 in (40.6 cm) circumference, and 8 in (20.3 cm) wide when flat. The body tapers to 24 sts, 4 in (10.2 cm) wide at the neck, and reaches 11.7 in (29.7 cm) after Rnd 38. The rim edging brings it to 12 in (30.5 cm), and the covered ring adds 2.5 in (6.4 cm), for a hanging length of about 14.5 in (36.8 cm). Check each stage as you go, and you’ll have a sturdy, tidy holder that keeps your bags in order.
Happy crocheting!