

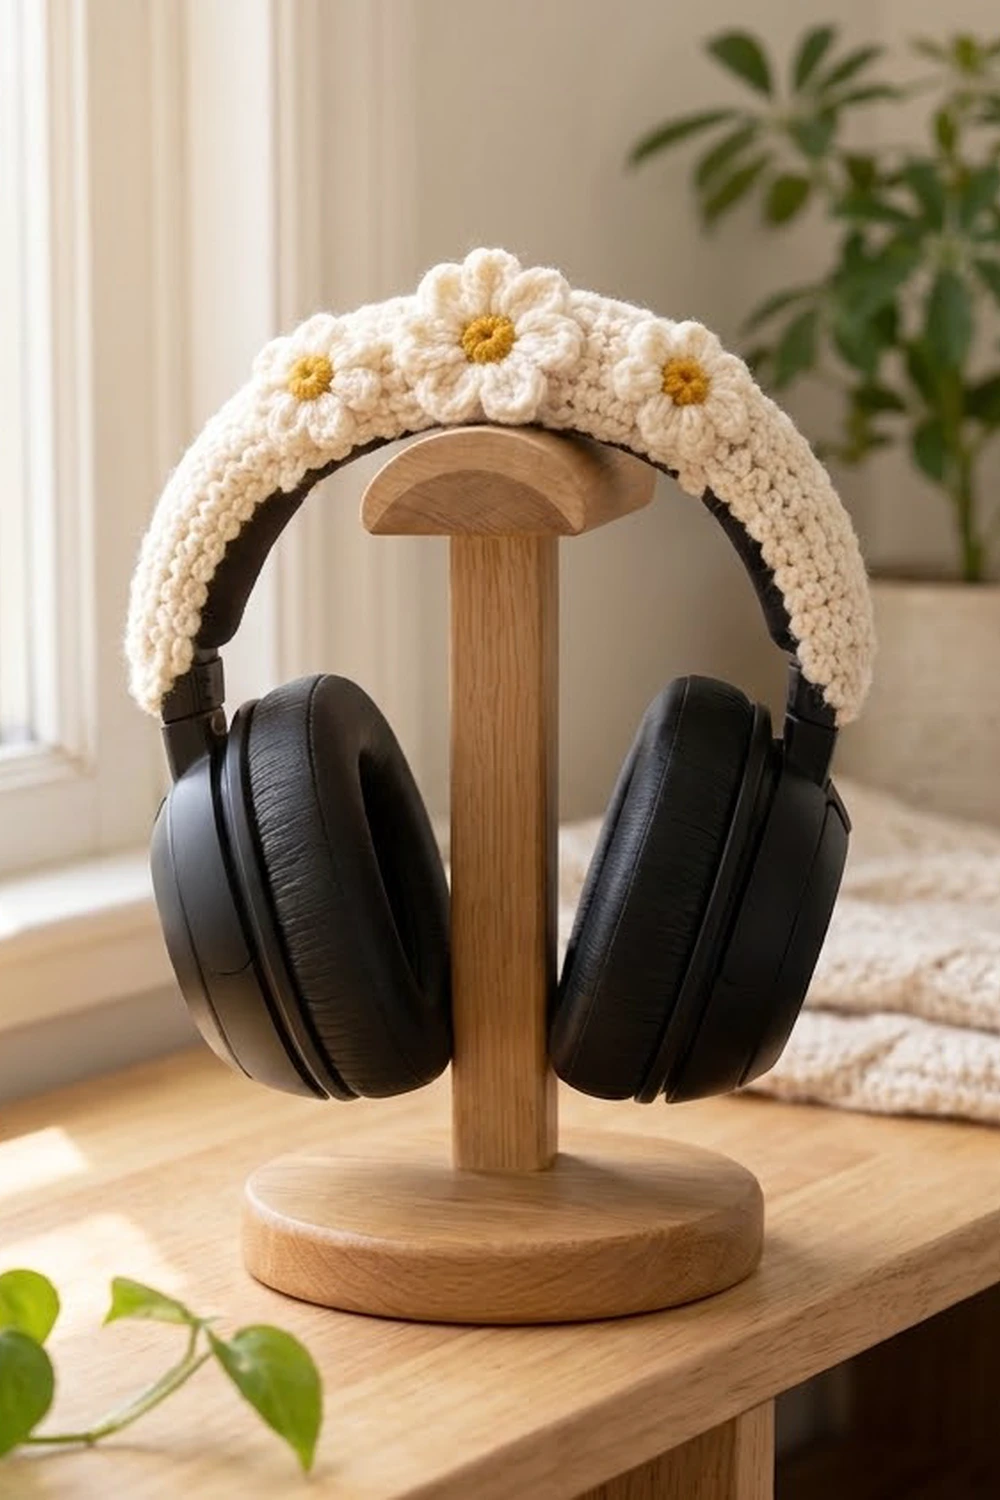
This little cover turns a plain pair of over-ear headphones into something soft and sweet. It is one dense strip of cream single crochet that wraps all the way around the headband and is seamed underneath. Three daisies sit on top: a larger daisy in the center and a smaller one on each side.
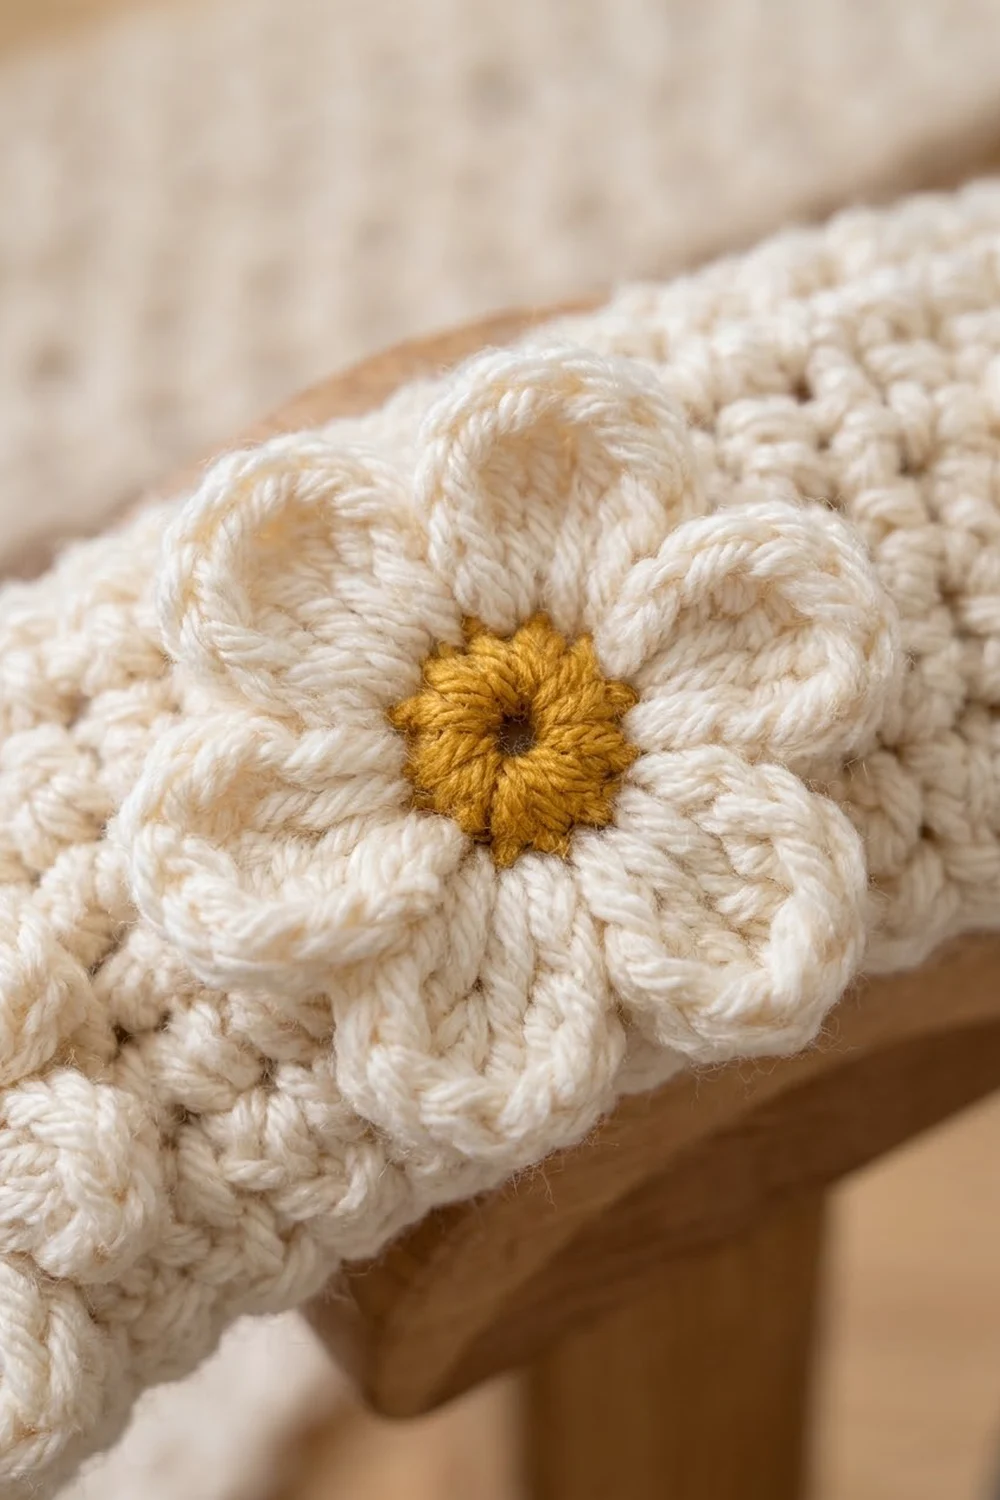
There are only two colors. Cream is used for the cover and petals, and warm mustard for the flower centers. The cover is a tight, even single crochet fabric that hides the headband and adds a little padding. Each daisy has six rounded, puffy petals around a small mustard center with a tiny opening in the middle.
All instructions use US crochet terms. With its border, the flat cover measures 3.5 in x 10.5 in (8.9 cm x 26.7 cm). The small daisies are about 1.75 in (4.4 cm) across, and the center daisy is about 2.25 in (5.7 cm).
Here’s how it goes together. Work the strip in short rows across its width, then add one round of single crochet border and block it. Wrap the strip around the headband and whipstitch the long edges together on the underside. Last, sew on the three daisies.
Finished Size and Construction
- Finished cover (flat): 3.5 in x 10.5 in (8.9 cm x 26.7 cm)
- Skill level: Easy
- Terminology: US crochet terms
- Yarn weight: Worsted (#4)
- Hook: 4.5 mm (US 7)
- Number of pieces: 4 (1 cover strip + 3 daisy appliqués)
- Layout: One strip seamed around the headband, with the daisies in a row along the top and the large daisy in the center
- Piece size: cover 3.5 in x 10.5 in (8.9 cm x 26.7 cm); small daisy 1.75 in (4.4 cm); large daisy 2.25 in (5.7 cm)
- Cover size before border: 3 in x 10 in (7.6 cm x 25.4 cm)
- Border depth: 0.25 in (0.6 cm) on every edge
The 3.5 in (8.9 cm) width fits a headband that measures about 3.25 in to 3.5 in (8.3 cm to 8.9 cm) around, which is typical for over-ear headphones. Wrap a soft tape measure around your headband to check it first. On most full-size models, the 10.5 in (26.7 cm) length reaches from one slider to the other.
Materials
Choose a smooth worsted-weight yarn with good stitch definition. Cotton or a cotton-acrylic blend works well because it holds its shape and won’t stretch out on a curved band. Avoid fuzzy yarns, which hide the petal shapes.
- Cream (Color A): 40 g, about 80 m (cover, border, and all petals)
- Mustard (Color B): 5 g, about 10 m (daisy centers)
These amounts include extra for a test daisy and for seaming.
Tools:
- 4.5 mm (US 7) crochet hook
- Tapestry needle
- Scissors
- Soft measuring tape
- Stitch markers (2–3)
- Blocking mat and rust-proof pins
- Spray bottle with water
Abbreviations (US Terms)
- ch – chain
- sl st – slip stitch
- sc – single crochet
- hdc – half double crochet
- dc – double crochet
- st(s) – stitch(es)
- rnd – round
- MR – magic ring
- RS / WS – right side / wrong side
Special technique, petal group: work all the stitches inside one set of parentheses into the same stitch. For example, (hdc, 2 dc) means 1 hdc and 2 dc, all in the same stitch.
Gauge and Checkpoints
Gauge: 16 sc and 18 rows = 4 in (10.2 cm) in sc worked flat with a 4.5 mm hook. That is 4 sts and 4.5 rows per inch (2.5 cm).
Make one small daisy before you start the cover, as a test piece. It should measure 1.75 in (4.4 cm) from petal tip to petal tip. If it does, your tension is right.
Checkpoints for the cover:
- After Row 1: width 3 in (7.6 cm), 12 sc
- After Row 18: length 4 in (10.2 cm)
- After Row 36: length 8 in (20.3 cm)
- After Row 45: 3 in x 10 in (7.6 cm x 25.4 cm)
- After border: 3.5 in x 10.5 in (8.9 cm x 26.7 cm)
If your piece is too big: switch to a 4.0 mm hook and start again. A loose cover slides and twists on the headband.
If your piece is too small: switch to a 5.0 mm hook. A cover that is too narrow won’t close around the band, and forcing the seam pulls the stitches open.
Adjusting length: every 9 rows adds or removes 2 in (5.1 cm). If you change the length, work 4 border sts per inch (2.5 cm) along the long sides.
Section 1: Cover Strip
Work the strip flat, in rows across the short width. The ch 1 at the start of each row does not count as a stitch.
With Color A, ch 13.
Row 1 (RS): Sc in 2nd ch from hook and in each ch across, turn. (12 sc)
Row 2: Ch 1, sc in each st across, turn. (12 sc)
Rows 3–45: Repeat Row 2. (12 sc in each row)
Don’t fasten off at the end of Row 45. Check that the strip measures 3 in x 10 in (7.6 cm x 25.4 cm), then go straight into the border.
Work through both loops of every stitch. This keeps the fabric firm and dense enough to cover the headband with no gaps.
Section 2: Daisies (Make 3)
Make 2 small daisies and 1 large daisy. All three start the same way, with a mustard center.
Small Daisy (Make 2)
Rnd 1: With Color B, MR, 6 sc in ring, sl st to first sc. (6 sc)
Rnd 2: Ch 1, 2 sc in each st around, sl st to first sc. (12 sc)
Pull the magic ring closed but leave a tiny opening in the middle for the soft center look. Fasten off Color B.
Rnd 3 (petals): Join Color A in any st. Sl st in next st, (hdc, 2 dc, hdc) in next st 6 times. Sl st to the joining st. (6 petals; 30 sts: 6 sl sts + 24 petal sts)
Each petal uses 2 sts of Rnd 2. Six petals x 2 sts = 12 sts, which matches Rnd 2 exactly.
Fasten off, leaving a 12 in (30.5 cm) tail for sewing. The daisy should measure 1.75 in (4.4 cm) across.
Large Daisy (Make 1)
Rnds 1–2: Work as for Small Daisy. (12 sc) Fasten off Color B.
Rnd 3: Join Color A in any st. Ch 1, sc in next st, 2 sc in next st 6 times, sl st to first sc. (18 sc)
Rnd 4 (petals): Sl st in next st, (hdc, 2 dc) in next st, (2 dc, hdc) in next st 6 times. Sl st to the first sl st. (6 petals; 42 sts: 6 sl sts + 36 petal sts)
Each petal uses 3 sts of Rnd 3. Six petals x 3 sts = 18 sts, which matches Rnd 3 exactly. Spreading each petal across 2 sts makes these petals wider and rounder than the small daisy’s petals.
Fasten off, leaving a 12 in (30.5 cm) tail. The daisy should measure 2.25 in (5.7 cm) across.
On each daisy, weave the mustard tails into the back. Keep the cream tails for sewing.
Border
The border is one round of sc worked all the way around the strip. It tidies the edges, squares the corners, and gives you a clean edge to whipstitch through when seaming.
Border gauge: same as the cover, 4 sc per inch (2.5 cm). Each corner is a group of 3 sc, and the middle sc of the group is the corner stitch.
Rnd 1: Continue from Row 45 with Color A. Ch 1, turn.
- Short side 1 (top of Row 45): 3 sc in first st, sc in next 10 sts, 3 sc in last st. (16 sts)
- Long side 1 (row ends): Work 38 sc evenly down the 45 row ends, skipping every 6th row end. (38 sts)
- Short side 2 (foundation chain): 3 sc in first ch, sc in next 10 ch, 3 sc in last ch. (16 sts)
- Long side 2 (row ends): Work 38 sc up the row ends, the same as Long side 1. (38 sts)
Sl st to first sc. (108 sts total) Fasten off and weave in ends.
Stitches per side, counting both corner stitches:
- Short sides: 1 corner + 1 + 10 + 1 + 1 corner = 14 sts
- Long sides: 1 corner + 1 + 38 + 1 + 1 corner = 42 sts
Why the math works:
- Width: 14 sts ÷ 4 sts per inch = 3.5 in (8.9 cm). That’s the 3 in (7.6 cm) strip plus 0.25 in (0.6 cm) of border on each long edge.
- Length: 42 sts ÷ 4 sts per inch = 10.5 in (26.7 cm). That’s the 10 in (25.4 cm) strip plus 0.25 in (0.6 cm) at each end.
- Long sides: skipping every 6th row end drops 7 of the 45 row ends, so 45 − 7 = 38. This changes the row gauge (4.5 rows per inch) to the stitch gauge (4 sts per inch), so the long edges lie flat instead of ruffling.
- Total: 4 corners + (2 x 12) + (2 x 40) = 108 sts.
Final Blocking
Block the flat pieces before you fit the cover. It’s much easier to get straight edges now than after seaming.
- Lightly mist the cover strip and all three daisies with water until they are damp but not soaked.
- Pin the cover to 3.5 in x 10.5 in (8.9 cm x 26.7 cm). Pin all 4 corners first, then add a pin every 1 in (2.5 cm) along the long edges.
- Pin each daisy face up. Ease the 6 petals outward so they are evenly spaced, and pin each petal tip. Pin the small daisies to 1.75 in (4.4 cm) and the large daisy to 2.25 in (5.7 cm).
- Press each mustard center gently with a fingertip so the small opening stays round.
- Let everything dry completely, at least 6 to 8 hours, before you unpin.
Fit, Seam, and Attach Daisies
- Wrap the cover around the headband with the RS facing out. Center it so the same length reaches toward each slider.
- Bring the two long edges together on the underside (the side that touches your head). Thread the tapestry needle with 24 in (61.0 cm) of Color A.
- Whipstitch the long edges together, matching each border st on one side to the same st on the other side, 42 sts to 42 sts. Go through the back loops only so the seam lies flat and nearly disappears.
- Keep the tension firm but not tight. Pull each stitch just enough for the edges to meet without puckering. When you’re done, the seam should lie flat and the cover shouldn’t spin when you twist it gently.
- Mark the center of the top of the cover and sew the large daisy there with its cream tail. Stitch through the base of each petal but leave the petal tips free so they stay lifted.
- Sew a small daisy on each side, with its center 2.25 in (5.7 cm) from the center of the large daisy. The petal tips will just meet, like a crown. Sew through the top layer only so no stitches show underneath.
- Weave all remaining tails into the inside of the cover.
Final Quality-Control Checklist
- Before fitting, the cover measures 3.5 in x 10.5 in (8.9 cm x 26.7 cm) flat.
- Every row has 12 sc, and the border has 108 sts.
- Counting corners, the short sides have 14 sts and the long sides have 42 sts.
- The corners are square and the long edges lie flat.
- Each daisy has 6 evenly spaced petals.
- The small daisies measure 1.75 in (4.4 cm) and the large daisy measures 2.25 in (5.7 cm).
- The mustard centers are round, each with a small, tidy opening.
- The seam sits completely on the underside of the headband.
- The daisies are centered in a line along the top.
- No tails show on the outside.
Troubleshooting
The strip gets narrower or wider. You’re dropping or adding a stitch at the row ends. Count the 12 sc every few rows, and put a marker in the last stitch of each row.
The long sides ruffle after the border. You worked 1 sc in every row end. Pull out the round and rework it, skipping every 6th row end so each long side has 38 sts.
The long sides pull in. You skipped too many row ends. Rework each long side to exactly 38 sts.
The cover won’t close around the headband. Your headband is more than 3.5 in (8.9 cm) around. Start again with ch 15 for 14 sc per row, which adds 0.5 in (1.3 cm) of width. In the border, work 12 sc between the corner groups on each short side instead of 10.
The cover is loose and twists. Make it again with a 4.0 mm hook, or pull the seam a little tighter.
The petals curl or cup. Your petal stitches are too tight. Go up half a hook size for the petal round only, then block well.
The center hole is too big. Pull the magic ring tighter before you fasten off Color B.
Care
Take the cover off the headphones before washing so the electronics never get wet. Hand wash it in cool water with mild soap, roll it in a towel to remove the water, and dry it flat.
Final Notes
Each measurement leads to the next. A gauge of 16 sc and 18 rows to 4 in (10.2 cm) gives a strip of 12 sts by 45 rows, which is 3 in x 10 in (7.6 cm x 25.4 cm). One round of border adds 0.25 in (0.6 cm) to every edge. That makes 14 sts by 42 sts and a finished size of 3.5 in x 10.5 in (8.9 cm x 26.7 cm), which wraps a headband about 3.5 in (8.9 cm) around. The daisies, at 1.75 in (4.4 cm) and 2.25 in (5.7 cm), sit in a neat crown across the top. Check each number as you go and the cover will fit the first time.
Happy crocheting!