

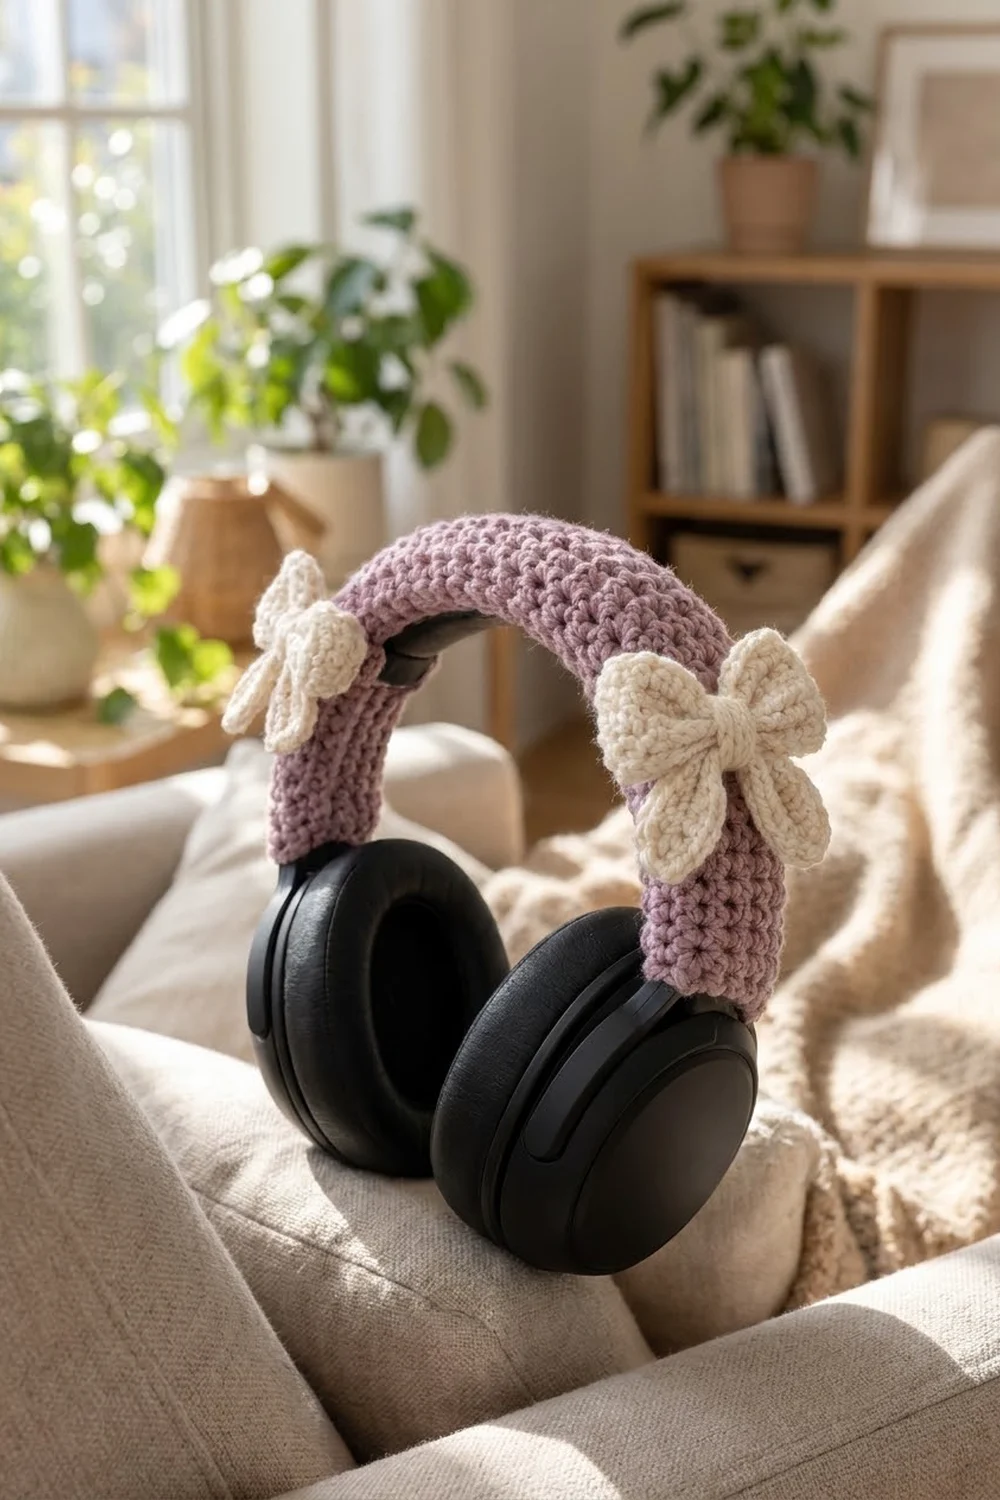
This cozy headphone cover turns a plain black headband into something soft and sweet. A dusty mauve sleeve wraps the full arc of the band, and two cream bows sit on the shoulders of the arc, one near each ear cup.
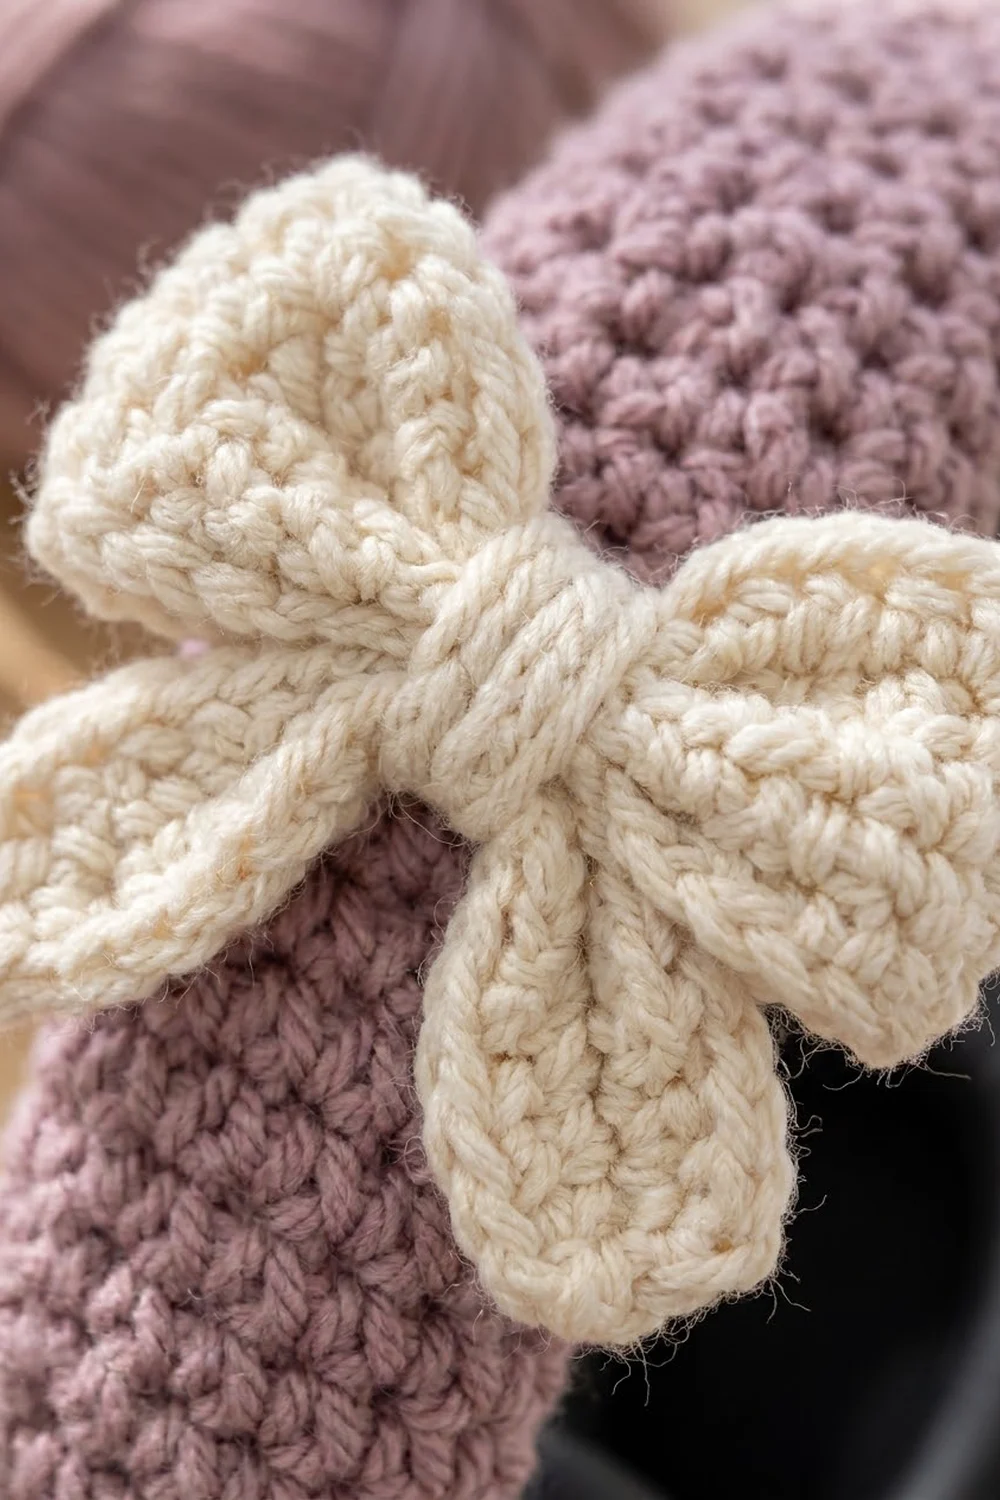
The look is simple and textured. The sleeve is worked in dense single crochet, so it feels padded and holds its shape. Each bow has two rounded upper wings, two pointed lower tails, and a center wrapped with yarn so it looks like tied ribbon.
This pattern uses US crochet terms. Laid flat, the finished cover strip measures 3.5 in (8.9 cm) wide by 12.5 in (31.8 cm) long. Each bow is about 2.75 in (7.0 cm) wide.
Construction is straightforward. You work one flat rectangle in rows and add a one-round border. Then you wrap it around the headband and sew the long edges together underneath. Each bow is one small rectangle and two leaf-shaped tails, pinched, wrapped and sewn on.
Finished Size and Construction
- Finished cover size: 3.5 in (8.9 cm) wide x 12.5 in (31.8 cm) long, flat
- Skill level: Easy
- Terminology: US crochet terms
- Yarn weight: Worsted (Medium #4)
- Hook: 4.5 mm (US 7)
- Number of pieces: 7 crocheted pieces: 1 cover strip, plus 2 bows made of 1 wing piece and 2 tails each
- Layout: 1 strip wrapped around the headband, with 1 bow centered 3 in (7.6 cm) from each short end
- Strip size before border: 3 in (7.6 cm) x 12 in (30.5 cm)
- Border depth: 0.25 in (0.6 cm) on every side
- Bow size: about 2.75 in (7.0 cm) wide x 2.75 in (7.0 cm) tall, including tails
The 12.5 in (31.8 cm) length fits most full-size over-ear headphones. The Gauge section explains how to adjust it.
Materials
Choose a smooth worsted yarn with good stitch definition. Cotton, cotton blends and soft acrylic all work. Cotton gives the crispest bows, and acrylic gives a slightly squishier sleeve. Avoid fuzzy yarns, which hide the single crochet texture.
Yarn
- Color A, dusty mauve (cover): 35 g / 70 m
- Color B, cream (bows and center wraps): 20 g / 40 m
These amounts include a margin for gauge checks and sewing tails.
Tools
- 4.5 mm (US 7) crochet hook
- Tapestry needle with a blunt tip
- Scissors
- 2-4 stitch markers
- Measuring tape or ruler
- Rustproof pins
- Spray bottle with water, for blocking
Abbreviations (US Terms)
- ch = chain
- sl st = slip stitch
- sc = single crochet
- hdc = half double crochet
- dc = double crochet
- st(s) = stitch(es)
- sp = space
- RS = right side
Special technique: center wrap. Pinch a piece across its middle to form two loops. Wind yarn tightly around the pinch 8 times, then secure it with a few stitches through all layers at the back.
Gauge and Checkpoints
Gauge: 16 sc x 18 rows = 4 in (10.2 cm) in single crochet worked in rows.
This fabric is firm on purpose. A tight gauge stops the sleeve from gaping over the band and keeps the bows from flopping.
Test first. Work the first 9 rows of the cover strip, then stop and measure before you go on. This short section is your swatch.
Checkpoints:
- After Row 1: the strip is 3 in (7.6 cm) wide.
- After Row 9: the strip is 2 in (5.1 cm) tall.
- After Row 27: the strip is 6 in (15.2 cm) tall.
- After Row 54: the strip is 12 in (30.5 cm) tall.
- After the border: the strip is 3.5 in (8.9 cm) x 12.5 in (31.8 cm).
- Bow wing piece: 3 in (7.6 cm) x 1.75 in (4.4 cm).
If your piece is too big, go down 0.5 mm in hook size and check again. If it is too small, go up 0.5 mm. Fix the width by changing hooks, not stitch counts, so the border math stays correct.
Fitting your headphones. Measure the headband arc along the outside curve, from one yoke to the other. Subtract 0.5 in (1.3 cm) for the border. The result is your strip length before border. Work about 4.5 rows per 1 in (2.5 cm), and keep the total a multiple of 9 rows so the border spacing comes out even. Then wrap a tape measure around the band itself. The 12-stitch width suits a band circumference of about 3 in (7.6 cm).
Cover Strip
With Color A, leave a 24 in (61.0 cm) tail for seaming later.
Row 1 (RS): Ch 13. Sc in 2nd ch from hook and in each ch across. Turn. (12 sc)
Row 2: Ch 1 (does not count as a st), sc in each st across. Turn. (12 sc)
Rows 3-54: Repeat Row 2. (12 sc in every row)
As you go, place a marker in Row 9 and in Row 27 and check them against the gauge checkpoints. Don’t fasten off after Row 54. Go straight into the border.
The strip is now 12 sts wide and 54 rows long, about 3 in (7.6 cm) x 12 in (30.5 cm).
Bows (Make 2)
Each bow uses one wing piece and two tails, all in Color B.
Wing Piece (make 1 per bow)
Row 1: Ch 13. Sc in 2nd ch from hook and in each ch across. Turn. (12 sc)
Rows 2-8: Ch 1, sc in each st across. Turn. (12 sc in every row)
Fasten off, leaving an 18 in (45.7 cm) tail. The rectangle measures about 3 in (7.6 cm) x 1.75 in (4.4 cm).
The 12 stitches run across the width of the bow. When you pinch the center, the 6 stitches on each side puff up into a rounded upper wing.
Tails (make 2 per bow)
Each tail is a pointed leaf worked around both sides of a short chain.
Round 1: Ch 7. Work along one side of the chain: sl st in 2nd ch from hook, sc in next ch, hdc in next ch, dc in next ch, hdc in next ch, sc in last ch. (6 sts)
Ch 1 to turn around the base. Work along the other side of the same chain: sc in first ch, hdc in next ch, dc in next ch, hdc in next ch, sc in next ch, sl st in last ch. (6 sts)
Join with sl st to the first sl st. (12 sts total, 6 per side, plus 1 base ch)
Fasten off, leaving a 6 in (15.2 cm) tail. The tail is about 1.5 in (3.8 cm) long and 0.75 in (1.9 cm) wide at its widest. The sl st end is the point, and the ch-1 end is the rounded base.
Assemble Each Bow
- Lay the wing piece RS up, with the rows running horizontally.
- Pinch the center so the 12 stitches fold into two equal wings of 6 sts each.
- Place the two tails behind the pinch with their bases overlapping at the center. Angle the points down and outward in a V.
- With Color B, work the center wrap: wind the yarn 8 times around the pinch, catching the tops of both tail bases.
- Push the needle through all layers 3 times at the back and knot securely.
- Keep one long tail for sewing the bow to the cover.
Make All Pieces
Totals:
- Color A: 1 cover strip
- Color B: 2 wing pieces and 4 tails, assembled into 2 bows
Layout on the flat strip (RS up, short ends at the yokes):
[left yoke end]                                        [right yoke end]
|-- 3 in (7.6 cm) --|                          |-- 3 in (7.6 cm) --|
                 [BOW 1] .. 6.5 in (16.5 cm) .. [BOW 2]
Center each bow 3 in (7.6 cm) from its short end, measured along the strip, and center it across the width. This puts the bows on the shoulders of the arc, just above each ear cup, with 6.5 in (16.5 cm) of plain mauve across the top of the head.
Border
Border gauge: the same 16 sc = 4 in (10.2 cm). One round of sc adds 0.25 in (0.6 cm) on every side.
After Row 54, continue with Color A, RS facing.
Border Round 1: Ch 1. Sc in each of the 12 sts of the last row. (12 sc on short side)
Ch 1 for the corner. This ch-1 sp does not count as a st. Turn the work to go down the long side, into the row ends.
Along the long side: sc in each of the next 8 row ends, skip 1 row end; repeat from * 6 times. (48 sc on long side)
Ch 1 for the corner. Sc in each of the 12 chs on the opposite side of the foundation chain. (12 sc on short side)
Ch 1 for the corner. Repeat the long-side sequence up the second long side. (48 sc on long side)
Ch 1 for the last corner, then join with sl st to the first sc. Fasten off.
Round total: 120 sc plus 4 corner ch-1 sps, which don’t count as sts. The 120 sc are 24 sc worked 1 per existing stitch across the two short sides, plus 96 sc worked into row ends along the two long sides.
Why the math works:
- Each short side has 12 sts and gets 12 sc, so the 3 in (7.6 cm) width doesn’t change.
- Each long side has 54 row ends. At 18 rows per 4 in (10.2 cm), rows are shorter than stitches are wide. One sc in every row end would put 54 sc into 12 in (30.5 cm), and the edge would ruffle. Working 8 of every 9 row ends gives 6 x 8 = 48 sc. At 16 sc per 4 in (10.2 cm), 48 sc is exactly 12 in (30.5 cm), so the edge lies flat.
- The corners are ch-1 spaces, not stitches, so no stitch is counted on two sides.
- The round adds 0.25 in (0.6 cm) per side. The strip grows from 3 in x 12 in (7.6 cm x 30.5 cm) to 3.5 in x 12.5 in (8.9 cm x 31.8 cm).
Joining the Cover to the Headband
You sew the cover on directly around the headband. To remove it later, snip the seam.
Method: whipstitch through the back loops of the border sc along both long sides.
- Lay the strip RS down. Set the headband on top with its inner (head-side) surface facing up and the short ends of the strip at the yokes.
- Fold both long edges up and around the band so they meet along its underside.
- Pin at both ends and at the center. The 48 sc on one long side match the 48 sc on the other, stitch for stitch.
- Thread the 24 in (61.0 cm) Color A tail onto the needle. Start at one corner and whipstitch sc 1 to sc 1, sc 2 to sc 2, and so on until all 48 pairs are joined.
- Fasten off and weave the end inside the sleeve.
Tension advice: pull each stitch just snug enough to close the gap, not so tight that it puckers. Every 12 stitches, check that the seam runs straight down the center of the underside.
Size checkpoint: before you sew, the long edges should meet with no more than a slight stretch. If they overlap by more than 0.5 in (1.3 cm), your band is thinner than average. If they can’t meet, it’s thicker. See Troubleshooting.
Attaching the bows: with the cover on, mark a bow position 3 in (7.6 cm) from each short end. Center each bow on top of the band. Sew around the center wrap and along the back of each wing with small stitches through the cover only. Don’t sew into the headband.
Final Blocking
- Block the strip and bows before you sew anything to the headband.
- Pin the strip RS up to 3.5 in (8.9 cm) x 12.5 in (31.8 cm). Pin each corner first, then every 2 in (5.1 cm) along each long edge.
- Mist lightly until damp, not soaked.
- Pin each wing piece to 3 in (7.6 cm) x 1.75 in (4.4 cm) and each tail to 1.5 in (3.8 cm) long.
- Let everything dry completely, usually 6-8 hours.
- After assembly, fluff the bow wings with your fingers so they stand up rounded instead of lying flat.
For acrylic, you can steam lightly with the iron held above the fabric. Never touch the iron to the yarn.
Final Quality-Control Checklist
- Every strip row has 12 sc.
- The strip has 54 rows and measures 12 in (30.5 cm) before the border.
- The border has 12 sc on each short side and 48 sc on each long side.
- The bordered strip is 3.5 in (8.9 cm) x 12.5 in (31.8 cm).
- The underside seam is straight and even.
- Each bow has two equal wings of 6 sts each and two matching tails.
- Each center wrap is tight and secure at the back.
- Both bows sit 3 in (7.6 cm) from their ends and mirror each other.
- All ends are woven in and hidden.
Troubleshooting
The strip is wider than 3 in (7.6 cm). Your gauge is loose. Go down a hook size and restart, because extra width makes the sleeve baggy.
The long border edge ruffles. You’re working into every row end. Go back to the 8-and-skip-1 sequence.
The long border edge pulls in. You may be skipping too often. Recount to 48 sc per long side.
The edges overlap around a thin band. Rip back and work the strip 10 sts wide instead of 12. Keep the short-side border at 1 sc per st.
The edges won’t meet around a thick band. Work the strip 14 sts wide.
The cover is too short or too long. Add or remove rows in groups of 9. Each group changes the length by 2 in (5.1 cm) and keeps the border math clean.
The bow looks flat. Wind the center wrap tighter and pinch firmly so the wings puff up.
The tails curl. Block them flat and pin the points.
Care
Spot clean with a damp cloth and mild soap. For a deeper clean, snip the seam, hand wash the cover in cool water, lay it flat to dry, then sew it back on.
Final Notes
The measurement chain is simple. Gauge is 16 sc x 18 rows = 4 in (10.2 cm). Twelve stitches give a 3 in (7.6 cm) width, and 54 rows give a 12 in (30.5 cm) length. The border adds 0.25 in (0.6 cm) per side, for a finished size of 3.5 in x 12.5 in (8.9 cm x 31.8 cm). Each bow starts as a 3 in x 1.75 in (7.6 cm x 4.4 cm) rectangle with two 1.5 in (3.8 cm) tails, and sits 3 in (7.6 cm) from its end.
Check your gauge early and keep the border counts exact, and your headphones will look soft and polished. Happy crocheting!