

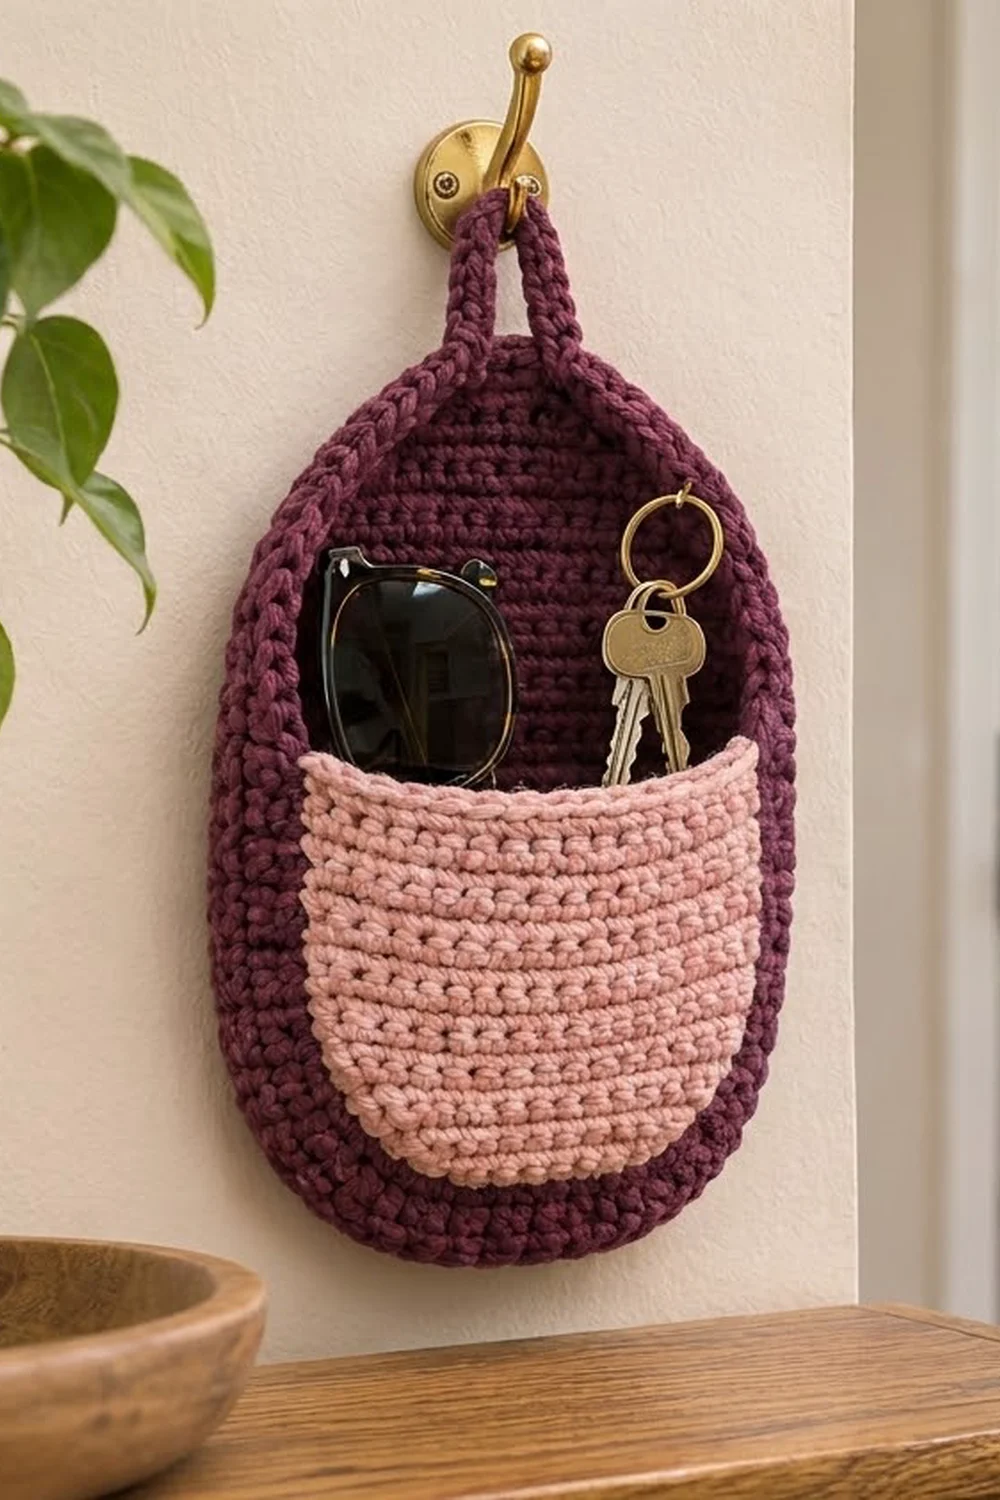
This wall pocket is a small catch-all for an entryway. It has a deep plum back panel shaped like a soft egg, a dusty pink pocket across the lower half, and a corded hanging loop at the top. It holds sunglasses, keys, and the other small things that usually end up scattered on a hall table.
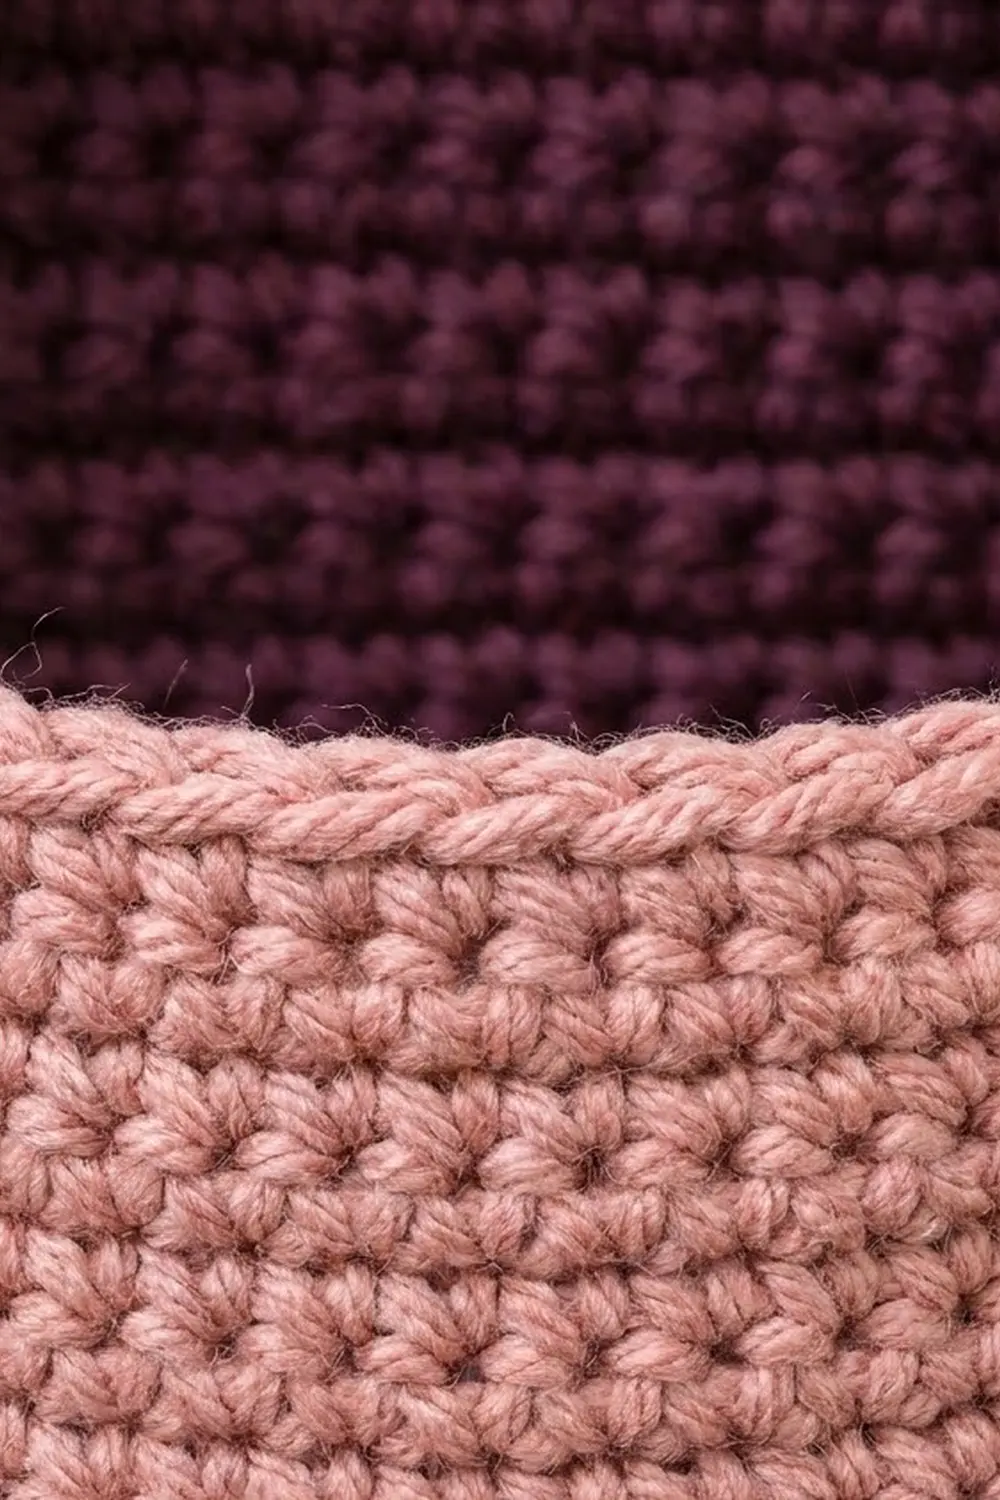
The style is simple and modern. Dense single crochet makes a firm, slightly pebbled fabric. A reverse single crochet border gives the plum outline a rope-like edge, and the pink pocket has a clean rim that follows the curve of the panel behind it.
All terms are US crochet terms. The finished piece measures 7.9 in (20.1 cm) wide by 11.5 in (29.2 cm) tall without the loop. The loop adds about 2 in (5.1 cm), for a total hanging height of about 13.5 in (34.3 cm).
You crochet the back panel in rows, starting at the rounded bottom and working up to the narrow top. The pocket is made the same way but shorter. Then you sew the pocket on and work a three-round border, with the hanging loop built into it.
Finished Size and Construction
- Finished size: 7.9 in x 11.5 in (20.1 cm x 29.2 cm), plus a 2 in (5.1 cm) loop
- Skill level: Easy
- Terminology: US crochet terms
- Yarn weight: Aran/worsted (#4), cotton or cotton blend
- Hook: 5.0 mm (H-8)
- Number of pieces: 2 (back panel and pocket), sewn together
- Layout: Pocket centered over the lower part of the back panel
- Back panel before border: 6.9 in x 10.5 in (17.5 cm x 26.7 cm)
- Pocket after edging: 6.8 in x 6.5 in (17.3 cm x 16.5 cm)
- Border depth: about 0.5 in (1.3 cm) on every edge
Materials
Use a smooth cotton or cotton blend. Cotton holds its shape, so the pocket stays open and the back hangs flat. Avoid fuzzy or stretchy yarns, because they sag once the pocket is holding something.
These quantities assume a yarn with about 170 m per 100 g (186 yd per 100 g):
- Plum (Color A): 70 g, about 119 m (130 yd), for the back panel, border, loop, and sewing
- Dusty pink (Color B): 35 g, about 60 m (65 yd), for the pocket
Both quantities include a margin of about 20% for your gauge swatch and small differences in tension.
Tools:
- 5.0 mm (H-8) crochet hook
- Tapestry needle
- 2 locking stitch markers
- Rust-proof pins
- Measuring tape and scissors
- Spray bottle and a blocking mat or folded towel
Abbreviations (US Terms)
- ch: chain
- sc: single crochet
- sc2tog: single crochet 2 together (decrease)
- inc: 2 sc in the same stitch
- sl st: slip stitch
- st(s): stitch(es)
- rev sc: reverse single crochet
Special stitch: reverse single crochet (crab stitch). Don’t turn your work. Working from left to right (right to left if you’re left-handed), insert the hook into the next stitch to the right. Yarn over and pull up a loop, then yarn over and pull through both loops. Each stitch twists slightly, which gives the edge its corded look.
Gauge and Checkpoints
Gauge: 14 sc and 16 rows = 4 in (10.2 cm), which is 3.5 sts and 4 rows per 1 in (2.5 cm).
Work a swatch of 16 sts by 18 rows and measure across the center. The fabric should feel firm, with no gaps between the stitches. Then treat the back panel as your real test piece and check it at each stage:
- After Row 12: 24 sts measure 6.9 in (17.5 cm) wide, and the piece is 3 in (7.6 cm) tall.
- After Row 30: the piece is 7.5 in (19.1 cm) tall.
- After Row 42: the piece is 10.5 in (26.7 cm) tall, and the top 8 sts measure 2.3 in (5.8 cm).
- Pocket after edging: 6.8 in x 6.5 in (17.3 cm x 16.5 cm).
If your piece is too big, switch to a 4.5 mm hook. If it’s too small, switch to a 5.5 mm hook. Don’t change the stitch counts, because all of the shaping and border math depends on them.
Back Panel (Color A, Plum)
Work in sc rows and turn at the end of every row. The ch 1 at the start of a row doesn’t count as a stitch. To increase, work an inc in the first and last st of the row. To decrease, work sc2tog over the first 2 and the last 2 sts.
Row 1: Ch 11. Sc in the 2nd ch from the hook and in each ch across. Turn. (10 sts, 2.9 in / 7.4 cm wide)
Rounded bottom:
- Row 2: Ch 1, inc in the first st, sc to the last st, inc in the last st. Turn. (12 sts)
- Row 3: Repeat Row 2. (14 sts)
- Row 4: Repeat Row 2. (16 sts)
- Row 5: Repeat Row 2. (18 sts)
- Row 6: Ch 1, sc in each st across. Turn. (18 sts)
- Row 7: Repeat Row 2. (20 sts)
- Row 8: Repeat Row 6. (20 sts)
- Row 9: Repeat Row 2. (22 sts)
- Rows 10–11: Repeat Row 6. (22 sts)
- Row 12: Repeat Row 2. (24 sts)
The increases start close together and then spread out, so the bottom curves smoothly instead of coming to a point.
Straight body:
- Rows 13–30: Ch 1, sc in each st across. Turn. (24 sts)
These 18 rows add 4.5 in (11.4 cm).
Tapered top:
- Row 31: Ch 1, sc2tog, sc to the last 2 sts, sc2tog. Turn. (22 sts)
- Rows 32–33: Ch 1, sc in each st across. Turn. (22 sts)
- Row 34: Repeat Row 31. (20 sts)
- Row 35: Repeat Row 32. (20 sts)
- Row 36: Repeat Row 31. (18 sts)
- Row 37: Repeat Row 32. (18 sts)
- Rows 38–42: Repeat Row 31 five times. (16, 14, 12, 10, 8 sts)
The decreases start slowly and then come every row, which gives the narrow egg-shaped top. Fasten off and weave in the ends.
Pocket (Color B, Dusty Pink)
The pocket is shaped like the back but starts 2 sts narrower, so its curve sits just inside the back’s curve.
Row 1: Ch 9. Sc in the 2nd ch from the hook and in each ch across. Turn. (8 sts)
- Rows 2–5: Ch 1, inc in the first st, sc to the last st, inc in the last st. Turn. (10, 12, 14, 16 sts)
- Row 6: Ch 1, sc across. Turn. (16 sts)
- Row 7: Increase row, worked like Row 2. (18 sts)
- Row 8: Sc across. (18 sts)
- Row 9: Increase row. (20 sts)
- Rows 10–11: Sc across. (20 sts)
- Row 12: Increase row. (22 sts)
- Rows 13–24: Ch 1, sc in each st across. Turn. (22 sts)
Checkpoint: the pocket measures 6.3 in (16.0 cm) wide by 6 in (15.2 cm) tall. Don’t fasten off.
Pocket edging (1 round): Ch 1. Don’t turn.
- Top edge: Inc in the first st, sc in the next 20 sts, inc in the last st. (24 sts)
- First side: Sc in each row end. (24 sts)
- Bottom: Working in the free loops of the foundation chain, inc in the first ch, sc in the next 6 ch, inc in the last ch. (10 sts)
- Second side: Sc in each row end. (24 sts)
- Sl st to the first sc to join.
Count: 78 sts worked one per existing stitch or row end (22 + 24 + 8 + 24), plus 4 corner increases, = 82 sts.
Fasten off and weave in the ends.
Make All Pieces
Make one of each piece:
- Back panel: 1 in Color A (plum)
- Pocket: 1 in Color B (dusty pink)
      ( loop )
    /  PLUM   \
   |   BACK    |
   |-----------|  <- pocket opening
   |   PINK    |
   |  POCKET   |
    \_________/
Joining
Lay the back panel flat with the right side up. Place the pocket on top, also right side up, with its open edge toward the narrow top of the back.
Position: Line up the pocket’s bottom edging with Row 1 of the back, and center it from side to side. The top of the pocket will sit about 6.5 in (16.5 cm) above the back’s bottom edge. The pocket’s outer edges should land about 1 st in from the back’s side edges. That space is 0.6 in (1.5 cm) narrower than the 6.8 in (17.3 cm) pocket, and the extra width gives the pocket a gentle outward bow so it opens easily. Pin about every 1 in (2.5 cm).
Method: Thread a tapestry needle with 30 in (76.2 cm) of plum yarn. Starting at one top corner, whipstitch through the outer loop of each pocket edging stitch and the back stitch beneath it. Work 24 stitches down one side, 10 across the bottom, and 24 up the other side, for 58 stitches in total. Leave the 24 top-edge stitches open.
Stitch-to-stitch logic: The pocket and the back have the same row height, so each pocket row end matches one back row. Sewing them one-to-one keeps the seam from twisting.
Tension: Make each stitch snug but not tight. Work 2 extra stitches at each top corner to reinforce the opening.
Checkpoint: The back still measures 6.9 in x 10.5 in (17.5 cm x 26.7 cm), and the pocket bows slightly outward.
Border and Hanging Loop (Color A, Plum)
Work the border around the back panel only. Fold the pocket edges toward the center as you go so you don’t catch them. The border uses the same gauge as the body (3.5 sts per 1 in / 2.5 cm), and each round adds about 0.25 in (0.6 cm) of depth.
Round 1: Join plum with a sl st in the first st of Row 42, then ch 1.
- Top edge: Inc in the first st, sc in the next 6 sts, inc in the last st. (10 sts)
- Side: Sc in each of the 42 row ends. (42 sts)
- Bottom: Working in the free loops of the foundation chain, inc in the first ch, sc in the next 8 ch, inc in the last ch. (12 sts)
- Side: Sc in each of the 42 row ends. (42 sts)
- Sl st to the first sc to join.
Count: 102 sts worked one per existing stitch or row end (8 + 42 + 10 + 42), plus 4 corner increases, = 106 sts.
Place markers in the 5th and 6th sts of the top edge.
Round 2: Ch 1, then sc in each st around, with 10 increases placed as follows:
- Top edge (10 sts): Inc in the 1st st, sc in the next 3 sts, ch 14, skip the 2 marked sts, sc in the next 3 sts, inc in the 10th st. (10 sc plus the ch-14 loop)
- Each side (42 sts): Inc in the 3rd st from the top and the 3rd st from the bottom. (44 sts)
- Bottom (12 sts): Inc in the 1st, 4th, 9th, and 12th sts. (16 sts)
- Sl st to the first sc to join.
Count: 106 sts plus 10 increases = 116. Subtract the 2 skipped sts for 114 sc (10 + 44 + 16 + 44), plus the ch-14 loop. Make sure the chain isn’t twisted before you continue past it.
Round 3: Ch 1. Don’t turn. Rev sc in each sc around. When you reach the loop, work 22 rev sc into the ch-14 space, then continue around.
Count: 114 rev sc + 22 rev sc on the loop = 136 sts.
Sl st to join, fasten off, and weave in the ends.
Why the math works: The 4 corner increases in Round 1 and the 10 curve increases in Round 2 sit where the outline turns most sharply. That gives the edge just enough extra length to lie flat without cupping or ruffling. Packing 22 rev sc around 14 chains turns the loop into a firm cord that holds its teardrop shape. The three rounds add about 0.5 in (1.3 cm) per edge, which brings the panel from 6.9 in x 10.5 in (17.5 cm x 26.7 cm) to 7.9 in x 11.5 in (20.1 cm x 29.2 cm).
Final Blocking
- Weave in all the remaining ends on the back of the panel.
- Lay the piece face up on a blocking mat or folded towel.
- Mist it until it’s damp but not soaked.
- Shape the outline: a round bottom, straight sides, and a narrower top.
- Pin it to 7.9 in x 11.5 in (20.1 cm x 29.2 cm).
- Tuck a folded cloth into the pocket so it dries slightly open.
- Lay the loop flat in a teardrop shape.
- Let it dry completely, usually 12–24 hours, before you remove the pins.
Final Quality-Control Checklist
- The panel measures 7.9 in x 11.5 in (20.1 cm x 29.2 cm).
- The loop is about 2 in (5.1 cm) tall and fully covered.
- The pocket is centered and bows slightly outward.
- An even plum outline shows around the sides and bottom.
- The pocket’s top corners are reinforced and its opening is free.
- The border lies flat.
- All the ends are hidden on the back.
Troubleshooting
- The border ruffles: You added extra stitches along the sides. Work exactly 1 sc per row end.
- The border cups: Your tension on the curves is too tight. Add 1 more increase on each bottom curve in Round 2.
- The seam ripples: The rows aren’t matched. Unpick the seam and re-pin it one-to-one.
- The pocket sags: Your fabric is too loose. Remake it with a smaller hook.
- The loop twists: The chain was twisted before you continued Round 2. Undo back to the loop and chain again.
- The top looks pointed: You decreased too fast. Make sure Rows 32, 33, 35, and 37 are worked even.
Care
Hand wash in cool water with mild soap. Press the water out in a towel and dry the piece flat in shape. Don’t tumble dry.
Final Notes
The measurement chain starts with the gauge. At 14 sc x 16 rows = 4 in (10.2 cm), the back panel comes out at 6.9 in x 10.5 in (17.5 cm x 26.7 cm) and the pocket at 6.8 in x 6.5 in (17.3 cm x 16.5 cm). The three-round border adds 0.5 in (1.3 cm) per edge, for a finished size of 7.9 in x 11.5 in (20.1 cm x 29.2 cm), plus a 2 in (5.1 cm) loop. If you match the gauge and confirm each checkpoint, your pocket will hang flat and hold its shape.
Happy crocheting!