

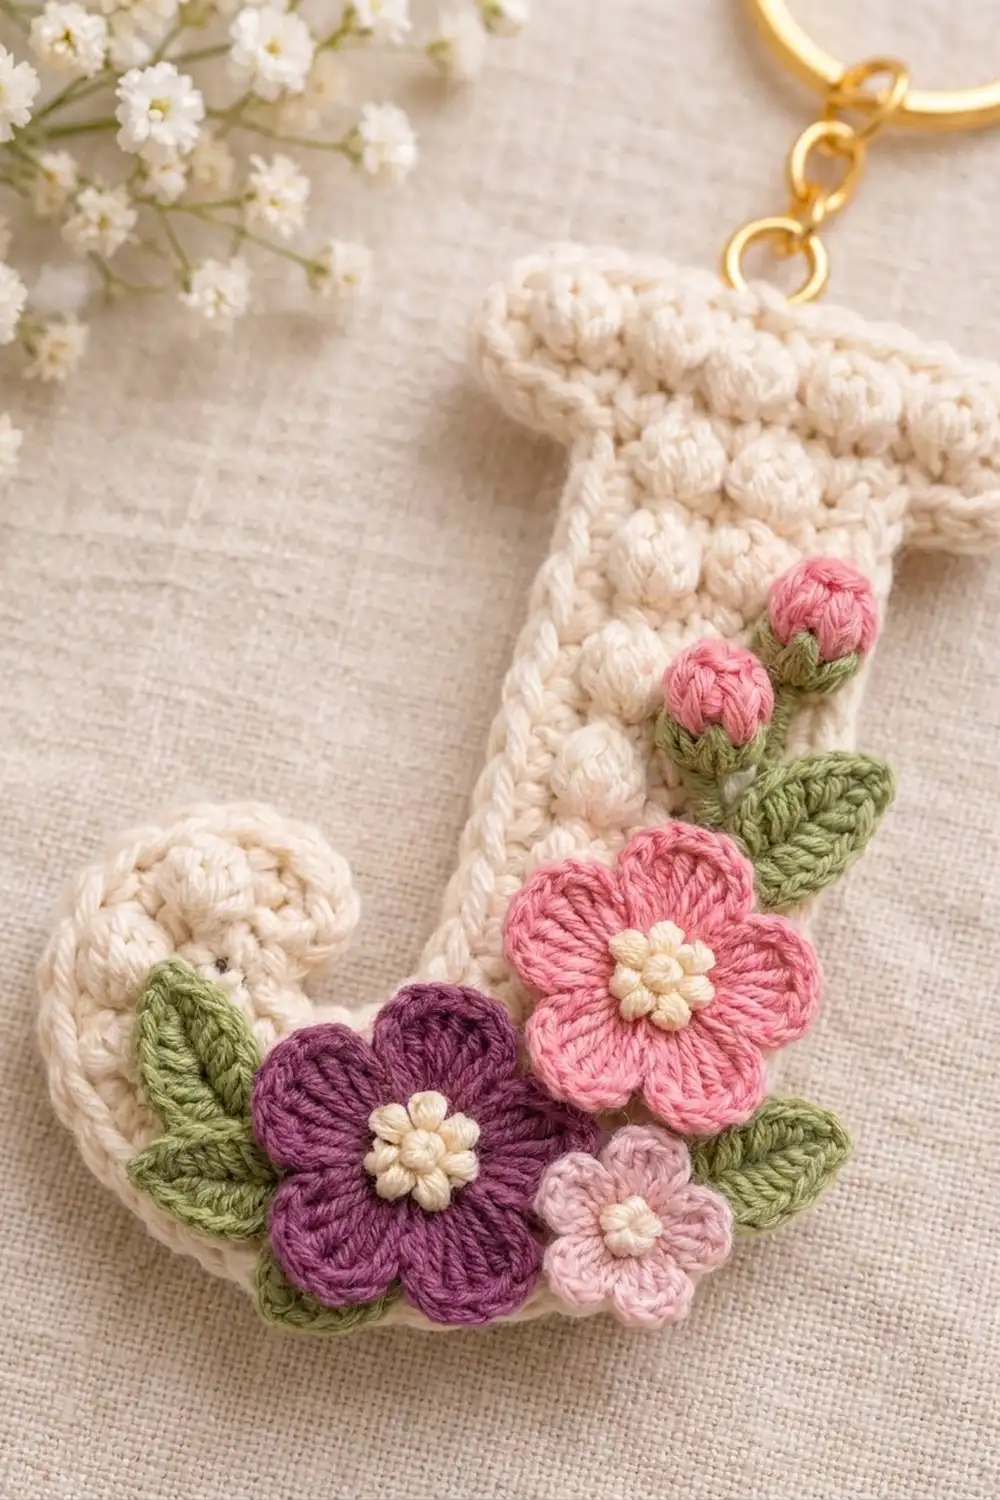
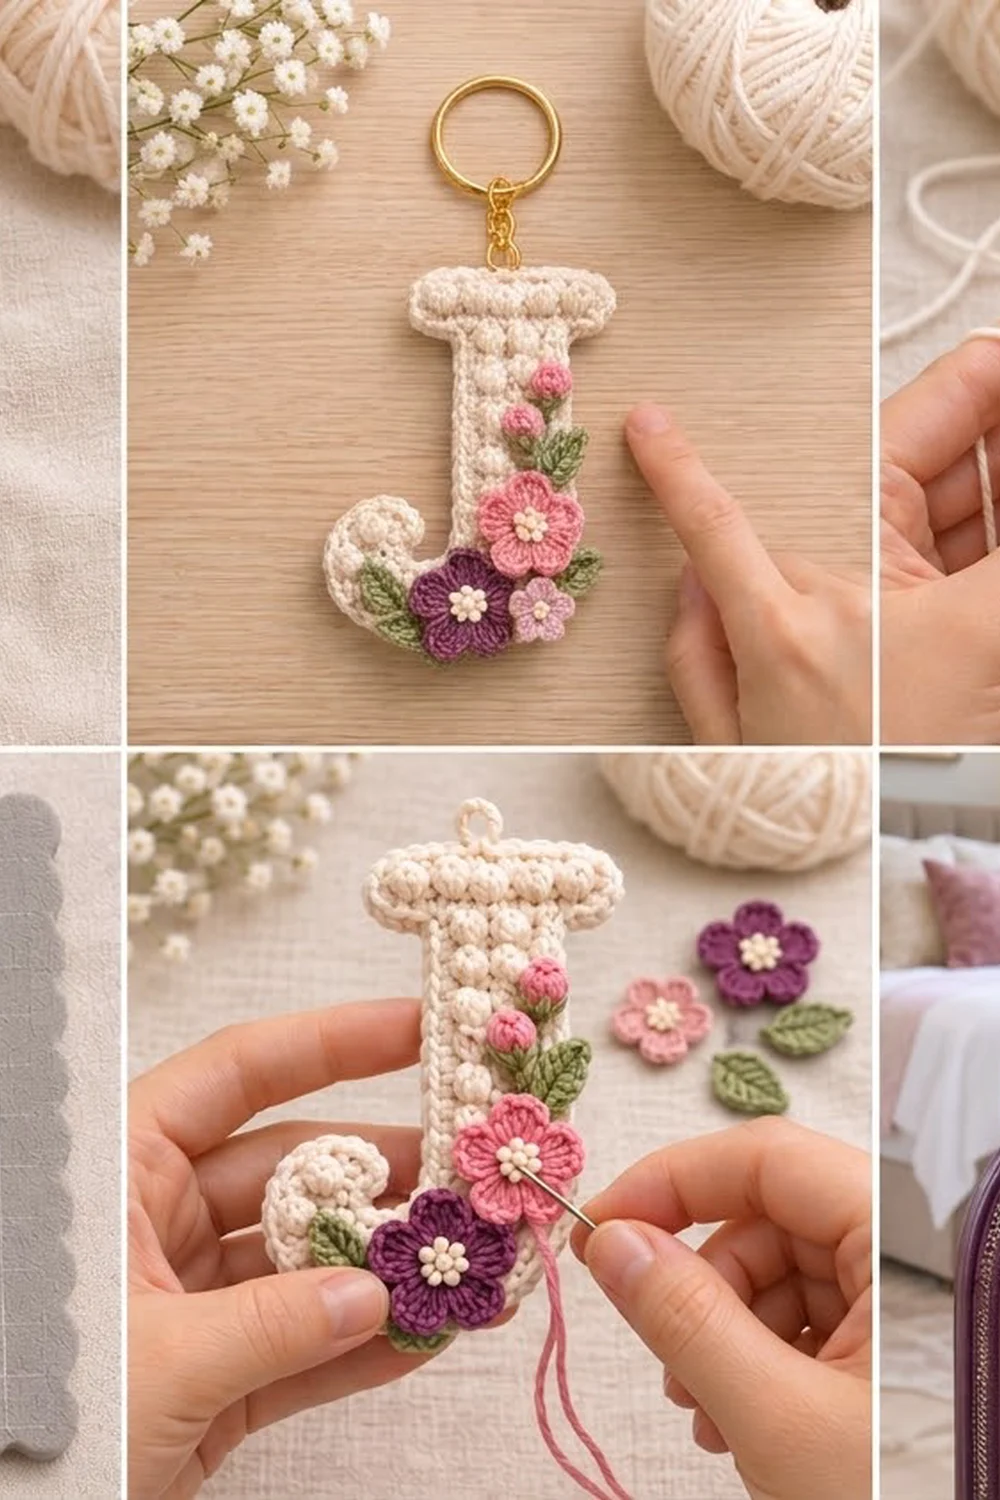
This Blossom Initial keychain is a bold, rounded letter J in soft cream cotton. A single column of puffy bobbles runs down the stem, a matching row of bobbles crosses the serif bar at the top, and the tail ends in a neat rolled curl. A twisted rope edge outlines the whole letter so it keeps a crisp shape.
The letter is cream. The spray of flowers on the lower stem adds pink, plum, light pink and leaf green. Small cream knots fill each flower center, and two pink rosebuds finish the spray. The result is a sweet, slightly vintage keychain for a bag, a set of keys or a suitcase handle.
This pattern uses US crochet terms. The finished letter is 4.25 in (10.8 cm) tall and 3.25 in (8.3 cm) wide, not counting the hardware.
You crochet the letter as one strip from the top down. First you make the serif bar, then you narrow to the stem, then you curve the strip using wedge rows of different stitch heights. Two border rounds go around the whole letter. Last, you sew on the curl, flowers, buds and leaves and add the keyring.
Finished Size and Construction
- Finished size: 4.25 in (10.8 cm) tall × 3.25 in (8.3 cm) wide
- Skill level: Intermediate
- Terminology: US
- Yarn weight: DK / light (3), cotton
- Hook: 3.25 mm (D-3)
- Number of pieces: 1 letter + 10 small appliqués (1 curl, 3 flowers, 2 buds, 4 leaves)
- Layout: One letter, with the appliqués clustered on the lower-right stem and bend
- Size before border: 3.75 in (9.5 cm) tall × 2.75 in (7.0 cm) wide; top bar 2.6 in (6.6 cm); stem 1 in (2.5 cm)
- Border depth: 0.25 in (0.6 cm) on every edge
Materials
Use a smooth, mercerized DK cotton. It shows the bobbles clearly and holds its shape on a keychain. Avoid fuzzy or splitty yarns, which hide the rope edge.
- Cream (main color): 10 g / 23 m
- Pink: 3 g / 7 m
- Plum: 2 g / 5 m
- Light pink: 2 g / 5 m
- Leaf green: 2 g / 5 m
All quantities include a margin for a gauge swatch and yarn tails.
Tools:
– 3.25 mm (D-3) crochet hook
– Tapestry needle
– Gold split ring, 1 in (2.5 cm)
– Gold chain, 0.75 in (1.9 cm), plus two 6 mm jump rings
– Two pairs of flat-nose pliers
– Stitch markers, rust-proof pins, blocking mat
– Scissors
Abbreviations (US Terms)
- ch: chain
- sl st: slip stitch
- sc: single crochet
- hdc: half double crochet
- dc: double crochet
- tr: treble crochet
- sc2tog / sc3tog: single crochet 2 / 3 together
- rev sc: reverse single crochet (crab stitch)
- MR: magic ring
- st(s): stitch(es)
- RS / WS: right side / wrong side
Special stitch – Bobble: Yarn over, insert the hook in the stitch, yarn over and pull up a loop, yarn over and pull through 2 loops. Repeat from * 3 more times in the same stitch (5 loops on the hook). Yarn over and pull through all 5 loops. You always work bobbles on WS rows so they pop out on the RS. A bobble counts as 1 stitch.
Gauge and Checkpoints
Gauge: 10 sc × 12 rows = 2 in (5.1 cm) square.
Before you start, make a test swatch. Then use these checkpoints as you work:
- After Row 3: the bar is 2.6 in (6.6 cm) wide and 0.5 in (1.3 cm) tall.
- After Row 17: the stem is 1 in (2.5 cm) wide, and the whole piece is about 2.8 in (7.1 cm) long.
- After Row 25: the piece is 3.75 in (9.5 cm) tall × 2.75 in (7.0 cm) wide, measured flat.
- After the border: the letter is 4.25 in (10.8 cm) × 3.25 in (8.3 cm).
If the bar is more than 1/8 in (0.3 cm) too wide, go down half a hook size. If it is too narrow, go up half a size. Bobbles that look flat usually mean your sc tension is too loose. Tighten your tension rather than adding stitches.
Letter J Body
The body is worked in rows from the top down. The ch 1 at the start of a row does not count as a stitch.
Top Bar
Row 1 (RS): With cream, ch 14. Sc in the 2nd ch from the hook and in each ch across. Turn. (13 sc)
Row 2 (WS): Ch 1, sc in the first st, bobble in the next st, sc in the next st. Repeat from * 5 more times. Turn. (13 sts: 6 bobbles, 7 sc)
Row 3 (RS): Ch 1, sc in each st across. Turn. (13 sc)
Narrowing to the Stem
Row 4 (WS): Sl st in each of the first 5 sts. Ch 1, then sc in the same st as the last sl st and in the next st. Bobble in the next st, which is the 7th st, the center of the bar. Sc in each of the next 2 sts. Leave the last 4 sts unworked. Turn. (5 sts)
The 4 slip-stitched sts and the 4 unworked sts form the two ledges under the bar, one on each side of the stem.
Stem
Row 5 (RS): Ch 1, sc in each st across. Turn. (5 sc)
Row 6 (WS): Ch 1, sc in each of the next 2 sts, bobble in the next st, sc in each of the next 2 sts. Turn. (5 sts)
Rows 7–17: Repeat Rows 5–6 five more times, then work Row 5 once more. (5 sts)
The stem now has 7 bobbles (Rows 4–16), stacked in one center column.
Curve (Wedge Rows)
Row 17 ends at the inner edge of the J, which is the left edge when the RS faces you. In the wedge rows, the stitches are short at the inner edge and tall at the outer edge, so the strip curves to the left.
Row 18 (WS): Ch 1, sl st in the first st, sc in the next st, bobble in the next st, dc in the next st, tr in the last st. Turn. (5 sts)
Row 19 (RS): Ch 2 (does not count). Dc in the tr, dc in the dc, hdc in the bobble, sc in the sc, sl st in the sl st. Turn. (5 sts)
Row 20 (WS): Ch 1, sl st in the sl st, sc in the sc, bobble in the hdc, dc in the dc, tr in the last dc. Turn. (5 sts)
Row 21 (RS): Repeat Row 19. (5 sts)
The strip has now turned about 135° and points up and to the left.
Tail
Row 22 (WS): Ch 1, sc in each of the next 2 sts, bobble in the next st, sc in each of the next 2 sts. Turn. (5 sts)
Row 23 (RS): Ch 1, sc in each st across. Turn. (5 sc)
Row 24 (WS): Ch 1, sc2tog, sc in the next st, sc2tog. Turn. (3 sc)
Row 25 (RS): Ch 1, sc3tog. Fasten off. (1 st)
There are 16 bobbles in total: 6 in the bar, 7 in the stem, and 3 in the curve and tail.
Border
Border gauge: Along the top edge, the border runs at 5 sc per inch, which matches the stitch gauge. Along the row-end edges, use 1 sc per sc row, which is 6 sc per inch and matches the row gauge. On tall row ends, work 1 sc for each sc-height of the stitch.
Rnd 1 (RS): With the RS facing, join cream in the top-right corner (the free loop of the first foundation ch). Work around the letter as follows:
| Section | Sc count |
|---|---|
| Top edge: 3 sc in the corner, 11 sc, 3 sc in the corner | 17 |
| Left bar end (Row 2 row-end) | 1 |
| Left bar bottom corner: 3 sc in the end st of Row 3 | 3 |
| Left ledge: 1 sc in each of the next 3 sts | 3 |
| Inner stem edge (Rows 4–17), 1 per row | 14 |
| Inner curve (Rows 18–21), spread evenly | 2 |
| Inner tail edge (Rows 22–24) | 3 |
| Tip: 3 sc in the sc3tog | 3 |
| Outer tail edge (Rows 24–22) | 3 |
| Outer curve: 4 sc in each tr row-end and 3 sc in each dc row-end (Rows 21–18) | 14 |
| Outer stem edge (Rows 17–4) | 14 |
| Right ledge: 1 sc in each of the next 3 unworked sts | 3 |
| Right bar bottom corner: 3 sc in the end st | 3 |
| Right bar end (Row 2 row-end) | 1 |
Sl st to the first sc. (84 sc)
Rnd 2: Ch 1, rev sc in each st around. Sl st to the first st and fasten off. (84 rev sc)
Why the math works: Each sc row is 1/6 in tall, so 1 sc per row-end matches the edge length exactly. The 14 rows of the stem get 14 sc on each side, so the stem stays straight. The outer curve is 14 sc-heights long (tr + dc + tr + dc = 4 + 3 + 4 + 3), so it gets 14 sc and lies flat. The inner curve is made of sl sts and is very short, so its 2 sc keep the inside of the curve snug. Each outer corner gets 3 sc so it turns without pulling. Rev sc keeps the count at 84 and makes the rope edge. Together the two rounds add 0.25 in (0.6 cm) on every side.
Hanging loop: Join cream in the 9th sc of the top edge (the center). Ch 8, then sl st in the same st. Fasten off. The loop is about 0.5 in (1.3 cm) long.
Appliqués
For each appliqué, leave an 8 in (20.3 cm) tail for sewing.
Curl (cream, make 1): MR. Ch 1, then 6 sc in the ring (6). Do not join; work in a spiral. Work 2 sc in each of the next 6 sts (12). Then sc in the next st, 2 sc in the next st 3 times (9 more sts). Sl st in each of the next 2 sts and fasten off. The curl is a tapered spiral about 0.9 in (2.3 cm) across.
Large flower (pink, make 1): MR. Ch 1, then 10 sc in the ring. Sl st to the first sc (10). Next: sl st in the next st, (hdc, 3 dc, hdc) in the next st. Repeat from * 4 more times (5 petals). The flower is 1.1 in (2.8 cm) across.
Medium flower (plum, make 1): Work as for the large flower, but make each petal (hdc, 2 dc, hdc). The flower is 1 in (2.5 cm) across.
Small flower (light pink, make 1): MR. Ch 2, 2 dc in the ring, ch 2, sl st in the ring. Repeat from * 4 more times. Pull the ring tight. The flower is 0.6 in (1.5 cm) across.
Rosebud (pink, make 2): Ch 3. Bobble in the 3rd ch from the hook, then ch 1 to close. Each bud is 0.4 in (1.0 cm).
Leaf (green, make 4): Ch 6. Starting in the 2nd ch from the hook, work sc, hdc, dc, hdc. In the last ch, work (sc, ch 2, sl st in the 2nd ch from the hook, sc). Working along the other side of the chain, work hdc, dc, hdc, sc. Sl st to the first sc. Each leaf is 0.75 in (1.9 cm) long.
Flower centers: With cream, embroider 5 French knots in the center of the large and medium flowers, and 3 in the small flower.
Assembly and Hardware
- Sew the curl over the tip of the tail, spiral side up, so its tapered end blends into the border.
- Pin the large pink flower over the outer stem edge, about 1 in (2.5 cm) above the bottom of the curve.
- Pin the plum flower at the lower left of the pink flower so it overlaps it slightly, sitting on the bend. Pin the small light-pink flower at the lower right, below the pink flower.
- Tuck one leaf on the left of the plum flower, one below the light-pink flower, and two beside the buds.
- Place the 2 rosebuds above the pink flower, one higher than the other, along the outer stem edge.
- Sew each piece around its edge with matching yarn, sewing through the front layer of the letter only. Using green yarn, add 2 straight stitches in a V at the base of each bud.
- Use the pliers to open a jump ring. Join the hanging loop to the chain, then use the second jump ring to join the chain to the split ring.
Final Blocking
- Weave in all ends on the WS, except where an appliqué covers them.
- Lay the letter RS up on the blocking mat.
- Pin the top bar straight at 3.1 in (7.9 cm) and the stem at 1.5 in (3.8 cm) wide.
- Ease the curve into a smooth arc and pin the tail so the overall width is 3.25 in (8.3 cm).
- Check that the height is 4.25 in (10.8 cm).
- Steam lightly, holding the iron above the piece without pressing, so the bobbles keep their shape.
- Let it dry completely, then unpin.
Final Quality-Control Checklist
- 84 border stitches, with no gaps at the ledges or the tip
- 16 bobbles, all popping out on the RS
- The stem edges are straight and the curve lies flat
- Final size is 4.25 in (10.8 cm) × 3.25 in (8.3 cm)
- All appliqués are sewn down securely, with nothing that could snag
- The jump rings are fully closed
Troubleshooting
- The curve cups or ruffles: The outer curve needs exactly 14 border sc. Recount it and fix the count.
- The curve won’t bend enough: Make sure the outer stitches of the wedge rows are full-height tr and dc, and the inner stitches really are sl sts.
- Bobbles sink to the back: Make sure you are working them on WS rows.
- The stem wavers: Work exactly 1 sc per row-end along the stem.
- The loop stretches: Work it tighter, or work a row of sl sts back along the chain.
Care
Spot clean, or hand wash in cool water. Reshape the letter and let it dry flat.
Final Notes
The measurements build on each other. If your gauge is 10 sc × 12 rows = 2 in (5.1 cm), the bar will be 2.6 in (6.6 cm) wide and the stem 1 in (2.5 cm) wide. That makes the unbordered letter 3.75 in × 2.75 in (9.5 × 7.0 cm). The 0.25 in (0.6 cm) border then brings it to a finished 4.25 in × 3.25 in (10.8 × 8.3 cm). Check your size at each stage and the letter will come out right.
Happy crocheting!