

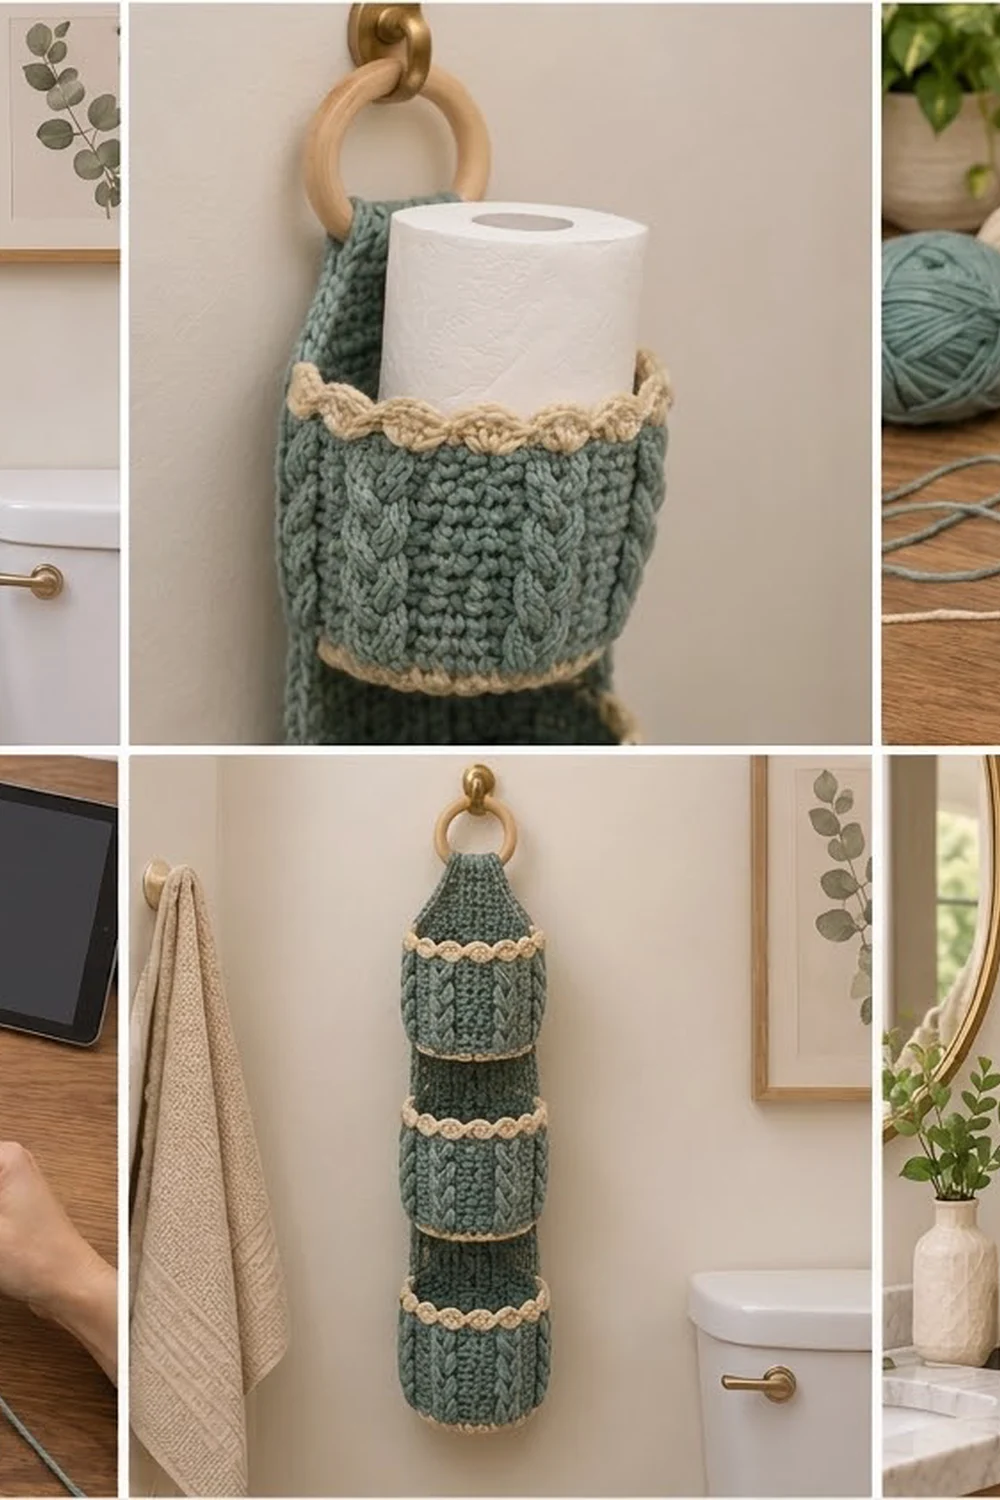
The Sage Cable Trio is a hanging toilet paper holder with three round pockets stacked on one narrow back panel. Each pocket holds a standard roll, and the top of the panel loops around a wooden ring so the holder hangs from any wall hook.
The main color is a soft sage green, with cream accents. Each pocket has a cream single crochet band at the bottom of the wall and a cream scallop trim at the rim. Six raised cables run around every pocket, so the front shows three twisted columns against a pebbly half double crochet background.
This pattern uses US crochet terms. The back panel is 4.5 in (11.4 cm) wide, the pockets are 5.5 in (14.0 cm) across, and the holder hangs about 19 in (48.3 cm) from the bottom edge to the top of the ring loop.
Construction is simple. Each pocket is worked in joined rounds from the center of the base up to the rim. The back panel is worked in rows, then tapered into a tab. You sew the pockets to the panel, work one border round around the panel, and fold the tab over the ring.
Finished Size and Construction
- Finished size: 4.5 in (11.4 cm) wide x about 19 in (48.3 cm) hanging length; pockets stick out 5.5 in (14.0 cm) from the panel
- Skill level: Intermediate (front post cables, working in rounds and rows)
- Terminology: US
- Yarn weight: Worsted (#4)
- Hook: 5.0 mm (H-8)
- Number of pieces: 4 (1 back panel + 3 pockets)
- Layout: 1 column of 3 pockets on a vertical panel
- Pocket size: 5.5 in (14.0 cm) diameter x 3.5 in (8.9 cm) tall
- Panel size before border: 4 in (10.2 cm) x 20.4 in (51.8 cm), including tab
- Border depth: 1 round of sc, about 0.25 in (0.6 cm)
Materials
Choose a smooth worsted cotton or cotton-acrylic blend. Cotton holds its shape well in a bathroom and shows the cables clearly. Avoid fuzzy yarns, which blur the cable twists.
- Color A, sage green: 130 g, about 260 m (284 yd)
- Color B, cream: 30 g, about 55 m (60 yd)
Quantities include a margin of about 15 percent for your gauge swatch and sewing.
Tools:
- 5.0 mm (H-8) crochet hook
- 3 in (7.6 cm) wooden ring
- Tapestry needle
- 4 to 6 stitch markers
- Measuring tape
- Rust-proof pins and a blocking mat
- Scissors
Abbreviations (US Terms)
- ch: chain
- sl st: slip stitch
- sc: single crochet
- hdc: half double crochet
- dc: double crochet
- inc: 2 hdc in the same stitch
- hdc2tog: half double crochet 2 together
- BLO: back loop only
- st(s): stitch(es)
- rnd: round
Special stitches:
- FPdc (front post double crochet): Yarn over, insert hook from front to back to front around the post of the stitch below, and complete a dc.
- FPtr (front post treble crochet): Yarn over twice, insert hook around the post from the front as above, and complete a tr.
- Cable cross (C4F): Skip the next 2 sts, FPtr around each of the next 2 FP sts below, then, working in front of the stitches just made, FPtr around each of the 2 skipped FP sts below. Uses 4 sts.
When you work any front post stitch, skip the stitch of the current round that sits behind it. This keeps every count unchanged.
Gauge and Checkpoints
Gauge: 14 hdc and 11 rows = 4 in (10.2 cm) in hdc rows. In sc, 16 sts = 4 in (10.2 cm).
Make a 5 in (12.7 cm) hdc swatch first. Then make one complete pocket before anything else, and check it against these points:
- After Rnd 6, the flat base measures 5.25 in (13.3 cm) across.
- The wall circumference is about 17.1 in (43.4 cm) for 60 sts.
- The finished pocket is 5.5 in (14.0 cm) across and 3.5 in (8.9 cm) tall.
- A toilet roll slides in without stretching the wall.
If your pocket is too big, go down to a 4.5 mm (7) hook. If it is too small or the roll is tight, go up to a 5.5 mm (I-9) hook. Re-check the panel after 11 rows: it should be 4 in (10.2 cm) wide and 4 in (10.2 cm) tall.
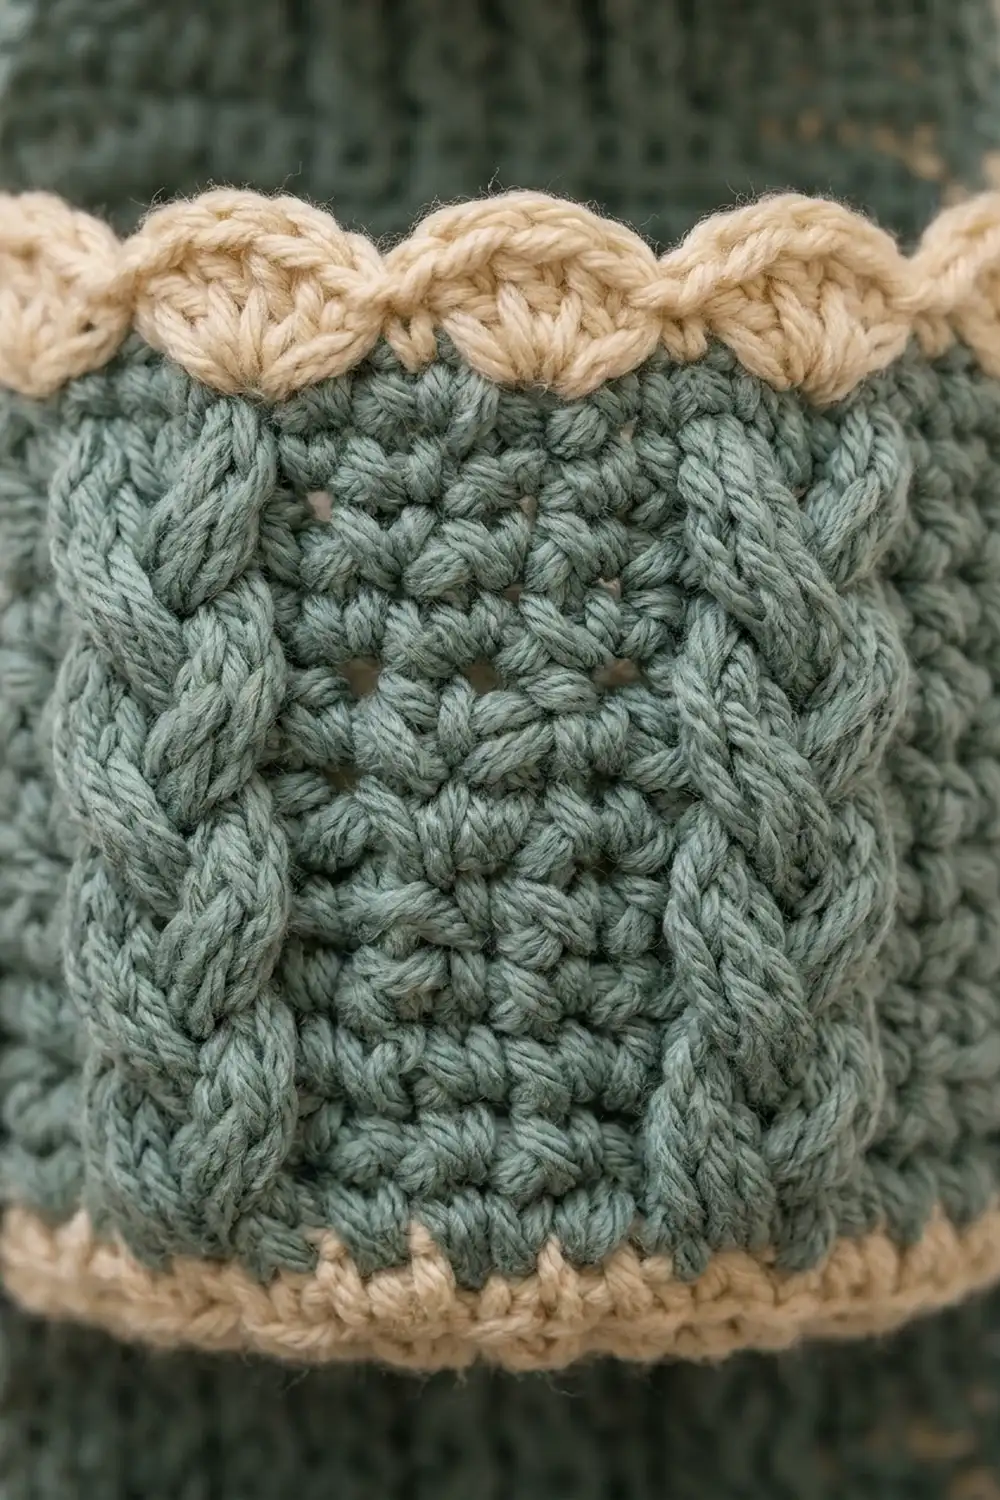
Pocket (Make 3)
Every round is joined with a sl st to the first st. The beginning ch does not count as a stitch. Keep the join at the same spot each round; this becomes the center back of the pocket.
Base
With Color A, make a magic ring.
Rnd 1: Ch 2, 10 hdc in ring, join. (10 sts)
Rnd 2: Ch 2, inc in each st around, join. (20 sts)
Rnd 3: Ch 2, hdc in next st, inc in next st; repeat from * 9 more times, join. (30 sts)
Rnd 4: Ch 2, hdc in next 2 sts, inc in next st; repeat from * 9 more times, join. (40 sts)
Rnd 5: Ch 2, hdc in next 3 sts, inc in next st; repeat from * 9 more times, join. (50 sts)
Rnd 6: Ch 2, hdc in next 4 sts, inc in next st; repeat from * 9 more times, join. (60 sts)
Checkpoint: the base lies flat and measures 5.25 in (13.3 cm). Fasten off Color A.
Bottom Cream Band
Rnd 7: Join Color B in any st. Ch 1, sc in BLO of each st around, join. (60 sts)
Working in the back loops turns the wall upward and leaves a neat ridge at the base edge.
Rnd 8: Ch 1, sc in each st around, join. (60 sts) Fasten off Color B.
Cable Wall
Rnd 9: Join Color A. Ch 2, hdc in each st around, join. (60 sts)
Rnd 10: Ch 2, hdc in next 6 sts, FPdc around each of next 4 sts; repeat from * 5 more times, join. (60 sts: 36 hdc + 24 FPdc, 6 cables)
Rnd 11 (cross round): Ch 2, hdc in next 6 sts, C4F; repeat from * 5 more times, join. (60 sts)
Rnds 12 and 13: Repeat Rnd 10, placing each FPdc around the FP sts below. (60 sts each)
Rnd 14 (cross round): Repeat Rnd 11. (60 sts)
Rnd 15: Repeat Rnd 10. (60 sts) Fasten off Color A.
Checkpoint: the green wall from Rnd 9 to Rnd 15 is about 2.5 in (6.4 cm) tall.
Scallop Rim
Rnd 16: Join Color B. Ch 1, sc in each st around, join. (60 sts)
Rnd 17: Ch 1, sc in next st, skip 2 sts, 5 dc in next st, skip 2 sts; repeat from * 9 more times, join to first sc. (60 sts: 10 sc + 50 dc, 10 scallops)
Each repeat uses 6 sts, and 10 repeats use exactly 60. Fasten off and weave in ends.
Checkpoint: the pocket is 3.5 in (8.9 cm) tall from base edge to scallop tips.
Back Panel
With Color A, ch 16.
Row 1: Hdc in 3rd ch from hook and in each ch across. (14 sts)
Rows 2–44: Ch 2 (does not count), turn, hdc in each st across. (14 sts)
Checkpoint: the panel is 4 in (10.2 cm) x 16 in (40.6 cm).
Row 45: Ch 2, turn, hdc2tog, hdc in next 10 sts, hdc2tog. (12 sts)
Row 46: Ch 2, turn, hdc2tog, hdc in next 8 sts, hdc2tog. (10 sts)
Row 47: Ch 2, turn, hdc2tog, hdc in next 6 sts, hdc2tog. (8 sts)
Row 48: Ch 2, turn, hdc2tog, hdc in next 4 sts, hdc2tog. (6 sts)
The taper adds about 1.5 in (3.8 cm).
Rows 49–56: Ch 2, turn, hdc in each st across. (6 sts)
This tab is 1.7 in (4.3 cm) wide and 2.9 in (7.4 cm) long. Do not fasten off; keep the loop on a stitch marker for the border.
Checkpoint: total panel length is 20.4 in (51.8 cm): 16 in + 1.5 in + 2.9 in.
Make All Pieces
- Pockets: 3 total. Each uses about 30 g of Color A and 9 g of Color B.
- Back panel: 1 total, about 40 g of Color A.
Layout (top to bottom):
        [ wooden ring ]
         \  tab  /       rows 45-56
   +--------------------+
   |    gap             |  rows 42-44
   |  [ POCKET 3 ]      |  rows 32-41
   |    gap             |  rows 27-31
   |  [ POCKET 2 ]      |  rows 17-26
   |    gap             |  rows 12-16
   |  [ POCKET 1 ]      |  rows 2-11
   |    edge            |  row 1
   +--------------------+
Joining
Sew each pocket to the right side of the panel with Color A and a tapestry needle, using a whipstitch through both layers.
Mark the back of each pocket. Find the join seam. Place markers 6 sts to each side of it in Rnd 7. These 12 sts are the pocket’s flat back.
Bottom seam, stitch to stitch. Lay Pocket 1 against the panel with its base pointing toward you. Match the 12 marked sts of Rnd 7 to panel sts 2–13 of Row 2, one pocket stitch to one panel stitch. Whipstitch across.
Side seams, round to row. Sew up from each end of the bottom seam. Follow the column of the marked stitch on the pocket and panel column 2 (left) or 13 (right). Match one pocket round to one panel row, from Rnd 7 to Rnd 16 against Rows 2–11. Ten rounds meet ten rows. The two sc rounds at the bottom of the wall are slightly shorter than an hdc row, so stretch them gently as you sew. Leave Rnd 17 free so the scallops stand up.
Place Pocket 2 on Rows 17–26 and Pocket 3 on Rows 32–41 the same way. Pocket bottoms are 15 rows, about 5.5 in (14.0 cm), apart. Each gap is 5 rows, about 1.8 in (4.6 cm), which leaves room for the roll to stick out above the rim.
Tension: Pull each stitch snug but not tight. If the panel puckers, the stitches are too tight.
Checkpoint: the panel still measures 4 in (10.2 cm) wide, and the first pocket starts about 0.4 in (1.0 cm) above the bottom edge.
Tip: If you prefer, work the border before sewing the pockets. The counts are identical.
Border
Border gauge: 16 sc = 4 in (10.2 cm).
Border Rnd 1: With the loop from Row 56 on your hook, ch 1, turn.
- Top of tab: 3 sc in first st, sc in next 4 sts, 3 sc in last st. (10 sts)
- First long side: Work 3 sc for every 2 row ends, down Rows 56 to 1. (84 sts)
- Bottom edge: Working into the foundation ch, 3 sc in first ch, sc in next 12 ch, 3 sc in last ch. (18 sts)
- Second long side: Work 3 sc for every 2 row ends, up Rows 1 to 56. (84 sts)
Join to the first sc. Total: 196 sts (10 + 84 + 18 + 84). Fasten off.
Why the math works: Two hdc rows are 0.73 in tall. At 4 sc per inch, that is 2.9 sc, so 3 sc per 2 rows lies flat. 56 rows divided by 2 gives 28 pairs, and 28 x 3 = 84. Across the tops, 1 sc per hdc keeps the edges straight. The 3-sc groups turn each corner. The border adds 0.25 in (0.6 cm) on every side, so the panel becomes 4.5 in (11.4 cm) x 20.9 in (53.1 cm).
Attach the ring: Pass the tab through the wooden ring from front to back. Fold it down behind the panel and whipstitch the top edge of the tab to the back of Row 47. The loop should be snug around the ring.
Final Blocking
- Spray the holder lightly with water until damp, not soaked.
- Lay it face up on the blocking mat.
- Pin the panel straight to 4.5 in (11.4 cm) wide.
- Stuff each pocket with a toilet roll or a rolled towel so it dries round.
- Shape each scallop with your fingers so all 10 stand evenly.
- Pinch the cables upward so they stand out.
- Let it dry completely, then remove the pins.
Final Quality-Control Checklist
- Each pocket has 60 sts in every round from Rnd 6 to Rnd 17.
- Each pocket shows 6 cables, each crossed twice.
- Each rim has 10 even scallops.
- The panel is 14 sts wide for Rows 1–44 and 6 sts wide for Rows 48–56.
- The border has 196 sts with 3 sc at each corner.
- The pockets sit on Rows 2–11, 17–26, and 32–41, centered on the panel.
- All ends are woven in on the wrong side.
- A roll slides in and out of every pocket easily.
Troubleshooting
Base ruffles: Your tension is loose. Go down a hook size or tighten the increase stitches.
Base cups before Rnd 7: Your tension is tight. Go up a hook size.
Stitch count grows in the cable rounds: You worked an hdc behind a front post stitch. Skip the stitch behind every FP stitch.
Cables lean or look flat: Check that each C4F crosses in front, and that each FP stitch is worked around the FP stitch below.
Scallops look crowded: Check you skipped 2 sts on each side of every 5-dc group.
Pocket sags off the panel: Re-sew the side seams with smaller, tighter stitches through both loops of each pocket stitch.
Holder hangs crooked: Recenter the tab around the ring and re-sew it level across Row 47.
Care
Hand wash in cool water with mild soap, gently squeeze out water, and dry flat with a roll inside each pocket. Do not tumble dry.
Final Notes
Everything in this pattern follows one measurement chain. A gauge of 14 hdc and 11 rows per 4 in (10.2 cm) gives 60-st pockets that are 5.5 in (14.0 cm) across and 3.5 in (8.9 cm) tall. The 14-st panel is 4 in (10.2 cm) wide and 20.4 in (51.8 cm) long. Three pockets sit on matching rows, and one 196-st border brings the panel to 4.5 in (11.4 cm) x 20.9 in (53.1 cm). Once folded around the ring, it hangs about 19 in (48.3 cm).
Check your first pocket against the checkpoints, and the rest will follow.
Happy crocheting!