

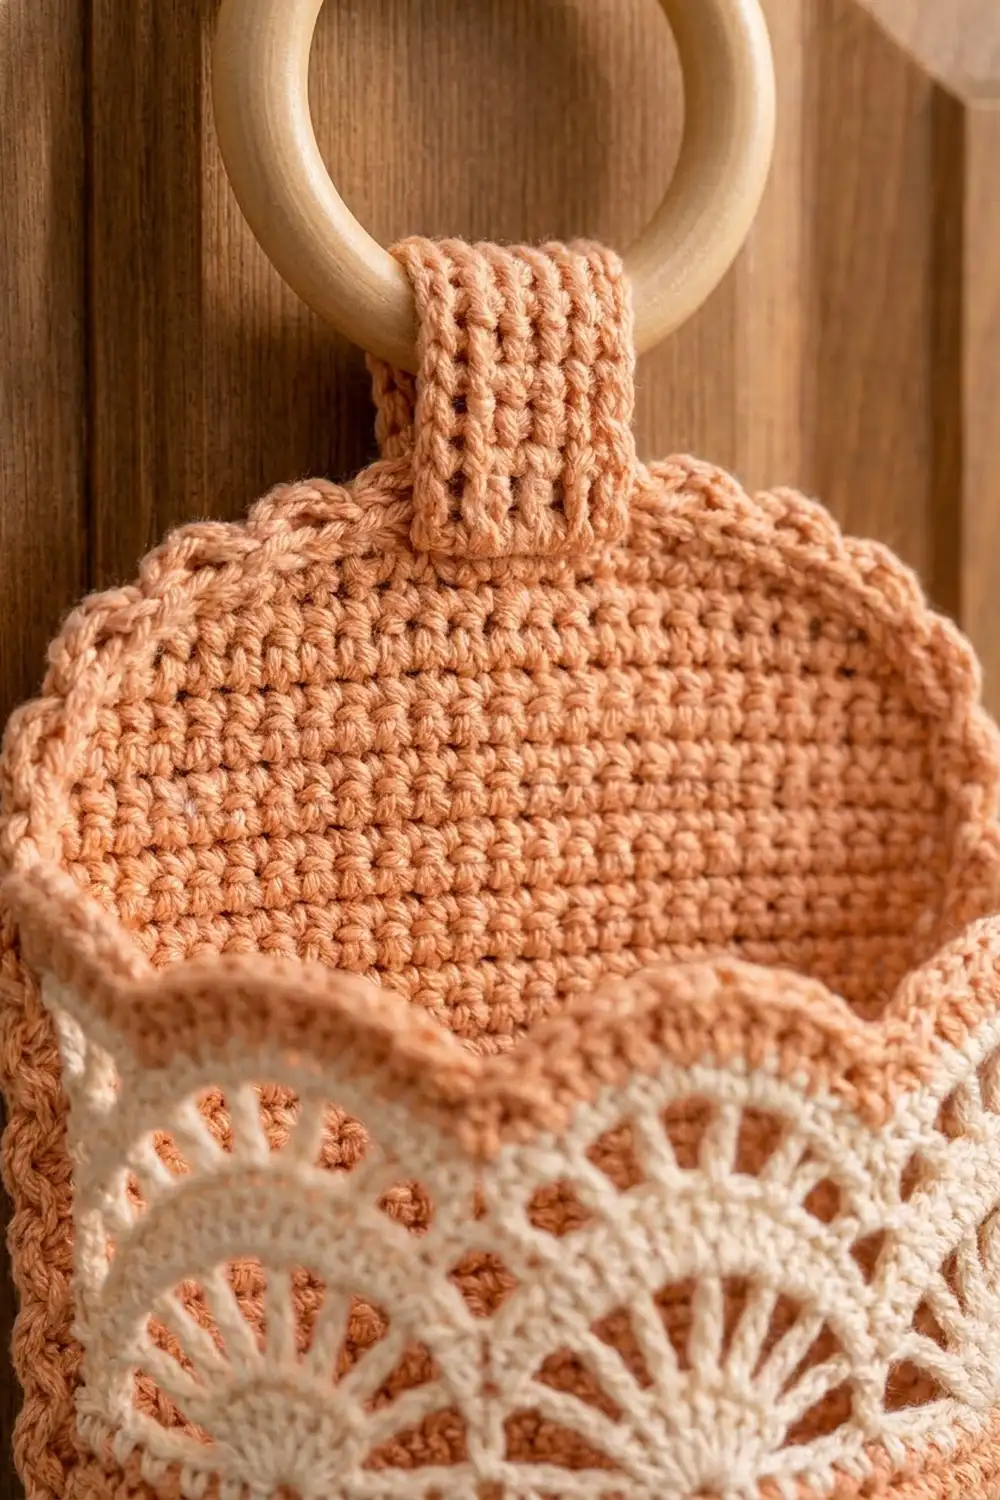
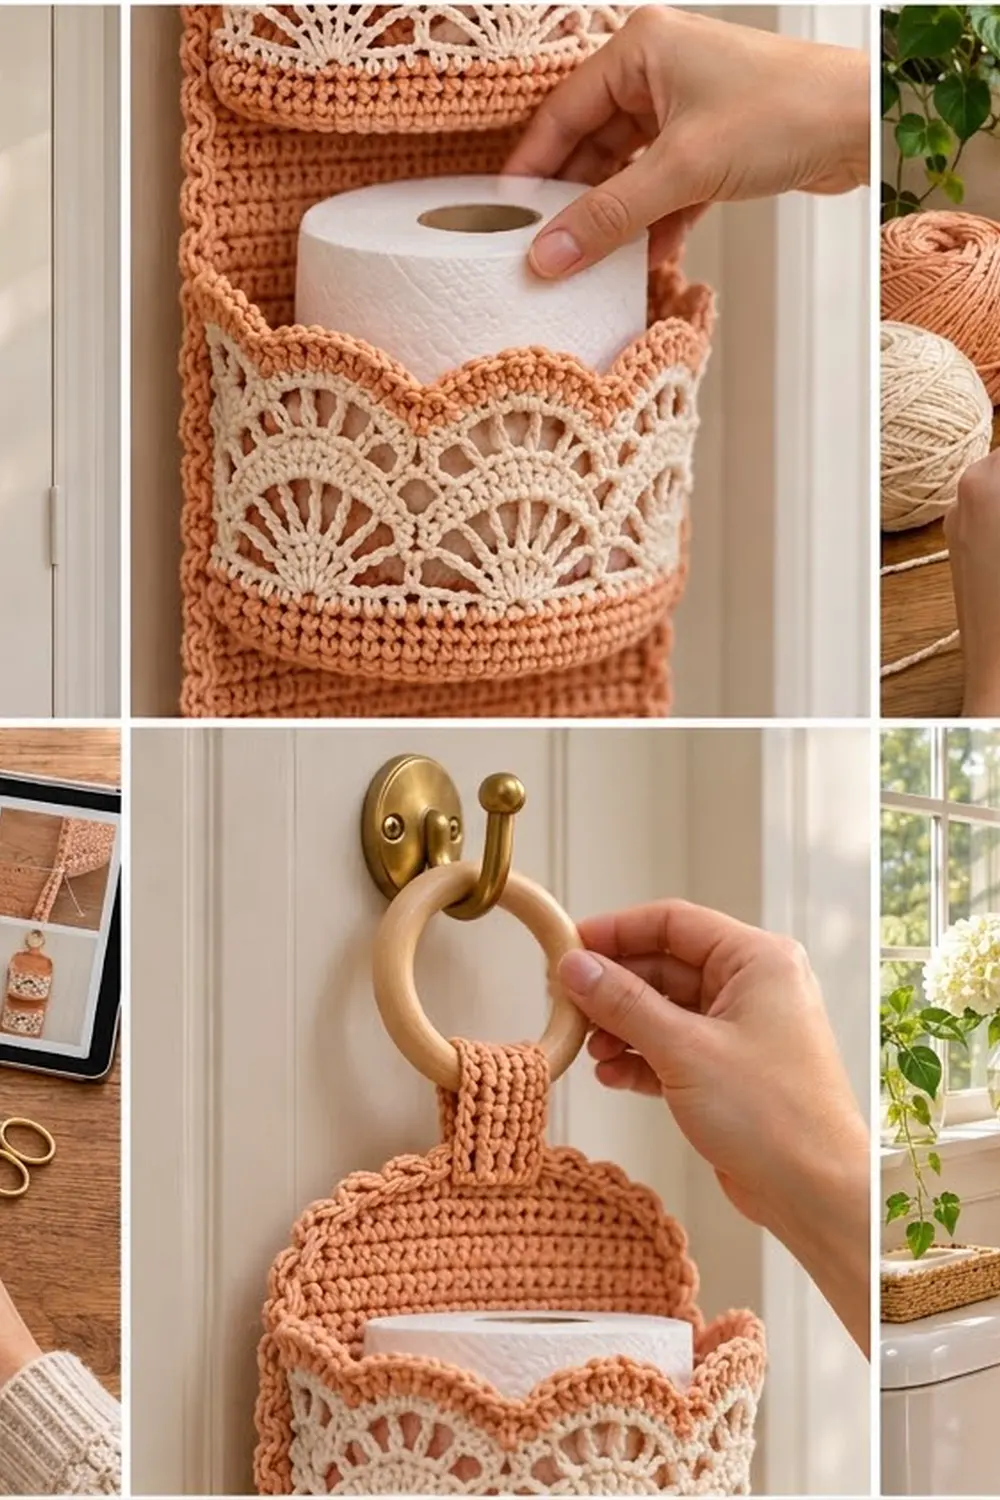
This hanging toilet paper holder stores three spare rolls on the back of a door or on a wall hook. It’s one long peach back panel with a rounded top. Three open pockets are stacked down the front, and a short ribbed tab loops through a natural wooden ring at the top.
Each pocket has three color bands. A solid peach band sits at the bottom, a cream band of openwork fans and arches sits in the middle, and a peach scalloped rim runs along the top. The warm peach and soft cream give it a cottage-style bathroom look.
The pattern uses US crochet terms. The finished holder measures 7 in (17.8 cm) wide and 21 in (53.3 cm) tall, including the border. It hangs about 24 in (61.0 cm) from the top of the ring to the bottom edge.
You’ll make the back panel in single crochet rows, then the pocket bases and the lace pocket walls flat, plus the tab. Sew each wall to its base, sew the three pockets onto the panel, add a two-round border, and attach the tab and ring.
Finished Size and Construction
- Finished size: 7 in x 21 in (17.8 cm x 53.3 cm); about 24 in (61.0 cm) including tab and ring
- Skill level: Easy-Intermediate
- Terminology: US
- Yarn weight: Worsted (#4), cotton
- Hook: 4.5 mm (US 7)
- Number of pieces: 8 (1 back panel, 3 pocket bases, 3 pocket walls, 1 tab)
- Layout: 3 pockets stacked vertically on 1 panel
- Panel size before border: 6 in x 20 in (15.2 cm x 50.8 cm)
- Pocket base: 5.75 in x 3.8 in (14.6 cm x 9.7 cm)
- Pocket wall: 14.25 in (36.2 cm) long at the foundation edge, 3.1 in (7.9 cm) tall
- Border depth: about 0.5 in (1.3 cm) per side
Materials
Choose a smooth cotton or cotton-blend worsted yarn. Cotton holds its shape in a damp bathroom and shows off the lace clearly. Avoid fuzzy or very stretchy yarns, since they blur the fans and let the pockets sag.
- Peach (main color): 260 g (442 m)
- Cream (contrast color): 60 g (102 m)
These amounts assume cotton worsted at about 170 m per 100 g. Both include a margin of roughly 15-20% for gauge swatching and differences in tension.
Tools:
– 4.5 mm (US 7) crochet hook
– Wooden ring, 2.5 in (6.4 cm) diameter
– Tapestry needle
– 6-8 locking stitch markers
– Scissors
– Measuring tape
– Blocking mat, rustproof pins, and spray bottle
Abbreviations (US Terms)
- ch – chain
- sc – single crochet
- hdc – half double crochet
- dc – double crochet
- sc2tog – single crochet 2 together
- blo – back loop only
- sk – skip
- sp – space
- st(s) – stitch(es)
- rep – repeat
Fan (special stitch): Work [dc, (ch 1, dc) 6 times] in the same stitch. Each fan has 7 dc and 6 ch-1 spaces, which make the spokes of the cream fans.
Gauge and Checkpoints
Gauge: 16 sc and 18 rows = 4 in (10.2 cm) in sc rows with peach.
Test one piece first. Make one pocket base before you start anything else; it doubles as your gauge swatch. After all 17 rows, it should measure 5.75 in x 3.8 in (14.6 cm x 9.7 cm).
Checkpoints:
– Pocket base, Row 1 (23 sc): 5.75 in (14.6 cm) wide
– Pocket wall, Row 1 (57 sc): 14.25 in (36.2 cm) long
– Pocket wall, Row 10: 3.1 in (7.9 cm) tall
– Back panel, Row 20: 4.4 in (11.2 cm) tall
– Back panel, Row 85: 18.9 in (48.0 cm) tall
– Back panel, Row 90: 20 in (50.8 cm) tall, 6 in (15.2 cm) wide
If your piece is too big, try a 4.0 mm hook. If it’s too small, try a 5.0 mm hook. Matching the stitch gauge matters most, because the wall must fit around the base stitch for stitch.
Back Panel
Make 1 in peach. You’ll work from the bottom edge up.
Row 1: Ch 25, sc in 2nd ch from hook and in each ch across, turn. (24 sc)
Rows 2–85: Ch 1, sc in each st across, turn. (24 sc)
Checkpoint: 18.9 in (48.0 cm) tall.
Top shaping:
Row 86: Ch 1, sc2tog, sc in next 20 sts, sc2tog, turn. (22 sts)
Row 87: Ch 1, sc in each st across, turn. (22 sts)
Row 88: Ch 1, sc2tog, sc in next 18 sts, sc2tog, turn. (20 sts)
Row 89: Ch 1, sc2tog, sc in next 16 sts, sc2tog, turn. (18 sts)
Row 90: Ch 1, sc2tog, sc in next 14 sts, sc2tog. (16 sts)
Fasten off. Each long side now has 90 row ends. The top edge is 16 sts, or 4 in (10.2 cm), and the corners are softly rounded.
Place markers in the side edges at Rows 4, 31, and 58. These show where the bottom of each pocket goes. The pocket bases are 27 rows, or 6 in (15.2 cm), apart.
Pocket Base
Make 3 in peach.
Row 1: Ch 24, sc in 2nd ch from hook and in each ch across, turn. (23 sc)
Rows 2–17: Ch 1, sc in each st across, turn. (23 sc)
Fasten off. The base has 17 row ends on each short side. The last row is the back edge, which you’ll sew to the panel. The foundation chain is the front edge.
Pocket Wall
Make 3. You’ll work the wall flat as a long strip, and the fans need a multiple of 8 sts + 1.
Peach band:
Row 1: With peach, ch 58, sc in 2nd ch from hook and in each ch across, turn. (57 sc)
Rows 2–4: Ch 1, sc in each st across, turn. (57 sc)
Fasten off peach.
Cream lace band:
Row 5: Join cream in first st, ch 1, sc in each st across, turn. (57 sc)
Row 6 (fans): Ch 1, sc in first st, *sk 3 sts, fan in next st, sk 3 sts, sc in next st; rep from * 6 more times, turn. (7 fans, 8 sc)
Row 7 (arches): Ch 6 (counts as dc + ch 3), sc in 3rd ch-1 sp of first fan, ch 3, sc in 4th ch-1 sp of same fan, ch 3, dc in next sc. *Ch 3, sc in 3rd ch-1 sp of next fan, ch 3, sc in 4th ch-1 sp, ch 3, dc in next sc; rep from * 5 more times, turn. (8 dc, 14 sc, 21 ch-3 loops)
Row 8: Ch 1, sc in first dc. *3 sc in next ch-3 loop, 2 sc in next ch-3 loop, 3 sc in next ch-3 loop, sc in next dc; rep from * 6 more times, turn. The last sc goes in the 3rd ch of the beginning ch-6. (1 + 7 x 9 = 64 sc)
Fasten off cream.
Peach scalloped rim:
Row 9: Join peach in first st, ch 1, sc in same st. *Sk next st, hdc in next st, dc in next st, 2 dc in next st, 2 dc in next st, dc in next st, hdc in next st, sk next st, sc in next st; rep from * 6 more times, turn. (64 sts: 1 + 7 x 9)
Row 10: Ch 1, sc in each st across. (64 sc)
Fasten off and leave a 24 in (61.0 cm) tail. Each scallop in Row 9 sits right over one cream fan, because both rows use the same 9-st repeat.
Checkpoint: about 3.1 in (7.9 cm) tall at the scallop peaks. The top edge flares a little, and that flare gives the pocket its open, curved front.
Tab
Make 1 in peach.
Row 1: Ch 9, sc in 2nd ch from hook and in each ch across, turn. (8 sc)
Rows 2–20: Ch 1, sc blo in each st across, turn. (8 sc)
Fasten off and leave a 20 in (50.8 cm) tail. The tab measures 2 in x 4.4 in (5.1 cm x 11.2 cm).
Make All Pieces
- Peach: 1 back panel, 3 pocket bases, 1 tab, plus Rows 1–4 and 9–10 of all 3 walls
- Cream: Rows 5–8 of all 3 walls
Layout (front view, top to bottom):
        [ ring ]
        [ tab  ]
 ( rounded panel top )
 |  [ POCKET 3 ]  |   Rows 58–71
 |                |
 |  [ POCKET 2 ]  |   Rows 31–44
 |                |
 |  [ POCKET 1 ]  |   Rows 4–17
 |________________|
Joining
Use whipstitch and the matching yarn tail throughout.
1. Wall to base (stitch to stitch). Hold the foundation edge of a wall against three edges of a base. These are one side edge, the front edge, and the other side edge.
- Wall sts 1–17 go to the 17 row ends of the first side.
- Wall sts 18–40 go to the 23 front sts.
- Wall sts 41–57 go to the 17 row ends of the second side.
That’s 17 + 23 + 17 = 57, a perfect match. The base’s back edge stays open. Gently ease the corners so they curve rather than form sharp points.
2. Base to panel. Line up the base’s back edge with the panel row marked for that pocket, with the wall facing outward. Sew the 23 back-edge sts to the panel’s 24 sts. The 12th (center) base stitch catches 2 panel sts, and every other stitch matches 1 to 1.
3. Wall ends to panel. Sew each short end of the wall straight up the panel, along stitch column 1 on one side and column 24 on the other. The wall rows don’t match panel rows 1 to 1, so use this ratio:
- Rows 1–5: 1 panel row each (5 rows)
- Row 6: 3 panel rows
- Row 7: 2 panel rows
- Row 8: 1 panel row
- Row 9: 2 panel rows
- Row 10: 1 panel row
That totals 14 panel rows, so Pocket 1 covers Rows 4–17, Pocket 2 covers Rows 31–44, and Pocket 3 covers Rows 58–71.
Tension: Make each stitch snug but not puckered, so the panel stays flat behind the pocket. Don’t pull the cream rows tight, or the fans will close up.
Size checkpoint: The panel should still measure 6 in x 20 in (15.2 cm x 50.8 cm). Each pocket should stand out about 3.8 in (9.7 cm) from the panel.
Border
Use peach. Border gauge is the same as the body: 4 sc per inch along the stitch edges, and 8 sc per 9 row ends along the sides.
Round 1: Join peach in the first bottom st (Row 1, right-hand corner) and work around the panel.
- Bottom edge: 3 sc in first st, sc in next 22 sts, 3 sc in last st. (28 sc)
- Side edge: Work 8 sc in every 9 row ends, which means skipping every 9th row end. 90 row ends ÷ 9 = 10 sets, so 10 x 8 = 80 sc.
- Top edge: 2 sc in first st, sc in next 14 sts, 2 sc in last st. (18 sc)
- Second side edge: Same as the first. (80 sc)
Sl st to the first sc to join. (28 + 80 + 18 + 80 = 206 sc)
Round 2: Ch 1, reverse sc (crab stitch) in each st around, then sl st to the first st. (206 sts)
Fasten off.
Why the math works: The panel is 90 rows ÷ 4.5 rows per inch = 20 in tall. 80 side sc ÷ 4 sc per inch also equals 20 in, so the sides lie flat. On the bottom, the 3-sc corners turn a square 90 degrees. On the rounded top, the 2-sc corners add just enough to follow the curve. The two rounds add about 0.5 in (1.3 cm) per side, so the 6 in x 20 in panel becomes 7 in x 21 in (17.8 cm x 53.3 cm).
Attach the tab: Fold the tab around the wooden ring. Center it on the top edge with 5 border sts free on each side. Sew 1 in (2.5 cm) of one end to the front of the panel and 1 in (2.5 cm) of the other end to the back. About 1.2 in (3.0 cm) of tab loop shows above the panel.
Final Blocking
- Spray the whole holder until it’s evenly damp. Don’t soak it.
- Lay it face up on the blocking mat.
- Pin the panel to 7 in x 21 in (17.8 cm x 53.3 cm), keeping the sides straight.
- Stuff each pocket lightly with a rolled towel or a spare roll so the front curves evenly.
- Pin each peach scallop peak into a smooth curve, and open each cream fan with your fingers.
- Let it dry completely, usually 12-24 hours.
- Remove the pins and fillers, then hang it up.
Final Quality-Control Checklist
- Panel measures 7 in x 21 in (17.8 cm x 53.3 cm)
- Border Round 1 count is 206 sts, and all corners lie flat
- All 3 pockets are centered, level, and 27 rows apart
- Each wall shows 7 fans, 7 arches, and 7 peach scallops
- The base corners curve smoothly, with no gaps at the seams
- All tails are woven in on the back
- The tab is sewn securely through both layers, and the ring turns freely
Troubleshooting
- Fans look crowded: Your tension is too tight on Row 6. Rework it with looser ch-1 spaces, or go up 0.5 mm for the cream rows only.
- Wall is shorter than the base edge: Check Row 1 for 57 sts. A short foundation chain is the most common cause.
- Panel sides ripple after the border: You worked too many sc. Make sure you skip every 9th row end.
- Panel sides pull in: You worked too few sc. Count 80 per side.
- Pockets sag forward: Add a second line of whipstitch along the base’s back edge.
- Scallops don’t line up with the fans: Row 8 must total 64 sc before you start Row 9.
Care
Hand wash in cool water with mild soap, then gently press out the water. Reshape and dry flat. Remove the wooden ring before washing.
Final Notes
Everything comes back to one measurement chain. The 16 sc x 18 rows = 4 in (10.2 cm) gauge gives you a 23-st base 5.75 in (14.6 cm) wide. That base fits a 57-st wall exactly (17 + 23 + 17). The 24-st panel is 6 in (15.2 cm) wide and 90 rows (20 in / 50.8 cm) tall. Its 80-st border sides keep it flat, and the finished holder measures 7 in x 21 in (17.8 cm x 53.3 cm). If you check each number as you go, your three lacy pockets will line up and hang straight.
Happy crocheting!