

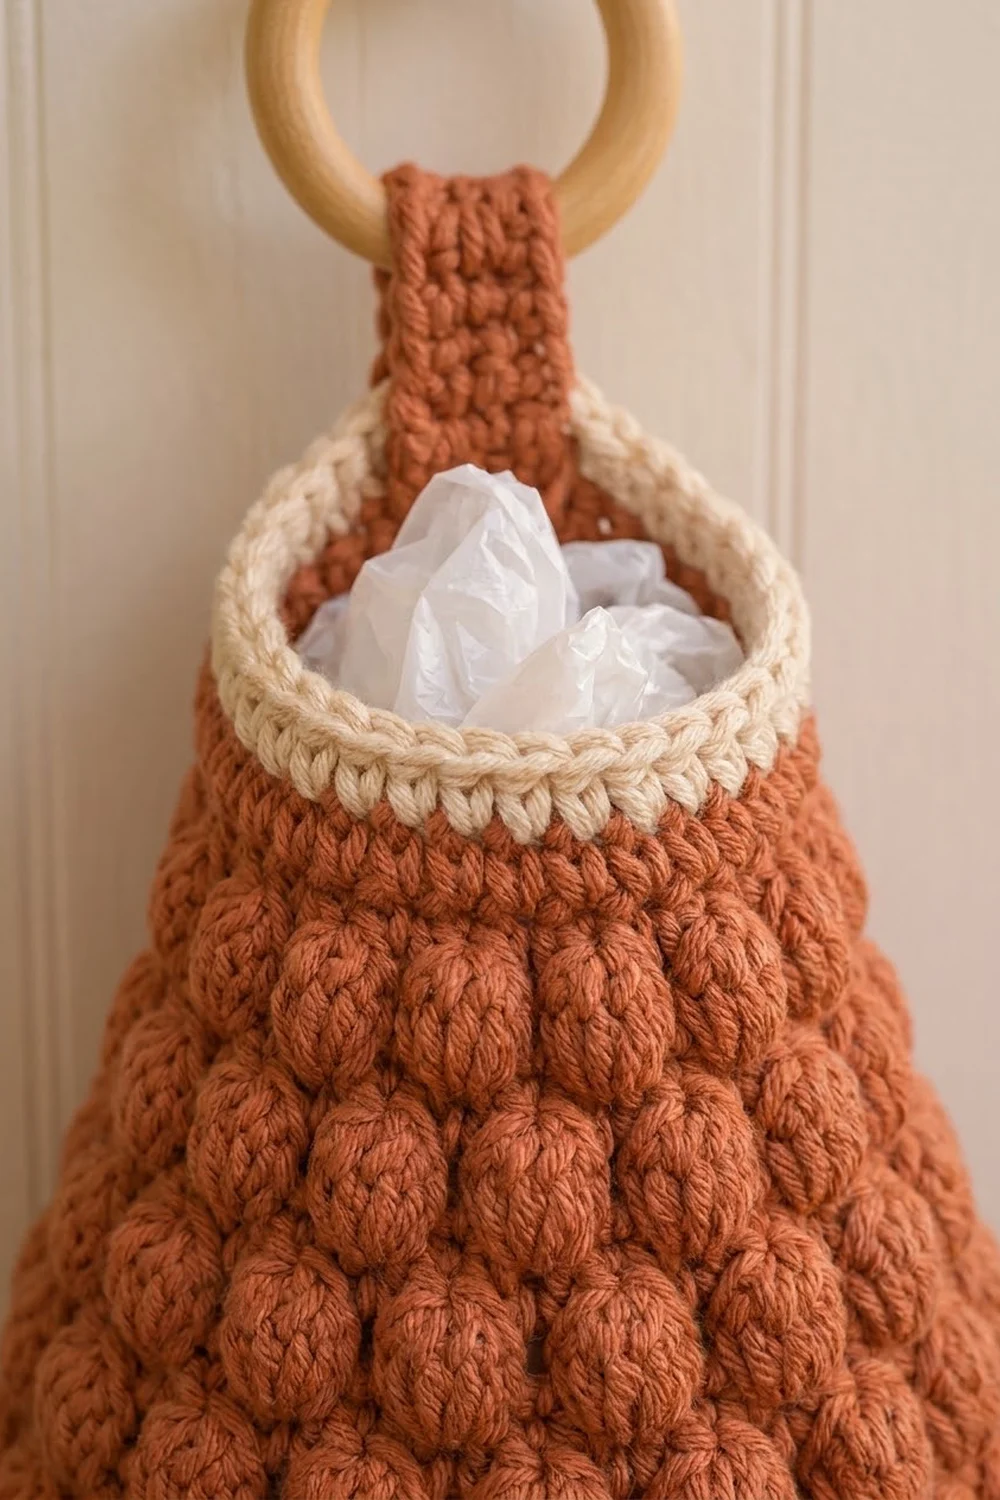
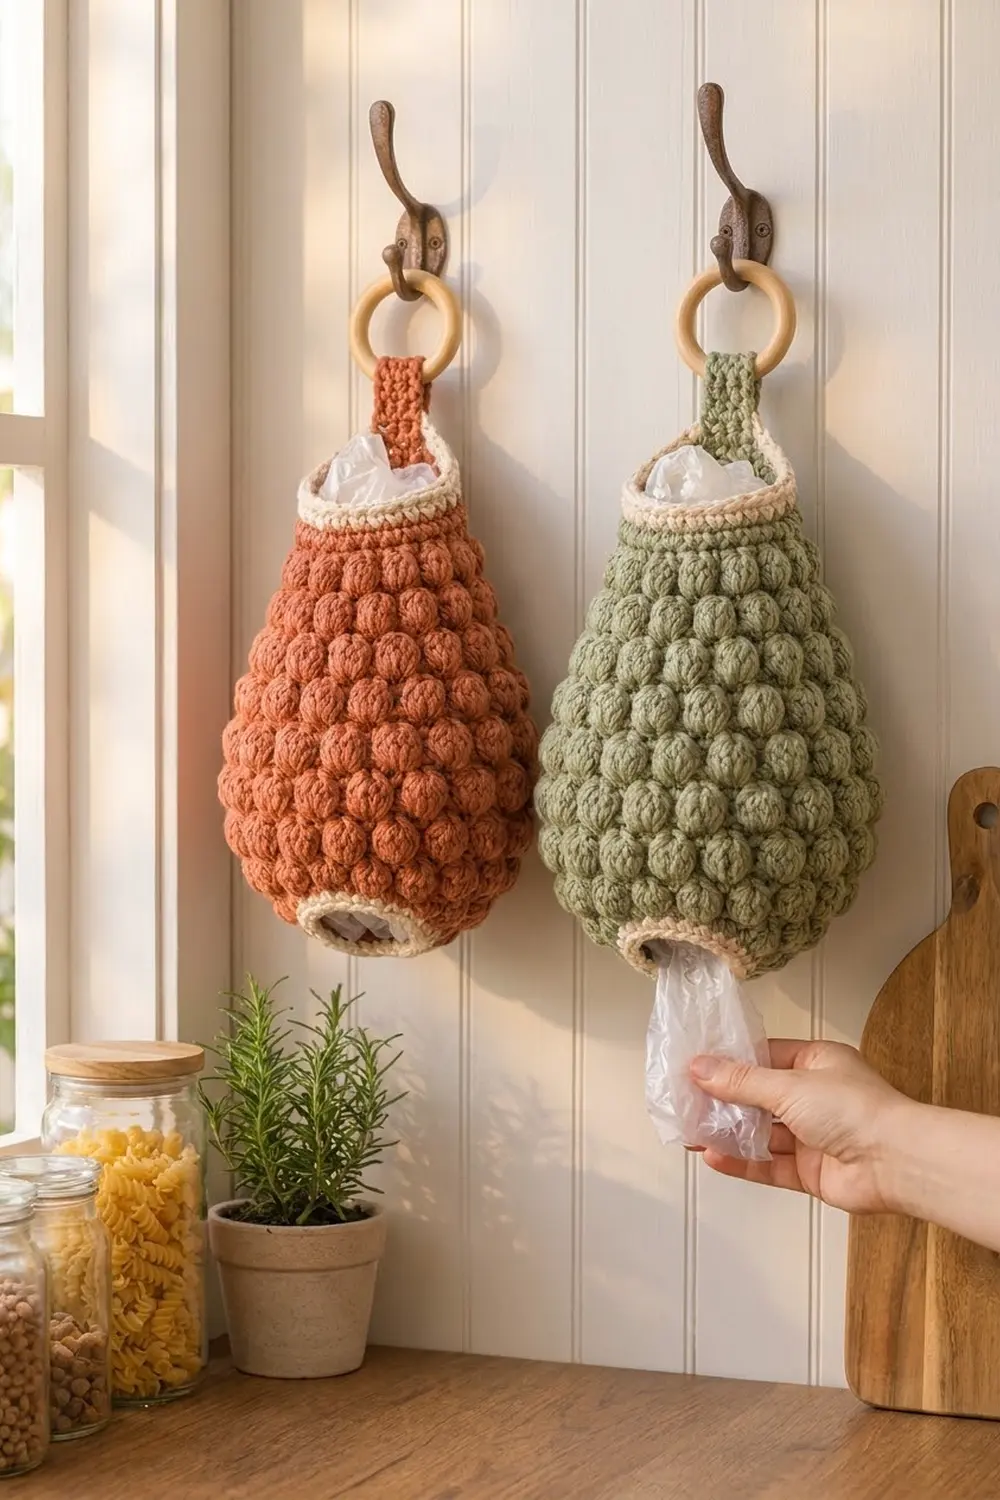
This teardrop bag holder hangs from a wooden ring and keeps grocery bags off your counter. You push bags in at the top and pull them out one at a time through the small opening at the bottom. The terracotta body is covered in rounded puff stitches, and the cream bands at both openings give it a neat finish.
The style suits a warm farmhouse kitchen. Terracotta and cream look earthy and soft, and a sage green body with the same cream trim works just as well if you want a second holder.
This pattern uses US crochet terms. The finished holder is 12.25 in (31.1 cm) tall and 8 in (20.3 cm) wide when flattened at its widest point. Including the strap and ring, it hangs about 18.25 in (46.4 cm) long.
You work the body in joined rounds from the bottom up. Puff rounds alternate with single crochet rounds, and you shape the body by increasing and decreasing only in the single crochet rounds. Then you add a cream band at the top, a cream band at the bottom (worked into the foundation chain), and a short strap that wraps around the ring.
Finished Size and Construction
- Finished size: 12.25 in (31.1 cm) tall × 8 in (20.3 cm) wide, flattened
- Hanging length with strap and ring: about 18.25 in (46.4 cm)
- Skill level: Easy / advanced beginner
- Terminology: US
- Yarn weight: Worsted (#4)
- Hook: 5.0 mm (H-8)
- Number of pieces: 1 (the body is worked in the round, and the strap is worked straight off it)
- Layout: One hanging teardrop tube with an opening at each end
- Piece size before trim: 10.5 in (26.7 cm) tall, 16 in (40.6 cm) around at the widest point
- Size before border: 10.5 in (26.7 cm) tall
- Border depth: Top band 1 in (2.5 cm); bottom band 0.75 in (1.9 cm)
Materials
Use a worsted-weight cotton or cotton blend. Cotton holds the teardrop shape, shows the puffs clearly, and won’t stretch out when the holder is full. The quantities below assume a yarn of about 170 m per 100 g.
- Terracotta (main color): 100 g / 170 m
- Cream (trim): 15 g / 26 m
Both quantities include a safety margin of roughly 25%.
Tools:
- 5.0 mm (H-8) crochet hook
- Wooden ring, 2 in (5.1 cm) outer diameter
- Stitch marker
- Tapestry needle
- Scissors
- Measuring tape
- Old towel or a bundle of plastic bags for blocking
Abbreviations (US Terms)
- ch – chain
- sl st – slip stitch
- sc – single crochet
- 2 sc – work 2 single crochet in the same stitch (increase)
- sc2tog – single crochet 2 together (decrease)
- st(s) – stitch(es)
- rnd(s) – round(s)
- puff – puff stitch (see below)
Puff stitch: Yarn over, insert the hook into the stitch, yarn over and pull up a loop to about 0.5 in (1.3 cm). Repeat from * to * 3 more times, so you have 9 loops on the hook. Yarn over, pull through all 9 loops, then ch 1 to close.
The closing ch 1 is the top of the puff. It counts as part of that 1 stitch, not as an extra stitch. On the next round, work 1 st into that closing chain.
Gauge and Checkpoints
Gauge: 16 sts = 4 in (10.2 cm). 8 pattern rounds = 3 in (7.6 cm), which means each round adds about 0.375 in (1.0 cm). In the cream sc bands, 4 rounds = 1 in (2.5 cm).
Test piece: Use Rounds 1–8 as your gauge test. They show your puff tension and your circumference before you commit to the whole body.
Checkpoints:
- After Rnd 1: 28 sts, 7 in (17.8 cm) around
- After Rnd 8: 64 sts, 16 in (40.6 cm) around, about 3 in (7.6 cm) tall
- After Rnd 16: about 6 in (15.2 cm) tall, still 16 in (40.6 cm) around
- After Rnd 28: 40 sts, 10 in (25.4 cm) around, 10.5 in (26.7 cm) tall
- After the top band: 11.5 in (29.2 cm) tall
- After the bottom band: 12.25 in (31.1 cm) tall
If your piece is too big: Go down to a 4.5 mm (7) hook. Also check that you’re pulling the puff loops up to 0.5 in (1.3 cm) and not taller.
If your piece is too small: Go up to a 5.5 mm (I-9) hook.
A difference of up to 0.5 in (1.3 cm) in height is fine. The holder still works.
Body
Work in joined rounds. Start every round with ch 1, which does not count as a stitch, and join each round with a sl st to the first st. The joins line up in one column, and that column becomes the back of the holder.
The puff rounds are the even-numbered rounds. Their starting stitch alternates:
- Rnds 2, 6, 10, 14, 18, 22, and 26 start with a puff: puff, sc.
- Rnds 4, 8, 12, 16, 20, 24, and 28 start with a sc: sc, puff.
This alternation offsets the bobbles from one puff round to the next, so they stack like the rows in the photo.
Foundation and Lower Shaping
With terracotta, ch 28. Sl st to the first ch to form a ring, taking care not to twist the chain.
Rnd 1: Ch 1, sc in each ch around, working into the back bump only. Join. (28 sts)
Working into the back bump keeps both front loops of the chain free for the bottom band later.
Rnd 2 (puff): Ch 1, puff in next st, sc in next st; repeat from * around. Join. (28 sts: 14 puffs + 14 sc)
Rnd 3 (increase): Ch 1, sc in next st, 2 sc in next st; repeat from * around. Join. (42 sts)
Rnd 4 (puff): Ch 1, sc in next st, puff in next st; repeat from * around. Join. (42 sts: 21 puffs + 21 sc)
Rnd 5 (increase): Ch 1, sc in next 2 sts, 2 sc in next st; repeat from * around. Join. (56 sts)
Rnd 6 (puff): Ch 1, puff in next st, sc in next st; repeat from * around. Join. (56 sts: 28 puffs)
Rnd 7 (increase): Ch 1, sc in next 6 sts, 2 sc in next st; repeat from * around. Join. (64 sts)
Rnd 8 (puff): Ch 1, sc in next st, puff in next st; repeat from * around. Join. (64 sts: 32 puffs)
Measure now: you should have 16 in (40.6 cm) around and about 3 in (7.6 cm) of height. This quick increase is what gives the base its rounded teardrop shape.
Straight Section
Rnd 9: Ch 1, sc in each st around. Join. (64 sts)
Rnd 10: Work as Rnd 2. (64 sts: 32 puffs)
Rnd 11: Work as Rnd 9. (64 sts)
Rnd 12: Work as Rnd 8. (64 sts: 32 puffs)
Rnds 13–17: Repeat Rnds 9–12 once more, then work Rnd 9 once. (64 sts each round)
That means Rnd 14 starts with a puff, Rnd 16 starts with a sc, and Rnds 13, 15, and 17 are plain sc rounds.
Measure now: the body should be about 6.4 in (16.3 cm) tall, which is the 6 in (15.2 cm) Rnd 16 checkpoint plus one more round.
Upper Shaping
Rnd 18 (puff): Ch 1, puff, sc; repeat around. Join. (64 sts: 32 puffs)
Rnd 19 (decrease): Ch 1, sc in next 6 sts, sc2tog; repeat from * around. Join. (56 sts)
Rnd 20 (puff): Ch 1, sc, puff; repeat around. Join. (56 sts: 28 puffs)
Rnd 21: Ch 1, sc in each st around. Join. (56 sts)
Rnd 22 (puff): Ch 1, puff, sc; repeat around. Join. (56 sts: 28 puffs)
Rnd 23 (decrease): Ch 1, sc in next 5 sts, sc2tog; repeat from * around. Join. (48 sts)
Rnd 24 (puff): Ch 1, sc, puff; repeat around. Join. (48 sts: 24 puffs)
Rnd 25: Ch 1, sc in each st around. Join. (48 sts)
Rnd 26 (puff): Ch 1, puff, sc; repeat around. Join. (48 sts: 24 puffs)
Rnd 27 (decrease): Ch 1, sc in next 4 sts, sc2tog; repeat from * around. Join. (40 sts)
Rnd 28 (puff): Ch 1, sc, puff; repeat around. Join. (40 sts: 20 puffs)
Fasten off terracotta. The body should be 10.5 in (26.7 cm) tall and 10 in (25.4 cm) around at the top.
The decreases are spread more slowly than the increases (8 per round, every 4 rounds). That gives the upper body its long, gentle taper.
Border
The border is made of two cream sc bands, one at each opening. Border gauge: 16 sc = 4 in (10.2 cm), and 4 rounds = 1 in (2.5 cm).
These are round openings, so they have no corners. “Per side” here means each half of the holder when it is flattened with the join column at center back.
Top Band
Join cream with a sl st in the first st of Rnd 28.
Rnds 1–4: Ch 1, sc in each st around, working into the closing ch of each puff. Join. (40 sts each round, which is 20 per flattened side)
Fasten off and weave in the ends.
Bottom Band
Turn the holder upside down. Join cream in a free loop of the foundation chain at the join column.
Rnds 1–3: Ch 1, sc in each st around. On Rnd 1, work into the free loops of the chain. Join each round. (28 sts each round, which is 14 per flattened side)
Fasten off and weave in the ends.
Why the math works: Each band has exactly 1 sc per stitch in the edge below it.
- Top: 40 sts ÷ 4 sts per inch = 10 in (25.4 cm) around, the same as Rnd 28.
- Bottom: 28 sts ÷ 4 sts per inch = 7 in (17.8 cm) around, the same as Rnd 1.
Because the counts match, nothing is added or skipped, and the bands lie flat without ruffling or pulling in. The bottom band’s firm 3.5 in (8.9 cm) flattened width lets you pull one bag out at a time without the rest falling out.
Strap
Flatten the holder so the join column is centered at the back. With terracotta, join in the 3rd st to the right of the join column on the last round of the top band.
Row 1: Ch 1, sc in the same st and in the next 4 sts. (5 sts)
Rows 2–24: Ch 1, turn, sc in each st across. (5 sts each row)
The strap is 1.25 in (3.2 cm) wide and 6 in (15.2 cm) long.
To attach the ring:
- Pass the end of the strap through the wooden ring from front to back.
- Fold the last 1.5 in (3.8 cm) of the strap down behind itself.
- Whipstitch Row 24 across the back of the strap.
About 4 in (10.2 cm) of strap remains visible between the rim and the ring.
Final Blocking
- Weave in all ends along the inside of the stitches, then trim them.
- Soak the holder in cool water for 10 minutes. Press out the water gently. Don’t wring it.
- Roll it in a towel to remove the extra water.
- Stuff the holder firmly with a dry towel or a bundle of plastic bags to shape the teardrop. Make the widest point 8 in (20.3 cm) across when flattened.
- Pinch the top band evenly to 5 in (12.7 cm) wide and the bottom band to 3.5 in (8.9 cm) wide.
- Hang it by the ring, or lay it on its back, and let it dry completely.
- Remove the stuffing and check the measurements again.
Final Quality-Control Checklist
- [ ] Height is 12.25 in (31.1 cm), within 0.5 in (1.3 cm)
- [ ] Widest point is 8 in (20.3 cm) when flattened
- [ ] Top band is 40 sts and lies flat
- [ ] Bottom band is 28 sts and holds its round shape
- [ ] Puffs alternate cleanly from one puff round to the next
- [ ] The join column runs straight up the back
- [ ] The strap is centered over the join column
- [ ] The ring is stitched securely, with no gaps in the whipstitching
- [ ] All ends are woven in and invisible from the outside
Troubleshooting
The puffs look flat or uneven. Pull all 4 loops up to the same height, about 0.5 in (1.3 cm), and always close each puff with the ch 1.
The stitch count is off after a puff round. You probably worked into the ch-1 eye beside a puff or skipped a puff top. Remember that each puff is 1 st and its top is the closing chain.
The joins drift to one side. Make sure the ch 1 at the start of each round doesn’t count as a stitch, and that your first stitch goes into the same st as the join.
The holder flares at the top. Your top band tension is looser than the body. Go down half a hook size for the cream rounds.
The bags fall out of the bottom. Add a 4th round to the bottom band, working sc2tog twice evenly spaced, for 26 sts.
The strap stretches over time. Work a sl st down each long edge of the strap for extra firmness.
Care
Hand wash in cool water, press out the water gently, and reshape it while damp. Lay flat or hang to dry, and keep it away from direct heat.
Final Notes
Each stage of this pattern sets up the next. The 28-st foundation, at 4 sts per inch, gives a 7 in (17.8 cm) bottom opening. The increases take the body to 64 sts, which is 16 in (40.6 cm) around and 8 in (20.3 cm) flat. Twenty-eight rounds build 10.5 in (26.7 cm) of puff texture, and the decreases bring the top to 40 sts, or 10 in (25.4 cm) around.
The cream bands match those edges stitch for stitch. They add 1 in (2.5 cm) at the top and 0.75 in (1.9 cm) at the bottom, for 12.25 in (31.1 cm) in total. The strap and ring add about 6 in (15.2 cm) more of hanging length.
If you hit every checkpoint, the finished holder will match the plan. Happy crocheting!