

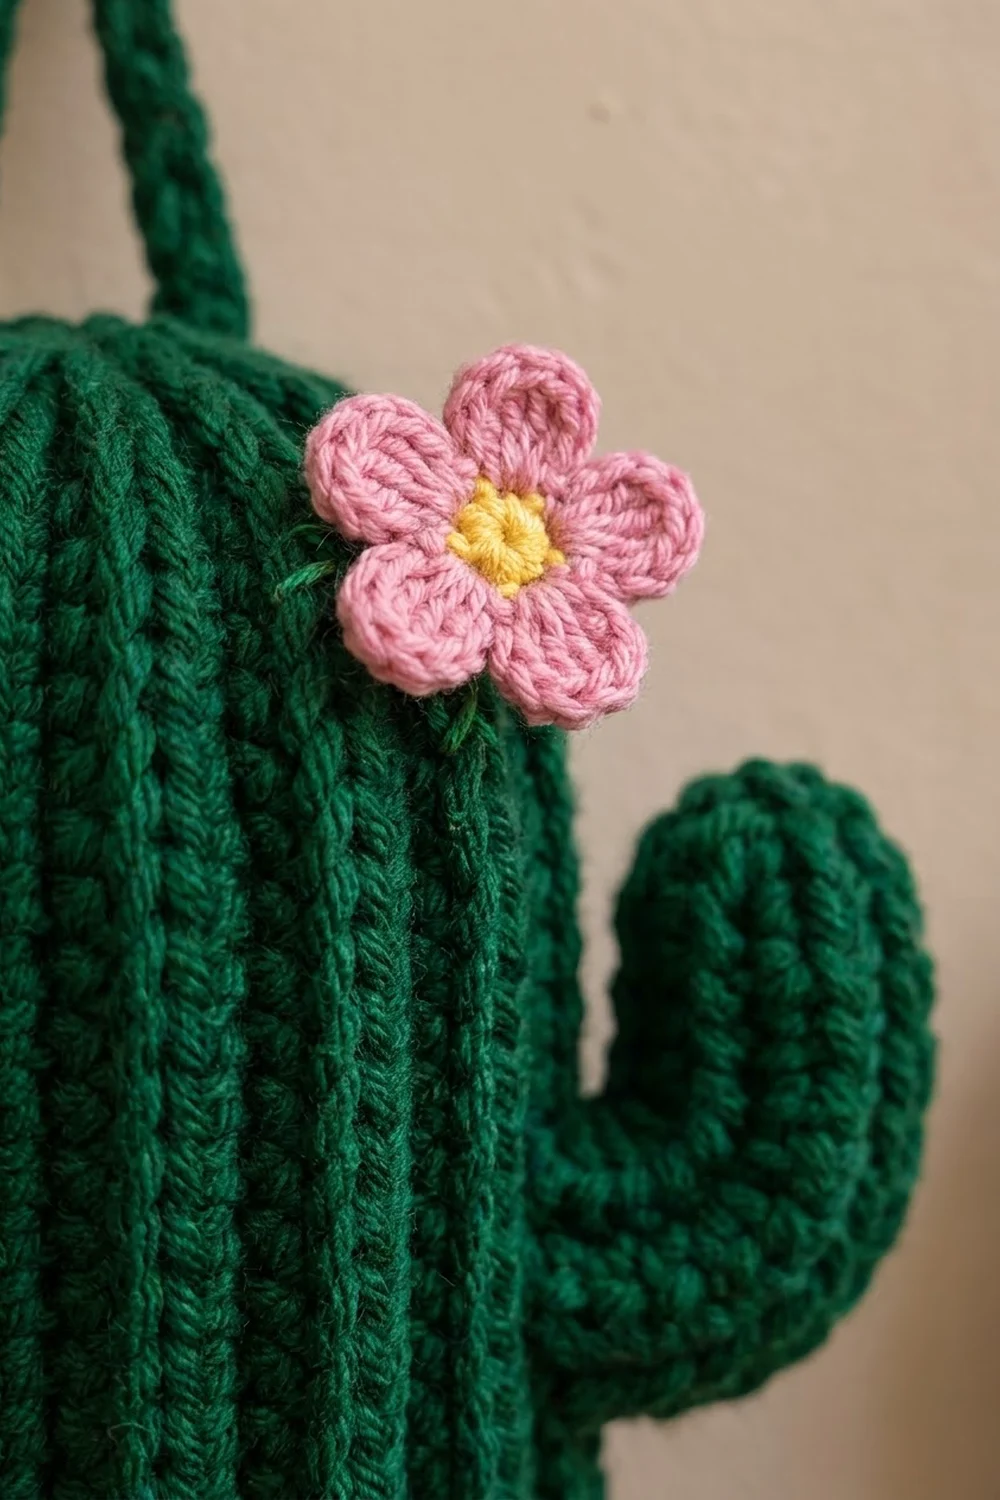
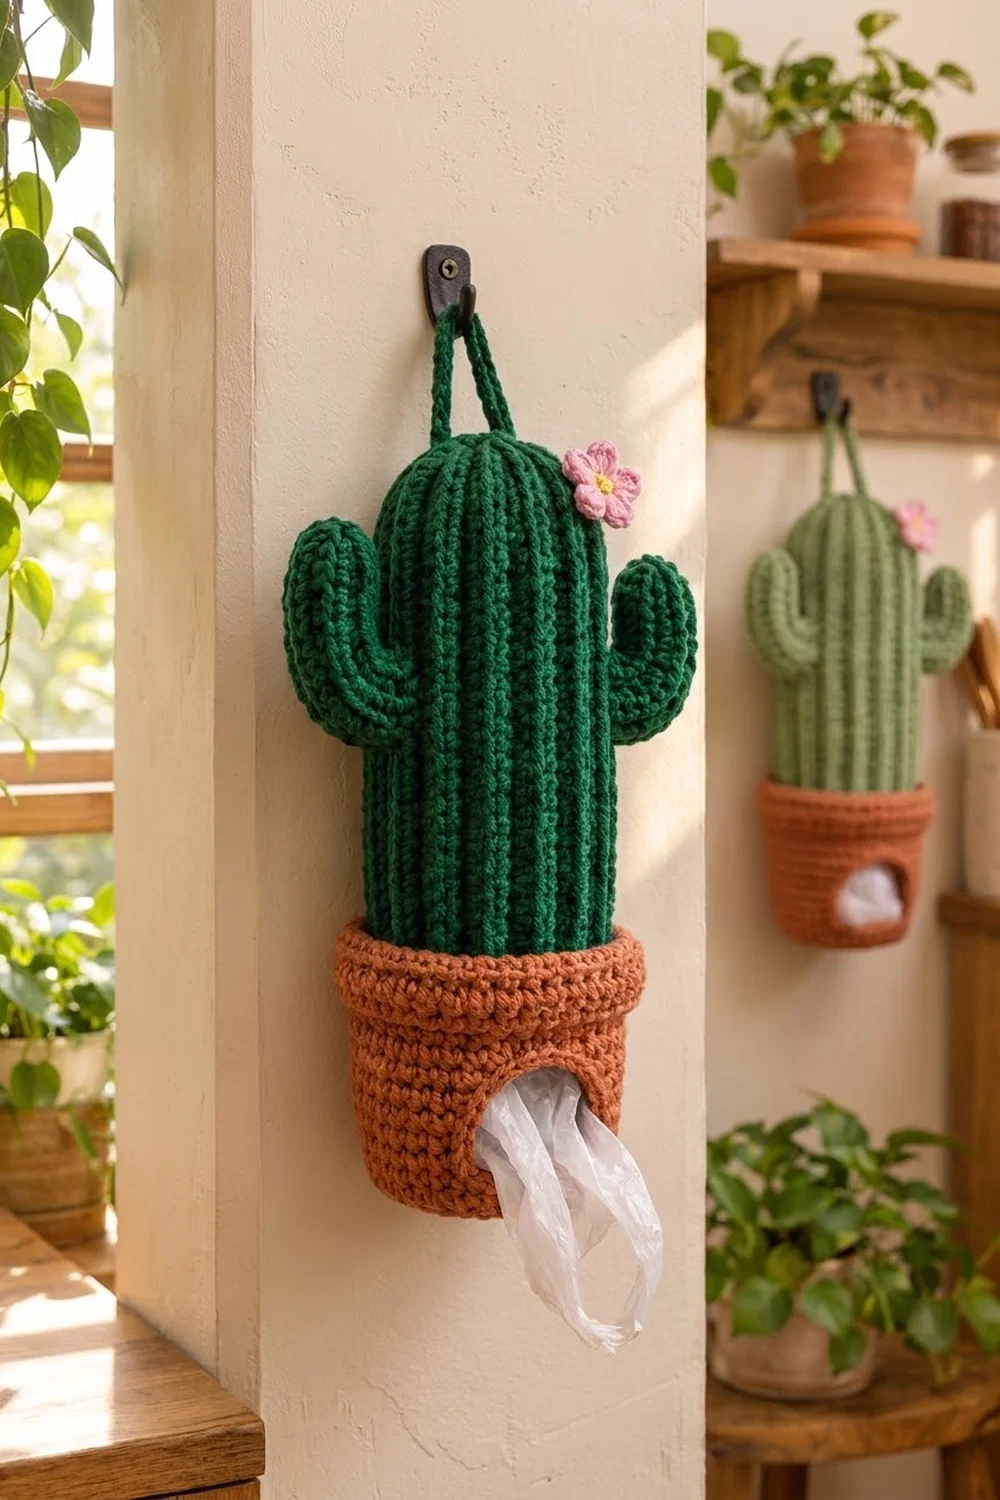
Plastic bags pile up fast. This hanging holder keeps them in one place and looks like a potted cactus on your kitchen wall. A deep forest-green ribbed cactus with two curved arms sits in a terracotta pot. A small pink flower with a yellow center sits on its shoulder.
The cactus body is a hollow ribbed tube with front and back post stitches, so the ribs run straight up and down like a real saguaro. The pot is plain single crochet with a raised rim and a rounded opening at the front. You stuff bags in through that opening and pull them out one at a time.
The pattern uses US crochet terms. The finished holder measures about 19 in (48.3 cm) tall without the hanging loop and about 10 in (25.4 cm) wide across the arms. The loop adds about 3.5 in (8.9 cm).
You make one pot, one cactus body, two arms, one flower, and one strap, then sew them together into a single holder. Everything except the strap and the opening rows is worked in rounds.
Finished Size and Construction
- Finished size: 19 in (48.3 cm) tall, 10 in (25.4 cm) wide across arms
- Skill level: Intermediate (post stitches, working rows inside a round, assembly)
- Terminology: US
- Yarn weight: Worsted (#4)
- Hook: 5.0 mm (H-8)
- Number of pieces: 1 finished holder, assembled from 5 crocheted parts (pot, body, 2 arms, flower) plus a strap
- Layout: Ribbed body tucked 2 in (5.1 cm) into the pot, arms on the sides, strap at the top
- Pot size: 6 in (15.2 cm) tall, 16 in (40.6 cm) around at the top of the wall
- Pot before rim: 5 in (12.7 cm) tall
- Rim depth: 1 in (2.5 cm), 4 rounds
Materials
Pick a smooth worsted yarn in acrylic or a cotton blend. Cotton holds its shape well, and acrylic is lighter and easier to wash. Avoid fuzzy yarn because it hides the ribs.
- Forest green (body, arms, strap): 120 g / 220 m
- Terracotta (pot): 90 g / 165 m
- Pink (flower): 5 g / 9 m
- Yellow (flower center): 2 g / 4 m, or one 8 mm yellow button
These amounts include a margin of about 10%.
Tools
– 5.0 mm (H-8) hook
– 4 stitch markers
– Tapestry needle
– Small handful of fiberfill for the arms
– Scissors
– Sewing pins
– Wall hook
Abbreviations (US Terms)
- ch – chain
- sl st – slip stitch
- sc – single crochet
- dc – double crochet
- sc2tog – single crochet 2 together
- FLO / BLO – front loop only / back loop only
- MR – magic ring
- st(s) – stitch(es)
- fpdc – front post double crochet: yarn over, insert hook from front to back to front around the post of the stitch, complete as a dc.
- bpdc – back post double crochet: yarn over, insert hook from back to front to back around the post, complete as a dc.
Gauge and Checkpoints
- Single crochet: 14 sts x 16 rounds = 4 in (10.2 cm)
- Rib pattern (in the round): 16 sts x 8 rounds = 4 in (10.2 cm)
Make the pot base first and use it as your test piece. After Round 8 it should measure 4.4 in (11.2 cm) across.
Checkpoints
– Pot base after Rnd 8: 4.4 in (11.2 cm) across
– Pot after Rnd 28: wall 5 in (12.7 cm) tall
– Pot after rim: 6 in (15.2 cm) tall
– Body after Rnd 20: 7 in (17.8 cm) long, 6 in (15.2 cm) wide flat
– Finished body: 15 in (38.1 cm) long
– Arm: 5.5 in (14.0 cm) long, 1.7 in (4.3 cm) wide flat
If your pieces come out too big, go down half a hook size. If they come out too small, go up half a size. Measure the rib separately, because post stitches pull in more than you expect.
Pot
Use terracotta. Work in continuous rounds unless told otherwise, and move your marker up each round.
Rnd 1: 6 sc in MR. (6)
Rnd 2: 2 sc in each st. (12)
Rnd 3: sc 1, 2 sc in next 6 times. (18)
Rnd 4: sc 2, 2 sc in next 6 times. (24)
Rnd 5: sc 3, 2 sc in next 6 times. (30)
Rnd 6: sc 4, 2 sc in next 6 times. (36)
Rnd 7: sc 5, 2 sc in next 6 times. (42)
Rnd 8: sc 6, 2 sc in next 6 times. (48)
Checkpoint: 4.4 in (11.2 cm) across.
Rnd 9: sc BLO in each st. (48) This makes a crisp edge where the base turns into the wall.
Rnd 10: sc in each st. (48) Sl st in next st.
Front Opening Rows
Now work back and forth, leaving 14 sts unworked. Those 14 sts form the bottom of the opening.
Row 11 (RS): ch 1, sc in same st and next 33 sts, leaving last 14 sts unworked. Turn. (34)
Row 12 (WS): ch 1, sc 7, 2 sc in next 4 times, sc 2. Turn. (38)
Rows 13–17: ch 1, sc across. Turn. (38)
Row 18: ch 1, sc 8, 2 sc in next 4 times, sc 2. Turn. (42)
Rows 19–23: ch 1, sc across. Turn. (42) Row 23 ends on the RS.
Rnd 24: ch 14 to bridge the opening, then sc in first st of Row 23 and in each st across; sc in each of the 14 ch. (56) Return to continuous rounds.
The opening is now 14 sts wide (about 4 in / 10.2 cm) and 13 rows tall (about 3.25 in / 8.3 cm).
Rnds 25–28: sc in each st. (56)
Checkpoint: the wall is 20 rounds/rows, or 5 in (12.7 cm), and the top is 16 in (40.6 cm) around. The rim and opening edging follow in the Border section.
Cactus Body
Use forest green. Start at the top of the dome.
Rnds 1–8: work as Pot Rnds 1–8. (48)
Rnds 9–12: sc in each st. (48)
Checkpoint: the dome is 3 in (7.6 cm) deep from the center.
Rnd 13: ch 2 (does not count), dc in each st, sl st to first dc. (48)
Rnd 14: ch 2, fpdc around each of next 2 sts, bpdc around next st 16 times, sl st to first st. (48)
Rnds 15–36: ch 2, fpdc around each fpdc and bpdc around each bpdc, sl st to first st. (48)
This makes 16 raised double ribs around the tube, with 8 showing on the front. Checkpoint after Rnd 20: 7 in (17.8 cm) long. After Rnd 36, the body is 15 in (38.1 cm) long and 6 in (15.2 cm) wide when flat. Fasten off and leave the bottom open.
Arms (make 2)
Use forest green.
Rnd 1: 6 sc in MR. (6)
Rnd 2: 2 sc in each st. (12)
Rnds 3–22: sc in each st. (12)
Fasten off and leave a 16 in (40.6 cm) tail. Stuff the closed end lightly and leave the open end soft. Flatten the open end. Fold the arm about 2 in (5.1 cm) from the open end into a right angle, so 3.5 in (8.9 cm) points up. Sew 3 small stitches inside the bend to hold the elbow.
Flower
Rnd 1: With pink, 10 sc in MR, sl st to first sc. (10)
Rnd 2: (ch 2, 2 dc, ch 2, sl st) in next st, sl st in next st 5 times. (5 petals)
Fasten off. Make a yellow French knot in the center, or sew on a yellow button. The flower measures about 1.75 in (4.4 cm) across.
Strap
With forest green, ch 31.
Row 1: sc in 2nd ch from hook and across. Turn. (30)
Rows 2–3: ch 1, sc across. Turn. (30)
The strap is about 8.5 in (21.6 cm) long and 0.75 in (1.9 cm) wide.
Border: Pot Rim and Opening Edging
The border is single crochet at the same gauge: 14 sts = 4 in (10.2 cm).
Rim
Continue from Pot Rnd 28 with terracotta.
Rnd 29 (trim round): working in FLO, sc 13, 2 sc in next 4 times. (56 worked 1 per st + 4 added = 60)
Rnds 30–32: sc in each st. (60)
That gives 15 sts in each quarter, up from 14. Fasten off.
Why it works: The 4 evenly spaced increases flare the rim out about 0.5 in (1.3 cm) in total, so it stands out like a real pot lip and doesn’t ruffle. Working Rnd 29 in FLO leaves the back loops as a ridge under the ledge. At 3.5 sts per in, 60 sts measures 17.1 in (43.4 cm) around. The pot is now 6 in (15.2 cm) tall.
Opening Edging
Join terracotta at the bottom-left corner of the opening, with the RS facing.
Edging Rnd 1:
– Bottom: sc in each of the 14 unworked sts. (14)
– Right side: work 11 sc over the 13 row ends: sc in row ends 1–3, skip 4, sc in 5–9, skip 10, sc in 11–13. (11)
– Top: sc in each of the 14 ch. (14)
– Left side: repeat the right side. (11)
– Sl st to first sc. (50)
Edging Rnd 2:
– Bottom: sc 14. (14)
– Right side: sc 9, sc2tog. (10)
– Top: sc2tog, sc 10, sc2tog. (12)
– Left side: sc2tog, sc 9. (10)
– Sl st to first sc. (46)
Fasten off.
Why it works: A sc row end is 0.25 in (0.6 cm) tall, and a sc is 0.29 in (0.7 cm) wide. That means 13 row ends (3.25 in / 8.3 cm) take about 11 sc without flaring. The inner edge of the hole is shorter than the outer edge, so Rnd 2 decreases. All 4 decreases go at the top corners, which rounds the top into an arch and keeps the bottom straight. The finished opening is about 3 in (7.6 cm) wide and 2.25 in (5.7 cm) tall.
Assembly
- Pin the strap ends to the top of the dome, one at the front and one at the back, directly across from each other on Rnd 3. Sew the ends down firmly. The loop rises about 3.5 in (8.9 cm).
- Slide the open end of the body into the pot until body Rnd 32 lines up with the top of the rim (pot Rnd 32). That leaves Rnds 33–36, about 2 in (5.1 cm), inside the pot. The bottom of the body sits about 4 in (10.2 cm) above the pot base, so bags can fall freely to the opening.
- Whipstitch the rim to the body around the back half. Add one tack on each front side. The front stays a little loose so the pot keeps its round shape.
- Sew the flattened end of the left arm to the side of the body over Rnds 18–20. Sew the right arm over Rnds 20–22, so it sits slightly lower. The bends should point up and out.
- Sew the flower to the upper-right shoulder of the dome, around Rnds 10–12.
- Weave in all ends.
Final Blocking
- Lightly mist the finished holder with water, or hold a steam iron 1 in (2.5 cm) above it. Never press the ribs flat.
- Put a can about 4.5 in (11.4 cm) across inside the pot to round out the wall.
- Roll a towel and slide it up into the body, then pat the ribs into straight vertical lines.
- Shape the arm elbows to 90 degrees and flatten the petals.
- Let it dry completely, then take out the can and towel.
- Measure: 19 in (48.3 cm) tall, 10 in (25.4 cm) wide.
Final Quality-Control Checklist
- Pot base is 48 sts, and the BLO ridge goes all the way around
- Wall is 56 sts above the opening, and the rim is 60 sts
- Opening edging is 46 sts after Rnd 2, with a rounded top
- Body is 48 sts with 16 straight ribs
- Arms are the same length and firmly attached
- Strap is centered and secure enough to hold a full load of bags
- Flower center is secure
- All ends are woven in
Troubleshooting
- Ribs lean or twist: Join each rib round with a sl st instead of working in a spiral, and check the count every round.
- Pot flares like a bowl: You may have increased too often. Rows 12 and 18 are the only wall increases.
- Opening puckers: Check that you skipped row ends 4 and 10 on each side.
- Opening ruffles: Go down a hook size for the edging only.
- Body too wide for the pot: Post stitches vary. Use a smaller hook for Rnds 13–36.
- Arms flop: Add a bit more stuffing near the elbow and tack the bend again.
Care
Hand wash cool and lay flat to dry, reshaping the pot over a can. Spot-clean between washes.
Final Notes
Each measurement depends on the one before it. The base is 4.4 in (11.2 cm), the wall reaches 5 in (12.7 cm), and the rim brings the pot to 6 in (15.2 cm). The body is 15 in (38.1 cm), with 2 in (5.1 cm) tucked inside the pot. That makes the holder 19 in (48.3 cm) tall and 10 in (25.4 cm) wide across the arms. If each checkpoint matches, the finished cactus will too.
Happy crocheting!