

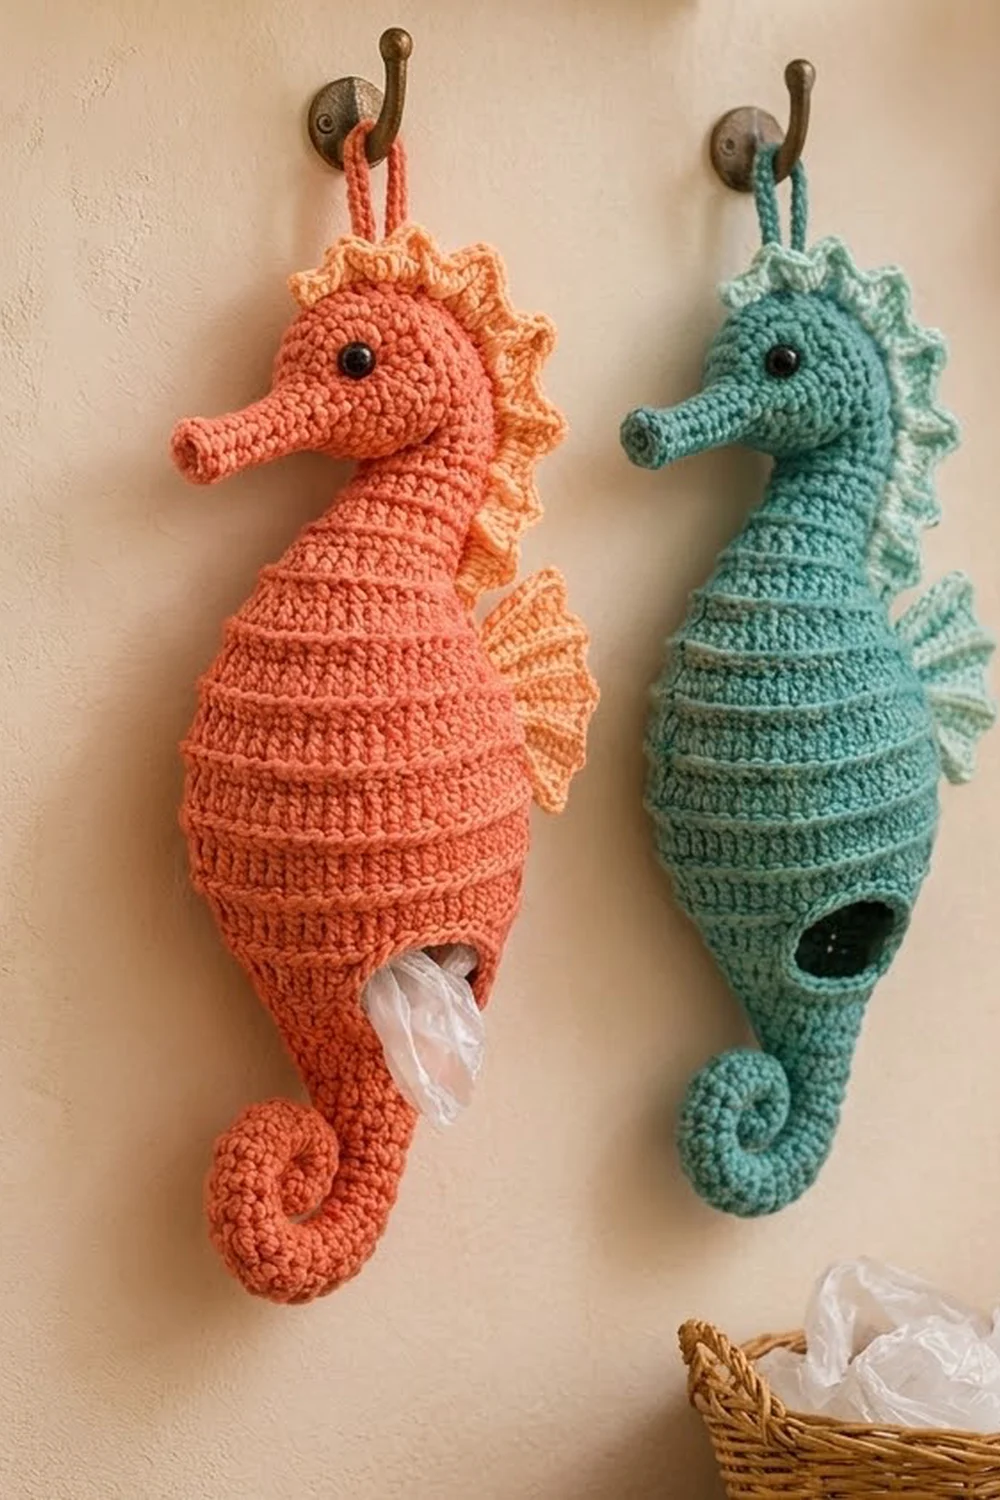
This seahorse is a grocery bag holder that also works as wall decor. The body is a coral egg shape with raised horizontal ridges. A soft oval opening low on the belly lets you pull bags out one at a time, and the tail below it curls forward into a tight spiral. A stuffed head with a long snout sits on top, a ruffled peach crest runs over the crown and down the back, and a ribbed peach fin fans out from the middle of the back.
Two colors are used: a warm coral for the body, head, snout, tail and hanging loop, and a soft peach for the crest and fin. The style is cheerful and coastal, and it fits a kitchen, laundry room or beach-themed entryway. All instructions use US crochet terms.
The finished seahorse is about 15.5 in (39.4 cm) tall without the hanging loop and about 8.5 in (21.6 cm) wide from snout tip to fin edge. Laid flat and empty, the body is about 6.9 in (17.5 cm) across at its widest point.
You will make six parts and sew them into one finished piece. The body and tail are worked as one piece from the top down in joined rounds. The head, snout, crest, fin and hanging loop are made separately and sewn on. You load bags through the belly opening and pull them out through the same opening.
Finished Size and Construction
- Finished size: about 15.5 in (39.4 cm) tall x 8.5 in (21.6 cm) wide, without the loop
- Skill level: Intermediate (back-loop ridges, front post stitches, shaping, assembly)
- Terminology: US crochet terms
- Yarn weight: Worsted (#4)
- Hook: 4.5 mm (US 7)
- Number of pieces: 6 parts (body/tail, head, snout, crest, fin, hanging loop) sewn into 1 seahorse
- Layout: one seahorse, hung from a hook by a loop on the back of the head
- Body size: 6.9 in (17.5 cm) wide flat x 10.5 in (26.7 cm) long, not counting the tail
- Size before edging: the belly opening is a 2.9 in (7.4 cm) horizontal slit
- Edging depth: 2 rounds of sc, about 0.5 in (1.3 cm) around the opening
Materials
Choose a smooth worsted-weight cotton or cotton-acrylic blend with good stitch definition, about 200 m per 100 g. Cotton shows the ridges best. Avoid fuzzy or very soft yarns, because the ridges blur and the body may sag when it’s full of bags.
- Coral (main color): 130 g / 260 m
- Peach (contrast color): 25 g / 50 m
These amounts include about 15% extra for a gauge swatch and differences in tension.
Tools and notions:
- 4.5 mm (US 7) crochet hook
- Two 10 mm black safety eyes
- About 20 g polyester fiberfill
- 4 locking stitch markers
- Tapestry needle
- Sewing pins
- Scissors
- Wall hook for hanging
Abbreviations (US Terms)
- ch – chain
- sl st – slip stitch
- sc – single crochet
- hdc – half double crochet
- dc – double crochet
- inc – 2 sts in the same st
- dec – decrease (sc2tog or hdc2tog, matching the stitch used in that round)
- MR – magic ring
- BLO – back loop only
- sk – skip
- st(s) – stitch(es)
- rnd(s) – round(s)
Special stitch – front post double crochet (fpdc): Yarn over and insert the hook around the post of the stitch, going in from the front, out the back and back to the front. Yarn over and pull up a loop, then (yarn over, pull through 2 loops) twice.
Ridge round: Work every st of the round in BLO. This leaves the front loops of the previous round unused, and they form a raised horizontal line on the right side.
Gauge and Checkpoints
- Body gauge: 14 hdc and 11 rnds = 4 in (10.2 cm)
- Detail gauge: 16 sc and 18 rnds = 4 in (10.2 cm)
Make the body first. It is the largest piece and sets the scale for everything else. Check these points as you go:
- After Rnd 3: the flat circle measures about 2.2 in (5.6 cm) across.
- After Rnd 10: the tube, pressed flat, measures about 6.9 in (17.5 cm) across.
- After Rnd 20: the body measures about 7.3 in (18.5 cm) from the top.
- After Rnd 29: the body measures about 10.5 in (26.7 cm) from the top.
If the body is too big, go down to a 4 mm (US G-6) hook. If it is too small, go up to a 5 mm (US H-8) hook. A slightly large body still holds bags well, but the head and snout will look small next to it, so match the gauge as closely as you can.
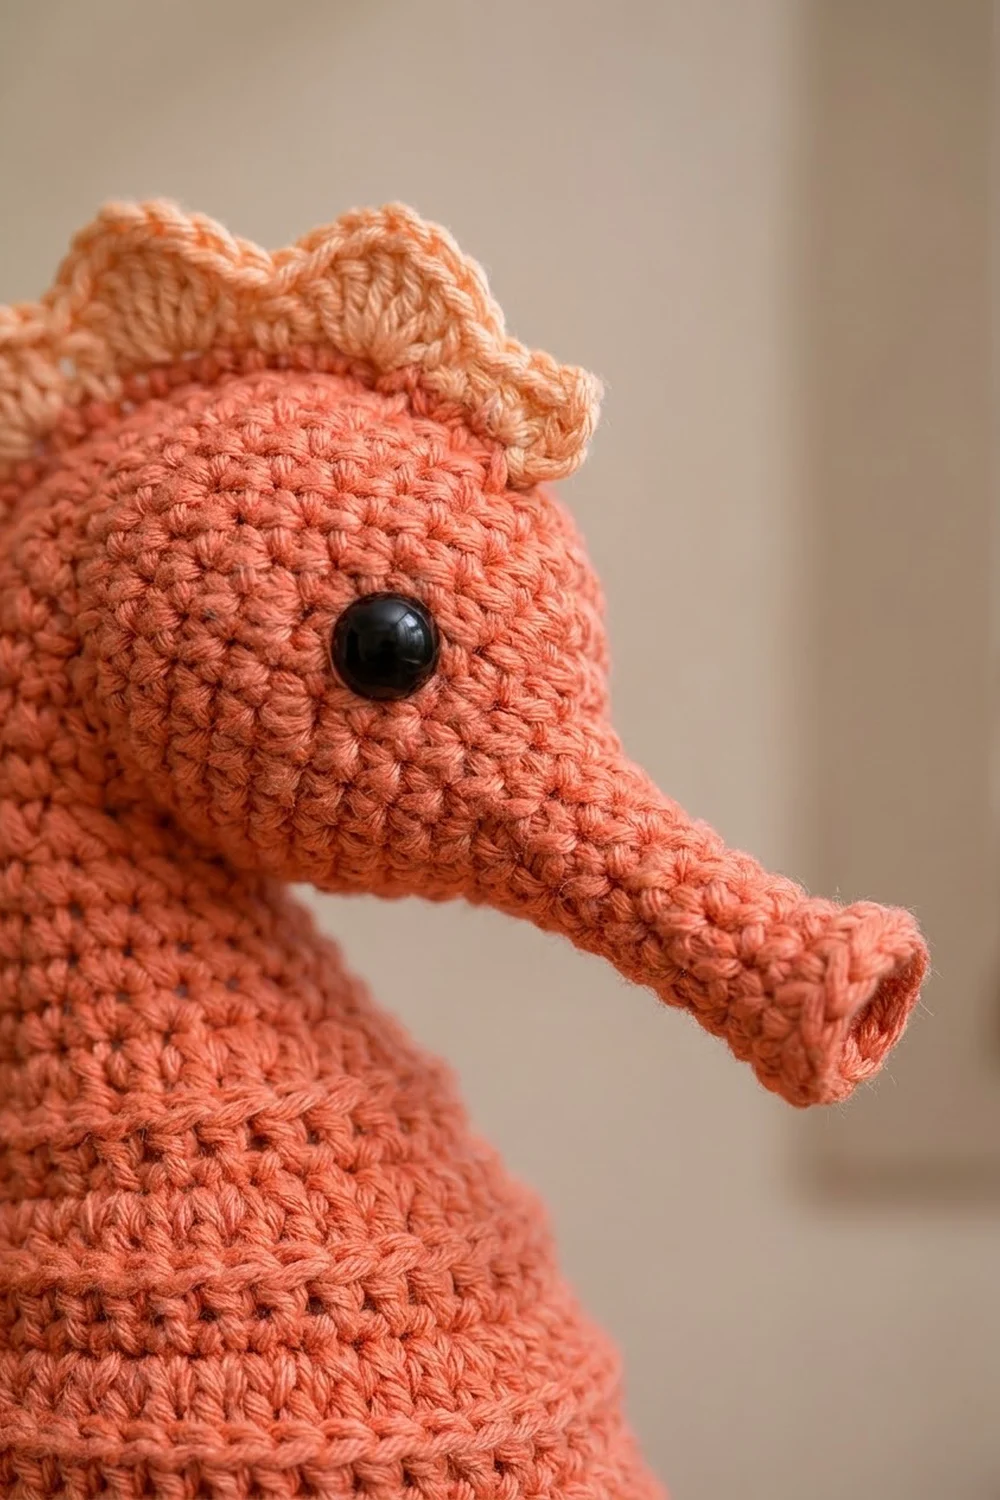
Body and Tail (Coral)
Work in joined rounds: at the end of each round, sl st to the first st, and start the next round with ch 1 (the ch 1 does not count as a stitch). The joins line up down the center back, and the belly opening ends up directly opposite them on the front. Mark the first st of every round.
Rnd 1: MR, ch 1, 8 hdc in ring, join. (8)
Rnd 2: 2 hdc in each st around. (16)
Rnd 3: (hdc 1, inc) 8 times. (24)
Rnd 4 (ridge): Hdc in each st around in BLO. (24)
Rnd 5: (hdc 2, inc) 8 times. (32)
Rnd 6: Hdc in each st around. (32)
Rnd 7 (ridge): In BLO, (hdc 3, inc) 8 times. (40)
Rnd 8: Hdc in each st around. (40)
Rnd 9: (hdc 4, inc) 8 times. (48)
Rnd 10 (ridge): Hdc in each st around in BLO. (48)
Rnds 11–12: Hdc in each st around. (48)
Rnd 13 (ridge): Hdc in each st around in BLO. (48)
Rnds 14–15: Hdc in each st around. (48)
Rnd 16 (ridge): Hdc in each st around in BLO. (48)
Rnds 17–18: Hdc in each st around. (48)
Rnd 19 (ridge): Hdc in each st around in BLO. (48)
Rnd 20: Hdc in each st around. (48)
Rnd 21 (opening): Hdc 19, ch 10, sk 10 sts, hdc 19. (38 hdc + 10 ch = 48)
Rnd 22 (ridge): Hdc in BLO of each hdc and in the top loop of each ch. (48)
The 10 skipped sts make a horizontal slit about 2.9 in (7.4 cm) wide, centered on the front.
Rnd 23: (hdc 4, dec) 8 times. (40)
Rnd 24: Hdc in each st around. (40)
Rnd 25 (ridge): In BLO, (hdc 3, dec) 8 times. (32)
Rnd 26: Hdc in each st around. (32)
Rnd 27: (hdc 2, dec) 8 times. (24)
Rnd 28 (ridge): Hdc in each st around in BLO. (24)
Rnd 29: (hdc 1, dec) 8 times. (16)
You should now have 9 ridges. Check that the body measures 10.5 in (26.7 cm).
Tail: Switch to sc and keep working in joined rounds.
Rnds 30–35: Sc in each st around. (16)
Rnd 36: (sc 6, dec) 2 times. (14)
Rnds 37–40: Sc in each st around. (14)
Rnd 41: (sc 5, dec) 2 times. (12)
Rnds 42–45: Sc in each st around. (12)
Rnd 46: (sc 4, dec) 2 times. (10)
Rnds 47–49: Sc in each st around. (10)
Rnd 50: (sc 3, dec) 2 times. (8)
Rnds 51–52: Sc in each st around. (8)
Stuff the tail firmly from the tip up to Rnd 32 only. Leave the body above it empty for bags.
Rnd 53: Dec 4 times. (4)
Fasten off, leaving a 12 in (30.5 cm) yarn tail. Close the hole and keep the yarn tail for tacking the curl later. Before curling, the tail measures about 5.3 in (13.5 cm).
Head (Coral)
Work in a continuous spiral (no joins), moving the marker up each round.
Rnd 1: MR, 6 sc. (6)
Rnd 2: Inc in each st. (12)
Rnd 3: (sc 1, inc) 6 times. (18)
Rnd 4: (sc 2, inc) 6 times. (24)
Rnd 5: (sc 3, inc) 6 times. (30)
Rnds 6–12: Sc in each st around. (30)
Fit the safety eyes between Rnds 7 and 8, 15 sts apart, so they sit on opposite sides of the head.
Rnd 13: (sc 3, dec) 6 times. (24)
Rnd 14: (sc 2, dec) 6 times. (18)
Stuff firmly.
Rnd 15: (sc 1, dec) 6 times. (12)
Rnd 16: Dec 6 times. (6)
Fasten off and close. The head is about 2.4 in (6.1 cm) across.
Snout (Coral)
Rnd 1: MR, 8 sc. (8)
Rnd 2: Sc in BLO of each st. (8)
Rnd 3: (sc 2, dec) 2 times. (6)
Rnds 4–8: Sc in each st around. (6)
Rnd 9: (sc 1, inc) 3 times. (9)
Rnd 10: (sc 2, inc) 3 times. (12)
Fasten off, leaving a long tail, and stuff lightly. Rnd 2 makes the flat tip, and Rnds 9–10 flare the base so it sits smoothly against the head. The snout is about 2.2 in (5.6 cm) long.
Crest (Peach)
Row 1: Ch 30, sc in 2nd ch from hook and in each ch across, turn. (29)
Row 2: Ch 1, sc in first st, sk 1, 5 dc in next st, sk 1, sc in next st; repeat from * 7 times total. (7 shells + 8 sc)
Each repeat uses 4 sts, so 1 + (7 x 4) = 29 and the shells fit the row exactly. The crest is about 7.25 in (18.4 cm) long and 1 in (2.5 cm) tall. Fasten off, leaving a long tail.
Fin (Peach)
Work in turned rows.
Row 1 (RS): MR, ch 2 (does not count), 7 dc in ring, turn. Pull the ring tight. (7)
Row 2: Ch 2, 2 dc in each st, turn. (14)
Row 3: Ch 2, fpdc around next st, 2 dc in next st; repeat 7 times, turn. (7 fpdc + 14 dc = 21)
Row 4: Ch 1, sc in first st, ch 3, sk 1, sc in next st; repeat 10 times. (11 sc + 10 ch-3 loops)
The fpdc stitches make the raised ribs that fan out across the fin, and the ch-3 loops make the scalloped edge. The fin is about 3.5 in (8.9 cm) wide and 2 in (5.1 cm) tall. Fasten off, leaving a long tail.
Hanging Loop (Coral)
Row 1: Ch 25, sc in 2nd ch from hook and in each ch across. (24)
The strip is 6 in (15.2 cm) long. Folded in half, it makes a 3 in (7.6 cm) loop.
Assembly
- Head: Pin the head over Rnds 1–4 of the body, tilted slightly forward so the eyes face sideways. Whipstitch all the way around.
- Snout: Sew the flared base to the front of the head between Rnds 8 and 11, on the same side as the belly opening. Point it forward and slightly down.
- Crest: Pin the straight edge along the center line. Start just above the snout and run it over the top of the head, down the back of the head and along the center back of the body to about Rnd 6. Sew through the Row 1 sts so the shells stand up.
- Fin: Sew the straight edge (the row ends and the ring) vertically along the center back from Rnd 11 to Rnd 20, with the scallops pointing away from the body.
- Loop: Fold the strip in half and sew both ends to the back of the head, just under the crest.
- Tail: Roll the tail forward, toward the belly, into about 2 turns. Use the yarn tail to tack the coils together at 3–4 points. The curl hangs about 2.75 in (7.0 cm) below the body.
Border: Belly Opening Edging (Coral)
Edging gauge: 16 sc = 4 in (10.2 cm).
Rnd 1: With the right side facing, join yarn at the right corner of the slit.
- Lower edge: sc in each of the 10 skipped sts of Rnd 20. (10)
- Left end: 2 sc into the side of the corner. (2)
- Upper edge: sc in the underside of each of the 10 ch from Rnd 21. (10)
- Right end: 2 sc into the side of the corner. (2)
Join. (24)
Rnd 2: Ch 1, sc in each st around, join. (24)
Fasten off and weave in the ends.
Why the math works: The slit is 10 sts wide along both edges. Working exactly 1 sc into each of those sts keeps both long sides at the original 2.9 in (7.4 cm), so the edge doesn’t ruffle or pucker. The 2 sc at each end turn the corners smoothly, which rounds the slit into an oval. The edging adds about 0.5 in (1.3 cm) of firm rim, which stretches to about 3.5 in (8.9 cm) as a bag is pulled through.
Final Blocking
- Lightly mist the crest and fin with water.
- Pin the fin into an even half-circle. Space the ribs evenly and open each ch-3 scallop.
- Pin each crest shell so it stands upright and fans out slightly.
- Let both pieces dry completely. For an acrylic blend, you can hold a steaming iron just above the pieces instead, without touching the yarn.
- Shape the opening into an oval with your fingers without stretching it.
- Hang the seahorse and check that it hangs straight. If it leans, adjust the tail tacks.
Final Quality-Control Checklist
- The body has 9 evenly spaced ridges.
- The opening is centered on the front, directly opposite the round joins.
- The opening rim has 24 sts and lies flat.
- The head is firmly stuffed, and the eyes are level.
- The snout points forward on the same side as the opening.
- The crest has 7 upright shells in a straight line.
- The fin has 7 ribs and 10 scallops.
- The tail is stuffed only up to Rnd 32 and holds 2 neat turns.
- The loop is secure, and the piece hangs straight.
- All ends are woven in.
Troubleshooting
- The ridges are faint: Make sure the ridge rounds are worked in BLO, not FLO. Firmer tension also helps them stand out.
- The join seam slants: Always work the first st of each round into the same st as the sl st join.
- The opening gapes or ruffles: Recount Rnd 1 of the edging. It should have exactly 24 sts.
- The opening is too tight: Work Rnd 2 of the edging with a hook one size larger.
- The crest flops over: Sew through both loops of the Row 1 stitches and block the shells upright.
- The tail uncurls: Add more tacks and pull them snug.
- The fin cups: Block it flat, or work Row 2 a little more loosely.
Care
Take the bags out, then spot clean with mild soap and cool water. Reshape and let it air dry. Do not tumble dry.
Final Notes
Each measurement builds on the gauge. At 14 hdc and 11 rnds to 4 in (10.2 cm), the 48-st body lies 6.9 in (17.5 cm) wide and 10.5 in (26.7 cm) long. The 10-st slit gives a 2.9 in (7.4 cm) opening, and the 24-st edging keeps it smooth. At 16 sc to 4 in (10.2 cm), the smaller parts come out as a 2.4 in (6.1 cm) head, a 2.2 in (5.6 cm) snout and a 7.25 in (18.4 cm) crest. Add the 2.75 in (7.0 cm) tail curl, and the seahorse stands about 15.5 in (39.4 cm) tall.
Happy crocheting!