

This curtain panel is made of open six-petal flowers in warm cream and soft sage green. Short chain bars link the flowers into an airy diamond lattice. Light passes through every petal, so the panel filters daylight without blocking the view.
Each flower has a small padded ring at the center and six pointed petals. Every petal has a crisp outline with ladder bars across the middle. The colors alternate down each column, and the columns are staggered by half a motif. The result is a calm, cottage-style pattern that suits linen, light wood and brass hardware.
The pattern uses US crochet terms. One finished panel measures about 37 x 78 in (94.0 x 198.1 cm) including the border. To dress a window like the one shown, make two panels.
Here is the construction in brief. You work each motif in three rounds and join it to its neighbors with join-as-you-go on the last round. Then a three-round border straightens the edges.
Finished Size and Construction
- Finished size: about 37 x 78 in (94.0 x 198.1 cm) per panel
- Skill level: Intermediate
- Terminology: US crochet terms
- Yarn weight: DK / light worsted (3) cotton
- Hook: 4.0 mm (G-6)
- Number of pieces: 88 motifs per panel
- Layout: 7 staggered columns. Columns 1, 3, 5 and 7 hold 13 motifs each; columns 2, 4 and 6 hold 12 motifs each
- Piece size: 5 in (12.7 cm) tip to tip
- Size before border: about 35.5 x 77 in (90.2 x 195.6 cm), measured tip to tip
- Border depth: about 0.5 in (1.3 cm) beyond the frame line
Materials
Use a smooth mercerized or combed cotton. It shows the ladder bars clearly and holds the petal points after blocking. Avoid fuzzy blends, because they fill in the openwork.
- Cream: 300 g / 678 m (six 50 g skeins of about 113 m each)
- Sage green: 200 g / 452 m (four 50 g skeins of about 113 m each)
- 4.0 mm (G-6) crochet hook
- Tapestry needle
- Locking stitch markers
- Rust-proof pins and blocking mats or a clean carpet
- Spray bottle
- 9 curtain clip rings
All quantities include a margin of roughly 15 to 20 percent for swatching and joining. Double them for a pair of panels.
Abbreviations (US Terms)
- ch – chain
- sl st – slip stitch
- sc – single crochet
- hdc – half double crochet
- dc – double crochet
- tr – treble crochet
- sp(s) – space(s)
- sk – skip
Special technique: ladder bar. Work a dc or tr into a chain you made earlier, on the opposite side of the petal. The stitch spans the gap and becomes a horizontal rung.
Joining tip: Replace the ch-2 of a petal tip with: ch 4, sl st in the neighbor’s tip ch-2 sp, ch 4. This makes one doubled chain bar.
Gauge and Checkpoints
- Chain gauge: 16 ch = 4 in (10.2 cm)
- Border gauge: 16 sc and 16 rows = 4 in (10.2 cm)
Make one test motif first and check it at each stage:
- After Round 1: the ring measures 1 in (2.5 cm) across.
- After Round 2: the motif measures 4.5 in (11.4 cm) tip to tip.
- After Round 3: the motif measures 5 in (12.7 cm) tip to tip, with each petal about 2 in (5.1 cm) long.
If your motif is larger than 5 in (12.7 cm), go down 0.5 mm in hook size. If it is smaller, go up 0.5 mm. A difference of 0.25 in (0.6 cm) per motif adds about 3.25 in (8.3 cm) to the panel length over 13 motifs, so get this right before continuing.
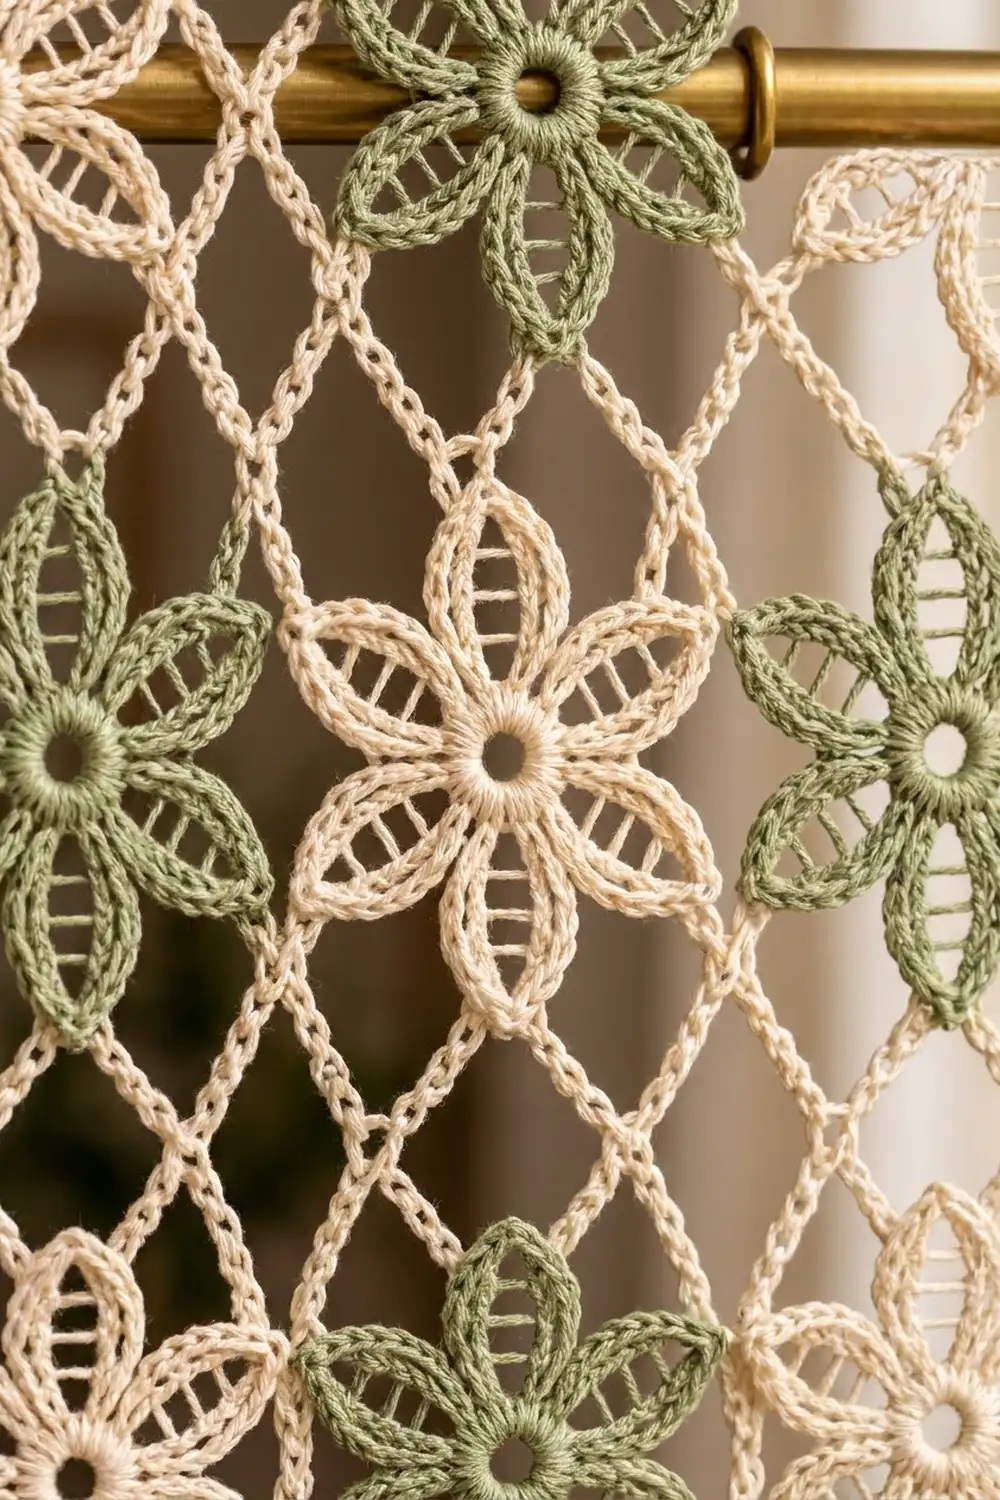
Motif (make 88)
Round 1: Ch 6, sl st in the first ch to form a ring. Ch 1, 18 sc in the ring, then sl st in the first sc. (18 sc)
Number the sc 1 to 18 in your head. Petals start at sc 1, 4, 7, 10, 13 and 16.
Round 2 (petals): Sl st in sc 1. Then work this petal sequence 6 times:
- Ch 10. This is side A; count its chains 1 to 10, starting from the center.
- Ch 3, then sl st in the 10th ch of side A. This forms the tip ch-3 loop.
- Work side B and the ladder bars:
- Ch 2, dc in the 8th ch of side A.
- Ch 2, tr in the 6th ch.
- Ch 2, tr in the 4th ch.
- Ch 2, dc in the 2nd ch.
- Ch 2, sk the next 2 sc of Round 1, sl st in the next sc.
On the sixth petal, the final sl st goes into sc 1. (6 petals, each with 4 ladder bars, 5 ch-2 sps on side B and 1 tip ch-3 loop)
The bars grade from dc to tr to tr to dc. This gives each petal its pointed lens shape.
Round 3 (outline): Work each petal in this order:
- Working over the chains of side A, work 2 sc in each of its 5 segments (between the center, the bar bases and the tip). This gives 10 sc.
- In the tip ch-3 loop work (sc, hdc, ch 2, hdc, sc).
- Work 2 sc in each of the 5 ch-2 sps on side B. This gives 10 sc.
- Sl st in the base sc.
Repeat for all 6 petals, then fasten off. (24 sts per petal, 144 sts in total, plus 6 sl sts and 6 tip ch-2 sps)
For every motif after the first, use the joining tip wherever that petal meets a motif you already made.
Make All Pieces
- Odd columns (1, 3, 5, 7): the colors run cream, green, cream, and so on. That is 7 cream and 6 green per column, for 28 cream and 24 green.
- Even columns (2, 4, 6): the colors run green, cream, green, and so on. That is 6 green and 6 cream per column, for 18 of each.
- Totals: 46 cream and 42 green, for 88 motifs.
Petals point straight up and down. Even columns sit half a motif lower than odd columns.
Col:  1   2   3   4   5   6   7
      C       C       C       C
          G       G       G
      G       G       G       G
          C       C       C
      C       C       C       C
         ... pattern continues ...
          C       C       C
      C       C       C       C
Joining
Use join-as-you-go on Round 3. Work column 1 from top to bottom, then column 2, and so on.
Each motif has six tips. Name them by direction: top, bottom, upper-left, lower-left, upper-right and lower-right. Every tip faces exactly one neighbor, so each connection is made only once. The later motif makes the bar, and the earlier motif keeps its plain ch-2 tip.
- Column 1: join each motif’s top tip to the bottom tip of the motif above.
- Even columns: join the top tip to the motif above (except on the first motif). Join the upper-left tip to the odd-column motif up and to the left, and the lower-left tip to the motif down and to the left.
- Columns 3, 5 and 7: join the top tip as above. Join the upper-left and lower-left tips to the even-column motifs beside them, where those motifs exist.
Keep the bars relaxed. Pull each sl st snug, but don’t tighten the chains, or the lattice will pucker. Check that each bar measures about 1 in (2.5 cm) between tips.
Size checkpoint:
- Motif centers sit 6 in (15.2 cm) apart vertically.
- Columns sit about 5.25 in (13.3 cm) apart, center to center.
- A finished odd column measures 77 in (195.6 cm) from top tip to bottom tip.
The outer tips of the top and bottom motifs in columns 3 and 5 are left free. They rest loosely inside the frame.
Border
The border uses the border gauge: 4 sc = 1 in (2.5 cm). The frame round places a straight chain line exactly on the outer tips, and two rounds of sc firm it up.
Round 1 (frame): Join cream with sc in the top tip of the top motif in column 1.
Top edge:
- Ch 20, then ch 1 more. This 21st ch is the bar point.
- Make a drop bar: ch 12, sl st in the top tip of the column 2 top motif, ch 12, sl st in the bar point.
- Ch 20, then sc in the top tip of the column 3 top motif.
- Repeat steps 1 to 3 twice more, so the round ends at the top tip of column 7.
- Ch 8, then ch 1 for the corner.
Right side:
- Ch 4, sc in the upper-right tip of the column 7 top motif.
- Ch 9, sc in the lower-right tip of the same motif.
- Work [ch 13, sc in the upper-right tip of the next motif, ch 9, sc in its lower-right tip] 12 times.
- Ch 4, then ch 1 for the corner.
Bottom edge: Mirror the top edge. Ch 8, sc in the bottom tip of column 7. Then work [ch 20, ch 1 bar point, drop bar of 12 ch to the column 6 bottom tip, ch 20, sc in the column 5 bottom tip] and repeat it across to column 1. Ch 8, then ch 1 for the corner.
Left side: Mirror the right side, using the lower-left and upper-left tips. Then ch 4, ch 1 for the corner, ch 8, and sl st in the first sc.
Count for Round 1 (drop-bar chains not counted, corners shown separately):
- Top and bottom: 8 + 1 + 3 x (20 + 1 + 20 + 1) + 8 = 143 sts each
- Sides: 4 + 13 x 11 + 12 x 13 + 4 = 307 sts each
- Corners: 4 corner ch
- Total: 904 sts
Round 2: Ch 1. Sc in each st along the frame line only (skip the drop-bar chains), with 3 sc in each corner ch. Sl st to join.
(912 sc) Counting both corner center sts in each side, that is 147 per top and bottom edge and 311 per side. Check: 2 x 147 + 2 x 311 − 4 shared corners = 912.
Round 3: Ch 1. Sc in each sc, with 3 sc in each corner center st. Sl st to join and fasten off.
(920 sc) That is 149 per top and bottom edge and 311 + 2 = 313 per side. Check: 2 x 149 + 2 x 313 − 4 = 920.
Why the math works:
- The top line has 144 intervals, which is 36 in (91.4 cm) at 4 sts per inch.
- Each side has 308 intervals, which is 77 in (195.6 cm).
- One column pitch of 21 sts is 5.25 in (13.3 cm), which matches the joined lattice.
- The drop bars of 12 ch cover the 3 in (7.6 cm) offset of the even columns.
- Two sc rounds add about 0.5 in (1.3 cm) all around, giving 37 x 78 in (94.0 x 198.1 cm).
Final Blocking
- Soak the panel in cool water, then press out the water in a towel without wringing.
- Lay it flat and pin the frame to 36 x 77 in (91.4 x 195.6 cm).
- Pin every petal tip so the motifs measure 5 in (12.7 cm) tip to tip and their centers sit 6 in (15.2 cm) apart.
- Open each petal so the ladder bars lie straight across.
- Mist lightly and leave the panel to dry completely.
- Unpin it, then clip the 9 rings to the top edge: one at each corner, and one above each column’s top tip or drop bar.
Final Quality-Control Checklist
- 88 motifs, in the correct colors per column
- Every petal has 4 ladder bars and a 24-st outline
- Every joining bar is about 1 in (2.5 cm) and none are twisted
- Border counts are 904, 912 and 920
- The panel measures 37 x 78 in (94.0 x 198.1 cm)
- All yarn ends are woven into the sc outlines
Troubleshooting
- Petals curl: the ladder bars are too tight. Loosen your tr stitches or go up a hook size.
- The lattice puckers: the joining chains are too tight. Remake them with looser chains.
- The frame ripples: the chain gauge is too loose. Remake Round 1 with a smaller hook.
- The panel is too short: check each motif against the 5 in (12.7 cm) checkpoint before you join more.
Care
Hand wash in cool water with mild soap and dry flat. Re-block if needed, and don’t tumble dry.
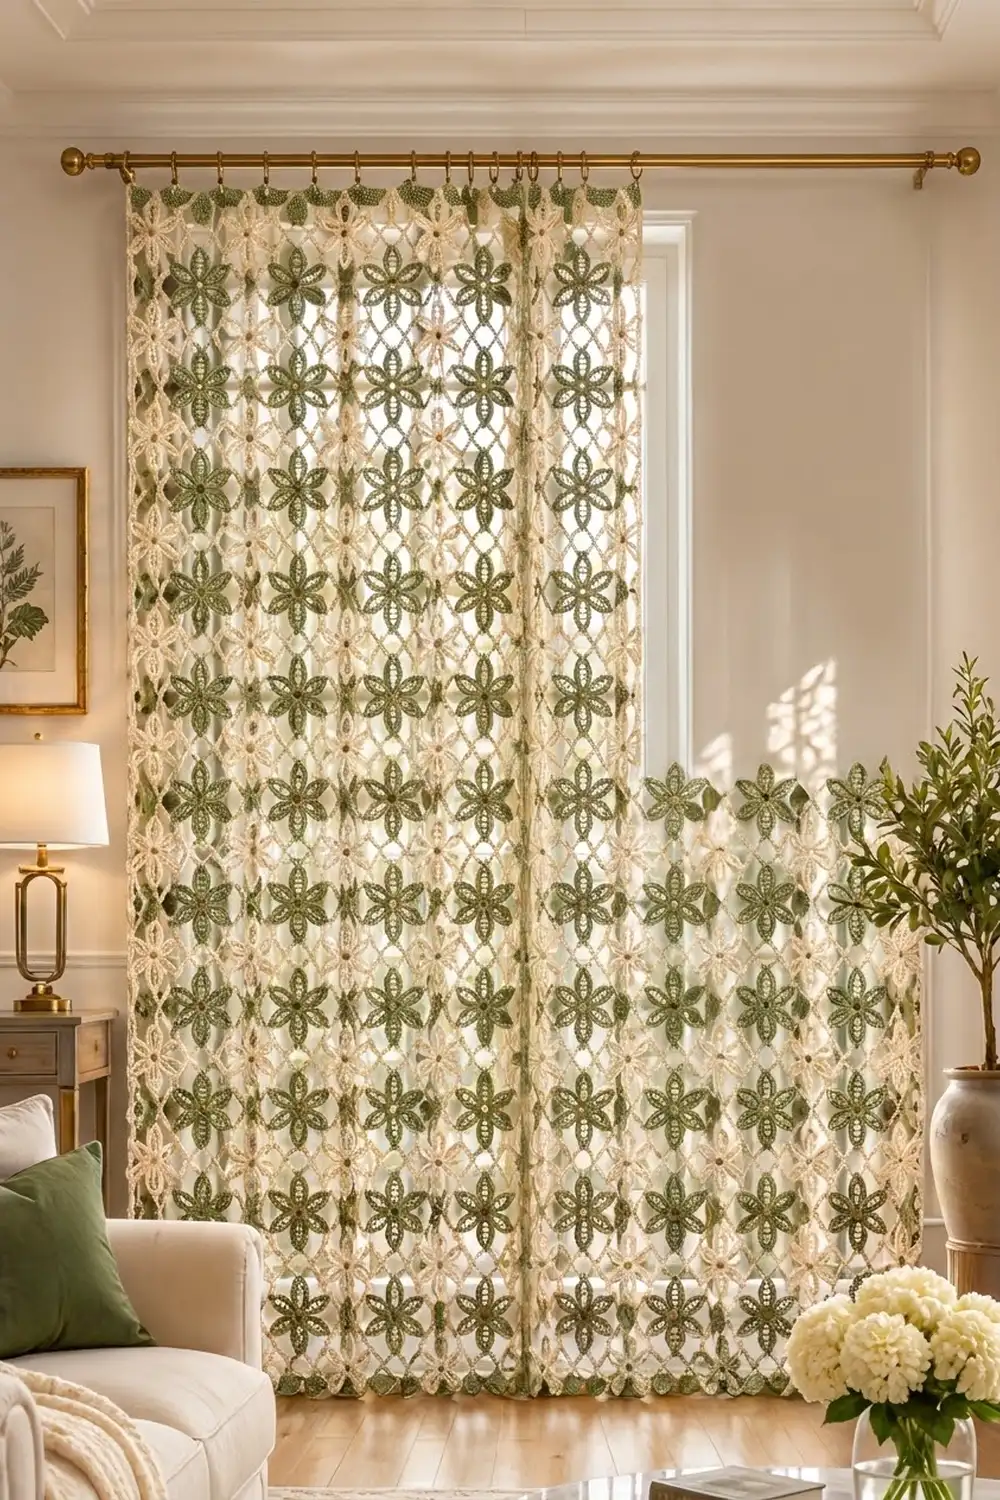
Final Notes
The measurements build on each other:
- A 1 in (2.5 cm) ring grows to a 5 in (12.7 cm) motif.
- Motifs join on a 6 in (15.2 cm) vertical pitch and a 5.25 in (13.3 cm) column pitch.
- That builds a 36 x 77 in (91.4 x 195.6 cm) frame line.
- The sc rounds finish the panel at 37 x 78 in (94.0 x 198.1 cm).
If every step matches its checkpoint, the panel will hang straight.
Happy crocheting!