

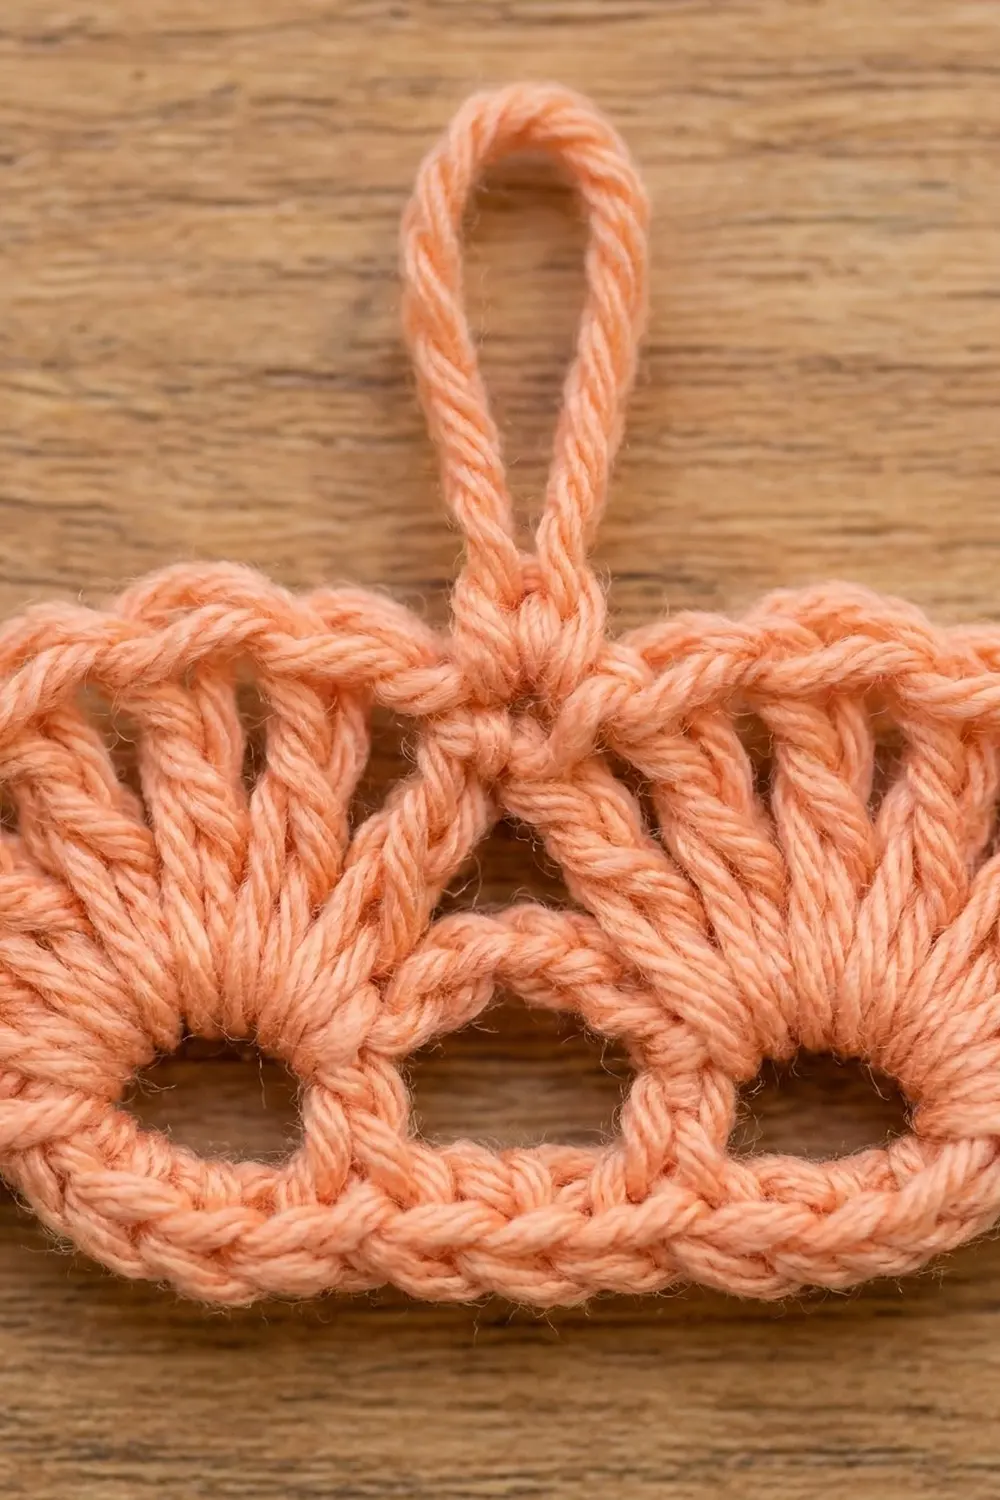
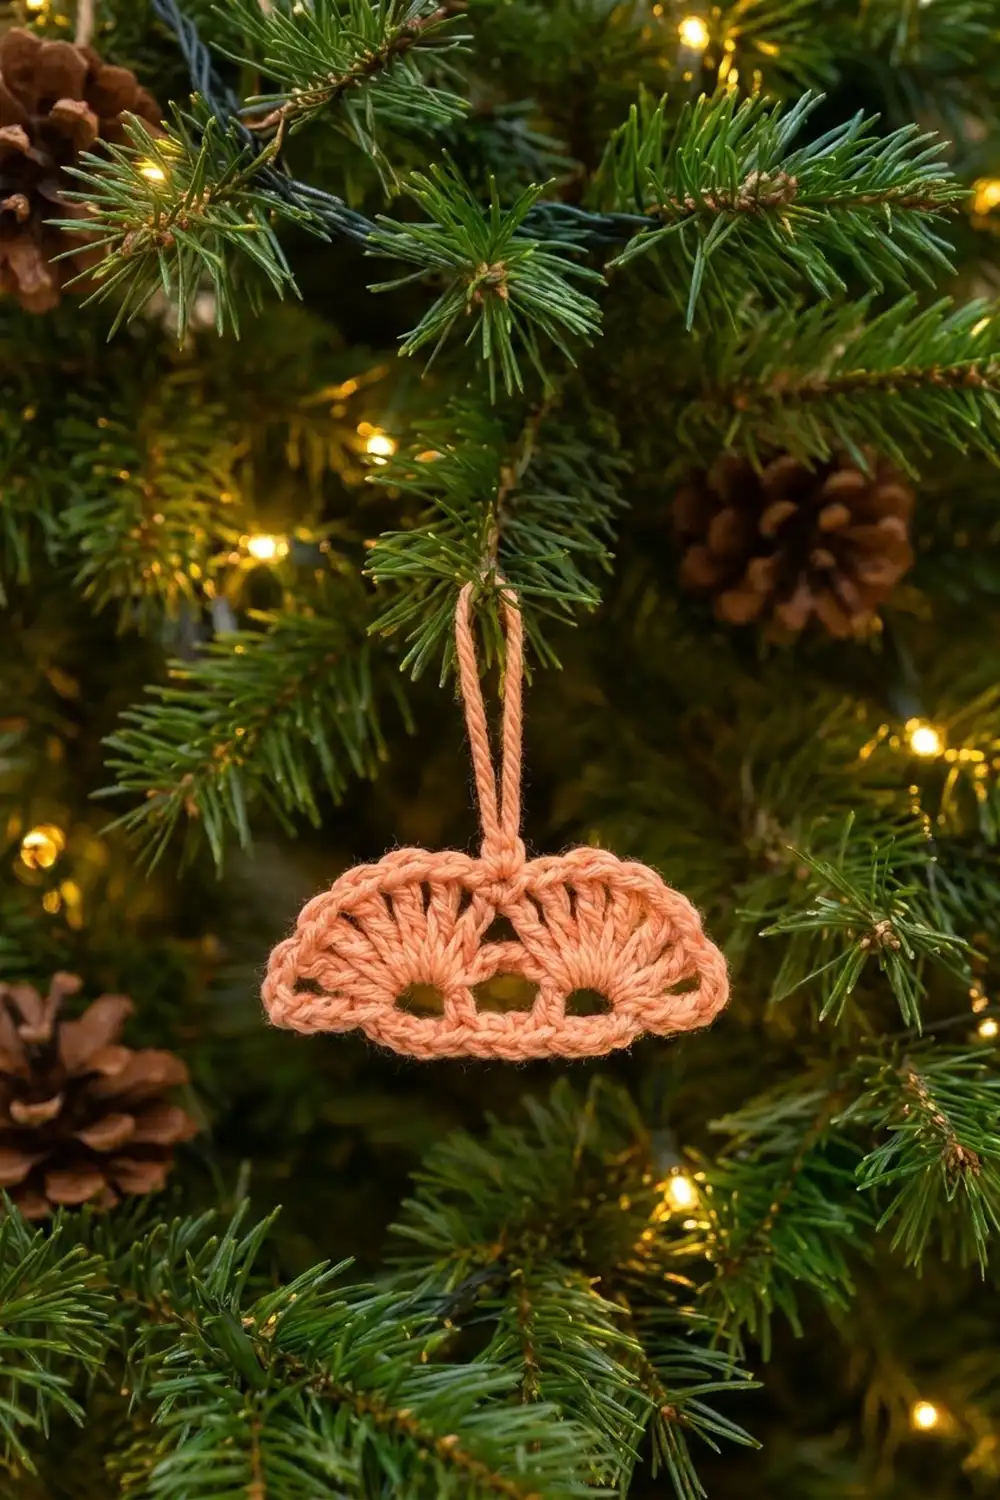
This little ornament is two half-circle fans sitting side by side on one straight base, like a pair of seashells or a small paper fan. Each fan grows out of a round opening at its base, and the open stitches let the light from the tree show through.
The sample is in one soft peach color, which looks warm against green branches. It also works well in cream, blush, gold, or classic red. The style is light and lacy, and it is very quick: one ornament takes about 20 minutes once you know the rows.
This pattern uses US crochet terms. The finished ornament measures 4 in (10.2 cm) wide and 1.75 in (4.4 cm) tall, without the hanging loop. The loop adds about 1.5 in (3.8 cm) above the top.
You make the ornament as one flat piece, in rows. First comes a single crochet base row. Next, an arch row forms the two openings. Then a fan of 9 double crochet goes into each arch. A single crochet edging finishes the fan curves and adds the hanging loop, and one last pass outlines the bottom edge. There is no sewing and no joining.
Finished Size and Construction
- Finished size: 4 in (10.2 cm) wide × 1.75 in (4.4 cm) tall, plus a 1.5 in (3.8 cm) loop
- Skill level: Easy
- Terminology: US crochet terms
- Yarn weight: DK (light worsted, #3)
- Hook: 4.0 mm (G-6)
- Number of pieces: 1
- Layout: One single motif, worked flat in rows
- Piece size: 4 in × 1.75 in (10.2 cm × 4.4 cm)
- Size before border: 3.75 in × 1.5 in (9.5 cm × 3.8 cm)
- Border depth: about 0.125 in (0.3 cm) on the sides and bottom, and about 0.25 in (0.6 cm) along the fan curves
Materials
Yarn: Use a smooth DK cotton or cotton blend. Cotton shows the fan stitches clearly and holds its shape on the tree. Acrylic also works, but it is softer and may need a light stiffener. Fuzzy or brushed yarns hide the openings, so avoid them.
- Peach (main and only color): 8 g, about 20 m (22 yd), per ornament
One ornament uses only about 5 g (12 m). These quantities include a margin for your gauge swatch, tails, and any rows you need to pull out and redo. One 50 g ball makes about 8 ornaments with yarn to spare.
Tools:
– 4.0 mm (G-6) crochet hook
– Tapestry needle
– Scissors
– Rust-proof pins and a foam blocking mat
– Spray bottle with clean water
– Optional: fabric stiffener or a starch spray
Abbreviations (US Terms)
- ch – chain
- sl st – slip stitch
- sc – single crochet
- dc – double crochet
- sk – skip
- sp – space
- st(s) – stitch(es)
- [ ] – repeat the steps inside the brackets the stated number of times
Special stitch – Fan: Work 9 dc into the same ch-sp. The dc should spread out into a half circle.
Gauge and Checkpoints
Gauge: 18 sc = 4 in (10.2 cm) with a 4.0 mm hook, which is 4.5 sc per inch.
A full gauge swatch isn’t needed for such a small item. Instead, make one complete ornament as your test piece and measure it at each checkpoint below.
- After Row 1: 17 sc measure 3.75 in (9.5 cm) across.
- After Row 3: The piece measures 3.75 in (9.5 cm) wide × 1.5 in (3.8 cm) tall, from the bottom edge to the top of the fans.
- After Row 4: Each fan curve lies flat, without cupping or waving.
- After Row 5 (finished): 4 in (10.2 cm) wide × 1.75 in (4.4 cm) tall.
If your piece is too big: If Row 1 is more than 0.25 in (0.6 cm) over 3.75 in (9.5 cm), go down to a 3.75 mm (F-5) hook.
If your piece is too small: If Row 1 is more than 0.25 in (0.6 cm) under 3.75 in (9.5 cm), go up to a 4.5 mm (7) hook.
A small size difference is fine for an ornament. What matters most is that the fans lie flat. That depends on keeping the same tension in Row 3 and Row 4.
Pattern
The ch-1 at the start of a row does not count as a stitch.
Row 1 – Base
Ch 18.
Row 1: Sc in the 2nd ch from the hook and in each ch across. Turn. (17 sc)
Number the stitches 1 to 17 in your head. Stitch 9 is the center. The rest of the ornament is built symmetrically around it.
Row 2 – Arch Row
This row forms the two large openings under the fans, plus the small gaps beside the center.
Row 2: Ch 1. Sc in st 1. Ch 2, sk st 2, sc in st 3. Ch 4, sk sts 4–6, sc in st 7. Ch 2, sk st 8, sc in st 9 (the center). Ch 2, sk st 10, sc in st 11. Ch 4, sk sts 12–14, sc in st 15. Ch 2, sk st 16, sc in st 17. Turn.
(7 sc and 6 ch-sps: ch-2, ch-4, ch-2, ch-2, ch-4, ch-2. That is 7 sc + 16 ch = 23 sts.)
Check: the sc sit on sts 1, 3, 7, 9, 11, 15, and 17. That is a mirror image around st 9. The two ch-4 arches should look the same size.
Row 3 – Fan Row
Row 3: Ch 1. Sc in the first sc. Sk the next ch-2 sp and the next sc. Work a Fan (9 dc) in the ch-4 sp. Sk the next sc and ch-2 sp. Sc in the center sc. Sk the next ch-2 sp and the next sc. Work a Fan (9 dc) in the next ch-4 sp. Sk the next sc and ch-2 sp. Sc in the last sc. Turn.
(3 sc + 18 dc = 21 sts)
Each fan’s 9 dc are all anchored in its ch-4 arch, so they spread into a half circle. The arch stays open underneath and becomes the round hole at the base of the fan. The skipped ch-2 spaces on each side of the center sc leave the small center gap. Spread the dc of each fan evenly along the arch with your fingers before you go on.
Checkpoint: 3.75 in (9.5 cm) wide × 1.5 in (3.8 cm) tall.
Row 4 – Fan Edging and Hanging Loop
Row 4: Ch 1. Sc in the first sc.
First fan: Sc in the next dc. [2 sc in the next dc, sc in the next dc] 4 times. (13 sc over 9 dc)
Center and loop: Sl st in the center sc. Ch 16, then sl st into the same center sc to close the hanging loop.
Second fan: Sc in the next dc. [2 sc in the next dc, sc in the next dc] 4 times. (13 sc over 9 dc)
Sc in the last sc. Do not turn and do not fasten off.
(1 sc + 13 sc + 1 sl st + 13 sc + 1 sc = 28 sc + 1 sl st = 29 sts, not counting the 16 loop chains)
Within each fan, the increases fall on dc 2, 4, 6, and 8. That keeps both fans symmetrical. The sl st at the center sits low, which creates the dip between the fans where the loop rises.
Border
The last pass outlines the straight bottom edge and ties it into the fan edging, so the whole outline matches.
Border gauge: Same as the body, 4.5 sc per inch (18 sc = 4 in / 10.2 cm). Work the sc firmly but don’t pull them tight, or the bottom edge will draw in.
Row 5 – Bottom Edging: Keep the right side facing you and work down the left side edge.
- Left side: Sc 1 into the row-end of Row 2. (1 sc)
- Bottom: Work into the free loops of the foundation chain. Work 3 sc in the first ch (corner), sc in each of the next 15 ch, then 3 sc in the last ch (corner). (21 sc, including both corners)
- Right side: Sc 1 into the row-end of Row 2. (1 sc)
- Close: Sl st into the first sc of Row 4. Fasten off.
(1 + 21 + 1 = 23 sc)
Why the math works:
- Bottom: The foundation chain has 17 free loops. One sc goes in each loop, and the 2 corner loops get 2 extra sc each: 17 + 4 = 21. Those 4 extra stitches turn the corners without cupping, and the bottom gets only about 0.125 in (0.3 cm) wider on each side. That takes the width from 3.75 in (9.5 cm) to 4 in (10.2 cm).
- Fan curves: Each fan’s outer curve is longer than the 9 dc tops it sits on. Working 13 sc over 9 dc (9 sc + 4 increases) gives each curve enough length to lie flat at a radius of about 0.9 in (2.3 cm). That adds about 0.25 in (0.6 cm) to the height, taking it from 1.5 in (3.8 cm) to 1.75 in (4.4 cm).
- Sides: The single sc on each side covers the short row-end of the arch row. Rows 1 and 3 already end in sc that meet the corner and the fan edge.
Final Blocking
- Weave in all the ends along the bottom sc edge, where they won’t show through the openings.
- Mist the ornament with water until it is damp, not dripping.
- Lay it right side up on the blocking mat.
- Pin the bottom edge straight at 4 in (10.2 cm) wide, with a pin at each corner.
- Pin the top of each fan curve so the total height is 1.75 in (4.4 cm).
- Open each base hole into a neat round shape with a fingertip. If you like, pin through its center.
- Straighten the hanging loop so it stands up from the center dip.
- If you’re using stiffener, brush or spray it on now and blot off any extra.
- Let it dry completely, at least 6–8 hours, before you unpin it.
Final Quality-Control Checklist
- Row 1 has 17 sc.
- Row 2 has 7 sc and 6 ch-sps, placed symmetrically around st 9.
- Each fan has exactly 9 dc, all worked into its ch-4 arch.
- Each fan curve has 13 sc in Row 4.
- The hanging loop is anchored in the center sc, at the low dip.
- The bottom edge has 21 sc, including the 3-sc corners.
- The finished ornament is 4 in × 1.75 in (10.2 cm × 4.4 cm).
- Both base holes are open, round, and the same size.
- All ends are woven in and none show on the front.
Troubleshooting
The fans cup into a bowl shape: Row 4 is too tight. Rework it with a looser tension, or go up half a hook size for that row only.
The fan edges wave or ruffle: Row 4 is too loose, or you added extra increases. Check for 13 sc per fan, and work the row a little more firmly.
The two fans are different sizes: One ch-4 arch probably skipped the wrong number of stitches. Go back to Row 2 and check that the sc sit on sts 1, 3, 7, 9, 11, 15, and 17.
The base holes close up: Your ch-4 arches are too tight. Chain a little more loosely, or work the chains with one hook size larger.
The bottom edge curls up: Row 5 is pulling. Rework it more loosely and make sure each corner has 3 sc.
The ornament tilts when it hangs: The loop isn’t centered. Move it so both ends are anchored in the center sc.
Care
Hand wash in cool water, press out the water gently, and dry flat. Re-block if needed. If you used stiffener, you may need to reapply it after washing.
Final Notes
The measurement chain is short and easy to check. Row 1 sets the 3.75 in (9.5 cm) base. Rows 2 and 3 build the fans to 1.5 in (3.8 cm) tall. Row 4’s 13 sc per fan let the curves lie flat. Row 5’s 21-stitch bottom brings the ornament to its finished 4 in × 1.75 in (10.2 cm × 4.4 cm). Once you’ve made one, you can make a whole set for the tree, a gift package, or a garland of your own design.
Happy crocheting!