

This little ornament is lace you can finish in one evening. Staggered tiers of teal fans fill a pointed-oval shape, and a soft mint picot border frames them. Hang one on the tree, tie it to a gift, or make a handful for a mantel branch.
The colors are calm and wintry: deep evergreen teal for the lace body and a pale mint for the edging and loop. The fans grow from a single fan at the bottom point to three fans across the middle, then narrow back to one fan at the top. That gives a clean, symmetrical teardrop silhouette.
The pattern is written in US crochet terms. The finished ornament measures 3 in (7.6 cm) wide by 4.5 in (11.4 cm) tall. The hanging loop adds about 1.5 in (3.8 cm), for a total hanging length of about 6 in (15.2 cm).
You work the body in 10 short rows, starting at the bottom point and working upward. Fan rows alternate with anchor rows. The first rows increase at the edges, and the last rows decrease with slip stitches and short rows. After that, you add the border in two rounds and build the hanging loop into the second round.
Finished Size and Construction
- Finished size: 3 in (7.6 cm) wide x 4.5 in (11.4 cm) tall, plus a 1.5 in (3.8 cm) loop
- Skill level: Intermediate (short-row shaping, counting into fans)
- Terminology: US crochet terms
- Yarn weight: Size 3 crochet thread (lace / light fingering, category 0)
- Hook: 2.25 mm (US B-1)
- Number of pieces: 1
- Layout: Single pointed-oval motif; fan tiers of 1, 2, 3, 2, 1 from bottom to top
- Piece size before border: 2.5 in (6.4 cm) wide x 4 in (10.2 cm) tall
- Border depth: 0.25 in (0.6 cm) on every side, not counting the picots
Materials
Use a smooth, tightly plied mercerized cotton thread. Mercerized cotton shows the fan ribs clearly and blocks crisply. Avoid fuzzy or very soft thread, because the lace openings will close up.
- Color A, dark teal (body): 10 g, about 16 m
- Color B, pale mint (border and loop): 5 g, about 8 m
These amounts assume about 1.6 m per gram, which is typical for size 3 cotton thread. Both quantities include a comfortable margin for a gauge swatch and weaving in ends.
Tools:
– 2.25 mm (US B-1) crochet hook
– Tapestry needle with a small eye
– Scissors
– Blocking mat or folded towel, rustproof pins
– Spray bottle or light spray starch (optional)
– Ruler or tape measure
Abbreviations (US Terms)
- ch – chain
- sl st – slip stitch
- sc – single crochet
- dc – double crochet
- sk – skip
- sp(s) – space(s)
- st(s) – stitch(es)
- RS – right side
Special stitches:
– V-st: (dc, ch 2, dc) in the same stitch.
– Fan: 7 dc in the same stitch or space.
– Picot: ch 3, sl st in the 3rd ch from hook.
Gauge and Checkpoints
Lace gauge depends on tension more than on stitch counts. Treat the body as your swatch: work through Row 5, then measure before you continue.
- After Row 1: the single fan is 0.75 in (1.9 cm) wide and 0.4 in (1.0 cm) tall.
- After Row 3: two fans across measure 1.6 in (4.1 cm); the piece is 1.2 in (3.0 cm) tall.
- After Row 5: three fans across measure 2.5 in (6.4 cm); the piece is 2 in (5.1 cm) tall.
- After Row 10: the body is 4 in (10.2 cm) tall from point to point.
- After the border: 3 in (7.6 cm) x 4.5 in (11.4 cm).
If your piece is too big, go down 0.25 mm (to a 2.0 mm hook). If it is too small, go up 0.25 mm (to a 2.5 mm hook). Measure gently pinned flat. Lace looks smaller straight off the hook and opens up after blocking, so allow about 0.125 in (0.3 cm) of growth.
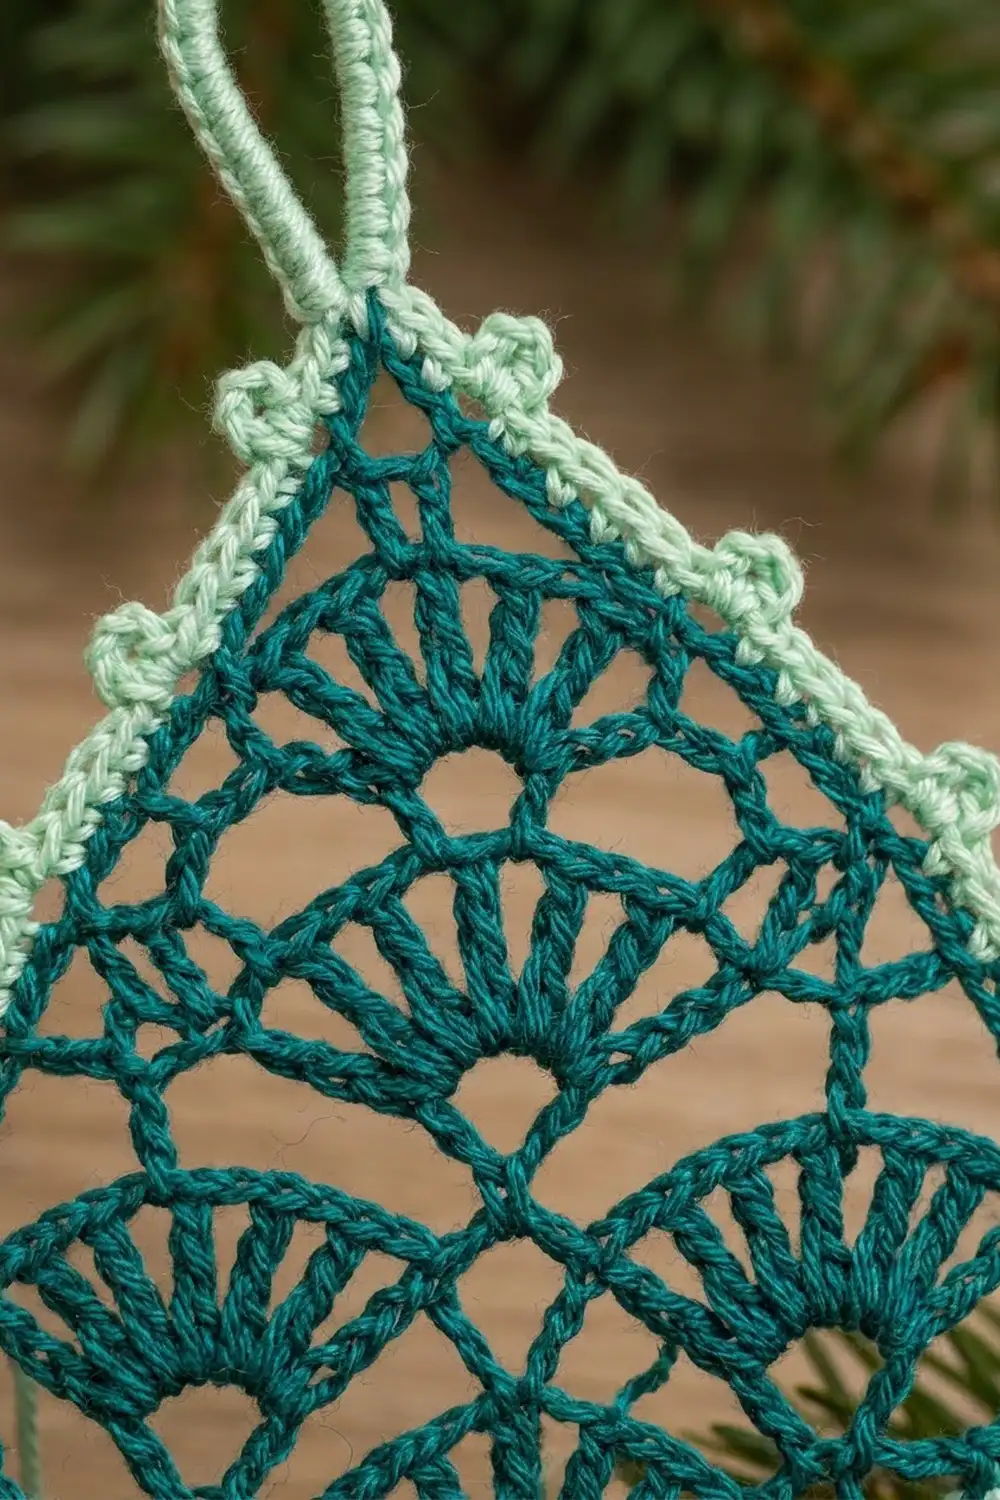
Body (Color A)
Turn at the end of every row. All rows are worked back and forth.
Row 1 (RS): Ch 4. Work 6 dc in the 4th ch from hook. The skipped ch-3 counts as the first dc. (7 dc = 1 fan)
The base of this fan is the bottom point of the ornament.
Row 2 (increase): Ch 5 (counts as dc + ch 2), dc in the first dc to make an edge V-st. Ch 3, sk 2 dc, sc in the center (4th) dc, ch 3, sk 2 dc. Work a V-st in the top of the turning ch. (2 V-sts, 1 sc, 2 ch-3 sps)
Row 3 (fan row): Ch 3 (counts as dc), 6 dc in the first V-st ch-2 sp. Ch 2, sc in the sc, ch 2. Work 7 dc in the last V-st ch-2 sp. (2 fans = 14 dc, 1 sc, 2 ch-2 sps)
The two fans sit diagonally above the first fan. This staggered layout creates the diamond-shaped openings.
Row 4 (increase): Ch 5, dc in the first dc to make an edge V-st. Ch 3, sc in the center dc of the first fan. Ch 3, V-st in the sc between the fans. Ch 3, sc in the center dc of the next fan. Ch 3, V-st in the last dc. (3 V-sts, 2 sc, 4 ch-3 sps)
Row 5 (widest fan row): Ch 3, 6 dc in the first V-st sp. Ch 2, sc in the next sc, ch 2, 7 dc in the next V-st sp; repeat from * twice more. (3 fans = 21 dc, 2 sc, 4 ch-2 sps)*
Check your measurements now: 2.5 in (6.4 cm) wide and 2 in (5.1 cm) tall.
Row 6 (decrease): Sl st in the first 4 dc, which puts you at the center of the first fan. Ch 1, sc in the same dc. Ch 3, V-st in the next sc, ch 3, sc in the center dc of the next fan; repeat from * once more. Leave the last 3 dc unworked. (3 sc, 2 V-sts, 4 ch-3 sps)*
Row 7 (fan row): Ch 1, sc in the first sc. Ch 2, 7 dc in the next V-st sp, ch 2, sc in the next sc; repeat from * once more. (2 fans = 14 dc, 3 sc, 4 ch-2 sps)*
Row 8 (decrease): Sl st in the first sc, the ch-2 sp, and the first 4 dc, which puts you at the center of the first fan. Ch 1, sc in the same dc. Ch 3, V-st in the next sc, ch 3, sc in the center dc of the next fan. Leave the last 3 dc, the ch-2 sp, and the sc unworked. (2 sc, 1 V-st, 2 ch-3 sps)
Row 9 (top fan): Ch 1, sc in the first sc, ch 2, 7 dc in the V-st sp, ch 2, sc in the last sc. (1 fan = 7 dc, 2 sc, 2 ch-2 sps)
Row 10 (top point): Ch 1, sc in the first sc. Ch 3, sk the ch-2 sp and 3 dc, sc in the center dc. Ch 3, sk 3 dc and the ch-2 sp, sc in the last sc. (3 sc, 2 ch-3 sps)
Fasten off and weave in the ends. The center sc of Row 10 is the top point. The body should now measure 2.5 in (6.4 cm) x 4 in (10.2 cm).
Border (Color B)
Border gauge: each long side gets 25 sc spread over about 4.6 in (11.7 cm) of curved edge. That is roughly 5.5 sc per inch (2.2 sc per cm). This density sits flat on a lace edge without ruffling or cupping.
For counting, call the bottom corner sts A1, A2 (center), and A3, and the top corner sts B1, B2 (center), and B3.
Round 1: With RS facing, join Color B with a sl st at the base of Row 1 (bottom point). Ch 1 and work 3 sc in the same place (A1, A2, A3).
Work the first side, 25 sc, as follows:
– 2 sc in the row-end of each of Rows 1–5 (10 sc)
– 1 sc in each of the 3 outer dc of the Row 5 edge fan (3 sc)
– 1 sc in the Row 7 edge sc (1 sc)
– 2 sc in the Row 7 ch-2 sp (2 sc)
– 1 sc in each of the 3 outer dc of the Row 7 fan (3 sc)
– 1 sc in the Row 9 edge sc (1 sc)
– 2 sc in the Row 9 ch-2 sp (2 sc)
– 3 sc in the Row 10 ch-3 sp (3 sc)
Work 3 sc in the center sc of Row 10 (B1, B2, B3). Then work the second side to match the first in reverse order (25 sc). Sl st to the first sc. (56 sc: 25 per side + 3 at each point)
On the edges where you slip-stitched across in Rows 6 and 8, work each sc into the stitch under the sl st, so both sides match.
Why the math works: two sc per dc row-end matches the height of a dc. One sc per exposed dc keeps the fan tops flat. Two or three sc per chain space matches the length of that chain. The 3-sc groups at the points add the extra fullness that a sharp point needs. Since both sides are mirror images, they get the same 25 sc.
Round 2 (picots and loop): Sl st in the next st (A2). Ch 1.
– (Sc, picot) in A2.
– Sc in the next 3 sts, picot; repeat from * 8 more times. This covers 27 sts (A3, the 25 side sts, and B1) and makes 9 picots.
– Loop: sc in B2, ch 30, sl st in the same sc. Work 40 sc over the ch-30 loop, then sl st in the B2 sc.
– Sc in B3, picot. Sc in the next 3 sts, picot; repeat from * 7 more times. Sc in the last 2 sts (side end and A1).
Sl st to the first sc and fasten off. (56 sc, 19 picots, 1 loop)
The picots mirror each other from the bottom center, one every third st. That gives 9 per side plus 1 at the bottom point.
The border adds 0.25 in (0.6 cm) on each side: 2.5 + 0.5 = 3 in (7.6 cm) wide, and 4 + 0.5 = 4.5 in (11.4 cm) tall.
Final Blocking
- Weave in all ends and trim them close.
- Soak the ornament in cool water for 5 minutes, then press out the water in a towel. Don’t wring it.
- Pin the ornament flat on the mat, starting with the top and bottom points 4.5 in (11.4 cm) apart.
- Pin the widest point to 3 in (7.6 cm), then ease the curves so both sides match.
- Pin each fan open, and pin into each diamond gap so the openings stay clear.
- Pin every picot outward so it sits as a small round bead.
- Spray lightly with starch if you want a stiffer ornament.
- Let it dry completely, at least 12 hours, before unpinning.
- Straighten the loop, pinning it upward if needed.
Final Quality-Control Checklist
- The body has fan tiers of 1, 2, 3, 2, 1, each fan with 7 dc.
- Every fan sits on a sc, and every V-st sits on a sc or at an edge.
- Round 1 has 56 sc: 25 per side plus 3 at each point.
- Round 2 has 19 picots: 9 per side plus 1 at the bottom point.
- The loop holds 40 sc and is firmly anchored at the top point.
- The finished size is 3 in (7.6 cm) x 4.5 in (11.4 cm).
- Both sides are mirror images, and the points are sharp and centered.
- All ends are hidden inside the stitches, with none showing through the lace.
Troubleshooting
Fans curl or ruffle: your dc are too loose for 7 per fan. Go down a hook size, or tighten the loop on your hook after each yarn over.
Diamond gaps look pinched: the ch-3 arches are too tight. Chain more loosely, or block with a pin in every gap.
Border ruffles: you have too many sc on a side. Recount to 25, and check that you didn’t put 3 sc in a ch-2 sp.
Border cups or pulls in: your sc are too tight. Work Round 1 with a hook one size larger, then switch back for Round 2.
Lopsided sides: you probably skipped an exposed dc on the slip-stitched side. Work into the stitches under the sl sts.
Floppy loop: make sure all 40 sc are packed onto the chain, and starch the loop when blocking.
Care
Hand wash in cool water with mild soap, press dry in a towel, and reshape flat. Store the ornament flat between tissue paper so the picots and points keep their shape.
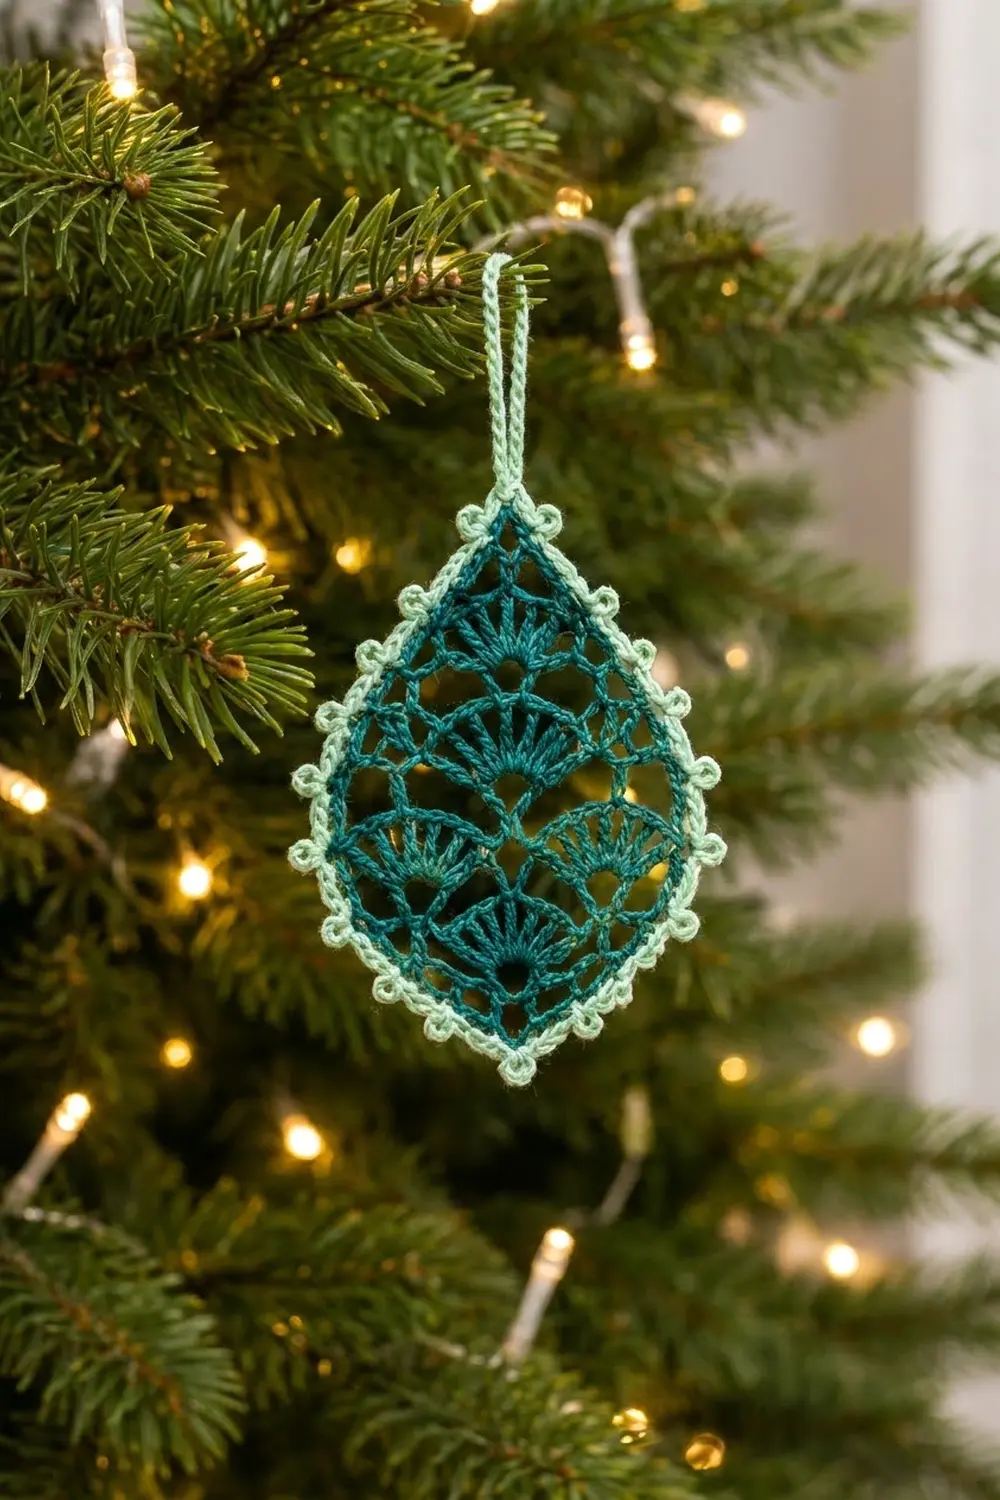
Final Notes
Here is the measurement chain:
– One fan is 0.75 in (1.9 cm) wide.
– Three fans after Row 5 measure 2.5 in (6.4 cm) across.
– Ten rows make a 4 in (10.2 cm) body.
– The 56-st border adds 0.25 in (0.6 cm) all around, for a finished 3 in (7.6 cm) x 4.5 in (11.4 cm) ornament.
– The loop adds 1.5 in (3.8 cm), for about 6 in (15.2 cm) of hanging length.
Check your size at each stage, block generously, and your teardrops will match every time. Happy crocheting!