

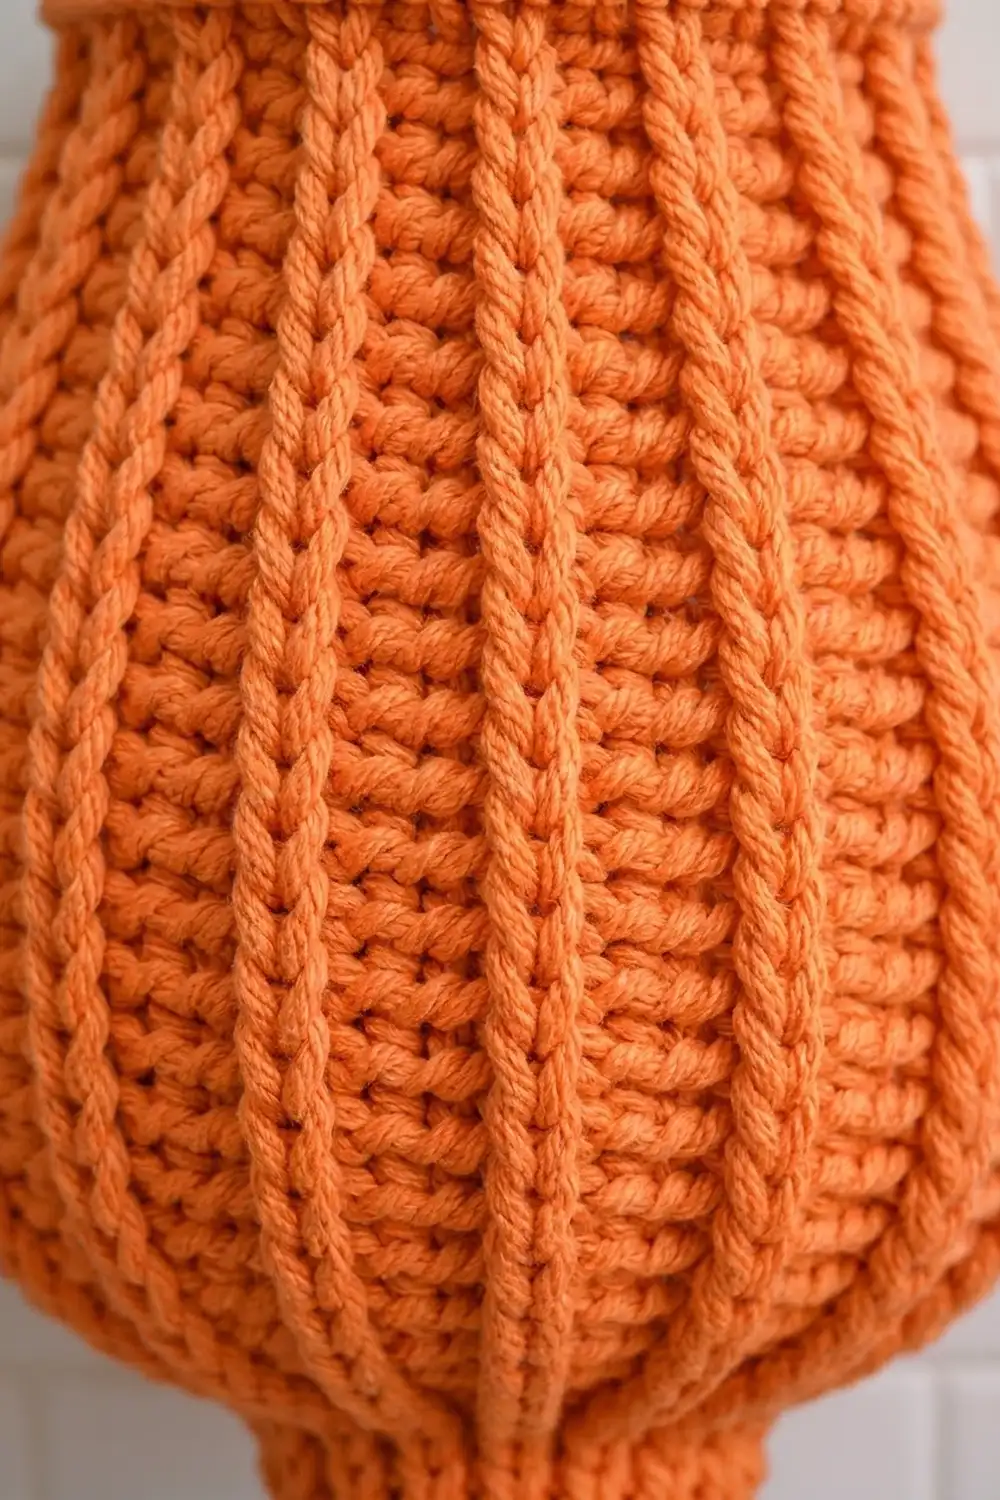
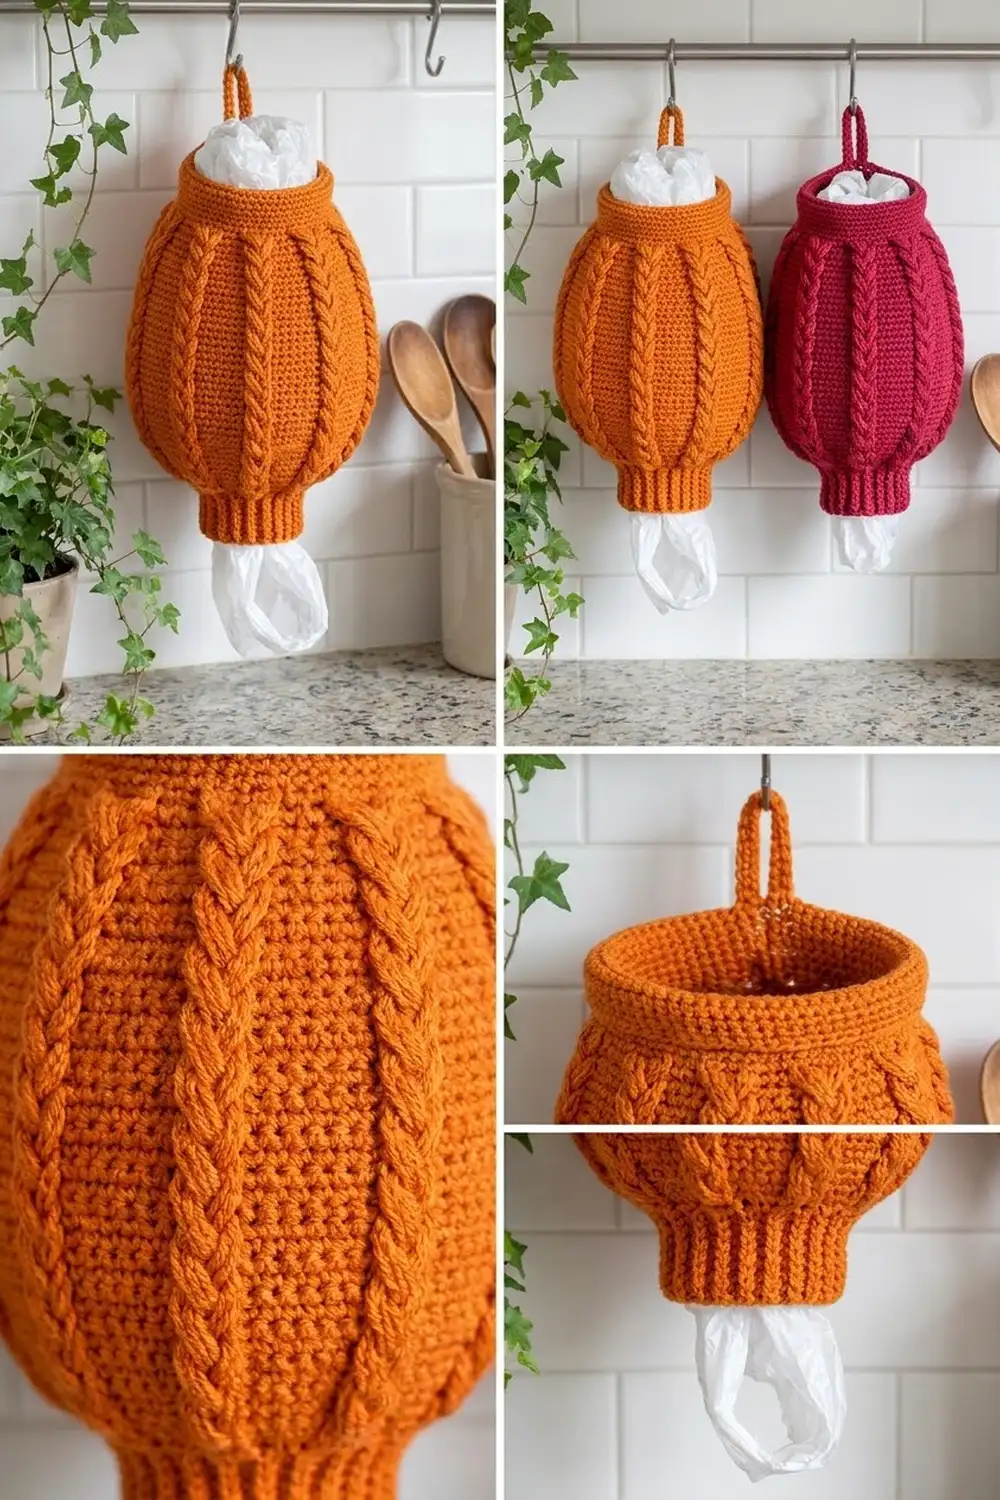
This plastic bag holder is shaped like a plump bulb. Twelve raised ribs run from top to bottom, and the background between them has a soft, ridged texture. You push used bags in through the wide top opening and pull them out one at a time through a snug ribbed cuff at the bottom.
The sample is pumpkin orange, which looks warm on a white backsplash. Deep raspberry red, olive, or cream work just as well. Cotton or a cotton blend is the best choice because it holds its shape and washes easily.
This pattern uses US crochet terms. The finished holder is about 11.5 in (29.2 cm) tall without the loop and 8.6 in (21.8 cm) wide at the widest point when flattened. The hanging loop adds about 3.5 in (8.9 cm).
You work the whole holder in one piece from the bottom up. You start with a ring for the cuff, work post-stitch ribbing, increase into the belly, work straight, decrease to the neck, then finish with a rolled single crochet rim and a crocheted hanging loop. There is no sewing.
Finished Size and Construction
- Finished size: 11.5 in (29.2 cm) tall × 8.6 in (21.8 cm) wide, measured flat
- Skill level: Easy–Intermediate (post stitches and working in the round)
- Terminology: US
- Yarn weight: #4 worsted cotton or cotton blend
- Hook: 5.0 mm (H-8)
- Number of pieces: 1
- Layout: single piece worked in joined rounds, bottom up
- Piece size before rim: 10.7 in (27.2 cm) tall
- Rim (“border”) depth: 0.75 in (1.9 cm), 3 rounds of sc
- Loop: 28 sc, about 7 in (17.8 cm) long before folding, so it hangs 3.5 in (8.9 cm) above the rim
Materials
Yarn: Use a smooth worsted-weight cotton or cotton-acrylic blend with good stitch definition, so the ribs stand out clearly. Avoid fuzzy or very splitty yarn.
- Main color (pumpkin orange): 150 g / about 270 m (295 yd)
These quantities include a margin of about 15 percent for your gauge swatch and tension differences.
Tools:
– 5.0 mm (H-8) crochet hook
– 1 stitch marker
– Tapestry needle
– Scissors
– Measuring tape
– Spray bottle and blocking pins (optional, for shaping)
Abbreviations (US Terms)
- ch – chain
- sl st – slip stitch
- sc – single crochet
- hdc – half double crochet
- dc – double crochet
- hdc2tog – half double crochet 2 together
- st(s) – stitch(es)
- rnd(s) – round(s)
Special stitches:
– FPdc (front post double crochet): Yarn over. Insert the hook from front to back to front around the post of the stitch indicated, so the hook goes behind the post. Yarn over, pull up a loop, then [yarn over, pull through 2 loops] twice.
– BPdc (back post double crochet): Yarn over. Insert the hook from back to front to back around the post of the stitch indicated, so the hook goes in front of the post. Then finish the stitch like a regular dc.
– hdc2tog: [Yarn over, insert the hook in the next st, pull up a loop] twice, then yarn over and pull through all 5 loops on the hook.
The ch-2 at the start of a round does not count as a stitch. Join each round with a sl st to the first real stitch. Every FPdc rib is worked around the FPdc directly below it, which keeps the ribs stacked vertically.
Gauge and Checkpoints
Gauge: 14 sts and 10 rnds = 4 in (10.2 cm) in the body pattern (hdc background with FPdc ribs), worked in the round.
Each hdc round adds about 0.4 in (1.0 cm) of height. Each dc round of the cuff adds about 0.5 in (1.3 cm), and each sc round of the rim adds about 0.25 in (0.6 cm).
Test first: Work the cuff and Rnds 4–9, then lay the piece flat and measure. Checkpoints:
- After Rnd 3 (cuff): 1.5 in (3.8 cm) tall. The circumference is about 7 in (17.8 cm), so the flattened width is 3.5 in (8.9 cm).
- After Rnd 7: about 3.1 in (7.9 cm) tall from the bottom edge.
- After Rnd 20 (end of belly): about 8.3 in (21.1 cm) tall. The circumference is 17.1 in (43.4 cm) around 60 sts, so the flattened width is 8.6 in (21.8 cm).
- After Rnd 26 (neck): 10.7 in (27.2 cm) tall. The circumference is 13.7 in (34.8 cm) around 48 sts, so the flattened width is 6.9 in (17.5 cm).
If your piece is too big: Change to a 4.5 mm hook. If it is too small: Change to a 5.5 mm hook. Change the hook rather than the stitch counts, because the counts are what keep the 12 ribs evenly spaced.
Pattern
Cuff (Bottom Opening)
Foundation: Ch 24 and join with a sl st to the first ch to form a ring, taking care not to twist the chain.
Rnd 1: Ch 2, then dc in each ch around. Join. (24 sts)
Rnd 2: Ch 2. FPdc around the next st, BPdc around the next st; repeat from * around. Join. (24 sts: 12 FPdc, 12 BPdc)*
Rnd 3: Ch 2. FPdc around the FPdc, BPdc around the BPdc; repeat from * around. Join. (24 sts)*
The 12 FPdc columns you make here are the bottoms of the 12 body ribs.
Belly Increases
Rnd 4 (conversion round): Ch 2. FPdc around the next FPdc, 2 hdc in the next BPdc; repeat from * around. Join.
(24 sts worked 1-per-st + 12 added = 36 sts; each repeat is 3 sts)*
Rnd 5: Ch 2. FPdc around the FPdc, 2 hdc in the next st, hdc in the next st; repeat from * around. Join.
(48 sts; each repeat is 4 sts)*
Rnd 6: Ch 2. FPdc around the FPdc, hdc in each of the next 3 sts; repeat from * around. Join. (48 sts)*
Rnd 7: Ch 2. FPdc around the FPdc, hdc in the next st, 2 hdc in the next st, hdc in the next st; repeat from * around. Join.
(60 sts; each repeat is 5 sts: 1 rib + 4 hdc)*
Belly (Straight)
Rnds 8–20: Ch 2. FPdc around the FPdc, hdc in each of the next 4 sts; repeat from * around. Join. (60 sts per round, 13 rnds)*
The piece now curves outward into the bulb shape. The ribs should line up vertically. A slight spiral is normal with joined hdc rounds, and it straightens during blocking.
Shoulder and Neck
Rnd 21: Ch 2. FPdc around the FPdc, hdc in the next st, hdc2tog, hdc in the next st; repeat from * around. Join.
(48 sts; each repeat is 4 sts)*
Rnds 22–26: Ch 2. FPdc around the FPdc, hdc in each of the next 3 sts; repeat from * around. Join. (48 sts per round, 5 rnds)*
Check the size now: the piece should be about 10.7 in (27.2 cm) tall and 6.9 in (17.5 cm) wide flat at the neck.
Border: Rolled Rim and Hanging Loop
Rim gauge: 3 rnds of sc = 0.75 in (1.9 cm). Work the rim at the same tension as the body. It should feel firm, not tight.
Rnd 27: Ch 1. Sc in each st around, including the top of each FPdc. Join. (48 sc)
Rnd 28: Ch 1. Sc in each st around. Join. (48 sc)
Rnd 29: Ch 1. Sc in each st around. Join. (48 sc) Do not fasten off.
Why the math works: The neck has 48 sts, and each rim round places exactly 1 sc in each st, so it stays at 48. Because nothing is added, the rim doesn’t ripple. Because nothing is taken away, it doesn’t pull the opening narrower than 6.9 in (17.5 cm). Single crochet is shorter and denser than hdc, so these three rounds naturally curl slightly outward and give the rolled-edge look.
Hanging loop: Pick the back center of the rim: place the loop above a background panel, centered between two ribs.
- Ch 28, skip the next 3 rim sts, and sl st in the 4th st.
- Turn, then sc in each ch back along the chain. (28 sc)
- Sl st to the rim st where the chain started. Fasten off.
You now have a loop about 7 in (17.8 cm) long, which hangs 3.5 in (8.9 cm) above the rim. The 3 skipped stitches spread the weight across the rim. For a thicker cord, work a sl st in each sc along the loop.
Weave in all ends on the wrong side, running them through the background hdc, not the ribs.
Final Blocking
- Turn the holder right side out and lightly spray it with water until it is just damp.
- Stuff it firmly with plastic bags or a small towel to bring out the bulb shape.
- Straighten each rib with your fingers so it runs vertically, from the cuff to the rim.
- Pinch the rim into an even circle and roll it gently outward.
- Check the measurements: 8.6 in (21.8 cm) across the widest point and 11.5 in (29.2 cm) tall.
- Leave it to dry completely, hanging or standing upright, before you remove the stuffing.
Final Quality-Control Checklist
- Exactly 12 raised ribs, evenly spaced, with no doubled or missing columns
- 24 sts at the cuff, 60 sts at the belly, 48 sts at the neck and rim
- The cuff stretches enough for one bag to pass through but grips the rest
- The rim is smooth and even, with no gaps at the joins
- The loop sits between two ribs and is firmly anchored
- All ends are woven in securely on the inside
- The finished size is about 11.5 in × 8.6 in (29.2 cm × 21.8 cm)
Troubleshooting
Ribs drift sideways: Make sure the ch-2 does not count as a stitch and that you join to the first FPdc. Blocking corrects a slight lean.
Stitch counts are off: Count by repeats. Each repeat should be 3, 4, or 5 sts according to the round. Recheck each round before you join.
The cuff is too loose and bags fall out: Rework Rnds 2–3 with a hook one size smaller.
The cuff is too tight: Rework the foundation as ch 24 with a hook one size larger. Keep 24 sts so the 12 ribs still fit.
The rim flares: Your sc tension is loose. Rework the rim with a 4.5 mm hook.
The bulb looks flat: Your gauge is too loose. Use a smaller hook so the fabric holds its shape.
Care
Hand wash or machine wash on a gentle cold cycle, reshape while damp, and lay flat or hang to dry. Avoid high heat, which can shrink cotton and flatten the ribs.
Final Notes
The measurement chain is simple. A 24-st cuff 1.5 in (3.8 cm) tall increases to a 60-st belly 8.6 in (21.8 cm) wide, then decreases to a 48-st neck 6.9 in (17.5 cm) wide. The body measures 10.7 in (27.2 cm) before the rim. The 0.75 in (1.9 cm) rim brings the total to 11.5 in (29.2 cm), and a 28-sc loop finishes it. If you match the gauge at the first checkpoint, every later number follows.
Happy crocheting!