

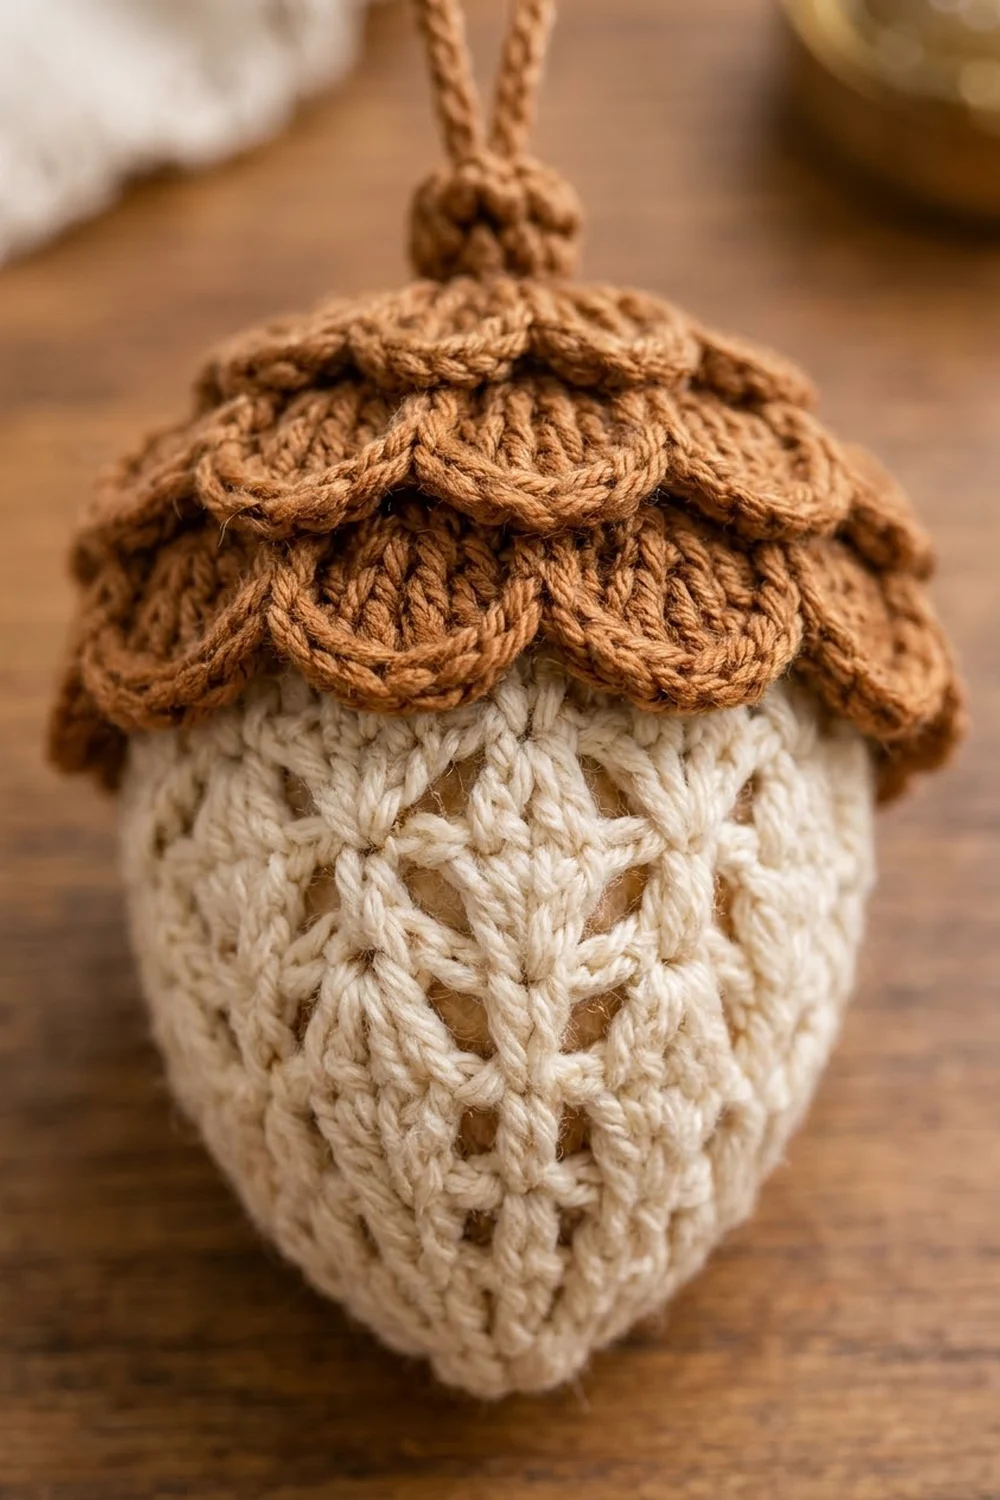
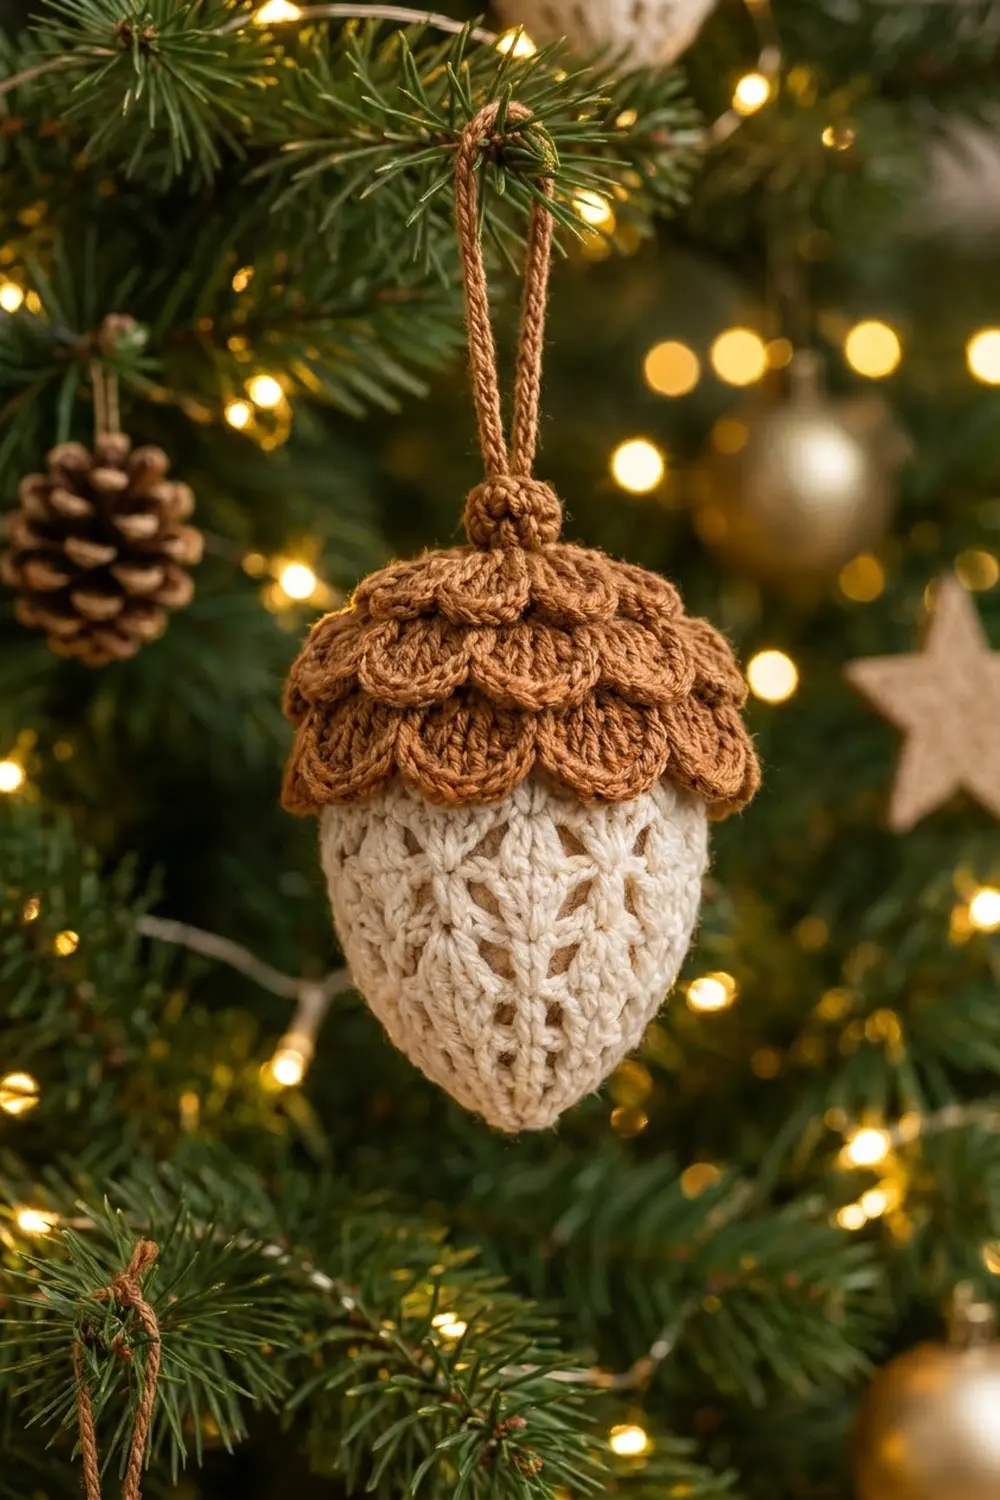
This little acorn ornament has a cream body and a warm brown cap. The body has a raised lattice of V-shaped spike stitches that form small diamonds all the way around. The cap is made of three tiers of rounded scallops. A small knob sits on top, and a brown cord loop lets the acorn hang from a branch.
The palette is just two colors, cream and caramel brown, so the ornament looks cozy next to pine cones, wood and warm lights. It works for Christmas, harvest tables or fall gift toppers.
All instructions use US crochet terms. The finished ornament measures about 2.5 in (6.4 cm) wide at the cap and 3.5 in (8.9 cm) tall without the loop. The loop adds about 1.75 in (4.4 cm).
The construction is simple. You crochet the body in joined rounds from the pointed tip upward, then stuff it and close it. The cap is worked from the top down. Two of its rounds are worked in the back loop only, which leaves front loops free for the scallop tiers. You finish with a tiny stem knob and a slip-stitch cord, then sew everything together.
Finished Size and Construction
- Finished size: 2.5 in (6.4 cm) wide x 3.5 in (8.9 cm) tall, plus a 1.75 in (4.4 cm) loop
- Skill level: Easy-intermediate (uses spike stitches and front-loop tiers)
- Terminology: US crochet terms
- Yarn weight: DK / light worsted (weight 3), cotton or cotton blend
- Hook: 3.0 mm (US C/2 or D/3)
- Number of pieces: 1 finished ornament made from 4 parts: body, cap, stem knob and hanging loop
- Layout: Stacked vertically, top to bottom: loop, knob, cap, body
- Body size: 2.1 in (5.3 cm) wide x 3 in (7.6 cm) tall, stuffed
- Cap size before the scallop rim: 2.4 in (6.1 cm) across, laid flat
- Scallop rim depth: about 0.4 in (1.0 cm)
Materials
Choose a smooth, tightly plied DK-weight cotton. Stitch definition matters here, because the spike lattice and the scallop edges are the whole look. Avoid fuzzy or brushed yarns.
- Cream (body): 10 g, about 25 m
- Caramel brown (cap, knob and loop): 8 g, about 20 m
These amounts include a margin of about 25 percent, so you won’t run short if you crochet a little loosely.
Tools:
- 3.0 mm crochet hook
- Polyester fiberfill, about 5 g
- 2 locking stitch markers
- Tapestry needle
- Scissors
- Pins
- Ruler or tape measure
Abbreviations (US Terms)
- MR: magic ring
- ch: chain
- sl st: slip stitch
- sc: single crochet
- dc: double crochet
- inc: 2 sc in the same stitch
- dec: single crochet 2 together (invisible decrease recommended)
- BLO: back loop only
- FLO: front loop only
- st(s): stitch(es)
- rnd: round
Special stitch: Spike V (SpV), worked over 2 stitches. Find the stitch 2 rounds below, directly under the next stitch of the current round.
- Insert your hook into that stitch, yarn over and pull up a loop to the height of the current round.
- Yarn over and pull through both loops. This is one long sc.
- Skip the next stitch of the current round. Work a second long sc into the same stitch 2 rounds below.
The two long loops fan upward from one point and form a V. One SpV uses 2 stitches and makes 2 stitches, so stitch counts never change.
Scallop: 5 dc in the next stitch.
Gauge and Checkpoints
Gauge: 22 sc and 24 rounds = 4 in (10.2 cm) in sc worked in the round. That is 5.5 sts and 6 rounds per 1 in (2.5 cm).
Make the body first and check it before you start the cap. Gauge matters less here than for a garment, but a tight, firm fabric keeps the stuffing from showing through.
Checkpoints:
- Body after Rnd 10 (36 sts): 6.5 in (16.5 cm) around; about 1.5 in (3.8 cm) from tip to edge
- Body after Rnd 18: about 2.75 in (7.0 cm) from tip to edge
- Finished, stuffed body: 2.1 in (5.3 cm) wide x 3 in (7.6 cm) tall
- Cap after Rnd 8 (42 sts), laid flat: 2.4 in (6.1 cm) across
- Cap after the scallop rim: about 2.5 in (6.4 cm) across when sitting on the body
Too big? Go down to a 2.75 mm hook. Too small, or the fabric too stiff to shape? Go up to a 3.25 mm hook. Use the same hook for the body and the cap so the cap fits.
Body (Cream)
Work the body in joined rounds from the pointed bottom tip up to the top. At the end of each round, sl st into the first sc. The ch 1 at the start of each round does not count as a stitch. Place a marker in the first stitch of each round.
Rnd 1: MR, 4 sc in ring, join. (4 sts)
Rnd 2: Inc in each st around. (8 sts)
Rnd 3: [Sc in next st, inc] 4 times. (12 sts)
Rnd 4: Sc in each st around. (12 sts) This plain round keeps the tip pointed.
Rnd 5: [Sc in next 2 sts, inc] 4 times. (16 sts)
Rnd 6: [Sc in next 3 sts, inc] 4 times. (20 sts)
Rnd 7: [Sc in next 4 sts, inc] 4 times. (24 sts)
Rnd 8: [Sc in next 5 sts, inc] 4 times. (28 sts)
Rnd 9: [Sc in next 6 sts, inc] 4 times. (32 sts)
Rnd 10: [Sc in next 7 sts, inc] 4 times. (36 sts)
Checkpoint: the opening measures 6.5 in (16.5 cm) around.
Rnds 11–12: Sc in each st around. (36 sts)
Rnd 13 (Lattice A): [SpV over next 2 sts, anchored in Rnd 11; sc in next 2 sts] 9 times. (36 sts)
Rnd 14: Sc in each st around. (36 sts)
Rnd 15 (Lattice B): [Sc in next 2 sts; SpV over next 2 sts, anchored in Rnd 13] 9 times. (36 sts)
Each Lattice B V anchors into a plain sc of Rnd 13, between two Lattice A Vs. This 2-stitch offset is what turns the Vs into diamonds.
Rnd 16: Sc in each st around. (36 sts)
Rnd 17 (Lattice A): Repeat Rnd 13, anchoring in Rnd 15. (36 sts)
Rnd 18: Sc in each st around. (36 sts)
Checkpoint: the body measures about 2.75 in (7.0 cm) from tip to edge. Pull each long loop up to the full round height so the fabric doesn’t pucker.
Rnd 19: [Sc in next 4 sts, dec] 6 times. (30 sts)
Rnd 20: [Sc in next 3 sts, dec] 6 times. (24 sts)
Rnd 21: [Sc in next 2 sts, dec] 6 times. (18 sts)
Stuff firmly now. Push the fiberfill well into the tip so it stays pointed.
Rnd 22: [Sc in next st, dec] 6 times. (12 sts)
Rnd 23: Dec 6 times. (6 sts)
Add a little more stuffing. Fasten off, leaving a 6 in (15.2 cm) tail. Weave the tail through the front loops of the last 6 sts, pull the hole closed and hide the end inside.
Cap (Caramel Brown)
Work the cap from the top down in joined rounds, the same way as the body. Rnds 5 and 8 are worked in BLO, which leaves the front loops of Rnds 4 and 7 free for the upper scallop tiers.
Rnd 1: MR, 6 sc in ring, join. (6 sts)
Rnd 2: Inc in each st around. (12 sts)
Rnd 3: [Sc in next st, inc] 6 times. (18 sts)
Rnd 4: [Sc in next 2 sts, inc] 6 times. (24 sts)
Rnd 5 (BLO): Working in BLO, [sc in next 3 sts, inc] 6 times. (30 sts)
Rnd 6: [Sc in next 4 sts, inc] 6 times. (36 sts)
Rnd 7: Sc in each st around. (36 sts)
Rnd 8 (BLO): Working in BLO, [sc in next 5 sts, inc] 6 times. (42 sts)
Checkpoint: laid flat, the cap measures 2.4 in (6.1 cm) across.
Rnds 9–10: Sc in each st around. (42 sts)
Because these rounds have no increases, the edge turns down and the cap becomes a shallow dome. Don’t fasten off. Go straight on to the bottom scallop rim in the Border section below.
Stem Knob (Caramel Brown)
Rnd 1: MR, 6 sc in ring, join. (6 sts)
Rnds 2–3: Sc in each st around. (6 sts)
Fasten off, leaving a 10 in (25.4 cm) tail. Push a pinch of stuffing inside. The knob is about 0.4 in (1.0 cm) across and 0.5 in (1.3 cm) tall.
Hanging Loop (Caramel Brown)
Ch 26. Sl st into the back bump of the 2nd ch from the hook and of each ch across. (25 sl sts) Fasten off, leaving 6 in (15.2 cm) tails at both ends. The cord measures about 3.5 in (8.9 cm) and folds into a 1.75 in (4.4 cm) loop.
Make All Pieces
For one ornament, you need:
- Cream: 1 body
- Caramel brown: 1 cap, 1 stem knob, 1 hanging loop
Layout, top to bottom:
   loop      (brown cord, folded)
   knob      (brown, 6 sts)
   cap       (brown, 3 scallop tiers)
   body      (cream lattice, tip down)
Joining
Method: Whipstitch with the brown yarn tail. Sew through stitches only, never through the stuffing.
- Fold the loop in half. Thread both tails from the outside through the center of the knob’s magic ring, then down through the center of the cap’s MR. Knot them on the inside of the cap. The loop now stands 1.75 in (4.4 cm) above the knob.
- Slide the knob down to the cap, open end down. Sew its last round to cap Rnd 2, working 1 knob stitch to every 2 cap stitches. The knob’s 6 sts meet the 12 sts of Rnd 2 evenly.
- Set the cap on the body so that cap Rnd 9 lines up with body Rnd 19 (30 sts). Pin at 4 evenly spaced points.
- Sew the inside of cap Rnd 9 to body Rnd 19, staying above the scallops so they hang free. The cap round has 42 sts and the body round has 30 sts, so take 7 cap stitches for every 5 body stitches, 6 times around.
Tension: Pull each stitch snug but not tight. Pulling too hard tilts the cap or puckers the body lattice.
Size checkpoint: The assembled ornament measures 3.5 in (8.9 cm) from the tip to the top of the knob. The cap sits about 2.5 in (6.4 cm) across.
Border: Scalloped Cap Tiers
On this ornament, the border is the three scallop tiers on the cap. Every tier uses the same 3-stitch repeat: one scallop, one skipped stitch and one sl st. Each tier’s base count is a multiple of 3, so the repeats close neatly with no leftover stitches.
Border gauge: One scallop (5 dc) covers 3 base stitches and stands about 0.4 in (1.0 cm) tall.
Tier 3, bottom rim (worked on cap Rnd 10, 42 sts): Ch 1. [5 dc in next st, skip next st, sl st in next st] 14 times. Join to the first dc. (14 scallops: 70 dc + 14 sl sts) Fasten off and weave in the end.
Why it works: 14 repeats x 3 sts = 42 sts, which matches Rnd 10’s count.
Tier 2, middle (worked in the free front loops of Rnd 7, 36 loops): With the outside of the cap facing you, join brown with a sl st in any free front loop. [5 dc in next loop, skip next loop, sl st in next loop] 12 times. The last sl st goes into the joining loop. (12 scallops: 60 dc + 12 sl sts) Fasten off.
Why it works: 12 repeats x 3 loops = 36 loops, which matches Rnd 7’s count.
Tier 1, top (worked in the free front loops of Rnd 4, 24 loops): Join brown the same way. [5 dc in next loop, skip next loop, sl st in next loop] 8 times. (8 scallops: 40 dc + 8 sl sts) Fasten off.
Why it works: 8 repeats x 3 loops = 24 loops, which matches Rnd 4’s count.
The tiers grow from 8 to 12 to 14 scallops, which gives the overlapping, stacked look. Start Tier 2 so its scallops sit between the scallops of Tier 3, and start Tier 1 so its scallops sit between those of Tier 2.
Final Blocking
- Lightly mist the cap with water, or hold it above a steam iron without touching it.
- With your fingers, curve each scallop down and out so the tiers overlap like shingles.
- Roll the body between your palms to even out the stuffing and sharpen the tip.
- Gently straighten any spike Vs that lean to one side.
- Hang the ornament by its loop and let it dry completely, at least 2 hours.
Final Quality-Control Checklist
- The body is 2.1 in (5.3 cm) wide and 3 in (7.6 cm) tall.
- The tip is pointed and firmly stuffed.
- Rnds 13, 15 and 17 each show 9 Vs, offset by 2 stitches from round to round.
- The cap tiers have 8, 12 and 14 scallops.
- The cap sits level and measures about 2.5 in (6.4 cm) across.
- The knob is centered, and the loop stands 1.75 in (4.4 cm) tall.
- No stuffing shows through the lattice.
- All ends are woven in and hidden.
Troubleshooting
The Vs look short and pull the fabric. Pull each long loop up to the full height of the current round before you finish the stitch.
The lattice makes stripes instead of diamonds. Check the 2-stitch offset. Lattice B must start with 2 sc, not with a SpV.
The cap is loose on the body. Work cap Rnds 9–10 with a hook 0.25 mm smaller, or sew the cap lower, to body Rnd 18.
The scallops ruffle. Your dc may be loose. Try 4 dc per scallop, on Tier 1 only.
The tip is blunt. Stuff the tip first with a small pinch of fiberfill, pushed in with the end of the hook.
Stuffing shows through. Use a smaller hook, or use cream-colored fiberfill.
Care
Spot clean with cool water and mild soap, then reshape and air dry. Store the ornament flat in tissue paper so the scallops keep their shape.
Final Notes
The measurements build on each other in a short chain. A gauge of 5.5 sts per 1 in (2.5 cm) makes the 36-stitch body 6.5 in (16.5 cm) around. That gives a stuffed body 2.1 in (5.3 cm) wide and 3 in (7.6 cm) tall. The 42-stitch cap lies flat at 2.4 in (6.1 cm), and with its scallop tiers it sits about 2.5 in (6.4 cm) across. Add the knob and the ornament is 3.5 in (8.9 cm) tall, with a 1.75 in (4.4 cm) loop on top. If you check each stage, every acorn you make will come out the same size.
Happy crocheting!