

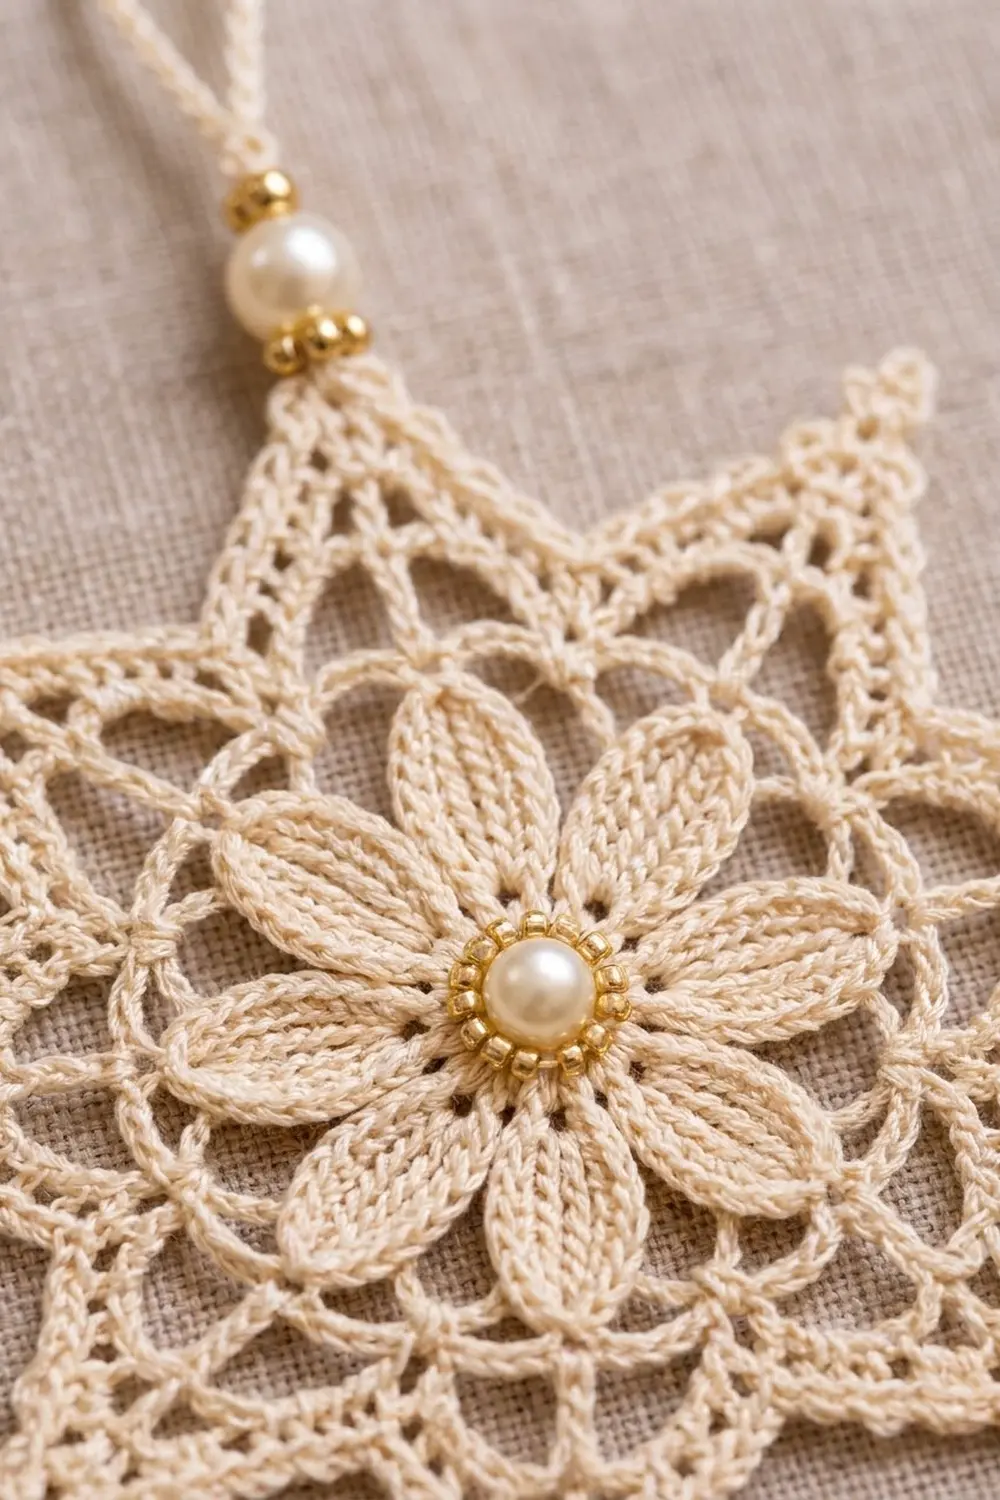
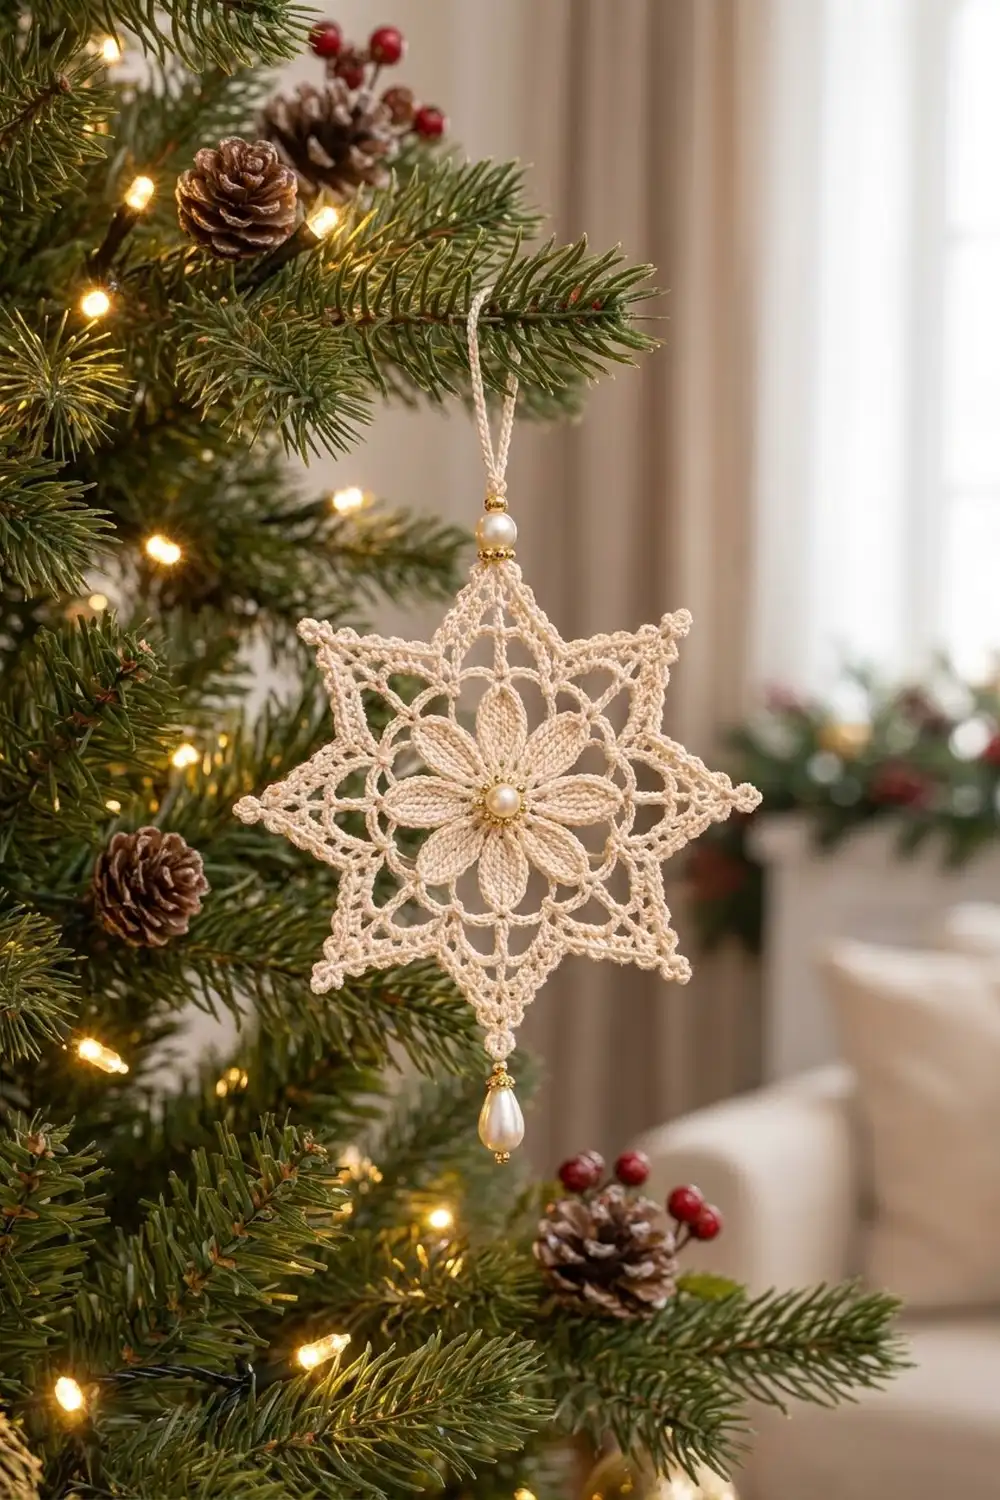
The Ivory Pearl Snowstar is a lacy, eight-pointed thread star with a soft flower at its heart. Eight solid oval petals surround a pearl center. A crisp ring frames them, and an open chain mesh fans out into eight sharp points edged with tiny picots.
It is worked entirely in ivory cotton thread and finished with cream pearls and small gold beads. The look is classic heirloom Christmas: quiet, elegant, and lovely against warm tree lights.
This pattern uses US crochet terms. The finished star measures 4.5 in (11.4 cm) from point to point. With the hanging loop and the bottom dangle, the total length is about 7.25 in (18.4 cm).
You work the star as one piece, in the round from the center out: flower, ring, mesh, points, then a picot border. You add the beads last and then block the star stiff.
Finished Size and Construction
- Finished size: 4.5 in (11.4 cm) point to point
- Total hanging length: about 7.25 in (18.4 cm), including the loop and dangle
- Skill level: Intermediate (thread work, beading)
- Terminology: US
- Yarn weight: Size 10 cotton crochet thread (lace weight)
- Hook: 1.75 mm steel hook (US steel 6)
- Number of pieces: 1
- Layout: Single motif, worked in the round
- Piece size: 4.5 in (11.4 cm) point to point
- Size before border: 4.25 in (10.8 cm) point to point after Rnd 8
- Border depth: about 0.125 in (0.3 cm) per side
Materials
Thread: Use mercerized size 10 cotton. It holds sharp points after blocking, and its sheen matches the pearls. Avoid fuzzy or acrylic threads, because they blur the lace and won’t stiffen well.
- Ivory / cream: 10 g, about 90 m (98 yd)
The star itself uses about 6 g. This quantity includes a margin for a test swatch, the hanging loop and weaving in ends.
Beads:
– 2 round cream pearls, 6 mm (one for the center, one for the loop)
– 1 round cream pearl, 4 mm (bottom dangle)
– 8 gold seed beads, 2 mm (center ring), plus 1 extra to use as a stopper
– 2 gold spacer beads, 3 mm (on either side of the loop pearl)
– 1 gold bead cap, 6 mm
– 1 teardrop pearl, 8 x 12 mm, drilled top to bottom
Tools:
– 1.75 mm steel crochet hook
– Big-eye beading needle and ivory sewing thread
– Fine tapestry needle
– Stitch marker, scissors and a ruler
– Foam blocking board and rustproof pins
– Fabric stiffener or heavy spray starch
Abbreviations (US Terms)
- ch – chain
- sl st – slip stitch
- sc – single crochet
- hdc – half double crochet
- dc – double crochet
- tr – treble crochet
- sp – space
- rep – repeat
- p (picot) – ch 3, sl st in 3rd ch from hook
- tip picot – ch 4, sl st in 4th ch from hook
- bch (bead chain) – slide a pre-strung bead up against the hook, yo and pull through, locking the bead inside that chain
Gauge and Checkpoints
Gauge matters for proportion more than for an exact size. Still, the points only look sharp when the mesh is the right tension, so work Rnds 1–3 as a test first.
Gauge: Rnds 1–3 measure 2 in (5.1 cm) across the petal tips.
Checkpoints:
– After Rnd 1: 0.5 in (1.3 cm) across
– After Rnd 3: 2 in (5.1 cm) across the petal tips
– After Rnd 5: 2.25 in (5.7 cm) across the ring
– After Rnd 7: 3.5 in (8.9 cm) across, measured from loop to loop
– After Rnd 8: 4.25 in (10.8 cm) point to point
– After Rnd 9: 4.5 in (11.4 cm) point to point
If it’s too big: Your flower is over 2.25 in (5.7 cm). Switch to a 1.5 mm hook and tighten your chains.
If it’s too small: Your flower is under 1.75 in (4.4 cm). Switch to a 2.0 mm hook.
A variance of 0.125 in (0.3 cm) is fine, since blocking will even it out.
The Flower Center
Rnd 1: Make a magic ring. Ch 1, then work 16 sc into the ring. Pull the ring tightly closed and sl st in the first sc to join. (16 sc)
Rnd 2: Ch 1. Sc in next st, ch 10, skip next st. Rep from * 7 more times, then sl st in the first sc to join. (8 sc, 8 ch-10 loops)
Rnd 3 (petals): In each ch-10 loop, work (2 sc, 2 hdc, 4 dc, ch 2, 4 dc, 2 hdc, 2 sc), then sl st in the next sc of Rnd 2. Repeat in all 8 loops. Join with a sl st in the base sc of the first petal.
Each petal has 20 sts plus a ch-2 tip. (160 sts, 8 ch-2 tips)
Packing 20 stitches into a 10-chain loop squeezes the loop shut. This shapes each petal into a solid, pointed oval, and the hidden chain becomes a faint center vein. Ease each petal flat with your fingers before you move on.
Checkpoint: 2 in (5.1 cm) across the petal tips.
The Ring
Rnd 4: Sl st across the first 2 sc, 2 hdc and 4 dc of the first petal, then sl st into the ch-2 tip (8 sl sts plus 1 into the tip). Ch 1 and sc in the same tip. Ch 9, sc in the next petal’s ch-2 tip. Rep from * 6 more times. Ch 9 and join with a sl st in the first sc. (8 sc, 8 ch-9 sps)
Rnd 5: Ch 1. Sc in the tip sc, then work 10 sc in the next ch-9 sp. Rep from * 7 more times and join. (88 sc)
The count is 8 tip sc plus (8 x 10) sc in the spaces: 8 + 80 = 88. That gives 11 sc per petal section, which forms the dense, firm ring that frames the flower.
Checkpoint: 2.25 in (5.7 cm) across. The ring should lie flat. If it ruffles, work 9 sc per space instead and adjust Rnd 6 to match.
The Lace Mesh
Rnd 6: Ch 1. Work the following in each 11-st section:
Sc in the first st (the one above a petal tip), ch 5, skip 5 sts, sc in the next st, ch 5, skip 4 sts.
Rep from * 7 more times and join. (16 sc, 16 ch-5 loops)
Each section uses 1 + 5 + 1 + 4 = 11 sts, which matches Rnd 5 exactly.
Rnd 7: Sl st in the next 3 ch to reach the center of the first loop. Ch 1 and sc in the same loop. Ch 7, sc in the next ch-5 loop. Rep from * 14 more times. Ch 7 and join to the first sc. (16 sc, 16 ch-7 loops)
From now on, the loops alternate between valley loops (V) and point loops (P). The first loop after your join is a V loop.
Checkpoint: 3.5 in (8.9 cm) across, measured from loop to loop.
The Star Points
Rnd 8: Sl st in the next 4 ch to reach the center of the first V loop. Ch 1 and sc in the same loop. Then:
Ch 7. In the next P loop, work (2 tr, ch 5, 2 tr). Ch 7, sc in the next V loop.
Rep from * 7 more times. On the last repeat, skip the final sc and join to the first sc instead.
Count: 8 sc, 32 tr, 16 ch-7 sps and 8 ch-5 tips.
The tr clusters push each P loop outward while the sc pulls each V loop in. That contrast creates the eight triangles.
Checkpoint: 4.25 in (10.8 cm) from point to point. This is your size before the border.
Border
Border gauge: 8 sc fill each ch-7 space, and 6 sc plus a tip picot fill each ch-5 tip. The border adds about 0.125 in (0.3 cm) on every side.
Rnd 9: Ch 1. Work the following for each point section:
- Sc in the V sc (1)
- In the ch-7 sp: 4 sc, p, 4 sc (8)
- Sc in each of the next 2 tr (2)
- In the ch-5 tip: 3 sc, tip picot, 3 sc (6)
- Sc in each of the next 2 tr (2)
- In the ch-7 sp: 4 sc, p, 4 sc (8)
Rep for all 8 sections and join with a sl st in the first sc. Leave a 6 in (15.2 cm) tail before fastening off.
Per section: 1 + 8 + 2 + 6 + 2 + 8 = 27 sc, plus 2 side picots and 1 tip picot.
Total: 27 x 8 = 216 sc and 24 picots (16 side picots and 8 tip picots).
Why the math works: Every ch-7 space gets 8 sc, which keeps the edge flat without stretching the chain. Every tr gets exactly one sc, so there are no extra stitches. Each tip gets 6 sc split evenly around the tip picot, so all eight points stay symmetrical. Because every section is identical, the star blocks out with even points.
Checkpoint: 4.5 in (11.4 cm) from point to point.
Hanging Loop and Pearls
Hanging loop: Cut a 1 yd (91.4 cm) length of thread. Use the beading needle to string one 3 mm gold spacer, one 6 mm pearl and a second gold spacer. Join the thread to the tip picot of any point, which becomes the top of the star. Then:
- Ch 1, bch (gold spacer), bch (pearl), bch (gold spacer), ch 1
- Ch 36, then sl st in the last ch made before the beads
- Fasten off and weave the ends into the stem
The loop hangs about 1.5 in (3.8 cm) long, and the bead stack is about 0.5 in (1.3 cm).
Bottom dangle: String the 4 mm pearl onto a new length of thread. Join to the tip picot of the opposite point. Ch 2, bch (pearl), ch 2, and fasten off, leaving an 8 in (20.3 cm) tail.
Thread the tail through the gold bead cap, the teardrop pearl and one 2 mm stopper bead. Pass the tail back up through the teardrop and the cap, knot it at the chain and weave it in. If the bead holes are too small for crochet thread, use doubled sewing thread instead. The dangle is about 0.75 in (1.9 cm).
Center: Using sewing thread, sew the 6 mm pearl over the closed magic ring. Then sew the eight 2 mm gold beads around it in a tight circle, one bead in line with each petal.
Final Blocking
- Weave in all thread ends before blocking.
- Soak the star in fabric stiffener (diluted as the label directs), or wet it and spray it heavily with starch.
- Gently press out the excess liquid in a towel. Don’t wring it.
- Lay the star face up on the foam board. Pin the top and bottom tip picots 4.5 in (11.4 cm) apart.
- Pin the left and right points, then the four diagonal points, so the angles between neighboring points are even.
- Pin each V sc inward slightly, about 3 in (7.6 cm) across from valley to opposite valley, to sharpen the points.
- Open each ch-loop and each petal with a pin tip, and center the flower.
- Let the star dry completely, about 12–24 hours, before unpinning.
Final Quality-Control Checklist
- 8 petals, 8 ring sections, 16 mesh loops and 8 points
- 216 sc and 24 picots in Rnd 9
- 4.5 in (11.4 cm) from point to point
- All points are the same length, within 0.0625 in (0.2 cm)
- The ring lies flat with no ruffles
- The pearls are secure and the center bead circle is even
- The loop and dangle sit at opposite points
- All ends are woven in and there are no visible knots
- The star is stiff and holds its shape when hung
Troubleshooting
Petals twist or curl: Your tension is tight in Rnd 3. Relax your hand, and flatten each petal as you finish it.
Ring ruffles: Use 9 sc per ch-9 space. That gives 80 sts and 10 per section; in Rnd 6, work skip 4 then skip 4 instead of skip 5 then skip 4.
Ring cups: Use a looser hook for Rnd 5, or make the ch-9 spaces into ch-10.
Points look blunt: Tighten the V sc in Rnd 8, and pin the valleys inward during blocking.
Points differ in length: Recount the tr in Rnd 8. Each point needs exactly 2 tr on each side.
Beads won’t fit the thread: Use a big-eye needle, or attach the beads with doubled sewing thread.
Star droops on the tree: Re-wet it with fresh stiffener and block it again.
Care
Store the star flat in tissue, away from moisture and crushing. To clean it, dab lightly with a damp cloth. If the star softens, re-stiffen it and block it again.
Final Notes
Each stage builds on the measurement before it:
- A 0.5 in (1.3 cm) center
- A 2 in (5.1 cm) flower
- A 2.25 in (5.7 cm) ring
- A 3.5 in (8.9 cm) mesh
- 4.25 in (10.8 cm) points
- A 4.5 in (11.4 cm) finished star
The stitch counts stay consistent all the way out: 16, then 88, then 216. If each checkpoint is right, the next one will be too. Make one star for a gift tag, or a whole set for the tree.
Happy crocheting!