

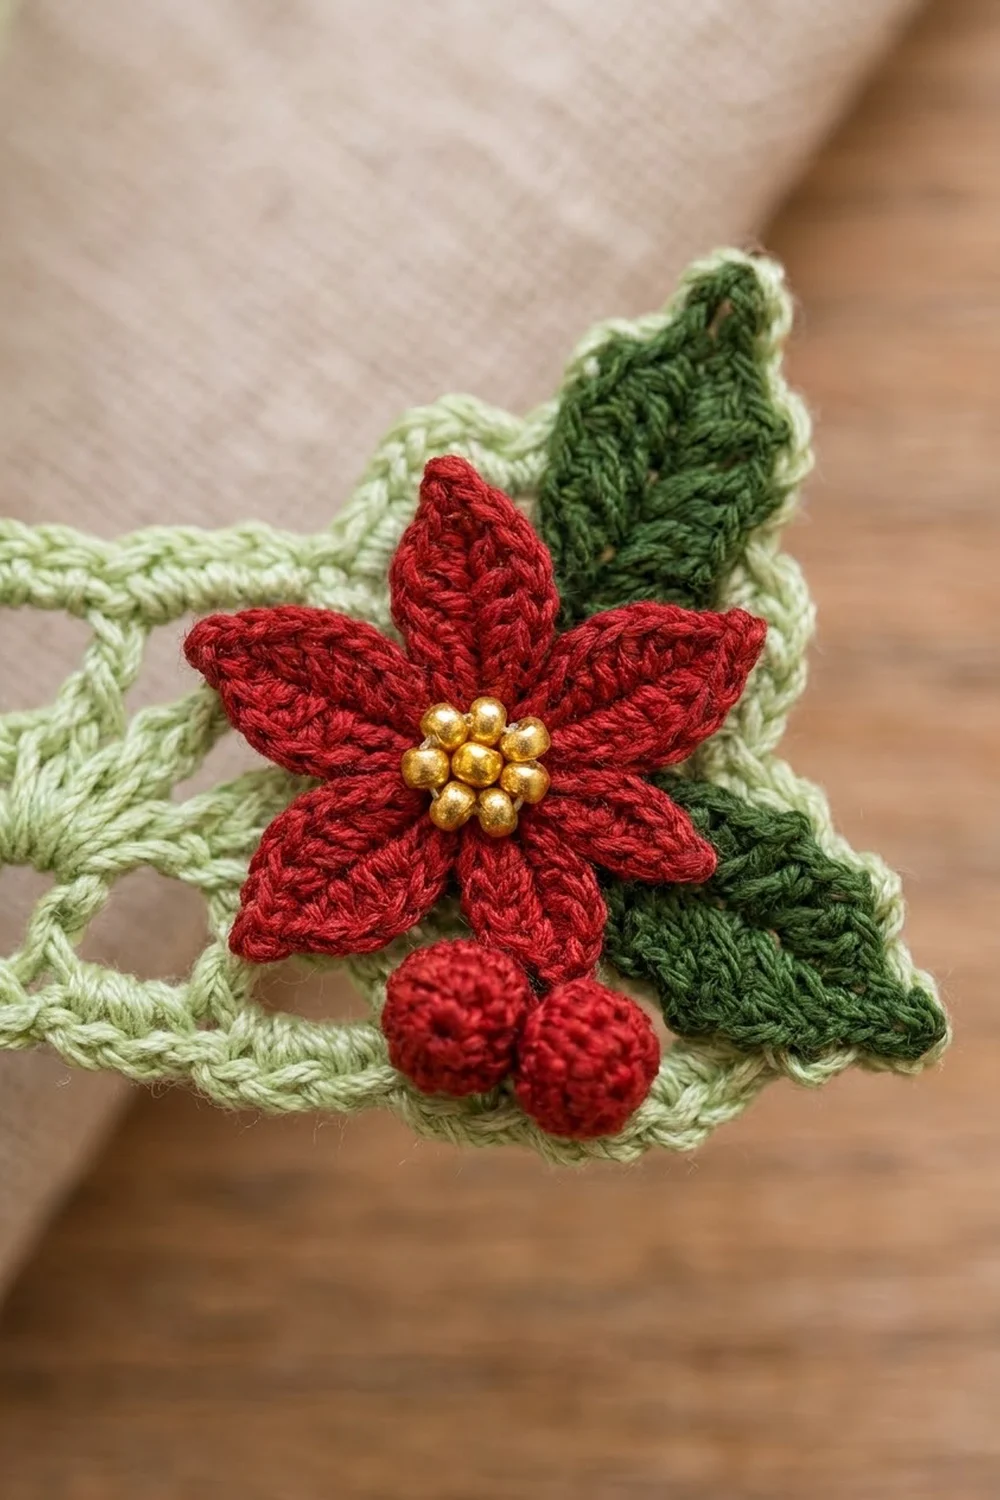
This little lace letter is a quick, festive make. It’s a capital “L” in soft sage-green cotton thread, built from stacked fan stitches framed by delicate chain windows. A small red poinsettia, two holly-style leaves and three round berries finish it off.
The colors are pale green lace, deep Christmas red, dark leaf green and a golden-yellow flower center. It has a vintage, handmade look that works well as a monogram gift tag, a name ornament or a personalized tree decoration.
This pattern uses US crochet terms. The finished letter measures 3.8 in (9.7 cm) tall and 2.7 in (6.9 cm) wide, plus a hanging loop of about 1 in (2.5 cm).
You work the letter flat in one piece from the bottom up. Start with the full width of the foot and work two rows of fans across it. Then continue up the upright stroke only, and finish the top with a wide fan row (the “capital”). A two-round border outlines the whole shape and adds the corner curls and the hanging loop. The poinsettia, leaves and berries are made separately and sewn on.
Finished Size and Construction
- Finished size: 3.8 in (9.7 cm) tall x 2.7 in (6.9 cm) wide, not counting the loop
- Skill level: Intermediate
- Terminology: US
- Yarn weight: Size 3 cotton crochet thread (light fingering)
- Hook: 2.25 mm (US B-1)
- Number of pieces: 1 lace letter, plus appliqué (1 poinsettia, 2 leaves, 3 berries)
- Layout: One “L” shape: the upright stroke is on the left and the foot extends to the right
- Upright stroke width: 1.3 in (3.3 cm) before the border, 1.6 in (4.1 cm) after
- Size before border: 2.4 in (6.1 cm) wide x 3.5 in (8.9 cm) tall
- Border depth: 0.15 in (0.4 cm) per side
Materials
Mercerized cotton thread gives crisp fans and keeps its shape after blocking. Size 3 thread is a little heavier than standard lace thread, so the letter is sturdy enough to hang without going floppy. Any smooth cotton of similar weight will work if you match gauge.
- Sage green (letter): 6 g, about 25 m
- Red (poinsettia and berries): 2 g, about 8 m
- Dark green (leaves): 1 g, about 4 m
- Golden yellow (center): 0.5 g, about 1 m
Tools:
- 2.25 mm (US B-1) crochet hook
- Sharp tapestry needle
- Small scissors
- Blocking board or foam mat, and rust-proof pins
- Spray bottle, or diluted fabric stiffener (optional)
All quantities include a small safety margin.
Abbreviations (US Terms)
- ch – chain
- sl st – slip stitch
- sc – single crochet
- hdc – half double crochet
- dc – double crochet
- tr – treble crochet
- sk – skip
- sp – space
- st(s) – stitch(es)
- FLO / BLO – front loop only / back loop only
- RS – right side
Special stitch – Fan: 7 dc in the same stitch or chain. The top row uses a large fan of 9 dc in the same stitch.
Turning chain: At the start of a dc row, ch 3 counts as the first dc.
Gauge and Checkpoints
Gauge:
– 10 sc = 1 in (2.5 cm).
– One fan repeat (one fan row plus one arch row) = 0.6 in (1.5 cm) tall.
The letter itself is your gauge test. The checkpoints come early, so if something is off you only rip back a few rows.
- After Row 1: 24 sc measure 2.4 in (6.1 cm).
- After Row 5 (foot done): The foot is 1.3 in (3.3 cm) tall.
- After Row 11 (fan column done): Total height is 3.1 in (7.9 cm). The upright is 1.3 in (3.3 cm) wide.
- After Row 13 (capital): Total height is 3.5 in (8.9 cm). The capital flares to about 1.7 in (4.3 cm).
- After the border: The letter is 3.8 in (9.7 cm) x 2.7 in (6.9 cm).
Too big? Go down to a 2.0 mm hook, or use a slightly finer thread. Too small? Go up to a 2.5 mm hook.
Row height matters most. If a fan repeat comes out taller than 0.6 in (1.5 cm), make your dc shorter by pulling up the first loop less.
The Lace Letter
Stitch positions are numbered 1–24 from the left edge of the letter, seen from the RS:
– Positions 1–13 become the upright stroke.
– Positions 14–24 are the foot extension.
Every row is symmetrical within its section, so the instructions read the same in either direction.
The Foot (Rows 1–5)
With sage green, ch 25.
Row 1 (RS): Sc in 2nd ch from hook and in each ch across, turn. (24 sc)
Row 2 (fan row): Ch 3, dc in next st, ch 1, sk 1, dc in next st, sk 2, Fan in next st, sk 2, dc in next st, ch 1, sk 1, dc in next 2 sts (positions 12–13), ch 1, sk 1, dc in next st, sk 2, Fan in next st, sk 2, dc in next st, ch 1, sk 1, dc in last 2 sts, turn.
(24 dc including 2 Fans, plus 4 ch-1 sps)
Row 3 (arch row): Ch 3, dc in next dc, ch 1, dc in next dc, ch 5, sk Fan, dc in next dc, ch 1, dc in next 2 dc, ch 1, dc in next dc, ch 5, sk Fan, dc in next dc, ch 1, dc in next dc and in top of turning ch, turn.
(10 dc + 4 ch-1 sps + 2 ch-5 arches = 24 positions)
Row 4 (fan row): Ch 3, dc in next dc, ch 1, dc in next dc, sk 2 ch, Fan in 3rd ch of ch-5, sk 2 ch, dc in next dc, ch 1, dc in next 2 dc, ch 1, dc in next dc, sk 2 ch, Fan in 3rd ch of ch-5, sk 2 ch, dc in next dc, ch 1, dc in next dc and in top of turning ch, turn.
(24 dc, 4 ch-1 sps)
Row 5 (arch row): Repeat Row 3. You finish at position 1, the left edge.
Checkpoint: the foot measures 2.4 in (6.1 cm) x 1.3 in (3.3 cm).
The Upright Stroke (Rows 6–11)
From here on, work over positions 1–13 only. Positions 14–24 stay unworked and form the top edge of the foot.
Row 6 (fan row): Ch 3, dc in next dc, ch 1, dc in next dc, sk 2 ch, Fan in 3rd ch of ch-5, sk 2 ch, dc in next dc, ch 1, dc in next 2 dc (positions 12–13), turn.
(13 dc including 1 Fan, plus 2 ch-1 sps)
Row 7 (arch row): Ch 3, dc in next dc, ch 1, dc in next dc, ch 5, sk Fan, dc in next dc, ch 1, dc in next dc and in top of turning ch, turn.
(6 dc + 2 ch-1 sps + 1 ch-5 arch = 13 positions)
Rows 8–11: Repeat Rows 6–7 twice.
The upright now holds five stacked fans: two from the foot rows and three from the narrow rows. Checkpoint: the piece is 3.1 in (7.9 cm) tall and the upright is 1.3 in (3.3 cm) wide.
The Capital (Rows 12–13)
Row 12: Ch 1, sc in first 2 dc, sc in ch-1 sp, sc in next dc, 5 sc in ch-5 arch, sc in next dc, sc in ch-1 sp, sc in next dc and in top of turning ch, turn.
(2 + 1 + 1 + 5 + 1 + 1 + 2 = 13 sc)
Row 13 (top fan): Ch 3, 2 dc in same st, sk 2, sc in next st, sk 2, 9 dc in next st (the 7th, center st), sk 2, sc in next st, sk 2, 3 dc in last st. Do not fasten off.
(3 + 1 + 9 + 1 + 3 = 17 sts)
The half-fans at each end flare outward and give the capital its wide, scalloped top.
Border
Border gauge:
– Along stitch tops and the foundation chain, work 1 sc per stitch (10 sc per inch).
– Along row ends, work 2 sc per dc row end and 1 sc per sc row end (about 7 sc per inch). This keeps the open lace edges flat.
Round 1: Ch 1. Rotate the piece to work down the left side, then work around as follows:
– Left side: 24 sc (2 in the Row 13 end, 1 in the Row 12 end, 20 in the ends of Rows 11–2, 1 in the Row 1 end), then ch 1 for the corner.
– Bottom: 24 sc in the free loops of the foundation ch, then ch 1.
– Right end of foot: 9 sc (1 in the Row 1 end, 8 in the ends of Rows 2–5), then ch 1.
– Top of foot: 11 sc across positions 24–14 of Row 5 (1 in each dc and ch-1 sp, 5 in the arch). Don’t chain at the inner corner; keep it snug.
– Right side of upright: 15 sc (12 in the ends of Rows 6–11, 1 in the Row 12 end, 2 in the Row 13 end), then ch 1.
– Top: 17 sc, 1 in each st of Row 13, then ch 1. Join with sl st to the first sc.
(24 + 24 + 9 + 11 + 15 + 17 = 100 sc, plus 5 corner ch-1 sps)
Round 2: Sl st in each sc around. Work the corners and loop like this:
– Bottom-left, bottom-right and top-right corners of the foot: 1 sl st in each corner ch-1 sp.
– Both top corners of the upright: (sl st, ch 6, sl st) in the corner sp to make a curl loop.
– Hanging loop: In the 9th (center) sc of the top edge, work (sl st, ch 20, sl st).
Join and fasten off.
(108 sl sts = 100 + 1 extra at the loop + 3 + 4 at the corners, plus 2 ch-6 curls and 1 ch-20 loop)
Why the math works: Each side count comes straight from its own rows. A dc row is about 0.3 in (0.8 cm) tall, so 2 sc per row end lie flat on the open edges. The top 17 sc match Row 13 and the bottom 24 sc match the foundation exactly. Each corner gets its own chain, and those chains are never counted in the side totals.
Poinsettia Appliqué
Flower: With red, make a magic ring.
- Rnd 1: 5 sc in ring, pull tight, join. (5 sc)
- Rnd 2 (small petals, FLO): *Ch 5, sl st in 2nd ch from hook, sc in next ch, hdc in next ch, dc in last ch, sl st in FLO of next sc; repeat from * 4 more times. (5 petals)
- Rnd 3 (large petals, BLO): *Ch 7, sl st in 2nd ch from hook, sc in next ch, hdc in next ch, dc in next 2 ch, tr in last ch, sl st in BLO of next sc; repeat from * 4 more times. Fasten off. (5 petals)
The large petals sit behind the small ones and show between them, giving 10 staggered points. With yellow, work 5 small French knots in the center. The flower measures about 1 in (2.5 cm) across.
Leaves (make 2): With dark green, ch 8.
– Sc in 2nd ch from hook, hdc in next, dc in next 2, hdc in next, sc in next.
– (Sc, ch 2, sc) in last ch for the tip.
– Working along the other side of the chain: sc, hdc, dc, dc, hdc, sc. Sl st in first ch and fasten off.
(14 sts plus a ch-2 tip)
Berries (make 3): With red, make a magic ring and work 5 sc. Pull it very tight, join and fasten off, leaving a tail. Tuck the starting tail inside, then gather with the end tail into a ball about 0.25 in (0.6 cm) across.
Assembly: Block the letter first. Then:
1. Sew the leaves behind the flower, one pointing up and right, one pointing down and right.
2. Center the flower over the right end of the foot, about 0.5 in (1.3 cm) in from the edge, letting the petals overlap the rim slightly.
3. Sew the berries in a cluster below the flower.
Final Blocking
- Weave in all ends except the appliqué tails.
- Soak the letter in cool water and press it in a towel.
- Pin it RS up to 3.8 in (9.7 cm) x 2.7 in (6.9 cm).
- Pin each curl into a round loop, and pin the fan tips so they spread evenly.
- Check that the upright is 1.6 in (4.1 cm) wide all the way up.
- Mist with diluted stiffener if you like, then let it dry completely.
- Unpin and sew on the appliqué.
Final Quality-Control Checklist
- [ ] Five fans run up the upright and two run along the foot.
- [ ] The ch-1 windows line up straight on both sides.
- [ ] Round 1 has 100 sc and 5 corner chains.
- [ ] The inner corner lies flat.
- [ ] Both curls are the same size.
- [ ] The hanging loop is at the exact top center.
- [ ] The letter measures 3.8 in (9.7 cm) x 2.7 in (6.9 cm).
- [ ] The appliqué is secure and no stitches show on the front.
Troubleshooting
- Fans cup: The fan dc are too tight. Loosen your yarn-overs.
- Upright leans: You’ve probably missed the turning-chain dc. Count 13 positions in every row.
- Edges ruffle: There are too many border sc. Work exactly 2 per dc row end.
- Edges pull in: Work the sc around the turning chain instead of into it.
- Gap at the inner corner: Snug the first sc of the upright side, or sew the gap closed with a tail.
- Petals curl backward: Steam them lightly and pin them flat to dry.
Care
Hand wash in cool water with mild soap, reshape the fans and curls, and dry flat. Store it flat in tissue.

Final Notes
The whole letter follows one measurement chain:
– At 10 sc per inch, the foundation is 2.4 in (6.1 cm) wide.
– Each fan repeat adds 0.6 in (1.5 cm). Five repeats plus the sc rows and the capital make the letter 3.5 in (8.9 cm) tall.
– The 100-sc border adds 0.15 in (0.4 cm) per side, for a finished size of 3.8 in (9.7 cm) x 2.7 in (6.9 cm).
Check each stage as you go and your L will hang straight and lacy.
Happy crocheting!