

This valance is a strip of eight lacy half-circle fans that hangs from the curtain rod on its own crochet tabs. Each fan has an open window at its top, a ring of tall double crochet spokes, a layer of chain lace, and a scalloped outer edge finished with small picots. A solid band runs across the top and holds everything in a straight line.
The sample is worked in a single dusty rose cotton. It looks soft and cottage-style over a plain cream curtain, and the cream fabric shows through each fan’s window and lace. All instructions use US crochet terms.
The finished valance measures 56″ wide x 5″ deep (142.2 x 12.7 cm), not counting the tabs. Each tab forms a loop about 2″ (5.1 cm) tall above the band.
Here is how it comes together. You make eight fans flat in rows and join each new fan to the previous one with a picot join in its final row. Then you work a five-row header band across the top of the whole strip. Last, you work eight tabs up from the header, fold them to the back, and sew them in place.
Finished Size and Construction
- Finished size: 56″ x 5″ (142.2 x 12.7 cm), excluding tabs
- Skill level: Easy+ (simple stitches, careful counting)
- Terminology: US crochet terms
- Yarn weight: Worsted (#4) cotton
- Hook: 4.5 mm (US 7)
- Number of pieces: 8 fans, joined into one strip, plus 8 tabs worked onto the header
- Layout: 1 row of 8 fans, side by side
- Fan size: 7″ wide x 3.5″ deep (17.8 x 8.9 cm), with a 2″ (5.1 cm) window
- Size before header: 56″ x 3.5″ (142.2 x 8.9 cm)
- Header depth: 1.5″ (3.8 cm)
Materials
Pick a smooth worsted-weight cotton or cotton blend. Cotton keeps the lace crisp, holds its shape after blocking, and won’t stretch much as it hangs. Avoid fuzzy yarns, because they blur the spokes and picots.
- Dusty rose: 150 g / about 255 m (279 yd), or three 50 g balls of roughly 85 m (93 yd) each
Tools:
- 4.5 mm (US 7) crochet hook
- Tapestry needle
- Stitch markers (at least 8)
- Measuring tape
- Blocking mats and rust-proof pins
- Spray bottle
The yarn amount includes a margin of about 20% for swatching, gauge differences, and weaving in ends.
Abbreviations (US Terms)
- ch – chain
- sl st – slip stitch
- sc – single crochet
- hdc – half double crochet
- dc – double crochet
- st(s) – stitch(es)
- sp – space
- lp(s) – loop(s)
- RS / WS – right side / wrong side
Special stitches
- Ch-3 picot: Ch 3, sl st in the 3rd ch from the hook.
- Picot join: Ch 1, sl st into the matching picot of the neighboring fan, ch 1, sl st in the base of the ch-1 you just made. This replaces one ch-3 picot.
Gauge and Checkpoints
Gauge: 16 sc and 16 rows = 4″ (10.2 cm). In hdc, 16 sts and 12 rows = 4″ (10.2 cm).
Make one complete fan before you start the strip. One fan uses about 8 g, so it costs little and tells you everything. Check it at these points:
- After Row 1: the sc strip is 3.25″ (8.3 cm) long.
- After Row 5, lightly pinned: the fan is 7″ (17.8 cm) wide and 3.5″ (8.9 cm) deep, with a 2″ (5.1 cm) window.
- Each foot (the row ends at either side of the window): 2.5″ (6.4 cm) long.
If your fan comes out larger than 7.25″ (18.4 cm), go down half a hook size. If it’s smaller than 6.75″ (17.1 cm), go up half a hook size. Fix gauge now. A difference of 0.25″ (0.6 cm) per fan grows to 2″ (5.1 cm) across eight fans.
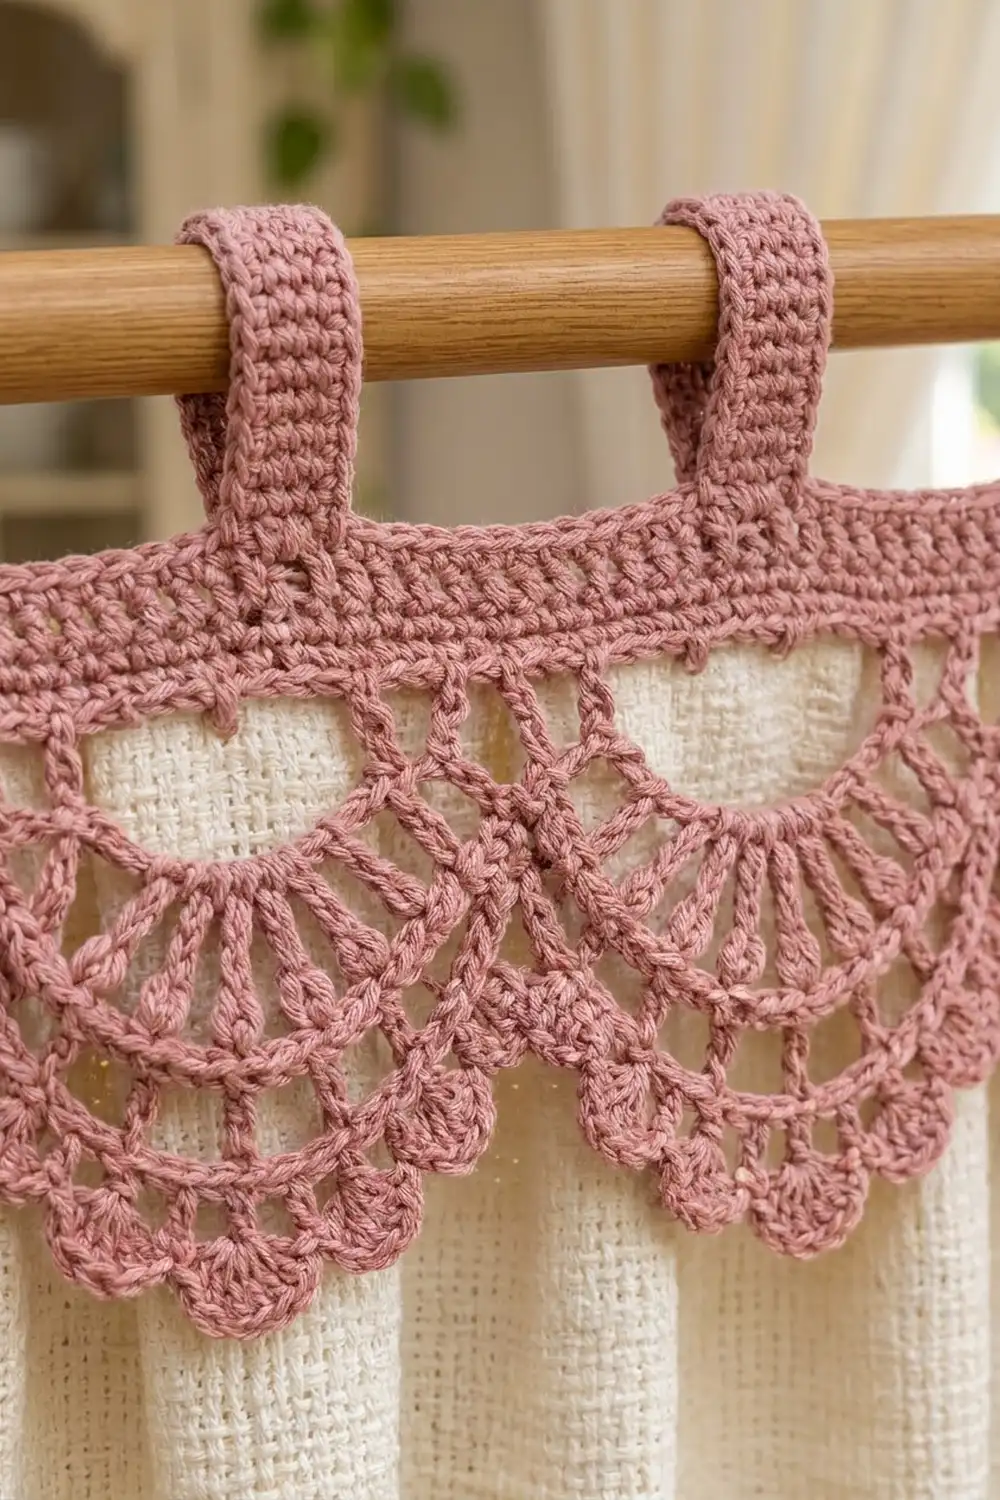
Fan Motif (Make 8)
Each fan is worked flat in rows. The Row 1 strip becomes the inner arch around the window. Each later row has more stitches and chains along its outer edge, so the strip curves into a half circle on its own.
Foundation: Ch 14.
Row 1 (RS): Sc in the 2nd ch from the hook and in each ch across. Turn. (13 sc)
Row 2: Ch 5 (counts as dc + ch 2), dc in next sc, ch 2; repeat from * 10 more times, dc in last sc. Turn. (13 dc, 12 ch-2 sps)*
These are the spokes. The ch-2 spaces spread them into a fan shape.
Row 3: Ch 1, sc in first dc, ch 3, sc in next dc; repeat from * 11 more times, working the last sc in the 3rd ch of the turning ch-5. Turn. (13 sc, 12 ch-3 lps)*
Row 4: Ch 1, sc in first sc, ch 5, skip next sc, sc in next sc; repeat from * 5 more times. Turn. (7 sc, 6 ch-5 lps)*
You’ll have worked sc into sc 1, 3, 5, 7, 9, 11, and 13.
Row 5 (RS): Ch 1, sc in first sc, in next ch-5 lp work (hdc, 2 dc, ch-3 picot, 2 dc, hdc), sc in next sc; repeat from * 5 more times. Fasten off. (6 scallops, 7 sc, 6 picots)*
Each scallop has 6 stitches plus a picot. Leave 6″ (15.2 cm) tails and weave them in after blocking. That way you can fix the shape first if you need to.
Foot check: Each foot is made of the row ends of Rows 1–5: about 0.25″ + 0.6″ + 0.4″ + 0.6″ + 0.65″ = 2.5″ (6.4 cm). Add the 2″ (5.1 cm) window and the fan is 2.5 + 2 + 2.5 = 7″ (17.8 cm) wide across the top.
Make All Pieces
You need 8 fans in dusty rose. Make Fan 1 exactly as written. For Fans 2–8, use a picot join on the first scallop of Row 5 (see Joining).
The 8 tabs are worked straight onto the header later, so they aren’t separate pieces to set aside.
Layout, seen from the RS with tabs above:
 [T8]    [T7]    [T6]    [T5]    [T4]    [T3]    [T2]    [T1]
=========================== HEADER BAND ===========================
 (F8)    (F7)    (F6)    (F5)    (F4)    (F3)    (F2)    (F1)
Fan 1 sits at the right end and each new fan is added to the left. Tabs are numbered to match the fans, and you’ll work them from right to left.
Joining
Method: Picot join-as-you-go in Row 5, plus the header band.
Work Rows 1–4 of the new fan as usual. Row 5 goes from the right foot to the left foot with the RS facing. Hold the new fan to the LEFT of the previous fan, RS up, with both fans’ windows pointing up. The first scallop of the new fan sits next to the last scallop of the previous fan.
In that first scallop, work (hdc, 2 dc), picot join to the last picot of the previous fan, then finish the scallop with (2 dc, hdc). Complete Row 5 as written. That’s 1 join per seam and 7 joins in all.
Stitch-to-stitch logic: Only one picot is shared at each seam. No stitches are added or removed, so every fan keeps its 6 scallops. The tops of the feet just meet. The header’s first row closes that top gap and locks the strip straight.
Tension: Keep the sl st in the picot join snug but not tight. If it’s too tight, the two fans pull toward each other and the scallops overlap.
Size checkpoint: Lay the joined strip flat without stretching it. It should measure 56″ (142.2 cm) across the top corners, give or take 1″ (2.5 cm), and be 3.5″ (8.9 cm) deep.
Header Band and Tabs (Border)
Border gauge: 4 sts per inch (1.6 sts per cm) in both sc and hdc.
Every fan gives exactly 28 sts to the header: 10 sc across the right foot, 8 ch over the window, and 10 sc across the left foot. With 8 fans, that’s 8 x 28 = 224 sts. No extra stitches go in at the seams.
Row 1 (RS): With the RS facing and the fans’ windows pointing up, join yarn at the top right corner of Fan 1 (the end of Row 5). Ch 1, then for each fan, from right to left:
- 10 sc evenly across the right foot: 3 sc in the Row 5 end, 2 sc each in the Row 4, Row 3, and Row 2 ends, and 1 sc in the Row 1 end.
- Ch 8 across the window.
- 10 sc evenly across the left foot: 1 sc in the Row 1 end, 2 sc each in the Row 2, Row 3, and Row 4 ends, and 3 sc in the Row 5 end.
Move straight on to the next fan. The picot join keeps the neighbor close, so you don’t need a chain between fans. Turn. (224 sts: 160 sc + 64 ch)
Row 2: Ch 2 (doesn’t count as a stitch), hdc in each sc and each ch across. Turn. (224 hdc)
Rows 3–4: Ch 2, hdc in each hdc across. Turn. (224 hdc per row)
Row 5: Ch 1, sc in each hdc across. Don’t turn. Fasten off. (224 sc)
Why the math works: At 4 sts per inch, 28 sts = 7″ (17.8 cm), which is exactly one fan’s width. 224 sts = 56″ (142.2 cm), the full strip. The window chains are counted as stitches in Row 1 and worked into in Row 2. That turns the 2″ (5.1 cm) window into a solid header without pulling it in. In height, 1 sc row (0.25″) + 3 hdc rows (1″) + 1 sc row (0.25″) = 1.5″ (3.8 cm). Fan depth plus header depth is 3.5″ + 1.5″ = 5″ (8.9 + 3.8 = 12.7 cm).
Tab placement: On Row 5, each fan’s 28 sts split as 11 + 6 + 11. Count from the right and put markers on sts 12–17 above each fan, so each tab is centered on its fan.
Tabs (make 8): With the RS facing, join yarn in the first marked st.
Tab Row 1: Ch 1, sc in the same st and in the next 5 sts. Turn. (6 sc)
Tab Rows 2–20: Ch 1, sc in each sc across. Turn. (6 sc per row)
Fasten off and leave a 10″ (25.4 cm) tail. The tab is 1.5″ (3.8 cm) wide and 5″ (12.7 cm) long.
Fold each tab to the WS. Line up its last row with header Row 2 and whipstitch it across the 6 matching stitches, so the stitches don’t show on the RS. This makes a loop about 2″ (5.1 cm) tall that fits rods up to 1″ (2.5 cm) across. For a thicker rod, add 4 rows (1″, 2.5 cm) for every extra 0.25″ (0.6 cm) of rod diameter.
Final Blocking
- Weave in all fan tails, but leave the tab tails until the tabs are sewn down.
- Pin the strip RS up on blocking mats. Pin the top edge of the header along a straight line 56″ (142.2 cm) long.
- Pin each window into a smooth 2″ (5.1 cm) half circle. A small jar lid or round template helps.
- Pull each fan down to 3.5″ (8.9 cm) below the header. Pin the 13 spokes so they’re evenly spaced.
- Pin out every picot to a point and open each ch-5 scallop into an even curve.
- Check that the total depth is 5″ (12.7 cm) all along the strip.
- Mist until damp, but not soaked. Let it dry completely, at least 12 hours.
- Unpin, then sew down the tabs and weave in the last ends.
Final Quality-Control Checklist
- 8 fans, each with 13 spokes and 6 picot scallops
- 7 picot joins, one per seam
- Header Rows 1–5 each have 224 sts
- Header is 1.5″ (3.8 cm) deep and straight
- Strip is 56″ x 5″ (142.2 x 12.7 cm)
- 8 tabs, each 6 sts wide and 20 rows long, centered over a fan
- Tab ends sewn invisibly to the WS
- Windows are round and even
Troubleshooting
Fan cups or ruffles: The spokes or loops are too long. Tighten your dc tension, or shorten the Row 4 loops to ch 4.
Fan stays straight and won’t curve: Your Row 1 is too loose. Work the foundation chain on a hook half a size smaller.
Header pulls the window shut: Your ch 8 is too tight. Chain loosely, or use a hook one size larger just for those chains.
Header is wavy: You have too many sts in Row 1. Recount each foot and make sure it has exactly 10 sc.
Strip is shorter than 56″: Some feet are missing stitches. Check the 3-2-2-2-1 placement on every foot.
Tabs twist: Sew the full width of each tab, not just its center.
Care
Hand wash in cool water with a mild soap, press out the water in a towel, and dry flat. Re-pin the windows and scallops if they lose their shape.
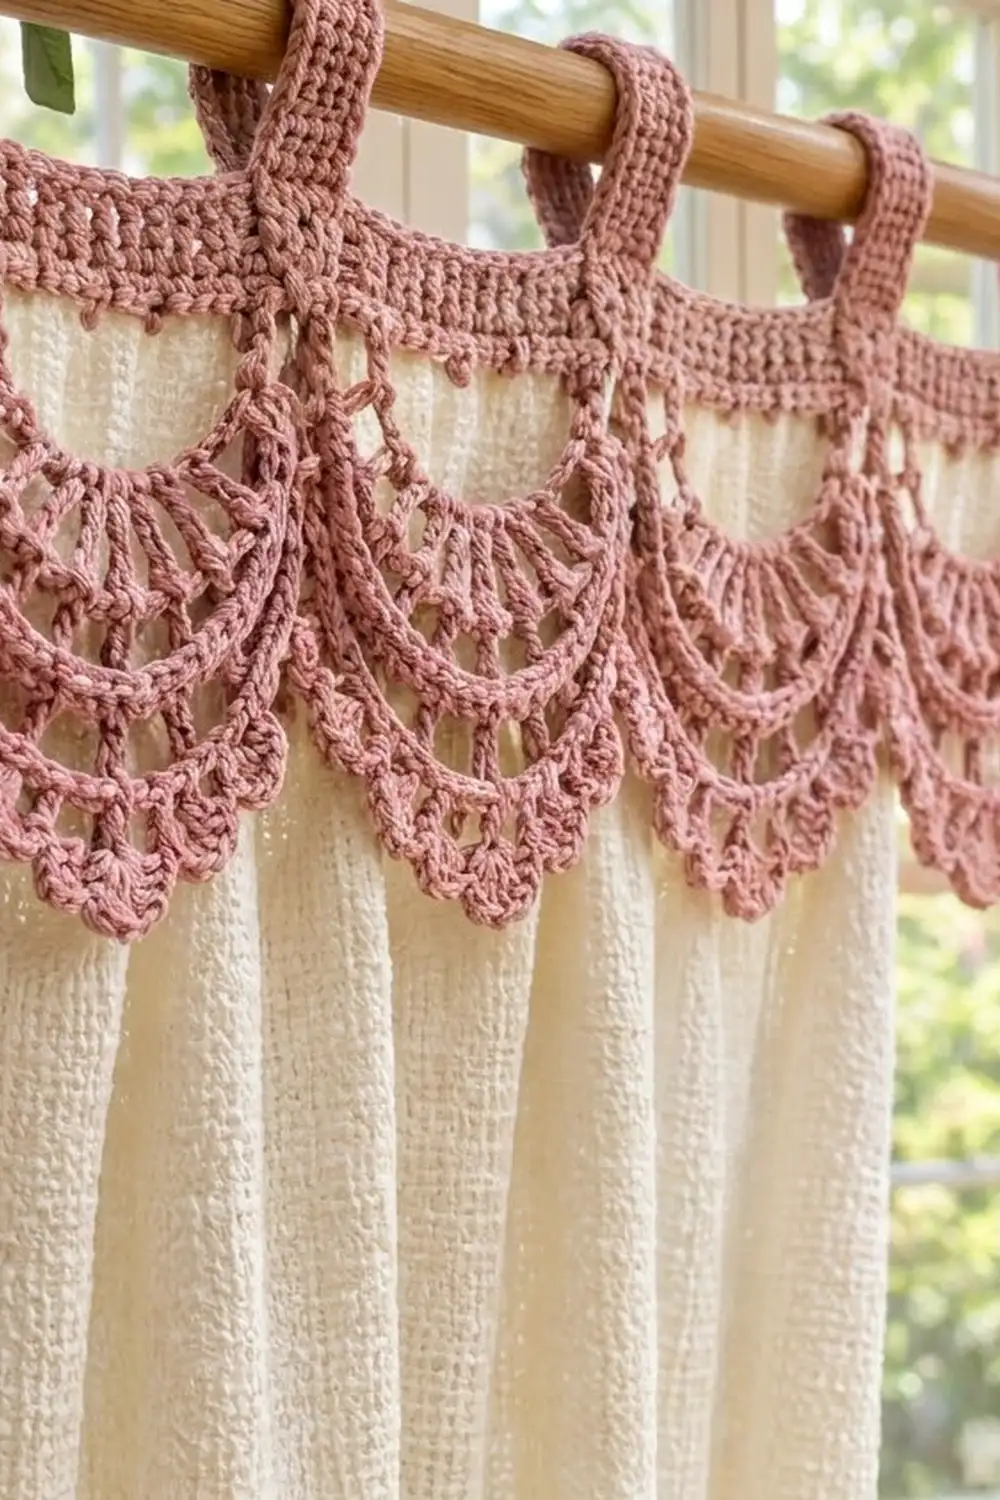
Final Notes
Everything depends on one chain of measurements: 13 sc for the arch, 13 spokes, 6 scallops, and a fan that’s 7″ (17.8 cm) wide. Each fan gives 28 sts to the header, and 8 fans give 224 sts, which is 56″ (142.2 cm). The 3.5″ (8.9 cm) fans plus the 1.5″ (3.8 cm) header make a valance 5″ (12.7 cm) deep, and it hangs on eight 5″ (12.7 cm) tabs. Check your first fan carefully and the rest of the strip will follow.
Happy crocheting!