

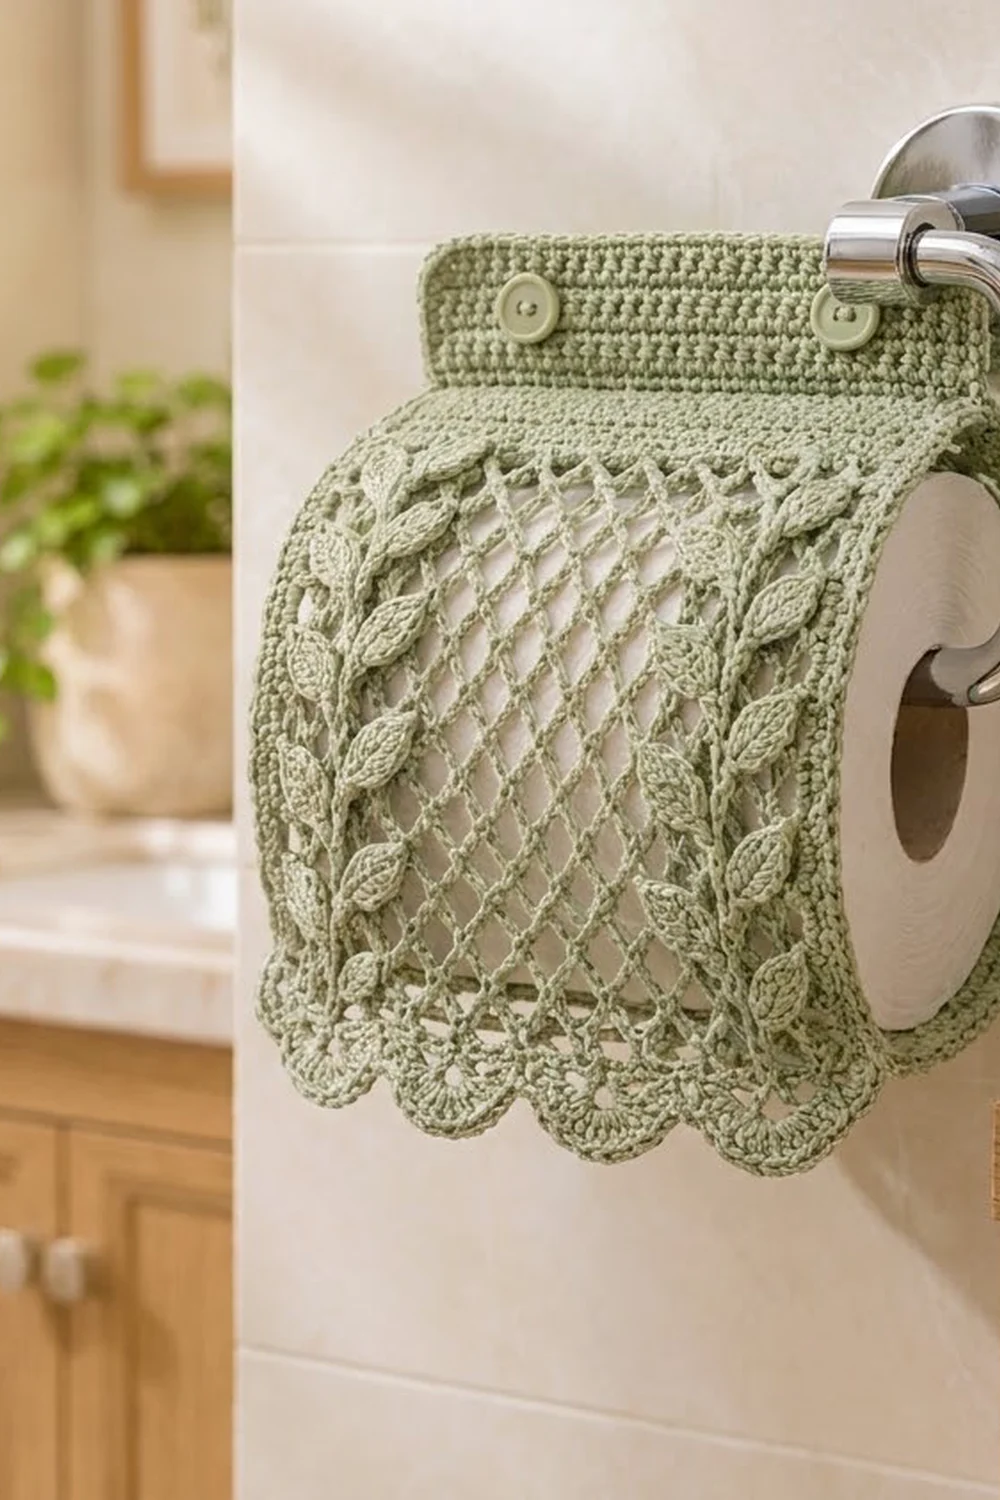
The Sage Vine Trellis cover is a soft, lacy way to dress up a plain toilet paper holder. One flat panel drapes over the roll. A solid band at the top buttons around the holder bar, and the body is an open diamond trellis. A climbing leaf vine runs down each side, and a row of shell scallops finishes the hem.
The whole piece uses one color, a calm sage green, so the texture does all the work. The roll shows softly through the mesh, and the solid leaves stand out against it. It suits farmhouse, cottage and botanical bathrooms.
This pattern uses US crochet terms. The finished cover measures 7.4 in (18.8 cm) wide by 12.8 in (32.5 cm) long when laid flat. Once the band is folded and buttoned around the bar, it covers a standard roll about 4.5 in (11.4 cm) wide.
Construction is simple. You crochet one panel from the top down: a solid button band, then the diamond mesh, then a conversion row and two scallop rows. You then add a two-row edging around the sides and top, make two leaf vines and sew them on.
Finished Size and Construction
- Finished size: 7.4 in (18.8 cm) wide x 12.8 in (32.5 cm) long, flat
- Skill level: Intermediate (easy repeats, careful counting)
- Terminology: US crochet terms
- Yarn weight: DK / light (#3) cotton
- Hook: 3.5 mm (E-4)
- Number of pieces: 1 main panel plus 2 appliquéd leaf vines
- Layout: Single vertical panel; the band folds in half over the holder bar
- Panel size before border: 6.6 in (16.8 cm) wide x 12.4 in (31.5 cm) long
- Border depth: 2 rows of sc, about 0.4 in (1.0 cm) on each side and across the top
Materials
Yarn: Use a smooth mercerized or combed cotton in DK weight. Cotton holds the mesh shape, shows the leaf texture clearly and stands up to a humid bathroom. Avoid fuzzy yarns, which blur the diamond pattern.
- Sage green: 70 g (about 160 m / 175 yd)
This amount includes a margin of roughly 15 percent. The panel uses about 50 g and each vine about 5 g. The extra covers your gauge swatch and any reworked rows.
Tools:
- 3.5 mm (E-4) crochet hook
- 2 buttons, 0.5 in (1.3 cm) across, in sage or ivory
- Tapestry needle
- Sewing needle and sage-colored thread
- Rust-proof pins and a blocking board
- Measuring tape
- Spray bottle
Abbreviations (US Terms)
- ch – chain
- sl st – slip stitch
- sc – single crochet
- hdc – half double crochet
- dc – double crochet
- sk – skip
- sp – space
- st(s) – stitch(es)
- RS – right side
Special stitch – Leaf: Ch 7, sc in 2nd ch from hook, hdc in next ch, dc in next 2 ch, hdc in next ch, sc in last ch. This makes 6 stitches and a pointed oval leaf about 1.2 in (3.0 cm) long and 0.5 in (1.3 cm) wide.
Gauge and Checkpoints
Gauge: 20 sc and 22 rows = 4 in (10.2 cm) in sc rows.
Mesh gauge: 8 ch-5 loops = 6.6 in (16.8 cm) across, and 2 mesh rows = 1 in (2.5 cm) tall.
Treat the button band as your swatch. After Row 6, measure across: 33 sc should equal 6.6 in (16.8 cm). If it is wider, go down half a hook size. If it is narrower, go up half a size. Restart until it matches.
Checkpoints:
- After Band Row 22: 6.6 in (16.8 cm) wide x 4 in (10.2 cm) long
- After Mesh Row 15: 11.5 in (29.2 cm) long in total
- After the Conversion Row: 11.7 in (29.7 cm) long
- After Scallop Row 2: 6.6 in (16.8 cm) x 12.4 in (31.5 cm)
- After the Border: 7.4 in (18.8 cm) x 12.8 in (32.5 cm)
If the mesh comes out too long, try working the ch-5 loops a little more firmly. If it is too short, relax your tension. Do not change the number of chains, because the loop count controls the width.
Main Panel
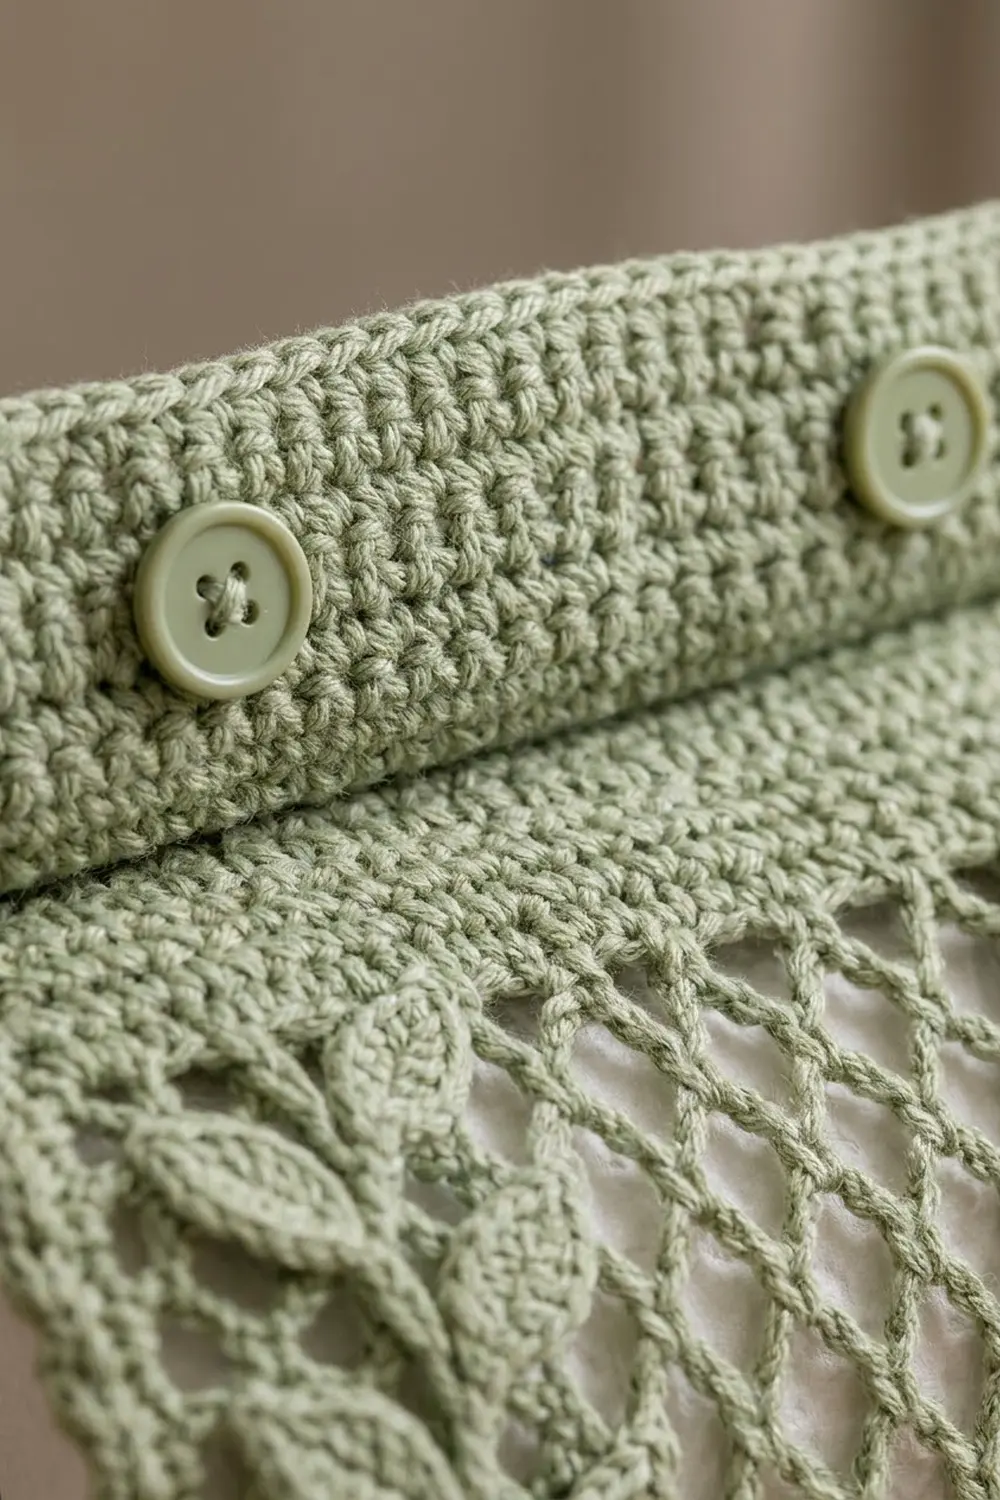
Button Band
Ch 34.
Row 1 (RS): Sc in 2nd ch from hook and in each ch across, turn. (33 sc)
Row 2: Ch 1 (does not count as a st here or in later rows), sc in each st across, turn. (33 sc)
Row 3 (buttonhole row): Ch 1, sc in next 7 sts, ch 2, sk 2, sc in next 15 sts, ch 2, sk 2, sc in last 7 sts, turn. (29 sc + 2 ch-2 sps)
Row 4: Ch 1, sc in next 7 sts, 2 sc in ch-2 sp, sc in next 15 sts, 2 sc in ch-2 sp, sc in last 7 sts, turn. (33 sc)
Rows 5–22: Ch 1, sc in each st across, turn. (33 sc)
At the end of Row 22 the band measures 6.6 in (16.8 cm) x 4 in (10.2 cm). Rows 1–11 are the flap that folds over the bar. Rows 12–22 stay at the front.
Diamond Mesh
Mesh Row 1: Ch 1, sc in first st, *ch 5, sk 3 sts, sc in next st; rep from * 7 more times, turn. (9 sc, 8 ch-5 loops)
Check: 1 + (8 x 4) = 33 stitches used, so the mesh fills the full band width.
Mesh Row 2: Ch 5 (counts as dc + ch 2), sc in first ch-5 loop, *ch 5, sc in next ch-5 loop; rep from * 6 more times, ch 2, dc in last sc, turn. (7 full ch-5 loops, 2 half loops at the edges)
Mesh Row 3: Ch 1, sc in first dc, *ch 5, sc in next ch-5 loop; rep from * 6 more times, ch 5, sc in 3rd ch of turning ch-5, turn. (9 sc, 8 ch-5 loops)
Mesh Rows 4–15: Repeat Mesh Rows 2 and 3 six more times. This makes 15 mesh rows in all, and Row 15 is a full-loop row with 9 sc and 8 ch-5 loops.
The mesh section measures 7.5 in (19.1 cm), and the panel is now 11.5 in (29.2 cm) long.
Conversion Row
Conversion Row: Ch 1, sc in first sc, *3 sc in next ch-5 loop, sc in next sc; rep from * 7 more times, turn.
Count: 9 sc worked into the 9 existing sc + 24 sc worked into the loops (3 in each of 8) = 33 sc.
This flat row gives the scallops a firm base and brings the panel back to the band width.
Scalloped Hem
Scallop Row 1: Ch 1, sc in first st, *sk 1, 5 dc in next st, sk 1, sc in next st; rep from * 7 more times, turn. (8 scallops: 40 dc + 9 sc)
Check: 1 + (8 x 4) = 33 stitches used.
Scallop Row 2: Ch 1, sc in first sc, *sc in next 2 dc, (sc, ch 3, sc) in center dc, sc in next 2 dc, sc in next sc; rep from * 7 more times. (57 sc + 8 ch-3 picots)
Check: 1 + (8 x 7) = 57 sc. Fasten off.
The panel now measures 6.6 in (16.8 cm) x 12.4 in (31.5 cm), which is its size before the border.
Leaf Vines (make 2)
Each vine has a 37-chain stem and 12 leaves: one leaf at the tip, 6 along one side and 5 along the other.
Ch 44.
Tip leaf: Sc in 2nd ch from hook, hdc in next ch, dc in next 2 ch, hdc in next ch, sc in next ch. This uses 7 chains and leaves 37 chains for the stem.
Pass 1 (along the top loops of the stem): Sl st in next 3 ch, Leaf, *sl st in next 6 ch, Leaf; rep from * 4 more times, sl st in last 4 ch.
Count: 3 + (5 x 6) + 4 = 37 stem chains, 6 leaves.
Pass 2 (along the free loops on the other side of the stem): Rotate the vine and work into the free loops of the foundation chain. Sl st in next 6 free loops, Leaf, *sl st in next 6 free loops, Leaf; rep from * 3 more times, sl st in last 7 free loops.
Count: 6 + (4 x 6) + 7 = 37 stem chains, 5 leaves.
Fasten off and leave a 12 in (30.5 cm) tail for sewing. The leaves on Pass 2 fall between the leaves on Pass 1, so the vine has alternating pairs. The stem is about 7.4 in (18.8 cm) long.
Border
Border gauge: 5 sc per 1 in (2.5 cm), the same as the band gauge.
With RS facing, join yarn at the bottom right corner (the end of Scallop Row 2). You will work up the right side, across the foundation chain and down the left side. You do not work across the scalloped hem.
Border Row 1: Ch 1, then work along the right side as follows:
- 1 sc in the end of Scallop Row 2
- 2 sc in the end of Scallop Row 1
- 1 sc in the end of the Conversion Row
- 2 sc in the end of each odd mesh row (8 rows = 16 sc)
- 3 sc in the end of each even mesh row (7 rows = 21 sc)
- 1 sc in the end of each band row (22 sc)
Right side total: 63 sc.
Then work across the top: 3 sc in the first foundation chain (corner), sc in the next 31 chains, and 3 sc in the last chain (corner). Work down the left side to match the right side in reverse order (63 sc). Turn.
Row 1 total: 63 + 3 + 31 + 3 + 63 = 163 sc.
Border Row 2: Ch 1, sc in each st, working 3 sc in the center sc of each corner group. Fasten off.
Row 2 counts: right side 64, corner 3, top 33, corner 3, left side 64 = 167 sc (163 + 4 corner increases).
Why the math works: Before the border, each long side is 12.4 in (31.5 cm) long. At 5 sc per inch, that side needs about 62 stitches, and 63 is close enough to lie flat without ruffling or pulling. The top edge is 33 foundation chains across 6.6 in (16.8 cm), which is exactly 5 sts per inch. The 3-sc corners turn neatly without adding extra width. Two border rows add 0.4 in (1.0 cm) to each side, so the width grows from 6.6 in (16.8 cm) to 7.4 in (18.8 cm). One row’s depth is added across the top, so the length grows from 12.4 in (31.5 cm) to 12.8 in (32.5 cm).
Final Blocking
- Weave in all ends on the panel and vines, except the vines’ sewing tails.
- Soak the panel and both vines in cool water for 10 minutes, then press out the water in a towel. Do not wring.
- Pin the panel flat, RS up, to 7.4 in (18.8 cm) x 12.8 in (32.5 cm).
- Pin the mesh first. Gently open each diamond so the rows line up straight and the side edges run parallel.
- Pin the point of each picot so the 8 scallops spread evenly along the hem.
- Lay each vine flat beside the panel. Straighten the stem and pin each leaf tip so the leaves angle up and outward.
- Let everything dry completely, which usually takes about a day.
- Attach the vines: Place one vine on each side of the mesh, centered over the outer column of diamonds. The tip leaf should point up toward the band and the base should sit just above the Conversion Row. Pin the vine in place. Whipstitch the stem down through the mesh with the yarn tail, then tack each leaf at its base and tip with sewing thread so it lies flat.
- Attach the buttons: Fold the flap (Band Rows 1–11) down over the front of Rows 12–22. Mark the spots on Row 20 that sit under the buttonholes, then sew the buttons there.
Final Quality-Control Checklist
- The panel measures 7.4 in (18.8 cm) x 12.8 in (32.5 cm) when laid flat.
- The band has 33 sc in every row, and both buttonholes sit 7 sts in from the edges.
- Mesh rows alternate between 8 full loops and 7 full loops with 2 half loops.
- The Conversion Row has 33 sc.
- There are 8 even scallops, each with a picot at its center.
- Each side of the border has 64 sc in the final row, and the top has 33 sc plus two 3-sc corners.
- Each vine has 12 leaves and lies flat without twisting.
- The buttons line up with the buttonholes when the band is folded.
- All ends are woven in securely.
Troubleshooting
The mesh leans or slants. You have probably missed the ch-5 turning chain or the final dc on an even row. Count the loops: odd rows have 8, and even rows have 7 plus 2 half loops.
The scallops cup or ruffle. The Conversion Row probably does not have 33 sc. Recount it before starting the scallops.
The side border waves. You have too many stitches on that side. Rework the row with 2 sc, not 3, in a few even-row ends.
The side border pulls in. You have too few stitches. Add 1 sc in a few band row ends, then add the same number to the other side.
The vine twists. Your slip stitches are too tight. Rework them more loosely, or use a 4.0 mm hook for the stem only.
The buttons slip out. Sew on slightly larger buttons, or close each buttonhole by 1 ch with a few sewn stitches.
Care
Hand wash in cool water with mild soap, press out the water in a towel and dry flat. Reshape the scallops and leaves while the cover is damp.
Final Notes
The size of this cover depends on a short chain of measurements. A gauge of 20 sc per 4 in (10.2 cm) gives a 6.6 in (16.8 cm) band. Eight ch-5 loops keep that same width through the mesh. The Conversion Row brings the hem back to 33 sc, which makes exactly 8 scallops. Two border rows bring the finished panel to 7.4 in (18.8 cm) x 12.8 in (32.5 cm). Check each stage as you go, and the cover will fit the bar and drape neatly over the roll.
Happy crocheting!